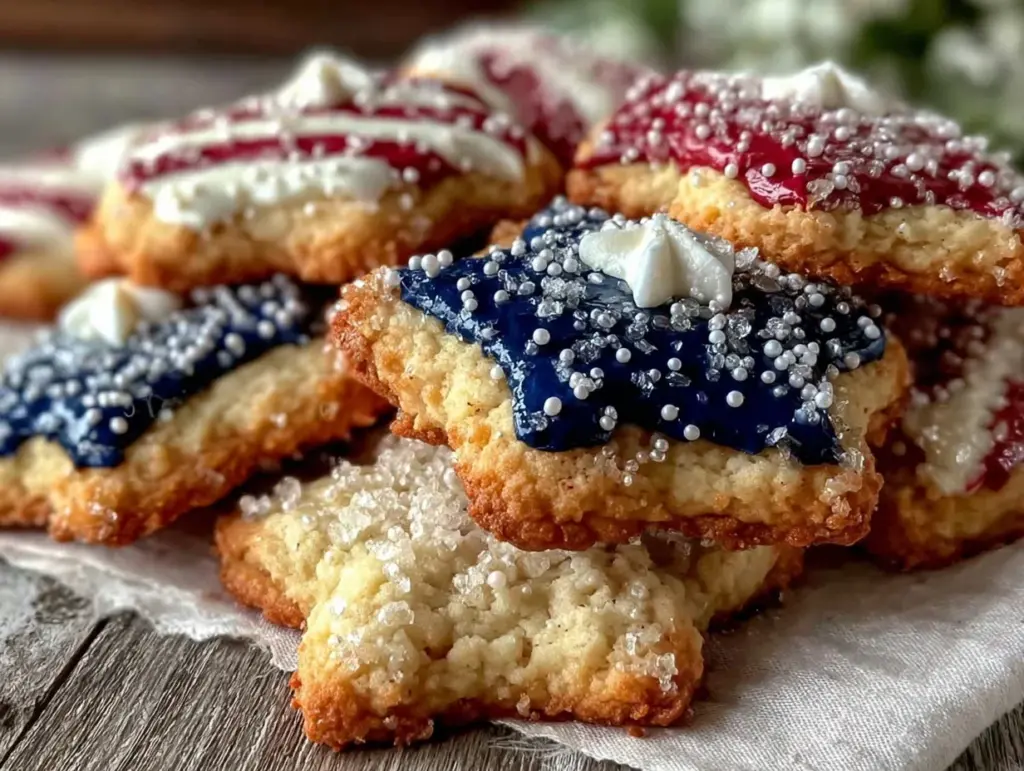
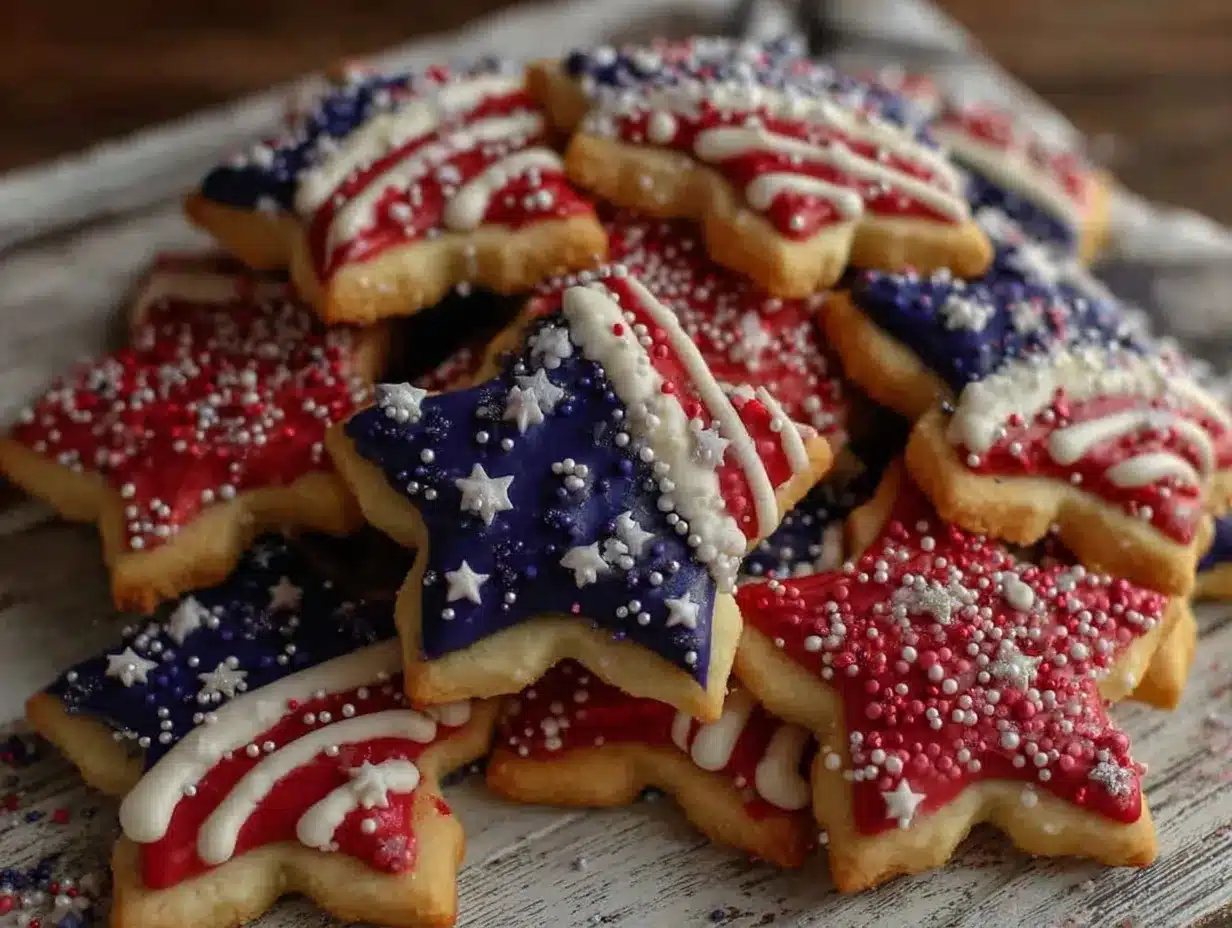
The kitchen smelled faintly of vanilla and cinnamon, but the real showstopper was the sight of those star-shaped cookies cooling on the rack, each frosted with glossy royal icing in red, white, and blue. Honestly, I wasn’t even planning to bake that day. The idea came up after a quick text from my neighbor, who casually mentioned her kids wanted “something festive” for the upcoming Fourth of July picnic. I had a bag of butter and a jar of powdered sugar sitting around, so I figured, why not give those Star-Spangled Sugar Cookies a whirl? Skeptical at first — because, let’s face it, homemade royal icing can be tricky — I ended up making them three times in the same week. Each batch got better, smoother, and more vibrant. The way that royal icing sets up with a perfect sheen but still melts in your mouth was surprisingly satisfying. It wasn’t just about the colors or the shapes; these cookies started to feel like a quiet celebration all on their own, even before the party began. They became my go-to for all patriotic events, and honestly, no one seemed to mind the extra helpings or the slightly imperfect edges. This recipe stuck around because it’s honest, approachable, and somehow, magically festive without fuss.
Why You’ll Love This Recipe
From years of testing sugar cookies — some utter disasters and some close calls — I can say this recipe is a keeper for many reasons. Not only does it hit that sweet spot between tender and crisp, but the royal icing tutorial truly sets it apart. Here’s why you’ll want to keep this one handy:
- Quick & Easy: The sugar cookie dough comes together in under 15 minutes, and the royal icing dries fast enough for last-minute decorating but slow enough to let you get creative.
- Simple Ingredients: No specialty items required — just pantry staples like unsalted butter, sugar, and eggs, plus a few basics for royal icing like meringue powder.
- Perfect for Patriotic Celebrations: Whether it’s July 4th, Memorial Day, or Veterans Day, these cookies add a splash of festive spirit without the stress.
- Crowd-Pleaser: Kids love the bright colors and fun shapes, and adults can’t resist the perfect balance of buttery cookie and sweet, smooth icing.
- Unbelievably Delicious: The secret is in the balanced vanilla and a touch of almond extract, making these cookies stand out from the usual sugar cookie crowd.
This isn’t just another sugar cookie recipe. The royal icing technique I share keeps the colors vibrant and gives you that smooth, professional finish without feeling overwhelmed. Plus, I’ve included practical tips that I’ve picked up from many a late-night cookie-decorating session. Honestly, these cookies have that nostalgic vibe but with a fresh, crisp bite that feels just right for summer celebrations. If you’ve ever tried to frost cookies and ended up with a sticky mess, this guide will change your game.
What Ingredients You Will Need
This recipe uses simple, wholesome ingredients to deliver bold flavor and satisfying texture without the fuss. Most of these are probably already hanging out in your pantry or fridge, with a couple of easy-to-find extras for the royal icing.
- For the Sugar Cookies:
- 2 ¾ cups (345g) all-purpose flour (for best results, sift before measuring)
- 1 teaspoon baking powder
- ½ teaspoon salt
- 1 cup (227g) unsalted butter, softened (I prefer Land O Lakes for its creaminess)
- 1 ½ cups (300g) granulated sugar
- 1 large egg, room temperature
- 1 ½ teaspoons vanilla extract (pure vanilla makes a difference)
- ½ teaspoon almond extract (optional but adds a lovely subtle depth)
- For the Royal Icing:
- 3 tablespoons meringue powder (I like Wilton brand for consistency)
- 4 cups (480g) powdered sugar, sifted to avoid lumps
- 5–6 tablespoons warm water (adjust for icing consistency)
- Gel food coloring in red and blue (gel colors give brighter hues without watering down the icing)
- Optional: ½ teaspoon vanilla extract or lemon juice for flavor
If you’re looking to keep it gluten-free, try swapping the all-purpose flour for an equal amount of almond flour or a gluten-free baking blend. For dairy-free, substitute the butter with vegan butter sticks that behave similarly in baking. And if you’re short on meringue powder, you can make royal icing with fresh egg whites, but I prefer meringue powder for safety and consistency.
Equipment Needed
Here’s what you’ll want on hand before getting started:
- Mixing bowls – at least two, one for cookies and one for icing
- Electric mixer or stand mixer – makes creaming butter and sugar much easier
- Measuring cups and spoons – accuracy really counts here
- Rolling pin – a smooth, medium-weight one works best for even cookies
- Star-shaped cookie cutters – various sizes if you want a mix
- Baking sheets lined with parchment paper or silicone mats
- Cooling racks – helps cookies cool evenly and quickly
- Squeeze bottles or piping bags with small round tips for icing application
- Toothpicks or scribe tools – handy for smoothing icing edges or fixing tiny mistakes
If you don’t have piping bags, small zip-top bags with a tiny corner snipped off work just fine for decorating. I’ve found silicone mats are a worthwhile investment because they keep cookies from sticking and make cleanup a breeze. Also, keeping your rolling pin and cookie cutters lightly dusted with flour helps avoid dough sticking and tearing.
Preparation Method
- Mix Dry Ingredients: In a medium bowl, whisk together 2 ¾ cups all-purpose flour, 1 teaspoon baking powder, and ½ teaspoon salt. Set aside. (This usually takes about 5 minutes.)
- Cream Butter and Sugar: Using a stand or hand mixer, beat 1 cup softened unsalted butter and 1 ½ cups granulated sugar on medium speed until light and fluffy, about 3-4 minutes. The mixture should lighten in color and feel airy. Don’t rush this step — it’s key for tender cookies.
- Add Egg and Extracts: Beat in 1 large room-temperature egg, followed by 1 ½ teaspoons vanilla extract and ½ teaspoon almond extract if using. Mix until fully combined.
- Combine Wet and Dry: Gradually add the dry ingredients to the wet, mixing on low until just incorporated. Avoid over-mixing here to keep cookies tender. The dough will be soft but manageable.
- Chill the Dough: Wrap the dough in plastic wrap and chill in the fridge for at least 1 hour, or up to overnight. This helps the dough firm up and makes rolling easier. (If you’re short on time, 30 minutes in the freezer works too, but watch closely.)
- Roll and Cut: Preheat your oven to 350°F (177°C). Lightly flour your surface and rolling pin, then roll out dough to about ¼-inch (6mm) thickness. Use star-shaped cookie cutters to cut cookies and transfer them to a parchment-lined baking sheet, spacing them 1 inch apart.
- Bake: Bake cookies for 8-10 minutes, or until the edges just start to turn golden. Keep an eye on them — they can go from perfect to overdone quickly. The centers will still look soft but will firm up as they cool.
- Cool: Let cookies cool on the baking sheet for 5 minutes before transferring to a wire rack to cool completely. Completely cooled cookies are essential before decorating.
- Prepare Royal Icing: In a mixing bowl, combine 3 tablespoons meringue powder and 4 cups sifted powdered sugar. Add 5 tablespoons warm water and beat on medium-high speed until stiff peaks form, about 5 minutes. Adjust water or sugar for desired consistency: thicker for outlining, thinner for flooding.
- Color and Decorate: Divide icing into separate bowls for red, blue, and white (leave some plain). Tint with gel food coloring as desired. Transfer to piping bags or squeeze bottles. Outline each cookie with thick icing, then flood the inside with thinned icing. Use toothpicks to spread and smooth. Let dry at room temperature for at least 4 hours or overnight for best results.
Pro tip: If your icing crusts too fast while decorating, cover bowls with damp cloths to keep it workable. Also, practice on parchment paper before decorating cookies to get comfortable with your piping flow.
Cooking Tips & Techniques
Royal icing can be intimidating, but a few tricks can make it a smooth ride. First, always sift your powdered sugar — lumps are your enemy here. When mixing icing, start with less water and add more gradually; it’s easier to thin than thicken.
For that perfect star-shaped cookie edge, chill your dough well. Cold dough cuts cleaner and holds shape better during baking. If your dough warms up too much while rolling, pop it back in the fridge for 10-15 minutes.
When piping, steady your hand by resting your elbow on the table and using your fingers to guide the bag. If you find the icing drying out mid-session, just give it a quick stir or add a tiny splash of water to refresh the consistency.
Don’t rush the drying time! Letting royal icing fully set overnight ensures the vibrant colors stay put and the cookies stack without smudging. And if you’re juggling multiple batches, try baking one sheet while decorating another to keep the workflow smooth.
Variations & Adaptations
While these sugar cookies are great as is, you can easily switch things up depending on your celebration or dietary needs.
- Flavor Variations: Swap almond extract for lemon zest and a bit of lemon juice in the dough for a bright citrus twist. Or add a pinch of cinnamon and nutmeg for a subtle warm spice.
- Dietary Adaptations: Use a gluten-free all-purpose flour blend instead of regular flour to make these safe for gluten-free diets. For vegan versions, replace butter with coconut oil and use aquafaba or vegan egg replacers, but note the texture may be slightly different.
- Decoration Alternatives: Instead of royal icing, try a simple glaze made from powdered sugar and milk for a softer finish. You can also sprinkle colored sugar crystals before baking for a crunchy, festive look.
- Shape Variations: While stars are the obvious choice for patriotic celebrations, hearts or circles work well, too. Use themed cookie cutters for other holidays or occasions.
Once, I tried adding a hint of peppermint extract for a winter holiday twist, which surprised everyone but was actually quite refreshing. Don’t be afraid to mix your favorite flavors into the dough or icing!
Serving & Storage Suggestions
These star-spangled sugar cookies are best served at room temperature, allowing the buttery cookie and royal icing to shine. They make a stunning centerpiece on a patriotic dessert platter alongside other red, white, and blue treats like the fresh red, white, and blue berry trifle.
Store cooled and decorated cookies in an airtight container at room temperature for up to 5 days. For longer storage, you can freeze undecorated cookies in a single layer wrapped tightly in plastic wrap and then in a freezer bag. Thaw completely before decorating.
If you’ve decorated in advance, place parchment paper between layers to prevent sticking. When reheating, avoid microwaves; instead, let cookies warm briefly at room temperature to keep that perfect texture. Flavors tend to mellow and deepen after a day, making these cookies even better the next day.
Nutritional Information & Benefits
One star-shaped sugar cookie with royal icing contains approximately 150-180 calories, depending on the size and amount of icing used. These cookies provide a modest boost of energy from the sugar and butter, but of course, they’re best enjoyed in moderation as a festive treat.
Key ingredients like butter provide fat-soluble vitamins, and vanilla extract offers antioxidants in trace amounts. While not a health food, this recipe can be adapted to suit lower-sugar or gluten-free diets, making it more approachable for different nutritional needs.
From a wellness perspective, baking and decorating can be a mindful, joyful activity that brings people together — and those moments are just as nourishing as the cookies themselves.
Conclusion
Making these Perfect Star-Spangled Sugar Cookies with Royal Icing isn’t just about the finished product — though those bright, glossy stars really do impress. It’s about the process of mixing, rolling, and decorating, and the little moments of satisfaction when your icing sets just right. Whether you’re baking for a big crowd or just a quiet celebration at home, this recipe is adaptable, forgiving, and downright fun.
Feel free to tweak the flavors, try different shapes, or pair these with some savory bites like the savory beer can chicken for your cookout. I love how these cookies bring a little sparkle to any gathering, and I hope they become a staple in your holiday baking, too.
Give the recipe a try, and if you experiment with your own spins or have questions, I’d love to hear about it in the comments. Baking is better when shared — and these cookies are perfect for sharing!
FAQs
- Can I make the dough ahead of time? Yes! The dough can be made and refrigerated for up to 3 days or frozen for up to 2 months. Just thaw completely before rolling out.
- How do I store decorated sugar cookies? Store them in an airtight container at room temperature, layering with parchment paper to prevent sticking. They last about 5 days this way.
- What if I don’t have meringue powder for royal icing? You can substitute with pasteurized egg whites, but meringue powder is safer and more consistent, especially if kids are involved.
- How thick should I roll the dough? Aim for about ¼-inch (6mm) thickness for the best balance of crisp edges and soft centers.
- Can I use this royal icing recipe for other cookies? Absolutely. This royal icing works great for most cut-out cookies and holds up well for detailed decorating.
Pin This Recipe!
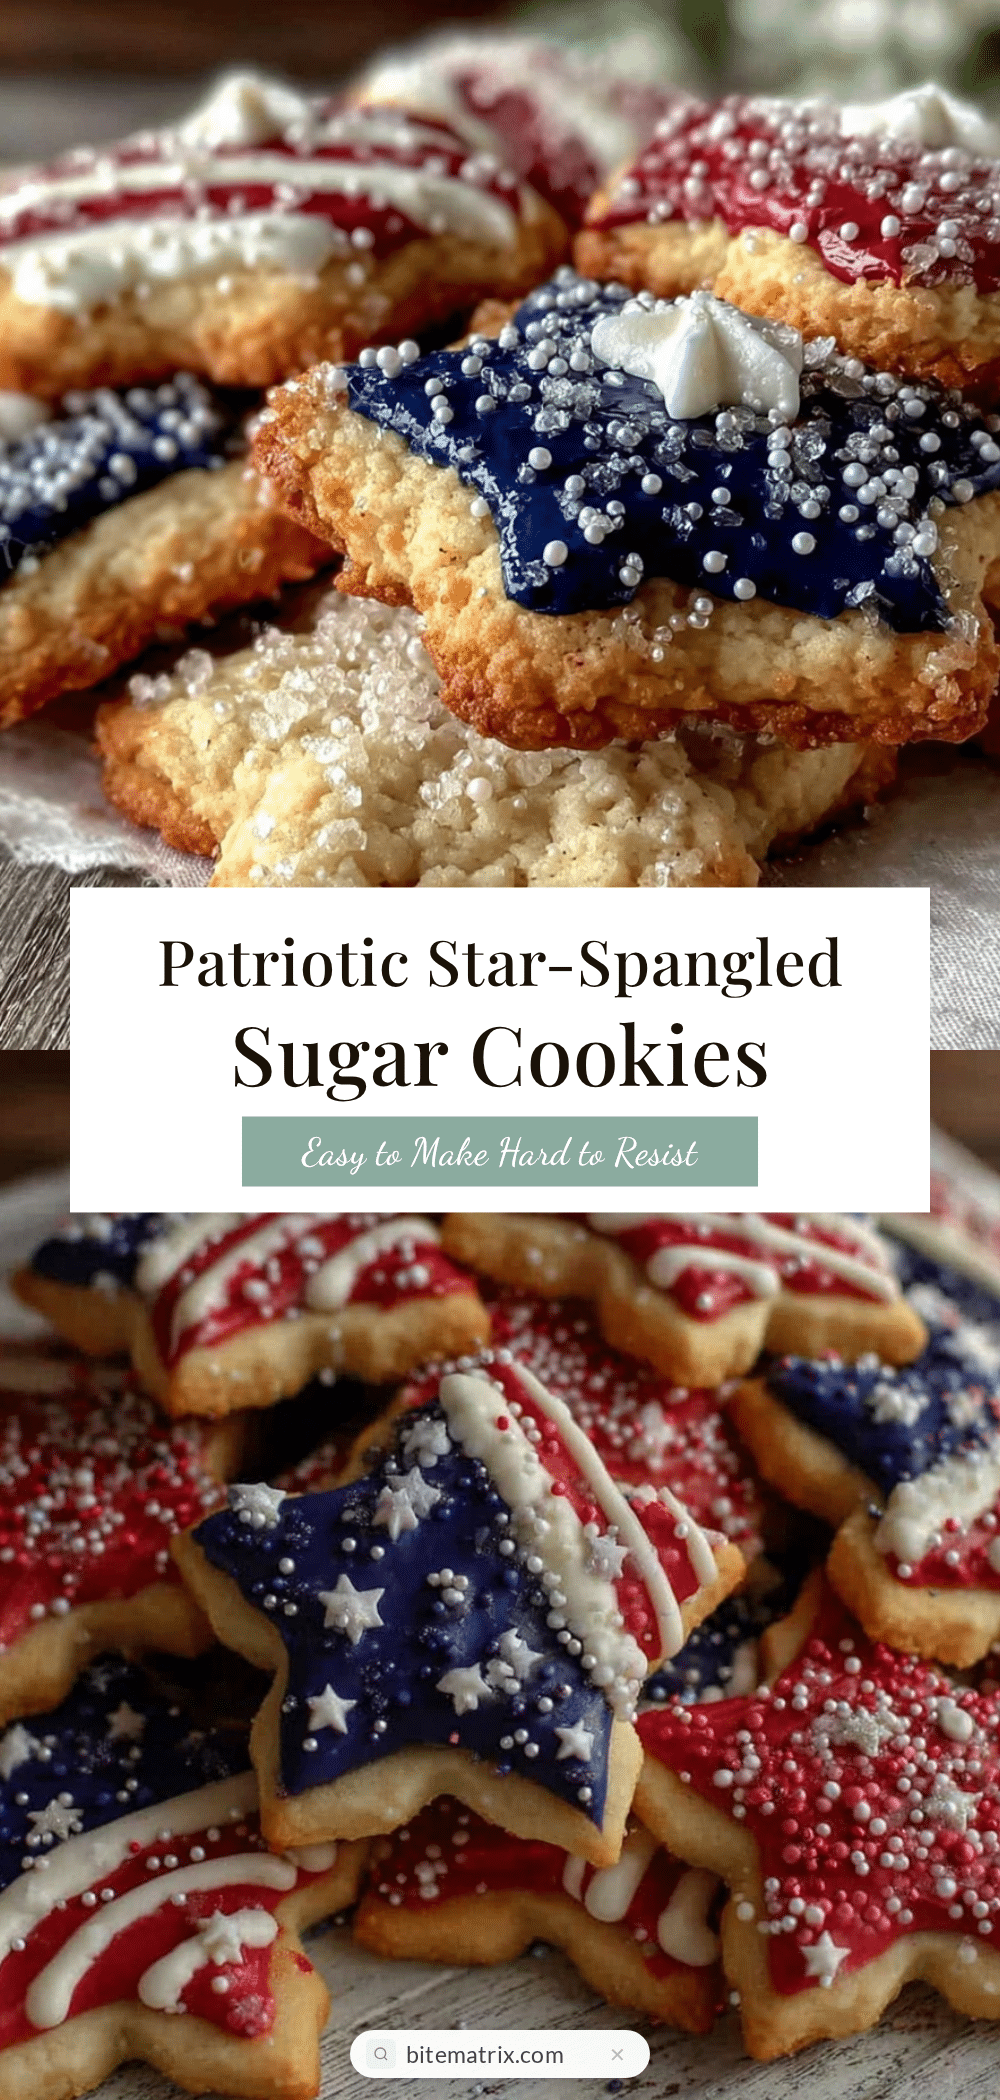
Perfect Star-Spangled Sugar Cookies Recipe Easy Patriotic Royal Icing Tutorial

These star-shaped sugar cookies are tender yet crisp, decorated with vibrant red, white, and blue royal icing, perfect for patriotic celebrations like the Fourth of July.
- Prep Time: 15 minutes
- Cook Time: 10 minutes
- Total Time: 1 hour 25 minutes
- Yield: 24 cookies 1x
- Category: Dessert
- Cuisine: American
Ingredients
- 2 ¾ cups (345g) all-purpose flour (sifted)
- 1 teaspoon baking powder
- ½ teaspoon salt
- 1 cup (227g) unsalted butter, softened
- 1 ½ cups (300g) granulated sugar
- 1 large egg, room temperature
- 1 ½ teaspoons vanilla extract
- ½ teaspoon almond extract (optional)
- 3 tablespoons meringue powder
- 4 cups (480g) powdered sugar, sifted
- 5–6 tablespoons warm water
- Gel food coloring in red and blue
- Optional: ½ teaspoon vanilla extract or lemon juice for flavor
Instructions
- Mix dry ingredients: whisk together flour, baking powder, and salt in a medium bowl; set aside.
- Cream butter and sugar: beat softened butter and granulated sugar on medium speed until light and fluffy, about 3-4 minutes.
- Add egg and extracts: beat in egg, vanilla extract, and almond extract if using until combined.
- Combine wet and dry ingredients: gradually add dry ingredients to wet, mixing on low until just incorporated.
- Chill dough: wrap dough in plastic wrap and chill in fridge for at least 1 hour or up to overnight.
- Roll and cut: preheat oven to 350°F (177°C). Lightly flour surface and rolling pin, roll dough to ¼-inch thickness, cut with star-shaped cookie cutters, and place on parchment-lined baking sheet 1 inch apart.
- Bake: bake for 8-10 minutes until edges start to turn golden; centers will look soft but will firm as they cool.
- Cool: let cookies cool on baking sheet for 5 minutes, then transfer to wire rack to cool completely before decorating.
- Prepare royal icing: combine meringue powder and powdered sugar in a bowl, add 5 tablespoons warm water, beat on medium-high until stiff peaks form (about 5 minutes). Adjust consistency with water or sugar as needed.
- Color and decorate: divide icing into bowls for red, blue, and white; tint with gel food coloring. Use piping bags or squeeze bottles to outline cookies with thick icing, flood inside with thinned icing, smooth with toothpicks. Let dry at room temperature for at least 4 hours or overnight.
Notes
Sift powdered sugar to avoid lumps in icing. Chill dough well for clean cookie edges. If dough warms while rolling, chill again for 10-15 minutes. Cover icing bowls with damp cloths to keep workable. Let royal icing dry overnight for best results. Practice piping on parchment paper before decorating cookies.
Nutrition
- Serving Size: 1 star-shaped cookie
- Calories: 165
- Sugar: 18
- Sodium: 80
- Fat: 7
- Saturated Fat: 4
- Carbohydrates: 25
- Protein: 1
Keywords: sugar cookies, royal icing, patriotic cookies, Fourth of July, star-shaped cookies, easy sugar cookies, holiday baking


