Scrambling around the kitchen with flour dusting the counter and a timer ticking down, I realized the usual box mix was nowhere to be found. Half a can of red food coloring left, and no time for a grocery run before the neighborhood cookout. So there I was, whipping up what became my Perfect Red Velvet Flag Cake with Cream Cheese Stars—a dessert born out of sheer necessity and a dash of stubborn creativity. Honestly, the house smelled like a bakery on steroids, with that unmistakable cocoa and tangy cream cheese aroma filling every corner.
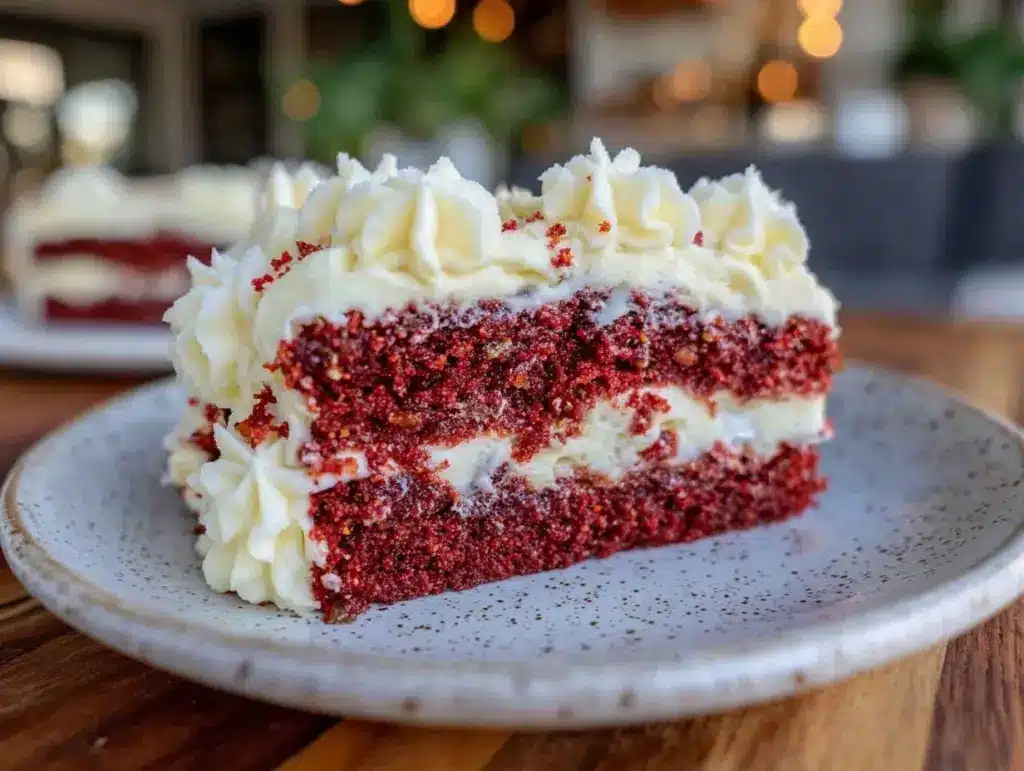
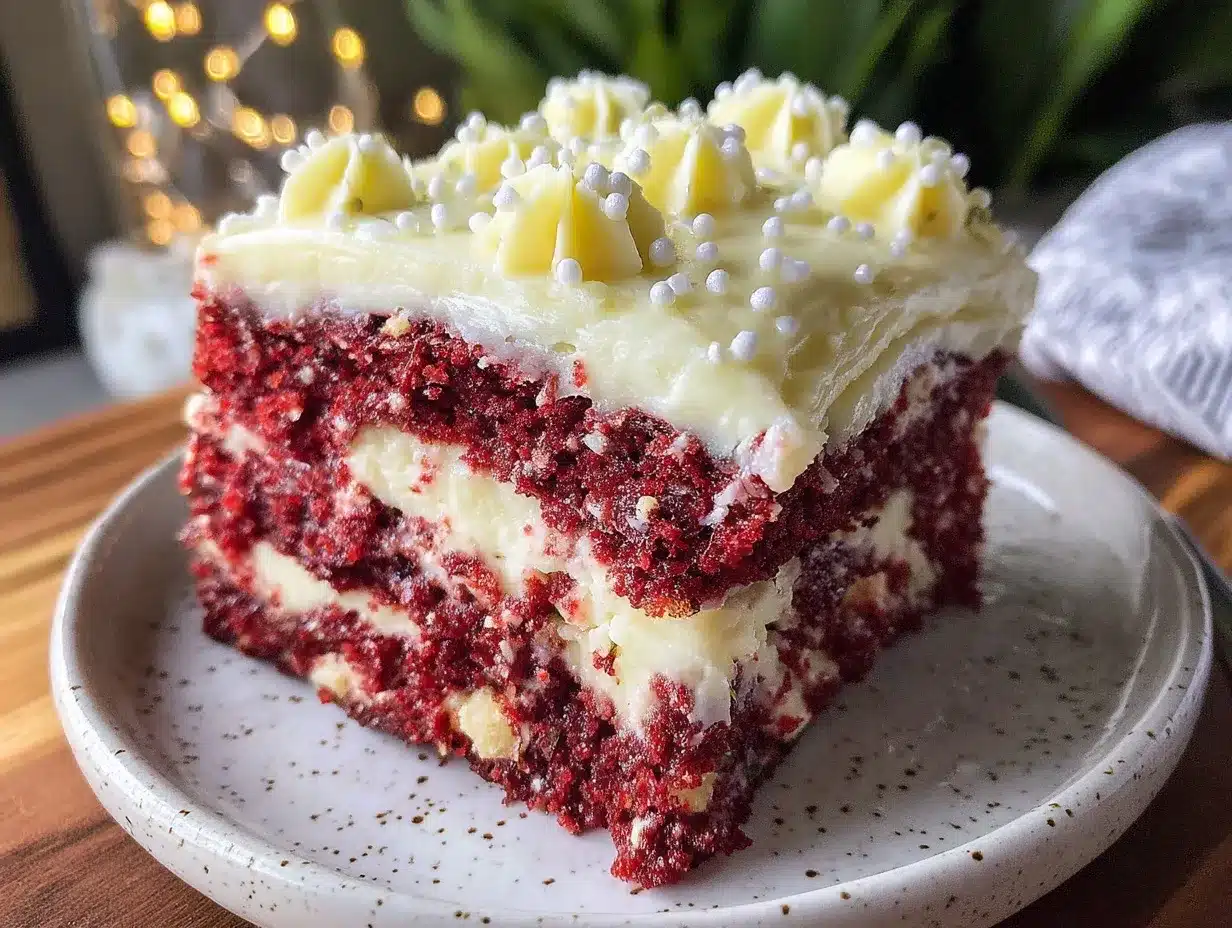
With frosting smeared on the counter and kids circling like excited vultures, I fashioned stars from cream cheese frosting, decorating the cake in a way that felt festive yet homemade—like a flag waving proudly but with personality. This cake wasn’t just a last-minute save; it quickly turned into a tradition. That vibrant red velvet crumb, moist but sturdy enough for the star-studded cream cheese topping, kept everyone coming back for seconds. Honestly, it’s the kind of recipe that makes you want to pause and savor, even in the middle of chaos.
It stuck with me not because it was perfect from the start, but because it felt real and doable—no fancy tricks, just a classic red velvet with a twist, full of heart and a bit of that homemade imperfection. This cake became my go-to whenever I needed a showstopper with zero fuss but all the wow. If you ever find yourself mid-chaos with guests on the way, this flag cake is the quiet hero you’ll want in your baking arsenal.
Why You’ll Love This Recipe
After testing this Perfect Red Velvet Flag Cake with Cream Cheese Stars countless times—sometimes under pressure, often with eager helpers—I can say it’s a recipe that delivers every single time. It’s been a hit from casual family dinners to spirited holiday celebrations.
- Quick & Easy: Ready in under 90 minutes from start to finish, making it a lifesaver for last-minute dessert needs or casual get-togethers.
- Simple Ingredients: You probably have most of these in your pantry right now—no need for specialty stores or exotic items.
- Perfect for Patriotic Occasions: Whether it’s the Fourth of July, Memorial Day, or just a fun summer party, this cake brings a festive vibe with a homemade touch.
- Crowd-Pleaser: Kids adore the cream cheese stars, and adults appreciate the classic red velvet flavor with a moist crumb that’s just right.
- Unbelievably Delicious: The interplay between the subtle cocoa in the cake and the tangy cream cheese stars creates a texture and flavor combo that feels like comfort food, but fancy enough for celebrations.
This isn’t just another red velvet cake recipe. The secret lies in the cream cheese stars—made from a smooth, slightly tangy frosting that holds its shape perfectly without being too sweet. Plus, the balance of cocoa and vanilla in the batter gives it that classic flavor without overwhelming the palate. I’ve experimented with a few variations, but this version is the one I keep coming back to (and trust me, it’s been through many tweaks!). It’s straightforward enough for a reluctant baker but impressive enough to earn compliments from dessert snobs.
Honestly, the reason it’s stuck around is because it’s both reliable and special—a little bit of showmanship with the star shapes, but zero stress. It’s the kind of recipe that makes you feel like you nailed it, even when life’s a whirlwind.
What Ingredients You Will Need
This Perfect Red Velvet Flag Cake with Cream Cheese Stars uses simple, wholesome ingredients that come together to create bold flavor and satisfying texture without the fuss. Most are pantry staples, with a few fresh items—perfect for easy substitutions if needed.
- For the Cake Batter:
- All-purpose flour – 2 ½ cups (315g), sifted for light texture
- Granulated sugar – 2 cups (400g), for sweetness and structure
- Unsweetened cocoa powder – 2 tablespoons (15g), the key for that subtle chocolate note
- Baking soda – 1 ½ teaspoons, to help the cake rise evenly
- Salt – 1 teaspoon, balances flavors
- Buttermilk – 1 ½ cups (360ml), room temperature (adds moisture and tang)
- Vegetable oil – 1 cup (240ml), neutral flavor and moist crumb
- Large eggs – 2, room temperature (helps with structure and richness)
- Red food coloring – 2 tablespoons, for the signature red hue (I recommend gel for vibrant color without extra liquid)
- Vanilla extract – 2 teaspoons, for depth of flavor
- White vinegar – 1 teaspoon, enhances the red color and tenderizes crumb
- For the Cream Cheese Stars Frosting:
- Cream cheese – 8 oz (225g), softened (use full-fat for best flavor and consistency)
- Unsalted butter – ½ cup (115g), softened (adds richness and smoothness)
- Powdered sugar – 3 cups (360g), sifted to avoid lumps
- Vanilla extract – 1 teaspoon
- Pinch of salt, to balance sweetness
For substitutions, you can swap buttermilk with a mixture of milk and lemon juice or vinegar if needed. For a gluten-free option, almond flour works well, though the texture will be a bit denser. If dairy is an issue, try a dairy-free cream cheese and butter substitute for the frosting—that said, the classic version really shines with real cream cheese.
When it comes to brands, I personally trust King Arthur Flour for the all-purpose flour due to its consistency, and Philadelphia cream cheese for the frosting. For red food coloring, a gel like AmeriColor delivers vibrant color without altering the batter consistency.
Equipment Needed
- Two 9-inch (23cm) round cake pans – non-stick preferred or well-greased
- Mixing bowls – medium and large sizes
- Electric mixer or stand mixer – for smooth batter and frosting
- Measuring cups and spoons – precise measurements matter here
- Sifter or fine mesh sieve – for flour and powdered sugar
- Rubber spatula – for folding batter and scraping bowls
- Piping bag with a small star tip (optional) – to pipe the cream cheese stars neatly; if you don’t have one, a zip-top bag with the corner snipped works just fine
- Cooling rack – to cool cakes evenly and prevent sogginess
If you don’t have two pans, you can bake the batter in batches, though it takes extra time. I’ve used silicone pans before, which are great for easy release but can bake a bit faster, so watch carefully. Also, maintaining your mixer by cleaning and drying the beaters right after use keeps things smooth next time.
For budget-friendly alternatives, any sturdy mixing bowl and a handheld mixer work just as well, though the stand mixer makes the frosting whipped and fluffy with less effort.
Preparation Method
- Preheat your oven to 350°F (175°C) and grease your two 9-inch round cake pans with butter or non-stick spray. Line the bottoms with parchment paper circles for easier cake removal. This step helps prevent sticking and ensures clean edges.
- Sift together the dry ingredients: In a large bowl, sift 2 ½ cups (315g) all-purpose flour, 2 cups (400g) granulated sugar, 2 tablespoons (15g) unsweetened cocoa powder, 1 ½ teaspoons baking soda, and 1 teaspoon salt. Mixing these well ensures even distribution of leavening and cocoa, which helps the cake rise uniformly and develop that subtle chocolate flavor.
- Combine wet ingredients: In a separate bowl, whisk together 1 ½ cups (360ml) buttermilk, 1 cup (240ml) vegetable oil, 2 large eggs, 2 tablespoons red gel food coloring, 2 teaspoons vanilla extract, and 1 teaspoon white vinegar. The vinegar is a neat trick—it reacts with the baking soda giving the cake a tender crumb and deeper red color.
- Mix wet and dry: Slowly pour the wet ingredients into the dry mixture. Using an electric mixer on a low speed, blend until just combined—about 30 seconds. Overmixing can lead to a denser cake, so stop once you see no streaks of flour. The batter should be smooth, thick, and vibrantly red.
- Divide the batter evenly between the prepared pans (about 3 cups or 700ml per pan). Smooth the tops with a spatula for even baking.
- Bake for 30-35 minutes or until a toothpick inserted into the center comes out clean or with just a few moist crumbs. Ovens vary, so start checking at 30 minutes. The cake should spring back lightly when pressed.
- Cool the cakes in their pans for 10 minutes, then turn them out onto a wire rack to cool completely before frosting. This prevents the cream cheese frosting from melting.
- Prepare the cream cheese stars frosting: In a large bowl, beat 8 oz (225g) softened cream cheese and ½ cup (115g) softened unsalted butter together until creamy and smooth—about 2-3 minutes on medium speed. Gradually add 3 cups (360g) sifted powdered sugar, beating on low until incorporated, then increase speed to medium-high for 2 minutes until fluffy. Stir in 1 teaspoon vanilla extract and a pinch of salt to balance sweetness.
- Fill your piping bag fitted with a star tip (or a zip-top bag with a corner snipped). Practice piping stars on parchment paper before decorating the cake.
- Assemble the cake: Place one cake layer on your serving plate. Spread a thin layer of frosting on top to help the second layer stick. Add the second cake layer and cover the entire cake with a smooth crumb coat of frosting. Chill for 15-20 minutes to set.
- Pipe cream cheese stars onto the chilled cake in clusters or an arrangement resembling a flag’s stars. You can get creative here—make them big, small, tightly packed, or spaced out. The frosting holds shape well, so you have some room for artistic flair.
- Refrigerate the cake for at least 1 hour before slicing. This helps the frosting firm up and the flavors meld together beautifully.
- Serve chilled or at room temperature, slicing with a sharp knife dipped in hot water for clean cuts.
If the cream cheese frosting seems too soft to pipe, pop it in the fridge for 10 minutes to firm up a bit. Also, when mixing the batter, scraping the bowl sides with a spatula prevents pockets of unmixed flour. I learned these little tricks the hard way—nothing worse than uneven cakes or frosting disaster when the guests are around!
Cooking Tips & Techniques
Getting the Perfect Red Velvet Flag Cake with Cream Cheese Stars right isn’t rocket science, but there are a few tips I’ve picked up from trial, error, and occasionally, frosting-coated fingers.
- Use gel food coloring: It packs more color punch without adding liquid. Liquid red food coloring can thin the batter and alter baking times.
- Room temperature ingredients: Eggs, buttermilk, cream cheese, and butter blend better when not cold, resulting in a smoother batter and frosting.
- Don’t overmix: Once wet and dry ingredients meet, mix just until combined to keep the crumb tender and light.
- Chill frosting before piping: If the cream cheese stars look droopy, a quick chill firms them up, making piping easier and stars sharper.
- Use parchment paper in pans: It’s a small step that saves you from a cake-crumbling disaster when removing layers.
- Test your oven temp: An oven thermometer is a good investment. Red velvet cakes can dry out if the oven’s too hot.
- Multitasking tip: While the cake bakes, prepare the frosting and line your pans. It keeps the kitchen flow smooth and makes the whole process less overwhelming.
One time, I accidentally swapped baking powder for baking soda and ended up with a cake that barely rose—lesson learned! Also, I’ve found that piping the stars while the cake is chilled helps avoid smudging and keeps the design crisp. And, if you’re new to piping, don’t stress—practice on parchment paper first; it’s a game-changer.
Variations & Adaptations
This Perfect Red Velvet Flag Cake recipe is flexible enough to adjust to your taste or occasion without losing its charm.
- Vegan Version: Use a flax egg or chia egg replacement for the eggs, plant-based buttermilk (almond or soy milk with lemon juice), and vegan cream cheese with vegan butter for the frosting.
- Healthier Twist: Substitute half the all-purpose flour with whole wheat pastry flour and reduce sugar slightly. Use Greek yogurt instead of butter in the frosting for tang and protein boost.
- Seasonal Flair: Add a teaspoon of orange zest to the batter or a handful of fresh blueberries around the cream cheese stars for a fresh burst of flavor.
- Chocolate Lovers’ Upgrade: Fold in mini chocolate chips into the batter or add a drizzle of melted dark chocolate over the finished cake for extra indulgence.
- Alternative Shapes: Instead of round layers, bake the cake in a sheet pan and cut into rectangles to assemble a flag design with stripes and stars, perfect for large gatherings.
Personally, I once swapped the cream cheese stars for a whipped mascarpone topping when I was out of cream cheese, and though different, it won rave reviews for its light, creamy texture. For a festive summer dessert, pairing this with a fresh fruit salad or a layered dessert like the red, white, and blue berry trifle is a showstopper.
Serving & Storage Suggestions
This cake tastes best served chilled or at room temperature—just take it out of the fridge 15 minutes before slicing. The cream cheese stars hold up beautifully and add a little texture contrast with the soft, moist cake.
For a festive presentation, serve on a white or blue platter to enhance the flag theme. It pairs wonderfully with a cold glass of milk, a cup of coffee, or even a fresh pitcher of strawberry basil lemonade for an extra summery vibe.
Store leftover cake covered in an airtight container in the refrigerator for up to 4 days. For longer storage, wrap tightly in plastic wrap and freeze for up to 2 months. When ready to enjoy, thaw overnight in the fridge and bring to room temperature before serving.
Reheating is not recommended as it can soften the frosting stars, but if you prefer a slightly softer texture, leave the cake out of the fridge for an hour before serving. The flavors meld over time, making the cake taste even richer the next day.
Nutritional Information & Benefits
Each slice of this Perfect Red Velvet Flag Cake with Cream Cheese Stars packs about 350-400 calories, depending on portion size. It contains moderate amounts of fat and sugar, balanced with protein from the cream cheese and eggs.
Key ingredients like buttermilk provide calcium and probiotics, while eggs offer essential vitamins like B12 and choline. The cocoa powder contributes antioxidants, albeit in small amounts, adding a subtle healthful note.
This recipe can be adapted for gluten-free or dairy-free diets by swapping flours and cream cheese, making it accessible to various dietary needs. Just be mindful of allergen substitutions, especially for nuts or soy in alternative ingredients.
From a wellness perspective, it’s a dessert that satisfies sweet cravings without feeling heavy or overly rich. The cream cheese stars add a tangy freshness that cuts through the sweetness, making this cake feel lighter than most traditional red velvet cakes.
Conclusion
This Perfect Red Velvet Flag Cake with Cream Cheese Stars is a recipe that’s earned its place in my kitchen through real-life hustle and a few frosting smudges. It’s approachable for any home baker, even when time is short and expectations are high. The balance of flavors, the festive look, and the simple ingredients make it a staple dessert that feels special without the stress.
Feel free to tweak it—whether that’s making it vegan, adding seasonal fruit, or experimenting with piping techniques. It’s meant to be yours as much as mine. I love this cake because it turns a chaotic kitchen moment into something joyful and memorable, and I hope it brings that same warmth to your table.
If you try it out, I’d love to hear how it turned out or what fun variations you came up with—sharing those moments is what makes cooking worth it!
Frequently Asked Questions (FAQs)
Can I make this red velvet cake ahead of time?
Yes! You can bake the cake layers a day in advance and keep them wrapped tightly in plastic wrap at room temperature or refrigerated. Frost and decorate just before serving for the freshest look.
What if I don’t have buttermilk?
You can make a simple buttermilk substitute by mixing 1 ½ cups milk with 1 ½ tablespoons lemon juice or white vinegar. Let it sit for 5 minutes before using.
How do I store leftover cake?
Store leftover cake covered in an airtight container in the fridge for up to 4 days. For longer storage, wrap tightly and freeze for up to 2 months.
Can I use a different frosting for the stars?
While cream cheese frosting is traditional and holds shape well, you can try mascarpone frosting or stabilized whipped cream, though they may be softer and less defined.
What’s the best way to pipe the cream cheese stars?
Use a piping bag fitted with a small star tip. If you don’t have one, a zip-top bag with a small snip in the corner works too. Practice on parchment paper first to get comfortable with the motion and pressure.
For festive meal ideas that pair well with this cake, you might enjoy the savory beer can chicken for a smoky main or light sides like the fresh creamy cucumber dill salad to keep things fresh and vibrant at your gathering.
Pin This Recipe!
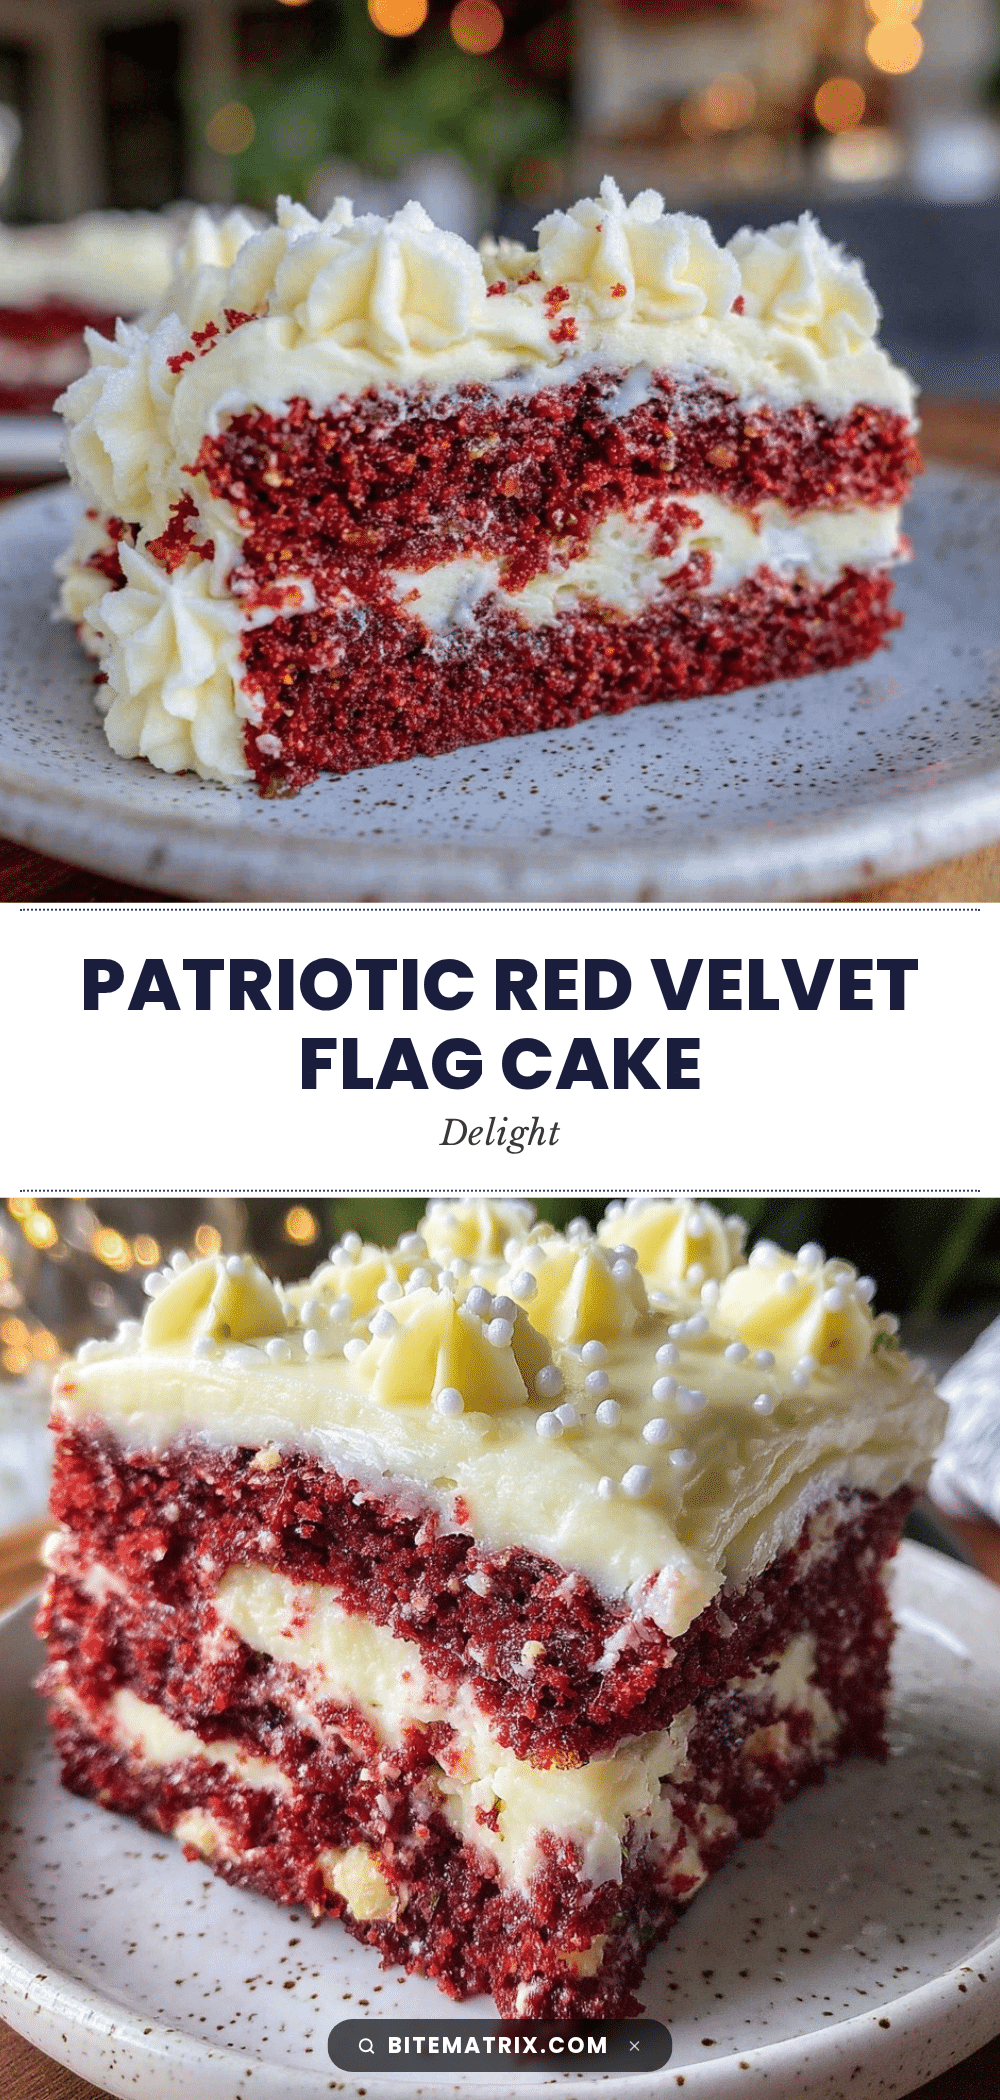
Perfect Red Velvet Flag Cake with Cream Cheese Stars

A moist and sturdy red velvet cake decorated with tangy cream cheese stars, perfect for patriotic occasions and last-minute celebrations.
- Prep Time: 20 minutes
- Cook Time: 35 minutes
- Total Time: 55 minutes
- Yield: 12 servings 1x
- Category: Dessert
- Cuisine: American
Ingredients
- 2 ½ cups (315g) all-purpose flour, sifted
- 2 cups (400g) granulated sugar
- 2 tablespoons (15g) unsweetened cocoa powder
- 1 ½ teaspoons baking soda
- 1 teaspoon salt
- 1 ½ cups (360ml) buttermilk, room temperature
- 1 cup (240ml) vegetable oil
- 2 large eggs, room temperature
- 2 tablespoons red gel food coloring
- 2 teaspoons vanilla extract
- 1 teaspoon white vinegar
- 8 oz (225g) cream cheese, softened
- ½ cup (115g) unsalted butter, softened
- 3 cups (360g) powdered sugar, sifted
- 1 teaspoon vanilla extract
- Pinch of salt
Instructions
- Preheat oven to 350°F (175°C) and grease two 9-inch round cake pans. Line bottoms with parchment paper.
- Sift together flour, sugar, cocoa powder, baking soda, and salt in a large bowl.
- In a separate bowl, whisk buttermilk, vegetable oil, eggs, red gel food coloring, vanilla extract, and white vinegar.
- Slowly pour wet ingredients into dry ingredients and mix on low speed until just combined, about 30 seconds.
- Divide batter evenly between prepared pans (about 3 cups or 700ml per pan) and smooth tops.
- Bake for 30-35 minutes or until a toothpick inserted comes out clean or with a few moist crumbs.
- Cool cakes in pans for 10 minutes, then transfer to wire racks to cool completely.
- For frosting, beat cream cheese and butter until smooth and creamy, about 2-3 minutes.
- Gradually add powdered sugar, beating on low until incorporated, then increase speed to medium-high and beat 2 minutes until fluffy.
- Stir in vanilla extract and a pinch of salt.
- Fill a piping bag fitted with a small star tip (or zip-top bag with corner snipped) with frosting and practice piping stars on parchment paper.
- Place one cake layer on serving plate, spread a thin layer of frosting, add second layer, and cover entire cake with a crumb coat.
- Chill cake for 15-20 minutes to set frosting.
- Pipe cream cheese stars onto chilled cake in clusters or flag pattern.
- Refrigerate cake for at least 1 hour before slicing.
- Serve chilled or at room temperature, slicing with a sharp knife dipped in hot water for clean cuts.
Notes
[‘Use gel food coloring for vibrant color without thinning batter.’, ‘Room temperature ingredients blend better for smooth batter and frosting.’, ‘Do not overmix batter to keep crumb tender.’, ‘Chill frosting if too soft before piping stars.’, ‘Use parchment paper in pans to prevent sticking.’, ‘Test oven temperature with thermometer to avoid drying cake.’, ‘Practice piping stars on parchment paper before decorating cake.’, ‘If cream cheese frosting is too soft, refrigerate for 10 minutes to firm up.’]
Nutrition
- Serving Size: 1 slice (1/12th of c
- Calories: 375
- Sugar: 33
- Sodium: 320
- Fat: 22
- Saturated Fat: 10
- Carbohydrates: 45
- Fiber: 1
- Protein: 5
Keywords: red velvet cake, cream cheese frosting, patriotic dessert, flag cake, easy cake recipe, holiday dessert, Fourth of July cake


