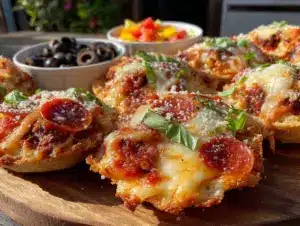
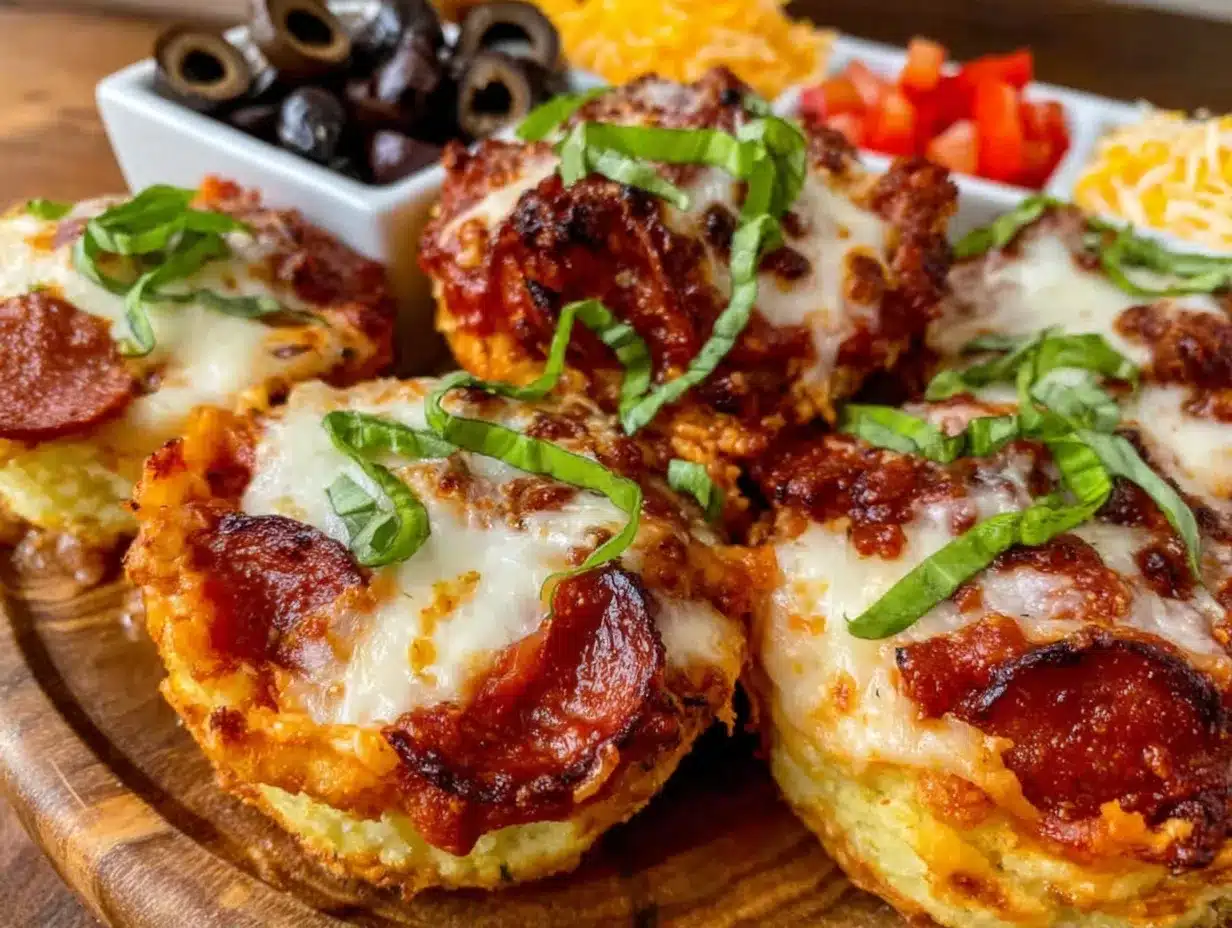
Soft, slightly chewy, and just the right thickness—that’s the whole point. The way the mini pizza crust feels between your fingers, with its gentle give and tiny air pockets, is what made me create this Easy Pizza Lunchables homemade DIY snack in the first place. I’m not even kidding; I remember peeling one off the parchment paper, fingertips brushing the warm edge, admiring that tender texture before I even thought about toppings or cheese. You know how some foods just pull you in with their feel before anything else? This definitely does.
The first time I made these, the kitchen was a bit chaotic—kids darting about, lunch looming—but that crust texture held my focus. It wasn’t crispy or cracker-thin like a typical pizza base; no, it was soft yet sturdy enough to hold all the toppings without sagging. That balance is tricky, and honestly, I’d tried a bunch of store-bought options that just fell apart or tasted like cardboard. Making these mini crusts from scratch was my little rebel move to bring back that satisfying handheld snack experience, the kind that kids love and parents appreciate because it’s homemade and wholesome. It stuck with me because, in a world full of processed convenience, this snack gives you control over every bite’s texture and flavor.
It’s not just about the crust though—layering the sauce, cheese, and toppings in a way that stays neat and fun to assemble adds to the tactile joy. The whole thing is a hands-on snack that feels like a mini pizza party in a box. I still remember the quiet realization when my youngest, usually picky, happily stacked his own toppings, eyes lighting up with pride. That’s why this recipe has stuck around in my kitchen—it’s easy, playful, and hits that sweet spot of texture and taste that makes homemade pizza lunchables a real treat.
Why You’ll Love This Recipe
Making pizza lunchables at home might sound like a lot, but this recipe is designed to be as simple and satisfying as possible. From my many attempts (some more successful than others), I’ve nailed down a method that’s quick, fun, and totally kid-friendly.
- Quick & Easy: Comes together in about 30 minutes, perfect for school lunches or after-school snacks that don’t require hours in the kitchen.
- Simple Ingredients: No need to hunt down weird specialty items; you probably have most of these pantry staples on hand.
- Perfect for Kids’ Snack Time: A creative and interactive way for kids to build their own mini pizzas, turning snack time into a little edible adventure.
- Crowd-Pleaser: Whether it’s a birthday party or a casual family gathering, these mini pizzas always get smiles and second helpings.
- Unbelievably Delicious: The balance of that soft homemade crust with tangy sauce and melty cheese is just the kind of comfort food that warms you up.
What sets this recipe apart from boxed lunchables is the texture-first approach—no more soggy crusts or mystery preservatives. Instead, you get a freshly made crust that’s soft but not mushy, topped with real, recognizable ingredients. Plus, customizing toppings is a breeze, whether you’re going classic pepperoni or mixing in veggies for extra color and crunch. Honestly, it’s the kind of snack that makes you close your eyes after the first bite, savoring that familiar-yet-better flavor combo.
If you want a fresh twist on a lunchbox classic without the fuss, this recipe fits perfectly. It’s like your favorite pizza, shrunk down and packed with personality. And hey, if you’re looking for a quick party snack to serve alongside, the easy Italian sub sandwich skewers make a great companion—both are fuss-free and fun to eat!
What Ingredients You Will Need
This recipe uses simple, wholesome ingredients to deliver bold flavor and satisfying texture without the fuss. Most of these are pantry staples, and you can swap a few to suit your kitchen or dietary preferences.
- For the Mini Pizza Crusts:
- All-purpose flour – 2 cups (240g) (I like King Arthur for consistent results)
- Instant yeast – 1 teaspoon
- Sugar – 1 teaspoon (feeds the yeast and adds slight sweetness)
- Salt – ½ teaspoon
- Warm water – ¾ cup (180ml)
- Olive oil – 2 tablespoons (adds tenderness)
- For the Sauce:
- Tomato sauce – ½ cup (120ml), smooth or slightly chunky
- Garlic powder – ¼ teaspoon
- Dried oregano – ½ teaspoon
- Salt and pepper – to taste
- For the Toppings:
- Shredded mozzarella cheese – 1 to 1½ cups (100-150g), fresh works best
- Pepperoni slices – about 20 pieces (or substitute with turkey pepperoni for a leaner option)
- Sliced black olives – ¼ cup (optional, for a salty pop)
- Diced bell peppers or mini sweet peppers – ¼ cup (adds color and crunch)
Feel free to swap the all-purpose flour with whole wheat for a nuttier flavor or use gluten-free flour blends if needed. For dairy alternatives, shredded vegan cheese can be used to make this recipe dairy-free. I recommend using a quality tomato sauce like Muir Glen for a fresh, vibrant base, but homemade marinara works beautifully too. If it’s summer, fresh cherry tomatoes halved can replace the sauce for a juicy, fresh twist.
Equipment Needed
- Mixing bowl – A large one to comfortably mix and knead the dough
- Measuring cups and spoons – For precise ingredient quantities
- Rolling pin – To roll out the pizza dough evenly (a clean wine bottle works in a pinch!)
- Baking sheet or pizza stone – For baking the mini crusts
- Parchment paper – Prevents sticking and makes cleanup easier
- Small bowl or spoon – For mixing the pizza sauce
- Sharp knife or pizza cutter – To cut the dough into mini circles or squares
I’ve used everything from silicone baking mats to parchment paper, and honestly, parchment is the easiest for cleanup. If you don’t have a rolling pin, don’t stress—stretching the dough with your hands works just fine and adds a rustic charm. For baking, a pizza stone crisps the crust nicely but a simple baking sheet lined with parchment is perfectly adequate for this recipe. If you want to keep things budget-friendly, even a cast iron skillet can be used to prebake the crusts before adding toppings.
Preparation Method
- Activate the yeast: In a small bowl, combine ¾ cup (180ml) warm water (about 110°F/43°C), 1 teaspoon sugar, and 1 teaspoon instant yeast. Stir gently and let it sit for 5 minutes until foamy. If it doesn’t foam, your yeast might be inactive—try again with fresh yeast.
- Make the dough: In a large mixing bowl, whisk together 2 cups (240g) all-purpose flour and ½ teaspoon salt. Add the yeast mixture and 2 tablespoons olive oil. Stir with a wooden spoon until a rough dough forms.
- Knead the dough: Turn the dough onto a lightly floured surface. Knead for 6-8 minutes until smooth and elastic but still soft. If it feels sticky, sprinkle with a bit more flour—but don’t overdo it; you want a tender crust.
- Let it rise: Place the dough ball in a lightly oiled bowl, cover with a damp cloth or plastic wrap, and let it rise in a warm spot for about 45 minutes or until doubled in size.
- Prepare the sauce: While the dough rises, mix ½ cup (120ml) tomato sauce with ¼ teaspoon garlic powder, ½ teaspoon dried oregano, and salt and pepper to taste in a small bowl. Set aside.
- Shape the mini crusts: Once risen, punch down the dough gently. Roll it out on a floured surface to about ¼-inch (6mm) thickness. Using a cookie cutter or glass, cut out circles about 3 inches (7.5cm) in diameter. Place these on a parchment-lined baking sheet.
- Prebake the crusts: Bake at 425°F (220°C) for 6-8 minutes until just starting to set but not browned. This prevents sogginess when toppings are added.
- Add toppings: Remove crusts from oven. Spread a teaspoon or so of sauce on each, sprinkle with shredded mozzarella, and top with pepperoni, olives, and peppers as desired.
- Bake again: Return to oven and bake for another 5-7 minutes until cheese is melted and bubbly.
- Cool and pack: Let the mini pizzas cool slightly before placing them into reusable containers or snack boxes for a perfect DIY lunchable experience.
Tip: If the dough feels too sticky at any point, flour your hands instead of adding flour to the dough directly. When prebaking, watch carefully—the crust should be firm but not browned. That’s the sweet spot for best texture.
Cooking Tips & Techniques
Getting the dough texture just right is the key challenge here. Kneading enough to develop gluten gives the dough stretch and chew without toughness. I’ve learned that resting the dough in a warm spot—not too hot—is crucial for a good rise. If your kitchen is cold, try popping it in the oven with just the light on for a cozy bubble bath effect.
When rolling out the dough, go for an even thickness. Uneven crusts can bake unevenly—some parts soggy, others overdone. If your dough springs back when rolling, let it rest for 5 minutes to relax the gluten.
Prebaking the crust is a must to avoid the dreaded soggy bottom. I once skipped this step and, trust me, the toppings weighed the crust down into a sad, floppy mess. Also, don’t overload the pizza with sauce or cheese—less is more to keep that perfect handheld balance.
For multitasking, prepare the sauce and toppings while the dough rises. This way, you’re ready to assemble once the crusts are prebaked. Personally, I like making extra sauce to keep in the fridge for quick dips or to spread on blackstone philly cheesesteak sandwiches—it’s surprisingly versatile!
Variations & Adaptations
- Gluten-Free: Swap regular flour with a 1:1 gluten-free baking blend. You might need to add a bit more water for a softer dough.
- Vegetarian: Skip the pepperoni and load up on colorful veggies like mushrooms, zucchini ribbons, or spinach for extra nutrients and color.
- Seasonal Twist: Use fresh summer tomatoes and basil instead of sauce for a Caprese-style lunchable. Add fresh mozzarella balls instead of shredded cheese.
- Spicy Kick: Add a sprinkle of red pepper flakes or swap pepperoni for spicy chorizo slices to turn up the heat.
- Personal Favorite: I’ve tried swapping tomato sauce for pesto with mozzarella and sun-dried tomatoes—kids went nuts for the flavor change. It’s an easy way to mix things up without changing the base method.
Serving & Storage Suggestions
Serve these mini pizza lunchables warm or room temperature. They’re great fresh but hold up well for a few hours in an insulated lunchbox. Presentation-wise, packing the mini pizzas with small compartments for extra toppings or dips makes the experience interactive and fun.
If you have leftovers, store them in an airtight container in the refrigerator for up to 3 days. To reheat, pop them in a toaster oven or conventional oven at 350°F (175°C) for 5-7 minutes to get that crust crisp and cheese melty again. Avoid microwaving if you want to preserve the original texture.
These pizzas actually develop more flavor after a day as the sauce soaks into the crust slightly, so if you’re prepping ahead for a party or picnic, they’re even better the next day. For a full meal, complement with a fresh side like the creamy cucumber dill salad or a zesty taco pasta salad to balance the richness.
Nutritional Information & Benefits
A single mini pizza (about 3 inches) typically contains roughly 150-180 calories depending on toppings, with about 7-9g of fat, 15-20g carbohydrates, and 6-8g protein. Using whole wheat flour increases fiber, helping keep kids full longer.
Key ingredients like olive oil provide heart-healthy fats, while tomato sauce adds antioxidants like lycopene. Homemade versions avoid preservatives, excess sodium, and added sugars often found in store-bought lunchables, making this a cleaner, more nutritious snack choice.
For families managing allergies, this recipe is flexible: use dairy-free cheese, gluten-free flour, or omit nuts and seeds safely. Personally, I appreciate how this snack feels nourishing while still being a treat—perfect for balancing health with happiness.
Conclusion
This Easy Pizza Lunchables homemade DIY snack is a little project that pays off big in texture, flavor, and fun. It’s a recipe that brings back the joy of building your own snack while giving you full control over what goes into it. Whether you’re packing lunches or prepping snacks for a crowd, it’s a reliable, satisfying choice that kids and adults alike appreciate.
Feel free to experiment with toppings and dough variations to suit your family’s tastes. I love this recipe because it bridges the gap between convenience and homemade goodness, making snack time feel special without hours in the kitchen. If you try it, I’d love to hear how your variations turned out or if the kids enjoyed the hands-on experience—drop a comment!
And if you’re in the mood for another quick, crowd-pleasing snack to serve alongside, those Italian sub sandwich skewers I mentioned earlier could be your new go-to.
FAQs
Can I make the pizza dough ahead of time?
Yes! You can prepare the dough a day ahead, store it covered in the fridge, and let it come to room temperature before shaping. This actually helps develop flavor.
What’s the best way to store leftover mini pizzas?
Store them in an airtight container in the refrigerator for up to 3 days. Reheat in an oven or toaster oven for best texture.
Can I freeze the mini pizza crusts?
Absolutely. Freeze prebaked crusts in a zip-top bag for up to 2 months. Thaw before adding toppings and baking.
What if I don’t have instant yeast?
You can use active dry yeast but dissolve it in warm water and let it proof for 10 minutes before mixing. Adjust rising times accordingly.
Are there any good dairy-free cheese options for this recipe?
Yes, shredded vegan mozzarella-style cheese works well. Brands like Daiya or Follow Your Heart melt nicely and taste great on these mini pizzas.
Pin This Recipe!
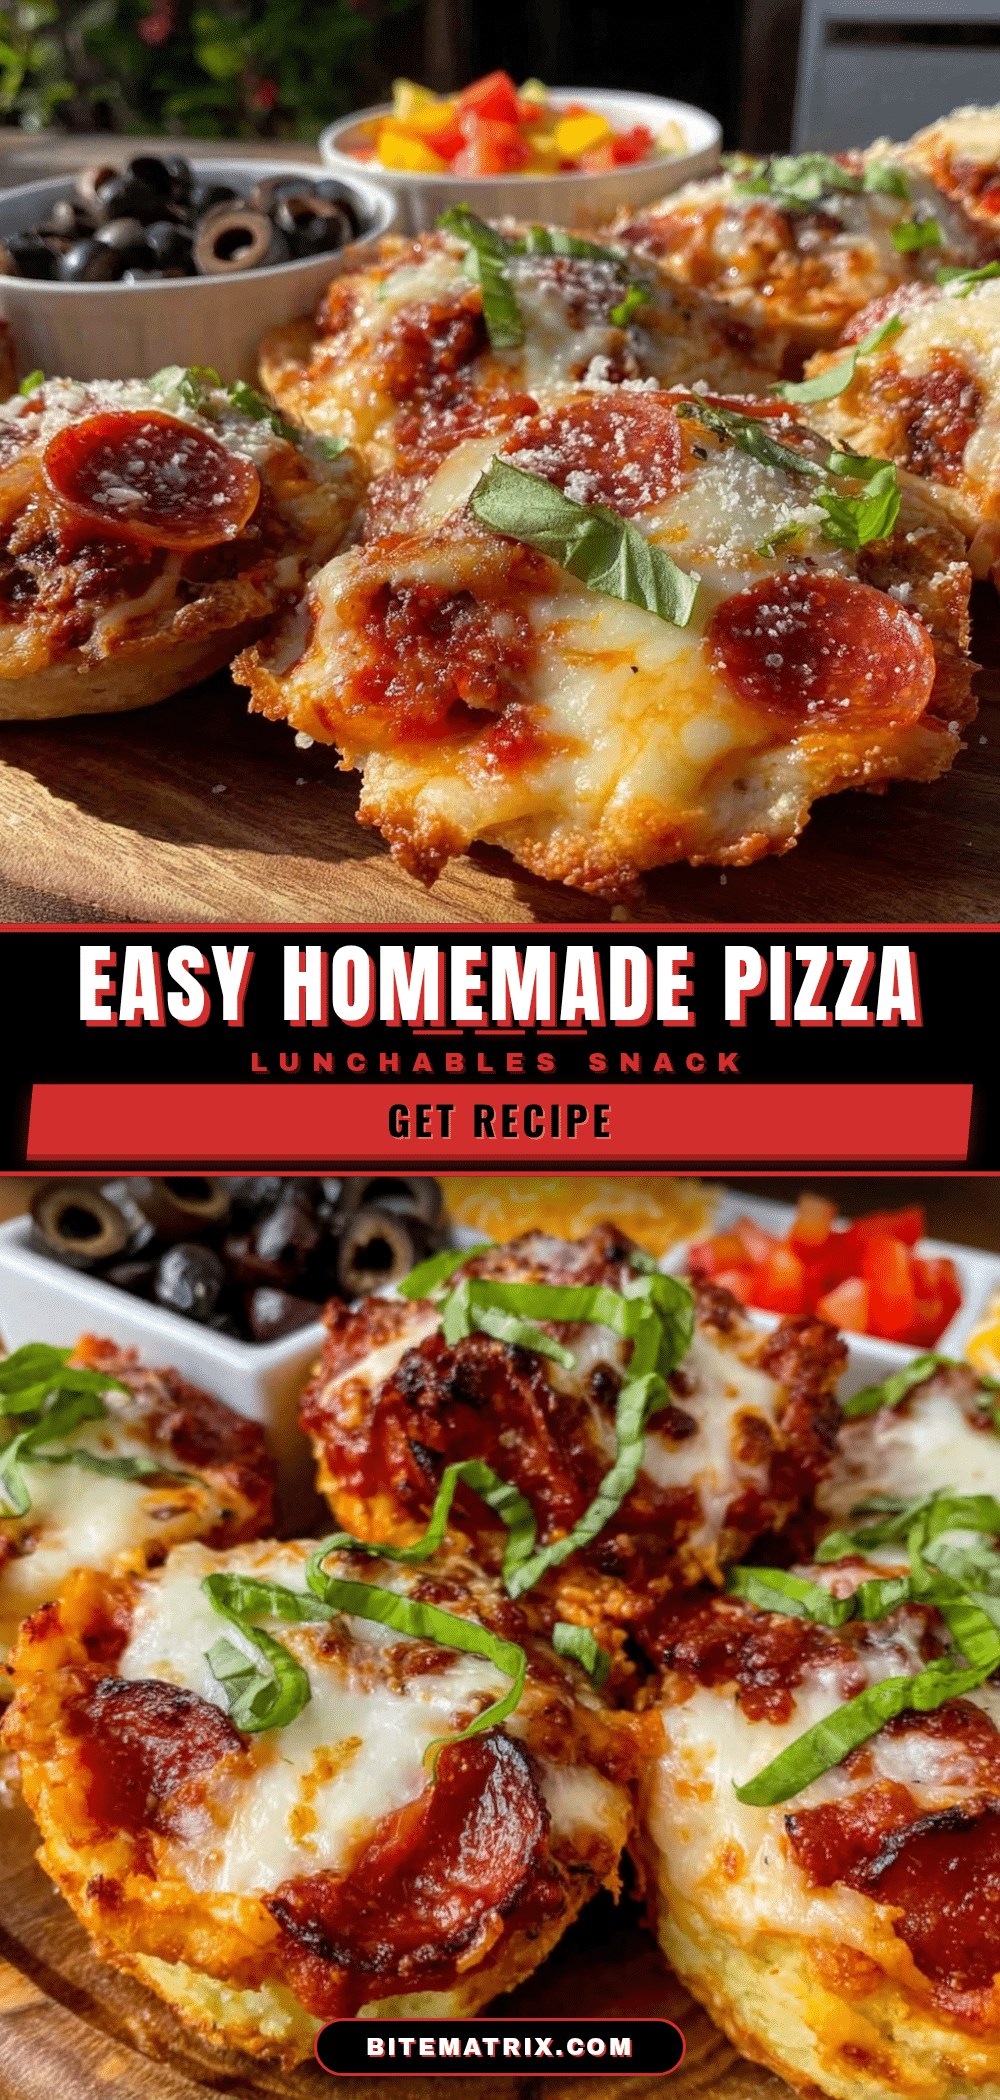
Easy Pizza Lunchables Recipe Homemade DIY Snack Ideas for Kids

This recipe creates soft, slightly chewy mini pizza crusts perfect for homemade DIY pizza lunchables. It’s quick, kid-friendly, and customizable with simple pantry ingredients.
- Prep Time: 15 minutes
- Cook Time: 15 minutes
- Total Time: 30 minutes
- Yield: 12 mini pizzas 1x
- Category: Snack
- Cuisine: American
Ingredients
- 2 cups (240g) all-purpose flour
- 1 teaspoon instant yeast
- 1 teaspoon sugar
- ½ teaspoon salt
- ¾ cup (180ml) warm water (about 110°F/43°C)
- 2 tablespoons olive oil
- ½ cup (120ml) tomato sauce
- ¼ teaspoon garlic powder
- ½ teaspoon dried oregano
- Salt and pepper to taste
- 1 to 1½ cups (100-150g) shredded mozzarella cheese
- About 20 pepperoni slices (or turkey pepperoni)
- ¼ cup sliced black olives (optional)
- ¼ cup diced bell peppers or mini sweet peppers
Instructions
- Activate the yeast: In a small bowl, combine ¾ cup warm water, 1 teaspoon sugar, and 1 teaspoon instant yeast. Stir gently and let sit for 5 minutes until foamy.
- Make the dough: In a large mixing bowl, whisk together 2 cups all-purpose flour and ½ teaspoon salt. Add the yeast mixture and 2 tablespoons olive oil. Stir until a rough dough forms.
- Knead the dough: Turn dough onto a floured surface and knead for 6-8 minutes until smooth, elastic, and soft. Add flour sparingly if sticky.
- Let it rise: Place dough in a lightly oiled bowl, cover, and let rise in a warm spot for about 45 minutes or until doubled in size.
- Prepare the sauce: Mix ½ cup tomato sauce with ¼ teaspoon garlic powder, ½ teaspoon dried oregano, salt, and pepper in a small bowl.
- Shape the mini crusts: Punch down dough, roll out to ¼-inch thickness, and cut into 3-inch circles. Place on parchment-lined baking sheet.
- Prebake crusts: Bake at 425°F (220°C) for 6-8 minutes until just set but not browned.
- Add toppings: Spread about a teaspoon of sauce on each crust, sprinkle with mozzarella, and add pepperoni, olives, and peppers as desired.
- Bake again: Return to oven and bake for 5-7 minutes until cheese is melted and bubbly.
- Cool and pack: Let mini pizzas cool slightly before packing into containers or snack boxes.
Notes
If dough is sticky, flour hands instead of adding flour directly to dough. Prebake crusts to avoid soggy bottoms. Avoid overloading with sauce or cheese for best handheld texture. Dough can be made ahead and refrigerated. Freeze prebaked crusts for up to 2 months. Reheat mini pizzas in oven or toaster oven for best texture; avoid microwaving.
Nutrition
- Serving Size: 1 mini pizza (about
- Calories: 150180
- Sugar: 12
- Sodium: 250350
- Fat: 79
- Saturated Fat: 34
- Carbohydrates: 1520
- Fiber: 12
- Protein: 68
Keywords: pizza lunchables, mini pizza, kids snack, homemade pizza, DIY snack, easy pizza recipe, lunchbox ideas