I need a snack that doesn’t require a plate, a fork, or any real commitment. That’s the thought that starts this whole thing—standing in my tiny kitchen, staring at the pantry, knowing I have exactly five things in there that can become something edible without turning on the oven. The mini-fridge is humming its usual sad hum. The microwave is doubling as a breadbox. And I’m hungry enough to eat my own arm but too lazy to wash a single dish.
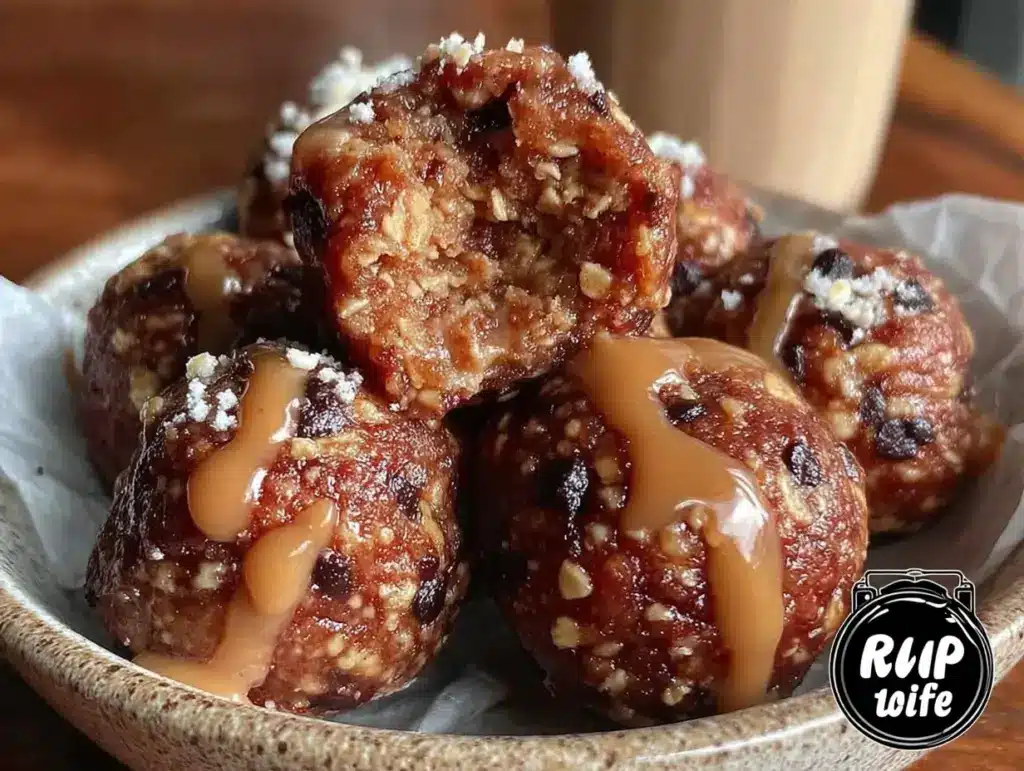
These energy balls came from that exact moment of desperation. I grabbed oats, peanut butter, honey, chocolate chips, and flaxseed—the five survivors of my last grocery run. I mashed them together in a bowl I didn’t even bother rinsing first. Rolled them into balls with slightly sticky hands. And then I ate three of them standing over the sink, feeling like I’d just hacked the system.
That was two years ago, and I’ve made them at least once a week since. They’ve gotten me through all-nighters, early classes, and that weird 3 p.m. slump where coffee just makes things worse. They’re not fancy. They’re not pretty. But they work, and honestly, that’s exactly what dorm food needs to be.
Why You’ll Love This Recipe
Let me tell you why these little balls of energy have become my most-requested recipe among friends who also live on ramen and prayer. They solve real problems that dorm life creates, and they do it without any drama.
- No oven required. Seriously. You mix everything in one bowl and roll. That’s it. No preheating, no baking sheets, no fire alarms going off at midnight.
- Five ingredients you already have. Oats, peanut butter, honey, chocolate chips, and flaxseed. If you don’t have one of these, your roommate probably does. I’ve made them with almond butter, sunflower seed butter, even that weird hazelnut spread someone left in the communal fridge.
- Ready in 10 minutes. Not 10 minutes plus cooling time. Not 10 minutes plus prep. Ten minutes from “I’m hungry” to “I’m eating.” That matters when you’re between classes or studying at 2 a.m.
- Actually filling. These aren’t those sad “energy” snacks that leave you hungry again in 20 minutes. The oats and peanut butter give you real staying power. I’ve survived six-hour library sessions on three of these and a water bottle.
- They travel anywhere. Throw them in your backpack, your gym bag, your car’s glove compartment (I don’t judge). They don’t melt, they don’t crumble, and they don’t make a mess. I’ve taken them on road trips, to the beach, and once on a plane when I was too broke for airport food.
What makes these different from every other energy ball recipe you’ve seen? It’s the ratio. I spent months tweaking the proportions so they hold together without being sticky, taste sweet without being sugary, and have that perfect texture—not too dense, not too crumbly. This is the version that finally worked, the one I’ve made for friends who immediately asked for the recipe.
These are the kind of snack that makes you feel like you’ve got your life together, even when you’re eating them over your keyboard at 3 a.m. finishing a paper you started way too late. They’re small victories in ball form.
What Ingredients You Will Need
This recipe uses simple, wholesome ingredients that come together to create something genuinely satisfying. No obscure superfoods, no expensive powders, no trips to a specialty store. Just five things that probably already live in your kitchen or your dorm’s communal pantry.
- Rolled oats (old-fashioned) — 1 cup (90g). These are the backbone of the recipe. They provide texture, fiber, and that chewy satisfaction that keeps you full. I prefer rolled oats over quick oats because they hold their shape better and don’t turn into mush. If all you have are quick oats, they’ll work, but the texture will be softer. Avoid steel-cut oats—they’re too hard and won’t bind properly. My go-to brand is Bob’s Red Mill, but any store brand works fine. Look for oats that are fresh—stale oats have a flat, almost dusty taste that ruins the whole batch.
- Creamy peanut butter — ½ cup (128g). This is the glue that holds everything together. Use a natural peanut butter with just peanuts and salt if you can—the oils help with binding and flavor. If you’re using a processed peanut butter like Jif or Skippy, your balls will be slightly sweeter and a bit firmer. Both work, I’ve tested them. Just make sure it’s room temperature and stirred well if it’s natural. Cold peanut butter is impossible to mix evenly and will leave you with dry patches. For a nut-free version, sunflower seed butter works beautifully—just know it’ll turn a slightly greenish color from a natural reaction with the baking soda (don’t panic, it’s fine).
- Honey — ⅓ cup (112g). This is your sweetener and your binder. It adds moisture, helps the balls hold together, and gives that subtle floral sweetness that balances the peanut butter. Local honey is lovely if you have it, but any liquid honey works. If you’re vegan, use maple syrup or agave nectar—just note that maple syrup makes the mixture slightly stickier, so you might need an extra tablespoon of oats. Don’t use crystallized honey unless you warm it up first; it won’t incorporate properly and you’ll end up with gritty spots.
- Mini chocolate chips — ⅓ cup (60g). These are the payoff. Every bite should have a little burst of chocolate. I use mini chips because they distribute more evenly than regular-sized ones, but regular chips work too—you just might get a few bites without any chocolate and then one bite that’s all chocolate. Not the worst problem to have. Dark chocolate chips (60-70% cacao) balance the sweetness best, but milk chocolate is great if you prefer a sweeter ball. For a white chocolate version, use white chips and add a pinch of flaky salt on top. I’ve also used chopped dark chocolate bars in a pinch—just make sure the pieces are small enough to mix in evenly.
- Ground flaxseed — 2 tablespoons (14g). This is the secret ingredient that makes everything work. Flaxseed absorbs moisture and helps bind the mixture without making it dry. It also adds omega-3s and fiber, which is a nice bonus. You need ground flaxseed, not whole—whole seeds will just pass through your system and won’t help with binding. If you don’t have flaxseed, you can substitute chia seeds (they’ll add a slight crunch) or skip it entirely and add an extra tablespoon of oats, though the texture won’t be quite as cohesive.
That’s it. Five ingredients. No protein powder, no coconut oil, no dates that need soaking, no weird superfood powders that cost $30 a bag. Just real food that you can find in any grocery store or campus market.
Equipment Needed
The beauty of this recipe is how little equipment it requires. If you have a bowl and a spoon, you’re basically there. But here’s what I use and what you can substitute when you’re in a dorm kitchen with limited tools.
- Large mixing bowl — Any bowl works. I use a medium ceramic bowl I got from a thrift store for $2. In a pinch, I’ve used a plastic takeout container (washed, obviously) and it worked fine.
- Measuring cups and spoons — You need a 1-cup measure, a ½-cup, a ⅓-cup, and a tablespoon. If you don’t have measuring cups, use a regular mug for the oats (fill it about ¾ full) and estimate the rest. I’ve done it. It works.
- Rubber spatula or wooden spoon — Something sturdy enough to mix thick dough. A rubber spatula is ideal because it scrapes the sides clean. A fork works in an emergency but takes forever.
- Baking sheet or plate — To hold the rolled balls while they set. Any flat surface works. I’ve used a cutting board, a dinner plate, and once a clean textbook covered in parchment paper.
- Parchment paper or wax paper — Optional but helpful. It prevents sticking and makes cleanup easier. If you don’t have it, just spray your plate lightly with cooking spray or rub it with a drop of oil.
- Small cookie scoop or tablespoon — For uniform balls. A cookie scoop is nice but not necessary. I’ve used a regular tablespoon for years. Your hands work too—just make sure they’re slightly damp so the mixture doesn’t stick to them.
That’s genuinely everything. No food processor, no mixer, no blender. This is the kind of recipe you can make in a dorm room with a mini-fridge and a microwave that’s mostly used for heating up leftovers. I’ve made these in hotel rooms, in my car at a rest stop, and once in a friend’s apartment that had exactly one bowl and one spoon.
Preparation Method
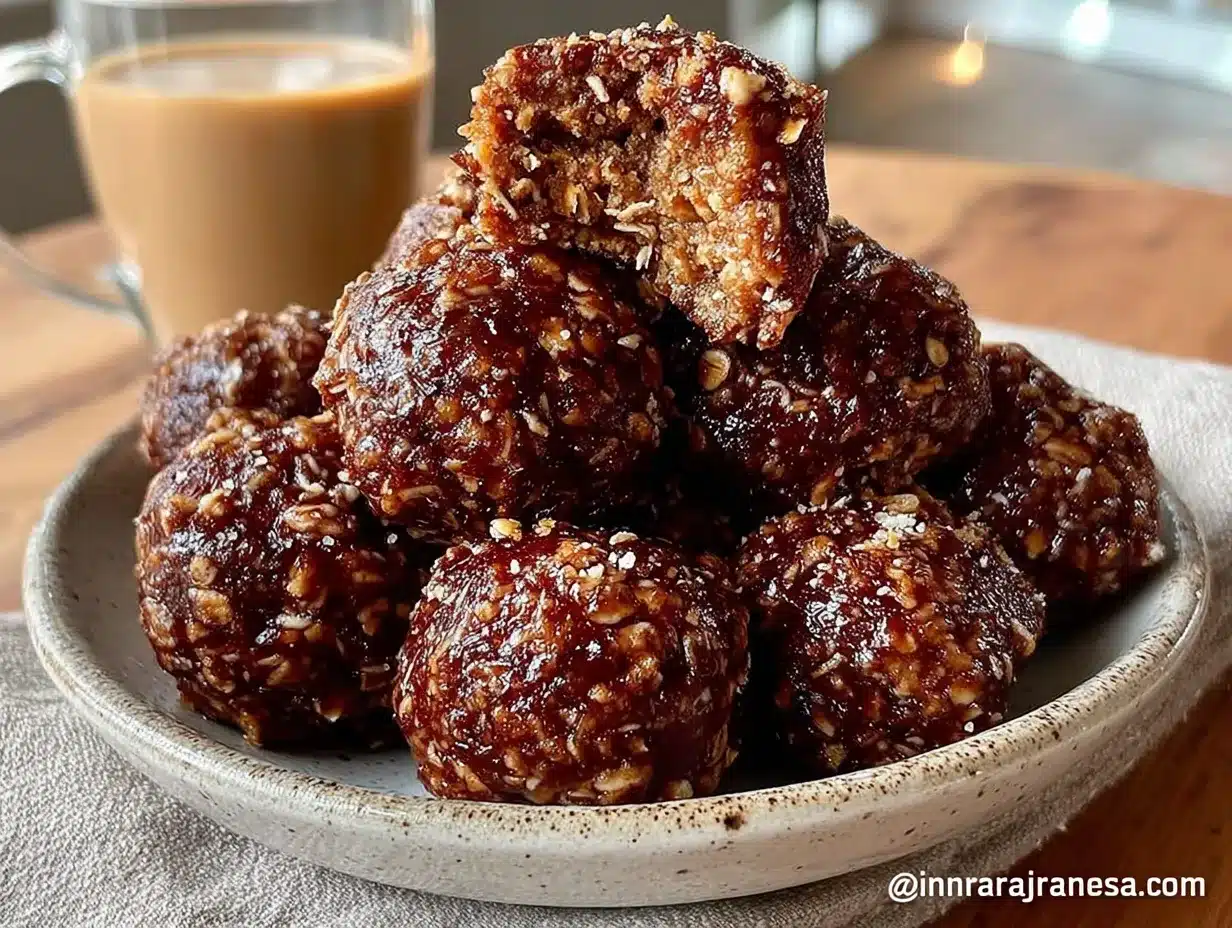
Alright, let’s make these energy balls. The whole process takes about 10 minutes from start to finish, and most of that time is just rolling. Here’s exactly how I do it, including all the little tricks I’ve learned from making these probably a hundred times.
- Measure your oats first. Put 1 cup (90g) of rolled oats into your mixing bowl. I always measure the oats first because they’re the most forgiving ingredient—if you accidentally add a little extra, it’s fine. Plus, they create a good base for everything else to mix into. Give the oats a quick look to make sure there aren’t any weird bits or stale pieces. I once found a small pebble in a bag of oats, so now I always check.
- Add the peanut butter. Scoop out ½ cup (128g) of creamy peanut butter and drop it right on top of the oats. If your peanut butter is natural and has separated oil on top, stir it really well in the jar first. I learned this the hard way—the first time I made these, I didn’t stir the peanut butter, and half my batch was oily while the other half was dry. If your peanut butter is cold from the fridge, let it sit out for 10 minutes or microwave it for 15 seconds to soften it. Cold peanut butter is a nightmare to mix and will leave you with stubborn lumps.
- Pour in the honey. Measure ⅓ cup (112g) of honey and add it to the bowl. Honey is sticky, so spray your measuring cup with a little cooking spray first, and it’ll slide right out. Or do what I do: use a rubber spatula to scrape every last drop out. Honey is too expensive to waste. If you’re using maple syrup instead, it’s a little thinner, so your mixture might feel slightly wetter—that’s normal.
- Add the flaxseed. Sprinkle 2 tablespoons (14g) of ground flaxseed over the mixture. Don’t dump it all in one spot—scatter it around so it incorporates more easily. Flaxseed is powdery, so try not to breathe in while you’re adding it. I’ve sneezed flaxseed all over my kitchen more times than I’d like to admit.
- Add the chocolate chips. Pour in ⅓ cup (60g) of mini chocolate chips. I save these for last because if I add them too early, they get crushed during mixing and turn the whole batch brown. Not the end of the world, but I prefer distinct chocolate chunks. Reserve a tablespoon of chips to press into the tops of the balls later if you want them to look pretty.
- Mix everything together. Start stirring with your rubber spatula or wooden spoon. At first, it’ll look like a mess—oats flying everywhere, peanut butter refusing to cooperate. Keep going. The mixture will start coming together after about 30 seconds of vigorous stirring. Switch to folding motions once the ingredients are mostly combined. The final texture should be thick and slightly sticky, like a stiff cookie dough. If it’s too dry and crumbly, add a teaspoon of honey or water. If it’s too wet and sticky, add a tablespoon of oats. I’ve had to adjust both ways depending on the humidity, the brand of peanut butter, and the phase of the moon (or so it seems).
- Chill the mixture (optional but recommended). Pop the bowl in the fridge for 15-20 minutes. This makes the mixture firmer and easier to roll. I skip this step when I’m impatient (which is often), but the balls come out rounder and neater when I don’t. If you’re in a rush, you can skip chilling entirely—just expect slightly stickier hands during rolling.
- Roll into balls. Scoop out about 1 tablespoon of mixture and roll it between your palms to form a ball. Aim for uniform size so they all set at the same rate. I use a small cookie scoop (about 1.5 tablespoons) for consistency. Wet your hands slightly with cold water before rolling—this prevents the mixture from sticking to your palms. You’ll need to re-wet your hands every 4-5 balls. The balls should be firm but not hard, about the size of a ping-pong ball. If they’re falling apart, your mixture is too dry—add a little more honey or peanut butter.
- Place on prepared surface. Set each ball on your baking sheet, plate, or whatever you’re using. Leave a little space between them so they don’t stick together. If you reserved some chocolate chips, press a few into the top of each ball now for a nicer presentation.
- Let them set. Let the balls sit at room temperature for about 10 minutes, then transfer them to the fridge for at least 30 minutes. This allows them to firm up and hold their shape. They’re edible immediately, but they’re much better after they’ve had time to set. The texture changes from soft and slightly crumbly to firm and chewy.
This recipe makes about 14-16 energy balls, depending on how big you roll them. I usually get 15 exactly when I use a level tablespoon measure. Store them in an airtight container in the fridge, and they’ll last for up to two weeks—though in my experience, they’re gone within three days.
Cooking Tips & Techniques
After making these energy balls more times than I can count, I’ve collected a few tricks that make the process smoother and the results better. Some of these I learned from recipe testing, some from happy accidents, and some from outright failures.
The temperature of your ingredients matters. Room temperature peanut butter and honey mix much more easily than cold ones. If your peanut butter has been in the fridge, microwave it for 10-15 seconds first. If your honey has crystallized, warm the jar in a bowl of hot water for a few minutes. I once tried to mix cold ingredients straight from the fridge and ended up with a lumpy, uneven mixture that took forever to come together.
Don’t overmix. Once everything is combined, stop. Overmixing can make the texture dense and tough, especially if you’re using a natural peanut butter that’s on the drier side. You want the oats to stay intact, not get broken down into flour. Mix just until you can’t see any dry oats or separate ingredients.
Use a cookie scoop for uniform balls. This isn’t just about aesthetics—uniform balls set at the same rate and have consistent texture. If some balls are twice the size of others, the big ones will be softer in the center while the small ones are already firm. A #60 cookie scoop (about 1 tablespoon) is perfect. I got mine at a restaurant supply store for $3, and it’s one of my most-used kitchen tools.
Wet hands are your friend. The mixture is sticky, and dry hands will just make a mess. Keep a small bowl of water nearby and dip your fingers before rolling each ball. Shake off the excess—you want damp hands, not dripping wet. This is the single most important tip for easy rolling. I learned this after my first batch turned into a sticky disaster that I had to scrape off my hands with a butter knife.
Chill the mixture if you have time. Even 10 minutes in the fridge makes a noticeable difference in how easy the mixture is to handle. The peanut butter firms up, the oats absorb some moisture, and everything becomes more cooperative. If you’re making these for the first time, definitely chill the mixture. Once you’ve made them a few times and know what the texture should feel like, you can skip it.
Taste test before rolling. Before you commit to rolling all the balls, grab a tiny pinch of the mixture and taste it. Is it sweet enough? Does it need more chocolate chips? A pinch of salt? Adjust now, not after you’ve rolled all 15 balls. I once made a batch where I forgot the honey entirely and didn’t realize until I’d rolled everything. That was a sad, dry batch of energy balls.
Press chocolate chips into the tops. This is purely aesthetic, but it makes the balls look so much more appealing. When you roll the balls, the chocolate chips get hidden inside. Pressing a few extra chips into the top makes them look intentional and appetizing. It takes 30 seconds and makes a huge difference in presentation.
Variations & Adaptations
The beauty of this recipe is how adaptable it is. I’ve tried dozens of variations over the years, and most of them have been successful. Here are my favorites, along with notes on what works and what doesn’t.
Vegan version. Swap the honey for maple syrup or agave nectar. Maple syrup gives a slightly thinner consistency, so you might need to add an extra tablespoon of oats. Agave is sweeter than honey, so use a little less—about ¼ cup instead of ⅓ cup. Both work beautifully, and the flavor profile shifts slightly depending on what you use. Maple syrup adds a subtle woodsy sweetness, while agave is more neutral.
Nut-free version. Use sunflower seed butter instead of peanut butter. The texture is almost identical, and the flavor is surprisingly similar. One thing to know: sunflower seed butter reacts with baking soda (if you ever add it) and turns green. Since this recipe doesn’t use baking soda, you’re fine. But don’t add baking soda to a sunflower seed butter version unless you want green energy balls. They’d still taste fine, but the color is alarming.
Protein boost. Add 2 tablespoons of your favorite protein powder. Vanilla or chocolate both work well. You’ll need to add an extra tablespoon of honey or a splash of milk to compensate for the dryness of protein powder. I’ve used whey, pea protein, and collagen powder—all work, though collagen makes the balls slightly softer. If you’re using a flavored protein powder, reduce the honey slightly since most protein powders are already sweetened.
Seasonal variations. In the fall, add ½ teaspoon of pumpkin pie spice and swap the chocolate chips for dried cranberries. In the summer, add ¼ cup of finely chopped dried mango and swap the chocolate chips for white chocolate chips. In winter, add ¼ teaspoon of peppermint extract and use dark chocolate chips. I make a different seasonal version every few months, and it keeps the recipe from getting boring.
Coconut version. Add ¼ cup of unsweetened shredded coconut to the mixture and roll the finished balls in more shredded coconut. This adds texture and a tropical flavor that pairs beautifully with the chocolate. Toast the coconut first for extra flavor—just spread it on a baking sheet and bake at 350°F for 3-5 minutes until golden. Watch it carefully; coconut burns fast.
Low-sugar version. Reduce the honey to 2 tablespoons and add 2 tablespoons of unsweetened applesauce. The applesauce adds moisture and sweetness without the sugar. The texture will be slightly softer, so add an extra tablespoon of oats to compensate. These won’t last as long in the fridge (about 5-7 days instead of two weeks) because of the added moisture from the applesauce.
Serving & Storage Suggestions
These energy balls are incredibly versatile when it comes to serving. They work for breakfast, snacks, post-workout fuel, or dessert. Here’s how I recommend serving and storing them for the best experience.
Serving temperature. I prefer them straight from the fridge—they’re firmer, chewier, and more satisfying that way. But they’re also delicious at room temperature, especially if you’re eating them on the go. If you’re serving them to guests, let them sit at room temperature for 10-15 minutes before serving. This softens them slightly and makes the texture more approachable for people who aren’t used to cold snacks.
Presentation ideas. Arrange them on a plate or in a mason jar for a casual, appealing look. If you’re bringing them to a party or study group, layer them in a clear jar with parchment paper between layers. They look beautiful and festive, especially if you’ve pressed extra chocolate chips into the tops. For a more polished presentation, dust them lightly with cocoa powder or powdered sugar.
Pairings. These energy balls pair beautifully with almost anything. I love them with a glass of cold milk, a cup of coffee, or a mug of hot tea. They’re also great crumbled over yogurt or oatmeal for extra texture and flavor. If you’re serving them as part of a snack board, they go well with fresh fruit, cheese, and nuts. I’ve even crumbled one over vanilla ice cream for a quick dessert.
Storage instructions. Store in an airtight container in the refrigerator for up to two weeks. I use a glass container with a tight-fitting lid, but any container works. If you’re stacking them, place a piece of parchment paper between layers to prevent sticking. They’ll also keep at room temperature for 2-3 days, but they’re much better refrigerated. If you’re taking them on a trip, pack them in a cooler or eat them within a day or two.
Freezer instructions. These freeze beautifully. Place the balls on a baking sheet lined with parchment paper and freeze until solid (about 1-2 hours). Transfer to a freezer-safe bag or container. They’ll keep for up to three months. To thaw, transfer to the refrigerator overnight or let sit at room temperature for 15-20 minutes. I always keep a batch in my freezer for emergency snacks—they’ve saved me from many a hangry moment.
How flavors develop over time. These energy balls actually improve after a day or two in the fridge. The flavors meld together, the oats soften slightly, and the texture becomes more uniform. If you can resist eating them all on day one, they’ll taste even better on day two or three. That said, I’ve never successfully kept a batch longer than four days—they just disappear too quickly.
Nutritional Information & Benefits
I’m not a nutritionist, but I’ve done enough research to understand why these energy balls are a genuinely good snack choice. Here’s the breakdown per ball (based on 15 balls per batch).
Estimated nutritional values per ball:
- Calories: 145-160
- Protein: 5g
- Carbohydrates: 18g
- Fiber: 3g
- Sugar: 10g (from honey and chocolate chips)
- Fat: 8g
- Sodium: 60mg
Health benefits of key ingredients: The oats provide complex carbohydrates for sustained energy, plus beta-glucan, a type of fiber that supports heart health. The peanut butter offers protein and healthy monounsaturated fats that keep you full and satisfied. The flaxseed is packed with omega-3 fatty acids, which are great for brain function—especially important when you’re studying. The honey provides quick energy from natural sugars, and the chocolate chips? Well, they provide joy, which is its own kind of nutrition.
Dietary considerations: This recipe is naturally vegetarian. It can be made vegan by swapping honey for maple syrup. It’s gluten-free if you use certified gluten-free oats (regular oats are often cross-contaminated). It’s dairy-free as written, since there’s no dairy in the recipe. For a nut-free version, use sunflower seed butter as mentioned above.
Potential allergens: This recipe contains peanuts and may contain gluten depending on the oats you use. The chocolate chips may contain dairy or soy depending on the brand. Always check labels if you’re serving someone with allergies.
My personal wellness perspective: I don’t believe in labeling foods as “good” or “bad.” These energy balls are a tool—a convenient, satisfying snack that happens to be made from whole ingredients. They’re not a health food, but they’re not junk food either. They’re just food, and they happen to work really well for what they’re designed to do: keep you going when you need fuel. I’ve eaten them for breakfast, as a pre-workout snack, and as a midnight treat. They serve all those purposes without judgment.
Conclusion
These easy 5-ingredient energy balls have become more than just a recipe in my life—they’re a solution. They solve the problem of being hungry with no time, of wanting something satisfying without cooking, of needing fuel that doesn’t require a plate or a fork. They’ve gotten me through late nights, early mornings, and everything in between.
What I love most about them is how forgiving they are. You can swap ingredients, adjust proportions, add things, take things away, and they still work. They’re the kind of recipe that builds confidence in the kitchen because they’re nearly impossible to mess up. And when you’re living in a dorm with limited resources and even less time, that kind of reliability is invaluable.
I encourage you to make these your own. Add cinnamon if you like warmth. Use almond butter if that’s what you have. Throw in some dried fruit or seeds. The base recipe is a starting point, not a rulebook. The best version of these energy balls is the one that works for your life, your pantry, and your taste buds.
If you make these, I’d love to hear how they turn out. Drop a comment below and let me know what variations you tried, what worked, and what you’d change. And if you’re looking for other easy snacks that don’t require an oven, check out my Italian sub sandwich skewers for another no-cook option. Happy snacking, friends.
Frequently Asked Questions
Can I make these without a fridge?
Yes, you can. The energy balls will hold together at room temperature for 2-3 days. They’ll be softer and slightly more prone to falling apart, but they’re still delicious. Store them in a cool, dry place in an airtight container. If your dorm room is particularly warm, try to eat them within a day or two.
Why are my energy balls too dry?
This usually happens when the peanut butter is too thick or the oats are too absorbent. Add a teaspoon of honey or a splash of water and mix again. If they’re still dry, add another tablespoon of peanut butter. The mixture should feel like slightly sticky cookie dough. If it crumbles when you squeeze it, it needs more moisture.
Why are my energy balls too sticky?
Too much honey or peanut butter is usually the culprit. Add an extra tablespoon of oats and mix well. If they’re still too sticky to roll, chill the mixture for 20-30 minutes. The cold firms everything up and makes it much easier to handle. You can also wet your hands more frequently while rolling.
Can I use quick oats instead of rolled oats?
Yes, but the texture will be different. Quick oats are more finely chopped, so they absorb moisture faster and create a softer, more uniform texture. The balls will be less chewy and more tender. Some people actually prefer this texture. If you’re using quick oats, you might need slightly less honey since they absorb liquid more efficiently.
How long do these last in the freezer?
Up to three months in an airtight container or freezer bag. To thaw, transfer to the refrigerator overnight or let sit at room temperature for 15-20 minutes. They’ll taste just as fresh as the day you made them. I recommend freezing them in single-serving portions so you can grab exactly what you need without thawing the whole batch.
Pin This Recipe!
Easy 5-Ingredient Energy Balls for Dorm Snacking

These no-bake energy balls are made with just five simple ingredients—oats, peanut butter, honey, chocolate chips, and flaxseed. Ready in 10 minutes, they’re the perfect grab-and-go snack for busy students, late-night study sessions, or anytime you need a quick, satisfying bite without turning on the oven.
- Prep Time: 10 minutes
- Cook Time: 0 minutes
- Total Time: 10 minutes (plus optional 30 minutes chilling)
- Yield: 14-16 energy balls 1x
- Category: Snack
- Cuisine: American
Ingredients
- 1 cup (90g) rolled oats (old-fashioned)
- ½ cup (128g) creamy peanut butter (room temperature)
- ⅓ cup (112g) honey
- ⅓ cup (60g) mini chocolate chips
- 2 tablespoons (14g) ground flaxseed
Instructions
- Measure the rolled oats into a large mixing bowl.
- Add the creamy peanut butter on top of the oats.
- Pour in the honey. For easy release, spray the measuring cup with cooking spray first.
- Sprinkle the ground flaxseed evenly over the mixture.
- Add the mini chocolate chips, reserving a tablespoon for topping if desired.
- Mix everything together with a rubber spatula or wooden spoon until a thick, slightly sticky dough forms. If too dry, add a teaspoon of honey or water; if too wet, add a tablespoon of oats.
- Optional but recommended: Chill the mixture in the fridge for 15-20 minutes to make rolling easier.
- Scoop about 1 tablespoon of mixture and roll between slightly damp palms to form a ball. Repeat with remaining mixture.
- Place the balls on a baking sheet or plate lined with parchment paper. If reserved, press a few chocolate chips into the tops.
- Let the balls set at room temperature for 10 minutes, then refrigerate for at least 30 minutes to firm up.
Notes
For best results, use room temperature peanut butter and honey. If the mixture is too sticky to roll, chill it for 15-20 minutes. Wet your hands slightly with cold water before rolling to prevent sticking. These energy balls improve after a day in the fridge as flavors meld. Store in an airtight container in the refrigerator for up to two weeks, or freeze for up to three months.
Nutrition
- Serving Size: 1 energy ball
- Calories: 145160
- Sugar: 10
- Sodium: 60
- Fat: 8
- Saturated Fat: 2
- Carbohydrates: 18
- Fiber: 3
- Protein: 5
Keywords: energy balls, no-bake snacks, dorm snacks, healthy snacks, 5-ingredient recipes, peanut butter snacks, easy snacks