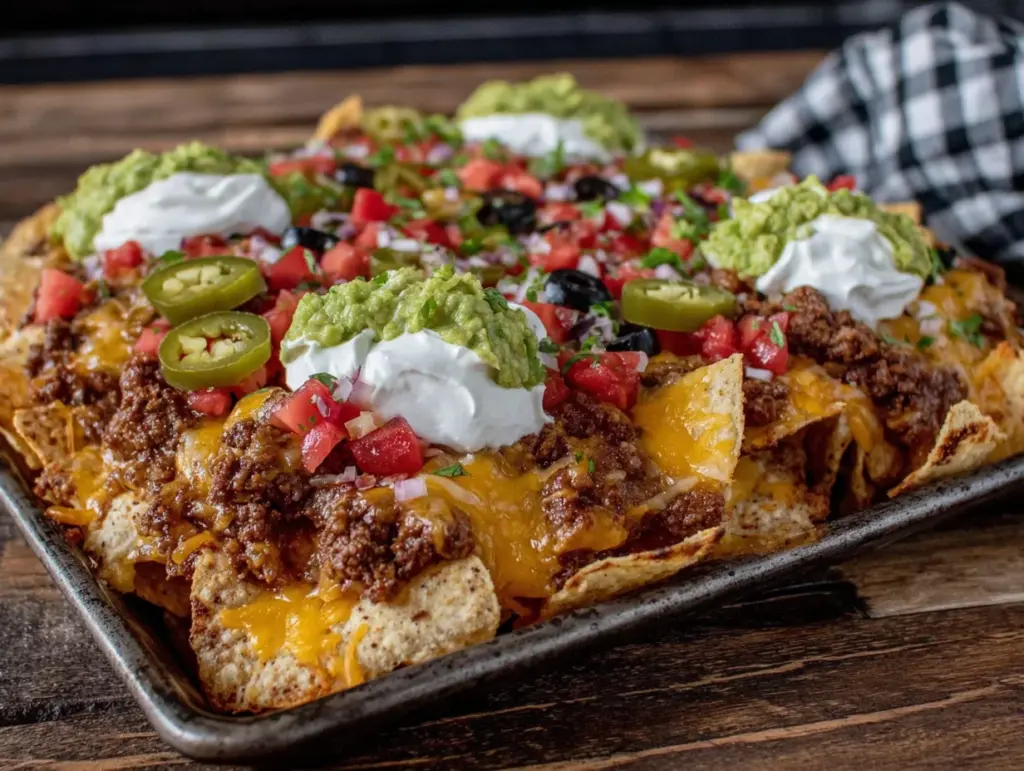
The crunch. That first crack of a tortilla chip under a mountain of melted cheese, seasoned beef, and just about everything else you could want—it’s a sound that means the game is on. I can still hear it from my uncle’s living room, that specific crunch mixed with the roar of the crowd on TV, the smell of chili powder and sizzling beef filling the air before kickoff. It was his signature move, this giant sheet pan of nachos, and the whole family would crowd around the coffee table, each person staking out their corner for the perfect loaded bite.
For years, I tried to recreate that magic. My early attempts were sad, soggy messes. Chips would get limp, the cheese would turn into a greasy puddle, and the toppings would slide off in one sad, monolithic clump. It was frustrating, honestly. I wanted that perfect, every-chip-has-something-good-on-it experience you get at a stadium, but from my own kitchen. After a lot of trial and error (and a few disappointing game days), I finally figured out the secret. It’s not about just piling stuff on; it’s about the layering, the timing, and a few key tricks that make these the Ultimate Tailgate Beef Nachos.
This recipe is the result of those lessons learned. It’s the one I bring to every watch party now, the one that disappears before halftime. It’s got that perfect balance of crispy, cheesy, meaty, and fresh, and it’s way easier than you’d think. Trust me, once you make these, you’ll never go back to the sad, store-bought version again.
Why You’ll Love This Recipe
Let’s be real—there are a million nacho recipes out there. But this one? It’s the one that’ll get you invited back to every tailgate. I’ve tested this more times than I care to admit, tweaking the spice blend and the baking method until it was just right. Here’s why these nachos are different.
- Perfectly Crispy Every Time: No more soggy chips! The trick is a two-step baking process and a smart layering technique that keeps the base chips crunchy.
- Restaurant-Quality Beef: The seasoned beef is the star. We’re not just browning meat; we’re building a deep, savory flavor with a homemade spice mix that beats any packet.
- Customizable for a Crowd: This recipe is a blueprint. Love jalapeños? Pile them on. Hate olives? Leave them off. It’s easy to adapt for picky eaters and adventurous fans alike.
- Built for Sharing: This isn’t a dainty appetizer. It’s a centerpiece. It’s the kind of dish that people gather around, grabbing chips and talking trash. It’s the heart of the party.
- Simple Ingredients, Big Flavor: You don’t need anything fancy. Most of these ingredients are probably in your pantry or fridge right now. It’s about how you put them together that makes the magic.
This isn’t just another snack. It’s a game-day essential. It’s the kind of food that makes you close your eyes after the first bite because it’s just that good. It’s comfort food at its finest—a little messy, a lot satisfying, and perfect for bringing people together.
What Ingredients You Will Need
This recipe relies on simple, wholesome ingredients to deliver that bold, stadium-style flavor without any fuss. Most are pantry staples, which makes this perfect for a last-minute craving. Here’s what you’ll need to grab.
For the Seasoned Beef:
- 1 lb ground beef (80/20 is ideal for flavor, but lean works too)
- 1 tablespoon olive oil
- 1 small yellow onion, diced (about ½ cup)
- 3 cloves garlic, minced
- 1 tablespoon chili powder (I prefer the McCormick brand for a consistent kick)
- 1 teaspoon ground cumin
- 1 teaspoon smoked paprika (adds a gorgeous depth)
- ½ teaspoon dried oregano
- ½ teaspoon salt
- ¼ teaspoon black pepper
- ½ cup beef broth (or water, but broth adds more flavor)
For the Nachos:
- 1 large (13-ounce) bag restaurant-style tortilla chips (look for the sturdy, thick-cut ones—they hold up better)
- 2 cups shredded Mexican blend cheese (or a mix of sharp cheddar and Monterey Jack)
- 1 (15-ounce) can black beans, drained and rinsed
- 1 cup cherry tomatoes, diced
- ½ cup pickled jalapeños (from a jar, or use fresh if you like more heat)
- ½ cup canned black olives, drained and sliced (optional, but I love them)
- ½ cup sour cream
- ½ cup fresh salsa or pico de gallo
- 1 ripe avocado, diced
- ¼ cup fresh cilantro, chopped
- 1 lime, cut into wedges
Substitution Guidance:
If you want to switch things up, feel free. For a leaner option, use ground turkey or chicken. For a vegetarian version, skip the beef and add a second can of black beans or some sautéed mushrooms. If you’re avoiding dairy, use a plant-based cheese shred and a dairy-free sour cream. The beauty of this recipe is its flexibility. I’ve even used leftover pulled pork from these BBQ ribs instead of beef, and it was incredible.
Equipment Needed
You don’t need a ton of fancy gear for this recipe, which is part of its charm. Here’s what you’ll need to get the job done.
- Large Sheet Pan: A half-sheet pan (18×13 inches) is perfect. It gives you enough room to spread the chips in a single layer without crowding.
- Large Skillet: For browning the beef. A cast-iron or non-stick pan works great.
- Cutting Board and Knife: For dicing the onion, garlic, tomatoes, and avocado.
- Measuring Spoons: For the spice mix.
- Spatula or Wooden Spoon: For breaking up the beef as it cooks.
- Small Bowls: For holding your prepped toppings.
If you don’t have a sheet pan, you can use a large oven-safe baking dish or even a cast-iron skillet. Just make sure it’s big enough to spread the chips out. I’ve made these on a disposable aluminum pan for a picnic before, and it worked like a charm. For the beef, a good heavy-bottomed skillet is worth its weight in gold—it helps get that nice brown crust on the meat.
Preparation Method
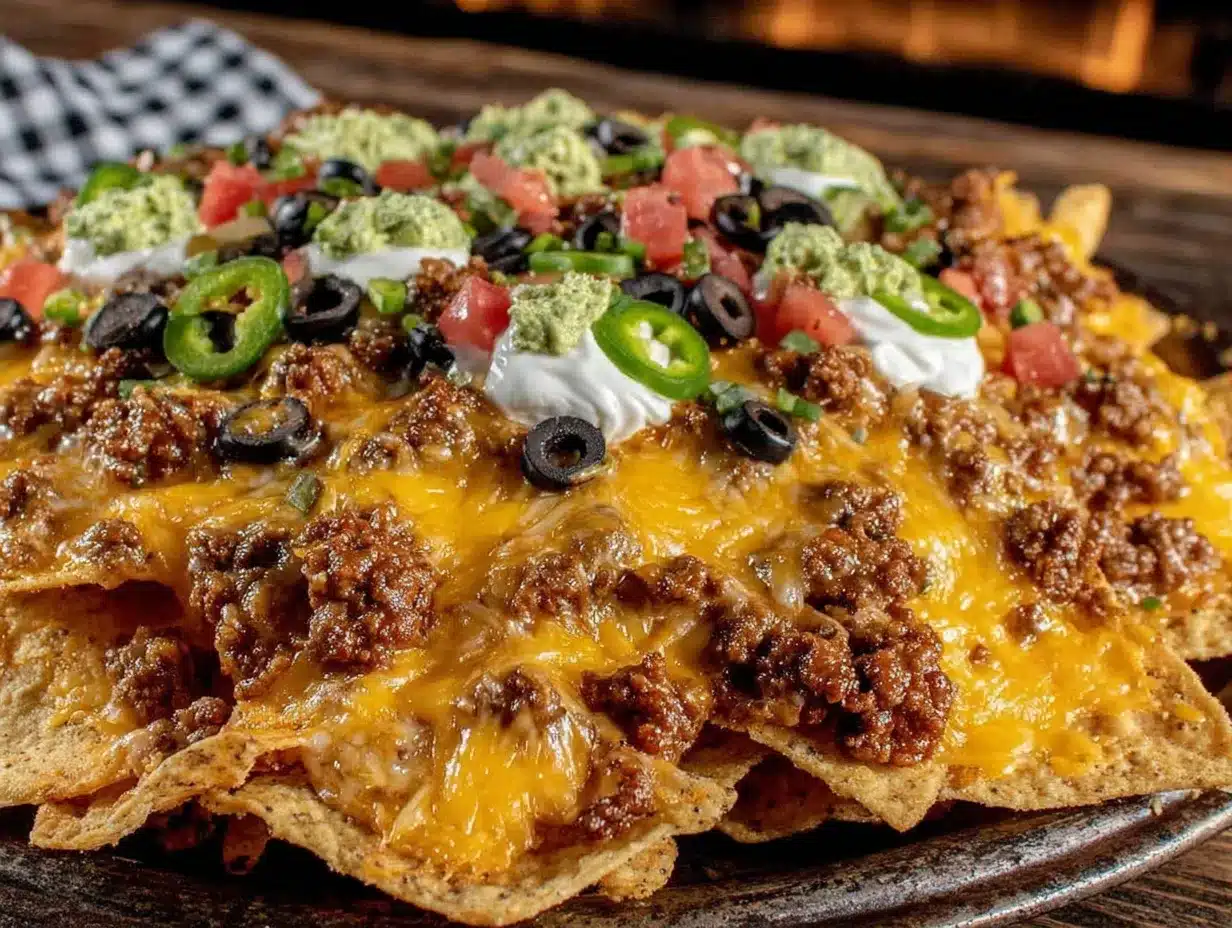
Alright, let’s get cooking! This method is designed to be foolproof, so follow along and you’ll have a tray of perfect nachos in no time. The whole process takes about 30 minutes from start to finish.
- Preheat and Prep: Preheat your oven to 400°F (200°C). While it’s heating up, dice your onion, mince your garlic, and chop your tomatoes and cilantro. This makes the whole process go much smoother.
- Cook the Beef: Heat the olive oil in your large skillet over medium-high heat. Add the diced onion and cook for 3-4 minutes until it’s soft and translucent. Add the ground beef, breaking it up with your spatula. Cook for 5-7 minutes, until it’s nicely browned. Don’t rush this step—you want some good caramelization for flavor.
- Add the Spices: Once the beef is browned, drain off any excess fat (leave about a tablespoon in the pan). Reduce the heat to medium. Add the minced garlic, chili powder, cumin, smoked paprika, oregano, salt, and pepper. Stir everything together and cook for 1 minute until the spices are fragrant. You’ll know it’s ready when the kitchen smells amazing.
- Deglaze the Pan: Pour in the beef broth and stir, scraping up any browned bits from the bottom of the pan. Let it simmer for 2-3 minutes until the liquid has mostly evaporated and the beef is coated in a thick, savory sauce. Remove from heat and set aside.
- First Layer of Chips: Spread about half of your tortilla chips in an even layer on your sheet pan. This is the foundation, so don’t be shy.
- First Layer of Toppings: Sprinkle half of the seasoned beef over the chips. Then, scatter half of the black beans and half of the shredded cheese over the top. This middle layer ensures every chip gets a little bit of everything.
- Second Layer of Chips: Spread the remaining tortilla chips on top of the first layer. This creates a second, equally loaded layer.
- Final Toppings: Top with the remaining beef, black beans, and cheese. Now, add the diced tomatoes and pickled jalapeños. This is where you can get creative.
- Bake: Place the sheet pan in the preheated oven and bake for 10-12 minutes, or until the cheese is fully melted and bubbly and the edges of the chips are starting to get a little golden brown. Keep an eye on it—you don’t want the chips to burn.
- Rest and Finish: Remove the pan from the oven and let it rest for 2-3 minutes. This allows the cheese to set slightly so it doesn’t slide off the chips. While it rests, dollop spoonfuls of sour cream and salsa over the top. Sprinkle with the diced avocado, sliced black olives (if using), and fresh cilantro.
- Serve Immediately: Squeeze a few lime wedges over the whole pan. Serve hot, directly from the sheet pan. It’s the best way to keep the chips crispy and the cheese gooey.
A quick note: The chips will start to soften as they sit, so these are best eaten right away. If you’re making them for a party, time the baking so they come out just as guests arrive.
Cooking Tips & Techniques
I’ve made this recipe more times than I can count, and I’ve learned a few things the hard way. Here are my best tips for nacho perfection.
- Don’t Overcrowd the Pan: This is the biggest mistake people make. If you pile chips too high, the ones in the middle will steam and get soggy. Use a large sheet pan and spread them in a relatively even layer. Two layers is the sweet spot.
- Build in Layers: Don’t just dump everything on top. Layering the chips, meat, beans, and cheese ensures that every chip you grab has a bit of everything. It’s a little more work, but it makes a huge difference.
- The Cheese Matters: Pre-shredded cheese has anti-caking agents that can prevent it from melting smoothly. For the best, gooiest melt, buy a block of cheese and shred it yourself. I know it’s an extra step, but trust me on this one.
- Watch the Oven: Ovens vary. Start checking your nachos at the 10-minute mark. You want the cheese bubbly and the chips just starting to brown at the edges. Over-baking will dry everything out.
- Fresh Toppings Are Key: The hot, cheesy, savory nachos need the freshness of the cold toppings. The cool sour cream, the juicy salsa, the creamy avocado, and the bright cilantro cut through the richness perfectly. Don’t skip them.
I once tried to make these on a grill while camping, thinking I’d be clever. Let’s just say the bottom chips were charcoal and the top ones were still cold. Stick to the oven for consistent results. And if you’re looking for another great party snack that’s easy to make, these classic burger sliders with secret sauce are always a hit, too.
Variations & Adaptations
This recipe is a fantastic base for your own creativity. Here are a few ways I’ve changed it up over the years.
- Chicken Nachos: Swap the ground beef for shredded rotisserie chicken or leftover grilled chicken. Toss the chicken in a little of the same spice mix and a splash of chicken broth. It’s a lighter option that’s just as satisfying.
- Vegetarian Nachos: Skip the meat entirely and double up on the black beans. Add some roasted corn, bell peppers, and zucchini for extra texture and flavor. You can also use a plant-based ground meat substitute.
- Breakfast Nachos: This is my secret weekend indulgence. Use the same base, but top the baked nachos with fried or scrambled eggs, crumbled bacon or chorizo, and a drizzle of hot sauce. It’s ridiculous in the best way.
- Spicy Mango Nachos: For a sweet and spicy twist, top the finished nachos with diced mango and a drizzle of sriracha or a spicy honey. The sweetness is a fantastic counterpoint to the savory beef and cheese.
- Low-Carb Nachos: If you’re watching your carbs, swap the tortilla chips for pork rinds or bell pepper strips. Bake them the same way, and you’ll get a satisfying, crunchy snack that fits your macros.
I once made a batch with crumbled crispy pork belly from this taco recipe instead of ground beef, and it was a game-changer. The rich, crunchy pork belly took these nachos to a whole new level.
Serving & Storage Suggestions
These nachos are best served hot, straight from the oven. I like to put the sheet pan right on the table with a pile of napkins and a warning that the pan is hot. It’s a casual, fun way to eat.
What to Serve With Them:
These nachos are a meal on their own, but they pair beautifully with a few other game-day favorites. A side of creamy cucumber dill salad adds a refreshing, cool contrast to the rich nachos. For a drink, a pitcher of strawberry basil lemonade is the perfect non-alcoholic option that feels fancy.
Storage:
Honestly, nachos are one of those things that don’t store well. The chips will get soft, and the texture is lost. If you do have leftovers (which is rare in my house), let them cool completely, then transfer them to an airtight container. They’ll keep in the fridge for about a day. To reheat, spread them on a sheet pan and bake at 350°F (175°C) for 5-7 minutes. They won’t be as crispy as fresh, but they’ll still be tasty.
Make-Ahead Tip:
You can prep the seasoned beef up to two days in advance. Cook it, let it cool, and store it in the fridge. When you’re ready to make the nachos, just reheat the beef in a skillet or the microwave before layering. This makes game-day assembly a breeze.
Nutritional Information & Benefits
Let’s be honest—this isn’t a health food. But it is real food, made with real ingredients, and that counts for something. Here’s a rough estimate of the nutritional breakdown per serving (about ¼ of the entire sheet pan).
- Calories: ~650-750
- Protein: ~35g
- Fat: ~40g
- Carbohydrates: ~45g
- Fiber: ~10g
Health Highlights:
- Protein Power: The beef and black beans provide a solid amount of protein, which helps keep you full and satisfied.
- Fiber Boost: The black beans and avocado are excellent sources of dietary fiber, which is great for digestion.
- Healthy Fats: The avocado provides heart-healthy monounsaturated fats.
- Vitamins and Minerals: The tomatoes, cilantro, and lime juice add a dose of vitamin C and antioxidants.
Dietary Considerations: This recipe can be made gluten-free by using certified gluten-free tortilla chips. It contains dairy (cheese, sour cream) and is not suitable for vegans, but it can be easily adapted as noted in the variations section.
I like to think of this as a “sometimes food.” It’s for celebrations, game days, and nights when you just want to indulge. And when you do, it’s worth doing it right.
Conclusion
So there you have it—the Ultimate Tailgate Beef Nachos. This recipe is more than just a snack; it’s a crowd-pleasing centerpiece that turns any gathering into a party. It’s the dish that people will ask you to bring again and again, the one that disappears in minutes, the one that sparks happy, messy, delicious memories.
I love this recipe because it’s forgiving. You can swap ingredients, add more heat, or dial it back. You can make it for a Super Bowl party or a quiet Tuesday night. It’s always good. It’s always satisfying. And it always, always makes me think of that first perfect crunch from my uncle’s living room.
Now it’s your turn. I want to hear about your nacho adventures! Did you try a crazy variation? Did your family devour them? Leave a comment below and tell me all about it. And if you loved this recipe, please share it with a friend who loves game day as much as you do. Let’s make every game day a little more delicious.
Frequently Asked Questions
Can I use pre-shredded cheese for this recipe?
You can, but you won’t get the same gooey, smooth melt. Pre-shredded cheese is coated in anti-caking agents that prevent it from melting as well. For the best results, shred a block of cheddar or Monterey Jack yourself. It takes an extra minute but makes a huge difference.
How do I keep my nachos from getting soggy?
The key is layering and not overloading the pan. Bake the nachos in two layers so the heat can circulate, and don’t add the fresh, wet toppings like sour cream, salsa, and avocado until after they come out of the oven. This keeps the chips crispy.
Can I make these nachos in an air fryer?
Yes, but you’ll need to work in batches. Use a smaller pan that fits in your air fryer basket. Follow the same layering instructions and cook at 350°F (175°C) for 5-7 minutes, or until the cheese is melted. Keep a close eye on them so the chips don’t burn.
What’s the best way to reheat leftover nachos?
The microwave will make them sad and soggy. The best way to reheat them is in the oven. Spread the leftovers on a sheet pan and bake at 350°F (175°C) for 5-7 minutes. They won’t be as crispy as fresh, but they’ll be much better than microwaved ones.
Can I prepare the beef ahead of time?
Absolutely! Cook the seasoned beef, let it cool completely, and store it in an airtight container in the refrigerator for up to 3 days. When you’re ready to make the nachos, just reheat the beef in a skillet or the microwave before layering it on the chips.
Pin This Recipe!
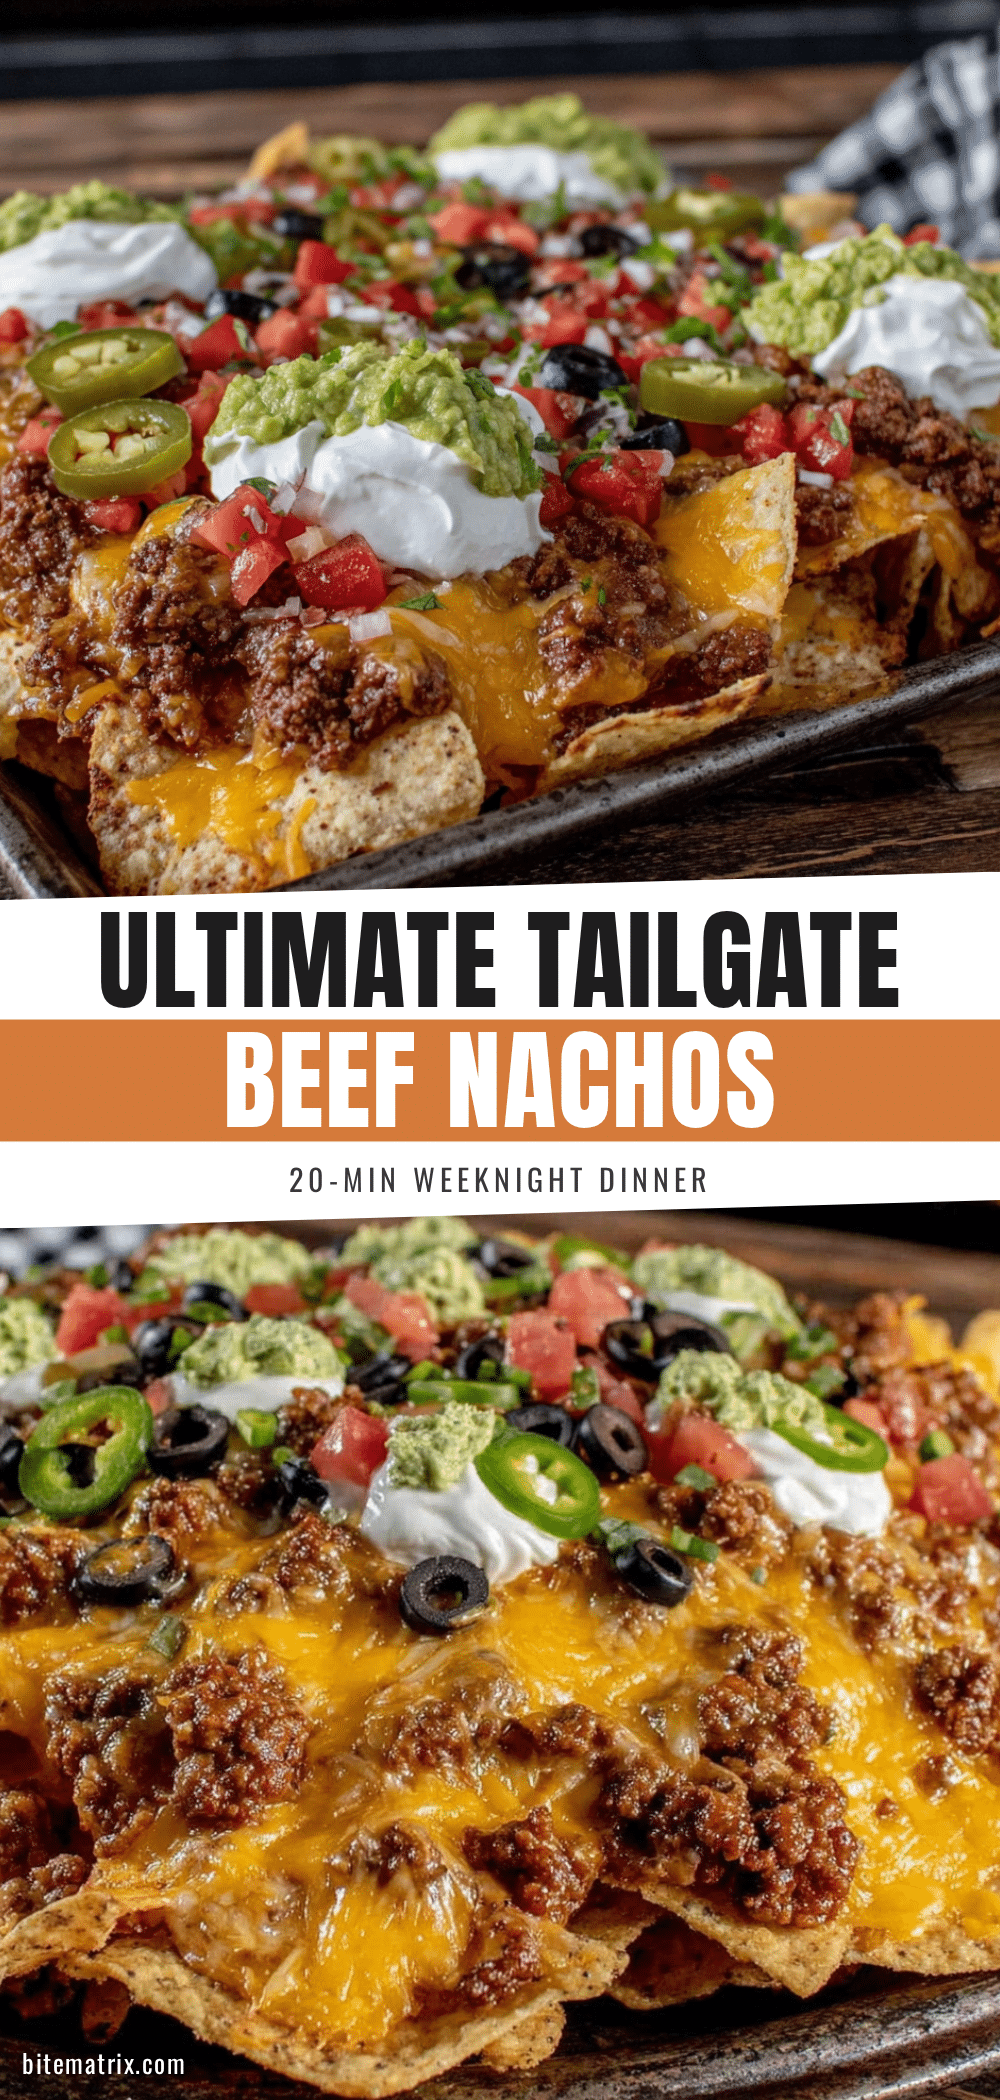
Ultimate Tailgate Beef Nachos – Easy Game Day Recipe

The perfect game-day snack with crispy tortilla chips, seasoned ground beef, melted cheese, and fresh toppings. This layered nacho recipe ensures every chip is loaded with flavor and stays crunchy.
- Prep Time: 15 minutes
- Cook Time: 20 minutes
- Total Time: 35 minutes
- Yield: 4 servings 1x
- Category: Appetizer
- Cuisine: Mexican-American
Ingredients
- 1 lb ground beef (80/20 is ideal)
- 1 tablespoon olive oil
- 1 small yellow onion, diced (about ½ cup)
- 3 cloves garlic, minced
- 1 tablespoon chili powder
- 1 teaspoon ground cumin
- 1 teaspoon smoked paprika
- ½ teaspoon dried oregano
- ½ teaspoon salt
- ¼ teaspoon black pepper
- ½ cup beef broth
- 1 large (13-ounce) bag restaurant-style tortilla chips
- 2 cups shredded Mexican blend cheese (or sharp cheddar and Monterey Jack)
- 1 (15-ounce) can black beans, drained and rinsed
- 1 cup cherry tomatoes, diced
- ½ cup pickled jalapeños
- ½ cup canned black olives, drained and sliced (optional)
- ½ cup sour cream
- ½ cup fresh salsa or pico de gallo
- 1 ripe avocado, diced
- ¼ cup fresh cilantro, chopped
- 1 lime, cut into wedges
Instructions
- Preheat oven to 400°F (200°C). Dice onion, mince garlic, chop tomatoes and cilantro.
- Heat olive oil in a large skillet over medium-high heat. Add diced onion and cook 3-4 minutes until soft.
- Add ground beef, breaking it up with a spatula. Cook 5-7 minutes until browned.
- Drain excess fat, leaving about 1 tablespoon. Reduce heat to medium. Add garlic, chili powder, cumin, smoked paprika, oregano, salt, and pepper. Cook 1 minute until fragrant.
- Pour in beef broth, scraping up browned bits. Simmer 2-3 minutes until liquid mostly evaporates and beef is coated. Remove from heat.
- Spread half the tortilla chips in an even layer on a large sheet pan.
- Sprinkle half the seasoned beef, half the black beans, and half the shredded cheese over the chips.
- Spread remaining tortilla chips on top.
- Top with remaining beef, black beans, and cheese. Add diced tomatoes and pickled jalapeños.
- Bake 10-12 minutes until cheese is melted and bubbly and chip edges are golden brown.
- Remove from oven and let rest 2-3 minutes. Dollop sour cream and salsa over top. Sprinkle with diced avocado, black olives (if using), and fresh cilantro.
- Squeeze lime wedges over the whole pan. Serve hot directly from the sheet pan.
Notes
For best results, shred cheese from a block instead of using pre-shredded. Don’t overcrowd the pan; use two layers of chips. Add fresh toppings like sour cream, salsa, and avocado after baking to keep chips crispy. Best eaten immediately. Leftovers can be reheated in the oven at 350°F for 5-7 minutes.
Nutrition
- Serving Size: 1/4 of sheet pan
- Calories: 700
- Sugar: 5
- Sodium: 1200
- Fat: 40
- Saturated Fat: 15
- Carbohydrates: 45
- Fiber: 10
- Protein: 35
Keywords: nachos, beef nachos, tailgate food, game day snack, loaded nachos, easy nacho recipe, party food