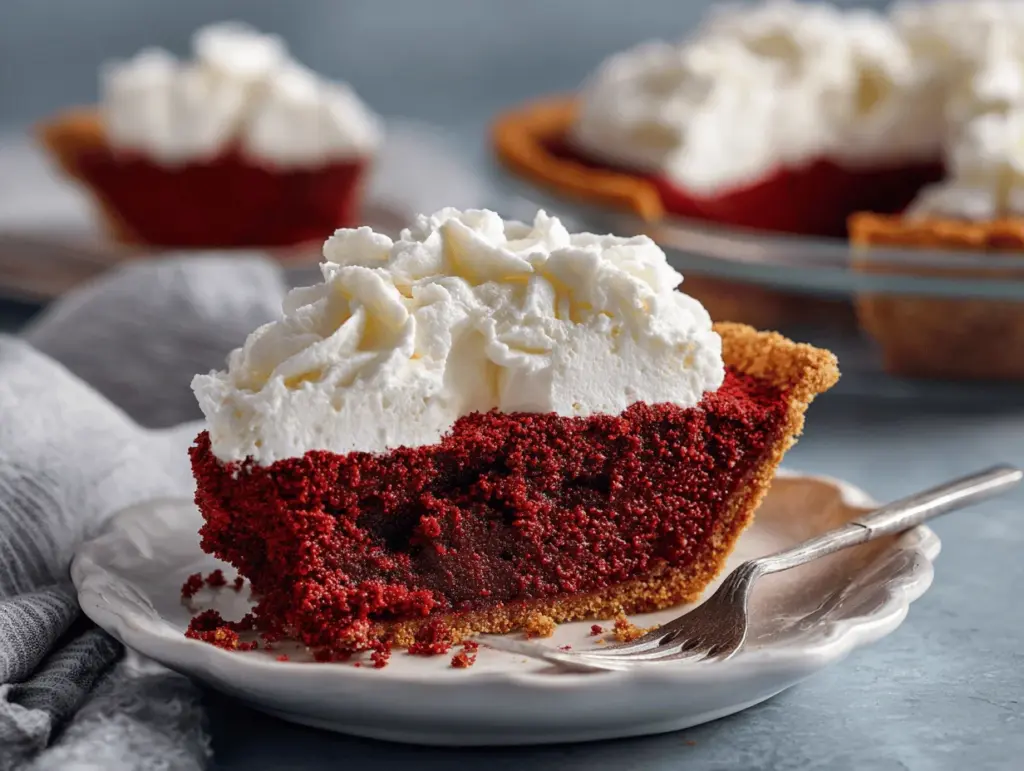
The first time I sliced into a gooey red velvet pie, I honestly didn’t expect my kitchen to smell like a bakery meets a chocolate lover’s dream. That warm, sweet aroma with hints of cocoa and vanilla—well, it’s the kind of thing that makes you pause, close your eyes, and just breathe it all in. This red velvet pie recipe isn’t just a dessert—it’s a showstopper, the kind you bring to a party and watch disappear slice by glorious slice. I stumbled onto this recipe during a late-night baking experiment, determined to whip up something decadent but simple for a friend’s birthday bash. Turns out, red velvet isn’t just for cake—when you make it into a gooey pie, it’s even more irresistible.
If you’re like me, you probably associate red velvet with fancy cakes and cream cheese frosting. But trust me, this gooey red velvet pie is easier, messier (in a good way!), and packs that classic flavor into every bite. I’ve tweaked and tested this recipe more times than I care to admit—sometimes swapping out the chocolate, sometimes going heavier on the vanilla. What I love most is how it brings together a soft, almost custardy center with that signature red velvet tang. It’s perfect for busy families, dessert lovers, and anyone who wants a little wow-factor without spending hours in the kitchen.
I always say, dessert should feel special, but making it shouldn’t be stressful. This red velvet pie recipe is proof—it’s as simple as mixing, pouring, and baking. Plus, it’s loaded with rich flavor and just the right amount of gooeyness. Whether you’re planning a birthday party, a Valentine’s Day treat, or just need something sweet for a cozy night in, you’ll find yourself coming back to this recipe again and again. I’ve made it for picky eaters, chocolate fanatics, and even those “I’m not a cake person” folks. Guess what? They all asked for seconds.
Why You’ll Love This Recipe
- Quick & Easy: You can whip up this gooey red velvet pie in under an hour, which is a lifesaver for last-minute get-togethers and surprise guests.
- Simple Ingredients: No need for a fancy shopping trip—you probably have everything in your pantry right now. That’s my kind of dessert.
- Perfect for Parties: I’ve brought this pie to birthdays, holiday dinners, and even potlucks. It always gets a round of applause (and a few recipe requests)!
- Crowd-Pleaser: Kids love the bright red color and gooey center, adults crave the rich flavor and creamy topping. Honestly, there’s never any leftovers.
- Unbelievably Delicious: The texture is like a cross between a brownie and a custard pie, all wrapped up in that classic red velvet taste. It’s comfort food, but with a little extra pizzazz.
What sets my gooey red velvet pie recipe apart? For starters, I blend the wet ingredients until silky smooth, making sure the cocoa and vanilla flavors pop without being overwhelming. I’ve tried it with melted chocolate in the mix for extra richness—total game changer. The secret is getting that middle just set but still gooey, so every bite melts in your mouth. A little cream cheese swirl on top? That’s optional, but trust me, it makes this pie unforgettable.
This dessert isn’t just about taste—it’s about the feeling it brings. I’ve seen friends close their eyes after the first bite, savoring every second. It’s the kind of pie you crave on a rainy day or when you need a pick-me-up. And it’s forgiving, too—if you forget an ingredient or swap something out, it almost always works. That’s the magic of a recipe that’s been tested (and devoured!) over and over again.
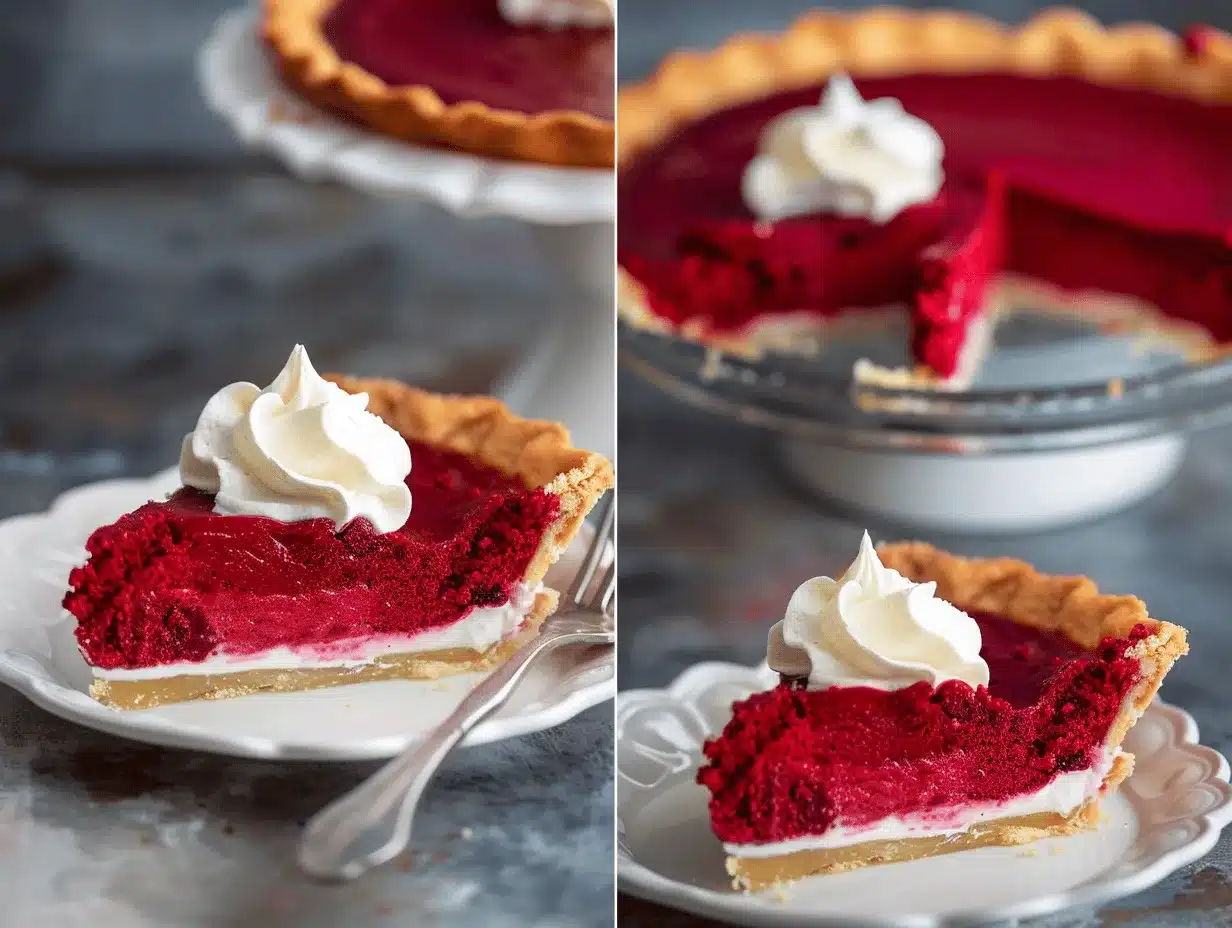
Whether you’re baking for a crowd or just yourself, this red velvet pie is comfort food at its finest. It’s easy enough for a beginner, but impressive enough for a seasoned baker. And hey, it’s totally Pinterest-worthy—bright red, gooey center, and a creamy topping that begs for a photo shoot.
What Ingredients You Will Need
This gooey red velvet pie recipe comes together with simple, everyday ingredients. Nothing fancy—just the basics that combine for a bold, luscious, and unforgettable dessert. Here’s what you’ll need:
- For the pie batter:
- 1 cup (200g) granulated sugar
- 1/2 cup (115g) unsalted butter, melted (adds richness and moisture)
- 2 large eggs, room temperature
- 1/4 cup (60ml) buttermilk (for signature red velvet tang)
- 2 tablespoons (10g) unsweetened cocoa powder (choose Dutch-process for deeper flavor)
- 1 cup (125g) all-purpose flour (substitute gluten-free flour if needed)
- 1 teaspoon vanilla extract (I love using pure vanilla for best taste)
- 2 teaspoons red food coloring (gel works best for vibrant color)
- 1/4 teaspoon salt
- 1 teaspoon distilled white vinegar (classic for red velvet, keeps it tender)
- For the cream cheese swirl (optional but highly recommended):
- 4 ounces (115g) cream cheese, softened
- 2 tablespoons (25g) granulated sugar
- 1/2 teaspoon vanilla extract
- For topping and serving:
- Whipped cream or vanilla ice cream (totally optional, but oh-so-good)
- White chocolate shavings or sprinkles (for a festive look)
If you’re missing an ingredient, I’ve got you covered. No buttermilk? Mix 1/4 cup milk with 1 teaspoon lemon juice—works like a charm. Out of red food coloring? The pie still tastes amazing, though it won’t have that iconic hue. For dairy-free folks, swap out butter and cream cheese for plant-based alternatives (I’ve tried it, and it’s still delicious!).
Ingredient quality makes a difference, especially with cocoa and vanilla. I use Ghirardelli cocoa and Nielsen-Massey vanilla when I want to impress, but store brands work fine, too. For the flour, King Arthur always gives me great texture. If you’re going gluten-free, Bob’s Red Mill 1:1 Baking Flour is my go-to. And don’t skip the vinegar—it’s a tiny ingredient, but it’s what makes red velvet pie tender and just a little tangy.
Seasonal tip: In summer, I sometimes add a handful of fresh berries on top before serving. In winter, a dusting of powdered sugar makes the pie feel extra festive. This recipe is flexible, forgiving, and ready for your personal touch.
Equipment Needed
- 9-inch (23cm) pie dish: Glass or ceramic works best for even baking. I’ve used disposable aluminum pans for parties, and they’re fine, too.
- Mixing bowls: At least two—one for the pie batter, one for the cream cheese swirl. If you only have one, just rinse it out between steps.
- Whisk or electric mixer: A whisk works for mixing, but a hand mixer makes the cream cheese swirl much smoother.
- Rubber spatula: Great for scraping the batter and swirling the cream cheese.
- Measuring cups and spoons: Scoop and level for accuracy—especially with flour and cocoa.
- Oven mitts: Because let’s face it, that pie dish gets hot!
- Wire cooling rack: It helps your pie cool evenly. If you don’t have one, just let the pie cool on the counter.
If you don’t have a pie dish, a cake pan (8-inch/20cm round or square) works in a pinch. For party batches, I’ve doubled the recipe and used a casserole dish—just adjust baking time. I’ve found that ceramic pans give the best gooey center without burning the edges, but glass pans let you see when the crust is set. Maintenance tip: wash your pie dish by hand to keep it looking and performing its best. Budget-friendly? I picked up my favorite ceramic pie plate for under $10 at a thrift store, and it’s still going strong!
Preparation Method
- Preheat and prepare: Preheat your oven to 350°F (175°C). Grease your 9-inch (23cm) pie dish with butter or nonstick spray (I like using butter for extra flavor!).
- Mix wet ingredients: In a large mixing bowl, combine the melted butter and granulated sugar. Whisk until smooth—about 1 minute. Add eggs one at a time, whisking well after each. Stir in the buttermilk, vanilla extract, vinegar, and red food coloring. The mixture should be vibrant and glossy. If it looks dull, add a bit more food coloring.
- Combine dry ingredients: In a separate bowl, whisk together flour, cocoa powder, and salt. Make sure there are no lumps (I’ve learned the hard way that cocoa clumps can ruin the texture!).
- Make the batter: Add the dry ingredients to the wet ingredients. Gently fold together with a spatula—don’t overmix, or your pie might get tough. The batter will be thick and bright red.
- Prepare cream cheese swirl: In a small bowl, beat softened cream cheese, sugar, and vanilla until smooth and creamy. If it’s lumpy, let the cream cheese sit out a bit longer.
- Fill the pie dish: Pour the red velvet batter into the prepared dish. Drop spoonfuls of the cream cheese mixture on top, then use a knife or skewer to gently swirl it through the batter. Don’t overdo it—the swirl should look marbled, not fully mixed in.
- Bake: Place the pie on the center rack of your oven. Bake for 28–34 minutes. The edges should be set, but the center should jiggle slightly when you gently shake the dish. If the edges brown too quickly, cover them with foil for the last 10 minutes.
- Cool: Transfer the pie to a wire rack and let it cool for at least 30 minutes. The pie will set up as it cools, but the center remains gooey and soft.
- Serve: Slice into wedges and top with whipped cream or ice cream. If you want neat slices, chill the pie for 1 hour before cutting. But honestly, I love eating it warm and gooey—just grab a spoon and dig in!
Troubleshooting: If your pie is too runny, bake it for 5 extra minutes. If it’s dry, check your oven temp—sometimes a hot oven can overbake the edges. For a gooier center, pull the pie out when the edges are set but the middle still jiggles. Sensory cues: the top should be shiny with swirled cream cheese, and the edges should pull slightly away from the pan.
I always set a timer for 30 minutes, then check every 2 minutes after that—ovens can be unpredictable, and this pie is all about getting that perfect gooey texture. If you’re making it for a party, bake it the night before and store covered at room temp. Reheat slices in the microwave for 10–15 seconds for that fresh-from-the-oven feel.
Cooking Tips & Techniques
After making this gooey red velvet pie more than a dozen times, I’ve picked up a few tricks that guarantee success. Here’s what I’ve learned:
- Room temp ingredients: Make sure eggs, butter, and cream cheese are at room temperature. It helps everything mix smoothly and bakes up fluffier.
- Don’t overmix: Once you add the dry ingredients to the wet, fold gently. Overmixing leads to a tough pie—trust me, I’ve done it and regretted it.
- Watch the bake time: Every oven is different. Start checking at 28 minutes. The center should wobble slightly—almost like a soft set custard.
- Swirling technique: Use a skewer or knife to swirl the cream cheese. Go back and forth just a few times for pretty marbling. If you swirl too much, you’ll lose that dramatic look.
- Edge protection: If your pie edges brown too fast, cover them with foil halfway through baking. I’ve learned this the hard way after a few crispy pie crusts!
- Let it cool: It’s tempting to slice right in, but letting it cool for 30 minutes helps the gooey center set. If you want clean slices, chill it for an hour.
- Multitasking: While the pie bakes, whip up your toppings or prep a quick salad for your party. It’s all about maximizing your kitchen time.
- Consistency: Use the same brands for flour and cocoa if you want repeatable results. Different cocoas can change the taste and color.
I once tried baking this pie in a convection oven—bad idea. The top dried out before the center set, so stick with a regular oven for gooey perfection. My biggest mistake? Overbaking. It still tasted good, but lost that magical gooey texture. Keep an eye on it, and don’t be afraid to trust your instincts—if it looks set on the edges but jiggly in the middle, you’re golden.
Variations & Adaptations
This gooey red velvet pie recipe is a blank canvas for creativity. Here are my favorite ways to switch things up:
- Gluten-Free: Use a 1:1 gluten-free flour blend. I’ve tried Bob’s Red Mill, and the texture stays just as gooey.
- Dairy-Free: Substitute plant-based butter and cream cheese. Almond milk mixed with lemon juice works as a buttermilk replacement.
- Nutty Twist: Fold in 1/2 cup chopped pecans or walnuts for some crunch. It adds a nice contrast to the gooey center.
- Berry Swirl: Drop spoonfuls of raspberry or strawberry jam on top with the cream cheese before swirling. It’s extra pretty for spring parties.
- Chocolate Boost: Mix in 1/2 cup mini chocolate chips for even more decadence. I’ve done this for my chocolate-obsessed friends, and it’s always a hit.
For different cooking methods, try baking in individual ramekins for single-serve pies—just reduce the bake time by 5–8 minutes. If you want more classic red velvet flavors, swap the cream cheese swirl for a cream cheese frosting dollop after baking. Allergens? Skip the nuts for nut-free, or use coconut yogurt in place of buttermilk for a soy-free version.
My personal favorite? Adding a dash of espresso powder to the batter. It deepens the cocoa flavor and gives the pie a subtle mocha vibe. Don’t be afraid to make it your own—this recipe forgives a lot, and every variation brings something new to the table.
Serving & Storage Suggestions
This gooey red velvet pie shines brightest when served slightly warm. I usually let it cool for 30 minutes, then slice and serve with a generous dollop of whipped cream or a scoop of vanilla ice cream. For a party, cut into small wedges so everyone gets a taste. Presentation tip: sprinkle white chocolate shavings or colorful sprinkles over the top for a festive touch—it’s super Pinterest-worthy!
Pair this pie with a cold glass of milk, hot coffee, or a sweet dessert wine. It’s rich, so lighter sides like fresh berries or a simple green salad balance things out. For holiday gatherings, serve with a dusting of powdered sugar and fresh mint leaves.
To store, cover the pie tightly with plastic wrap or place in an airtight container. It will keep at room temperature for up to 2 days, or in the fridge for up to 4 days. For longer storage, freeze slices in individual containers—thaw overnight in the fridge, then reheat gently in the microwave for 10–15 seconds. The flavor deepens overnight, and the gooey texture holds up surprisingly well. Just don’t store it uncovered—the edges dry out quickly.
If you’re planning ahead, you can bake the pie a day in advance, chill, then reheat slices as needed. Honestly, the leftovers (if there are any) taste just as good—maybe even better!
Nutritional Information & Benefits
Each slice of gooey red velvet pie is estimated to contain about 320 calories, 15g fat, 40g carbohydrates, and 5g protein. It’s not exactly “health food,” but the portion size is reasonable and you get a little protein from eggs and cream cheese. If you use plant-based or lower-fat options, the numbers drop a bit.
Cocoa powder brings antioxidants, and buttermilk adds calcium and probiotics. For gluten-free or dairy-free versions, you still get that rich flavor with the right swaps. Watch out for potential allergens—this pie contains eggs, dairy, and wheat (unless you adapt). If you’re counting carbs, it’s a splurge, but worth every bite for a special occasion.
I’m all about balance—enjoying treats like this gooey red velvet pie alongside healthy meals. It’s comforting, satisfying, and a little indulgence goes a long way toward a happy, well-rounded diet.
Conclusion
If you’re searching for a dessert that’s easy, unforgettable, and guaranteed to impress, this gooey red velvet pie recipe is it. From the vibrant color to the creamy swirls and melt-in-your-mouth center, every bite feels like a celebration. I love how flexible and forgiving this recipe is—swap ingredients, make it ahead, or add your own twist. It’s perfect for parties, cozy nights, or just treating yourself.
Give it a try, and don’t be afraid to make it your own. Leave a comment with your favorite variation, or snap a photo for Pinterest—this pie is begging for its moment in the spotlight! Whether you’re a seasoned baker or just starting out, you’ll find yourself coming back to this recipe again and again. Honestly, it’s one of my all-time favorites, and I hope it becomes yours too.
Bake, share, and enjoy every gooey, chocolatey bite—because dessert should be fun, delicious, and just a little messy. Happy baking!
Frequently Asked Questions
Can I make this gooey red velvet pie ahead of time?
Yes, you can bake it a day in advance. Cover and store at room temp or in the fridge, then reheat slices in the microwave for 10–15 seconds before serving.
Is it possible to make this recipe gluten-free?
Absolutely! Just swap the all-purpose flour for a 1:1 gluten-free blend. I’ve had great success with Bob’s Red Mill.
What’s the best way to get a vibrant red color?
Use gel food coloring instead of liquid—it gives a brighter hue without changing the batter’s texture. If you want extra color, add another teaspoon.
Can I freeze red velvet pie leftovers?
Definitely. Freeze individual slices in airtight containers. Thaw overnight and reheat gently for the best texture.
Why does my pie turn out dry or not gooey enough?
This usually means it’s overbaked. Check for a jiggly center at 28 minutes, and don’t be afraid to pull it early. Every oven is different—trust your instincts!
Pin This Recipe!
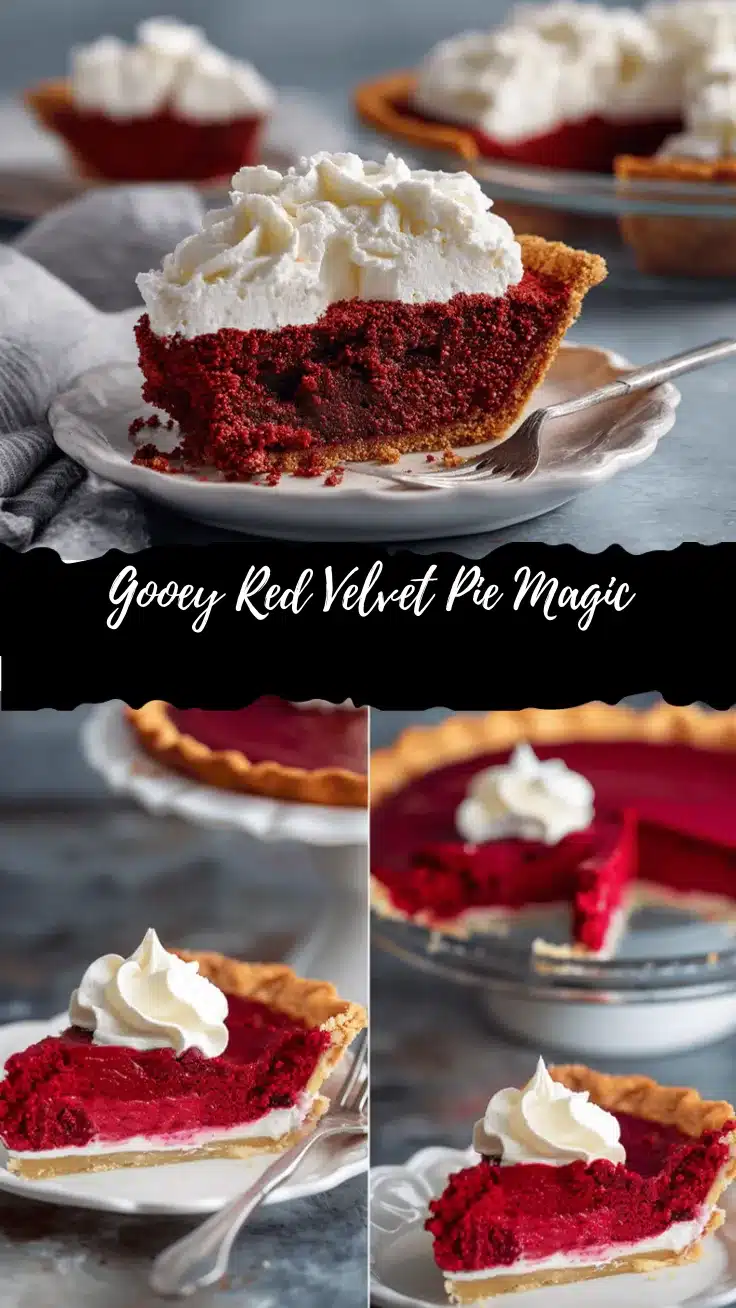
Red Velvet Pie Recipe: Easy Gooey Dessert for Parties (Best Ever)

This gooey red velvet pie is a decadent, crowd-pleasing dessert with a soft, custardy center and a classic red velvet tang. It’s easy to make, perfect for parties, and sure to impress with its vibrant color and creamy cream cheese swirl.
- Prep Time: 15 minutes
- Cook Time: 30 minutes
- Total Time: 45 minutes
- Yield: 8 servings 1x
- Category: Dessert
- Cuisine: American
Ingredients
- 1 cup (200g) granulated sugar
- 1/2 cup (115g) unsalted butter, melted
- 2 large eggs, room temperature
- 1/4 cup (60ml) buttermilk
- 2 tablespoons (10g) unsweetened cocoa powder (Dutch-process preferred)
- 1 cup (125g) all-purpose flour (or 1:1 gluten-free blend)
- 1 teaspoon vanilla extract
- 2 teaspoons red food coloring (gel preferred)
- 1/4 teaspoon salt
- 1 teaspoon distilled white vinegar
- 4 ounces (115g) cream cheese, softened (optional, for swirl)
- 2 tablespoons (25g) granulated sugar (for swirl)
- 1/2 teaspoon vanilla extract (for swirl)
- Whipped cream or vanilla ice cream (for serving, optional)
- White chocolate shavings or sprinkles (for topping, optional)
Instructions
- Preheat your oven to 350°F (175°C). Grease a 9-inch (23cm) pie dish with butter or nonstick spray.
- In a large mixing bowl, whisk together melted butter and granulated sugar until smooth, about 1 minute.
- Add eggs one at a time, whisking well after each addition.
- Stir in buttermilk, vanilla extract, vinegar, and red food coloring until the mixture is vibrant and glossy.
- In a separate bowl, whisk together flour, cocoa powder, and salt until no lumps remain.
- Gently fold the dry ingredients into the wet mixture with a spatula until just combined. Do not overmix.
- For the cream cheese swirl (optional): In a small bowl, beat softened cream cheese, 2 tablespoons sugar, and 1/2 teaspoon vanilla extract until smooth and creamy.
- Pour the red velvet batter into the prepared pie dish. Drop spoonfuls of the cream cheese mixture on top and swirl gently with a knife or skewer to create a marbled effect.
- Bake on the center rack for 28–34 minutes, until the edges are set but the center still jiggles slightly. Cover edges with foil if they brown too quickly.
- Transfer to a wire rack and cool for at least 30 minutes before slicing. For cleaner slices, chill for 1 hour.
- Serve warm or at room temperature with whipped cream or ice cream and optional toppings.
Notes
For best results, use room temperature ingredients and avoid overmixing the batter. Check the pie at 28 minutes—edges should be set and the center should jiggle slightly for a gooey texture. The cream cheese swirl is optional but highly recommended. Store leftovers covered at room temperature for up to 2 days or in the fridge for up to 4 days. For gluten-free or dairy-free adaptations, use a 1:1 gluten-free flour blend and plant-based butter/cream cheese.
Nutrition
- Serving Size: 1 slice (1/8 of pie)
- Calories: 320
- Sugar: 27
- Sodium: 210
- Fat: 15
- Saturated Fat: 9
- Carbohydrates: 40
- Fiber: 1
- Protein: 5
Keywords: red velvet pie, gooey dessert, party dessert, easy red velvet, cream cheese swirl, chocolate pie, holiday dessert, potluck dessert, American dessert, best red velvet pie