The sound of a crunchy taco shell, that first bite sending a cascade of seasoned beef, gooey cheese, and warm spices—honestly, it’s pure magic. My kitchen fills with the irresistible aroma of sizzling beef and toasty corn tortillas every time I whip up my crispy baked ground beef tacos. I didn’t grow up on classic taco night, but once I discovered this baked version, it instantly became a family staple—especially on those chaotic weeknights when “what’s for dinner?” turns into a minor emergency. There’s something about that golden, crisp shell hugging all those savory fillings that just hits different. It’s comfort, convenience, and a little bit of fun, all wrapped into one hand-held package.
I first stumbled on this method during a particularly hectic Tuesday—my skillet tacos kept falling apart, and let’s face it, no one enjoys half their filling on the plate! Baking the tacos was a light-bulb moment: less mess, more crunch, and zero fuss. Since then, I’ve tweaked the seasonings, played with fillings, and tested every trick to get that perfect crisp without deep frying. As someone who’s tested more taco recipes than I can count, I can say with total confidence: these crispy baked ground beef tacos are the ultimate weeknight favorite. They’re hearty enough for ravenous teens, customizable for picky eaters, and honestly, so easy you’ll wonder why you ever did taco night any other way.
Whether you’re feeding a crowd, meal-prepping for the week, or just need a reliable go-to dinner (who doesn’t, right?), this recipe delivers bold flavor, satisfying crunch, and big smiles every single time. And if you’re anything like me, you’ll appreciate that these tacos taste like a treat but come together in no time—with ingredients you probably already have. Ready to make taco night the best night of the week? Let’s get these crispy baked ground beef tacos on your table!
Why You’ll Love This Recipe
- Quick & Easy: You can have these crispy baked ground beef tacos on the table in under 40 minutes, start to finish. Perfect for those nights when you don’t want to spend hours in the kitchen.
- Simple Ingredients: No fancy shopping trips required! Most of these ingredients are pantry staples—ground beef, taco shells, cheese, and a few spices.
- Ultimate Weeknight Favorite: These tacos are my go-to for busy evenings, whether I’m feeding my family or just want leftovers for lunch the next day.
- Crowd-Pleaser: I’ve made this for everything from casual get-togethers to kids’ birthday parties—never a crumb left behind. Even picky eaters can build their own with their favorite toppings.
- Unbelievably Delicious: The combination of juicy, seasoned beef and melty cheese tucked inside a shatteringly crisp shell is pure comfort food. There’s a reason my friends beg for this recipe!
What sets these crispy baked ground beef tacos apart? It’s all about the method. Instead of frying, you bake the tacos so the shells crisp up beautifully, and all the cheesy, savory filling stays right where it belongs. I’ve learned over time that brushing the shells with a little oil before baking gives you that takeout-style crunch—without the mess or extra calories. The seasoning blend is just right: bold but not overpowering, and you can adjust the spice level to suit your crew.
This isn’t just another taco recipe—it’s the one you’ll come back to week after week. It fits every mood: casual dinners, game day snacking, or even those nights when you’re just craving something fun. Plus, it’s so easy to customize. I’ve swapped in ground turkey, added black beans for extra fiber, or even made a vegetarian version with lentils. And every time, the results are mouthwatering. There’s a reason these baked tacos have earned a permanent spot in my recipe binder—they just never disappoint.
What Ingredients You Will Need
This crispy baked ground beef tacos recipe keeps things wonderfully straightforward. Most of the ingredients are probably already in your kitchen, and a few smart swaps let you tailor it to your taste or dietary needs. Here’s what you’ll need to pull off taco night like a pro:
- For the Beef Filling:
- 1 pound (450 g) ground beef (I usually go with 85% lean for great flavor and less grease)
- 1 small yellow onion, finely diced (adds sweetness and depth)
- 2–3 cloves garlic, minced (fresh garlic gives a nice punch—use more if you love garlic like I do!)
- 1 tablespoon chili powder (adjust for your spice preference)
- 1 teaspoon smoked paprika (for a subtle smoky kick; sweet paprika works too)
- 1 teaspoon ground cumin
- 1/2 teaspoon dried oregano
- 1/2 teaspoon salt, plus more to taste
- 1/4 teaspoon black pepper
- 1/2 cup (120 ml) tomato sauce or salsa (keeps the filling juicy—use salsa for extra flavor)
- 1/4 cup (60 ml) beef or chicken broth (optional, for a saucier filling)
- For the Tacos:
- 10–12 crunchy taco shells (store-bought or homemade)
- 1 1/2 cups (170 g) shredded cheddar cheese (Monterey Jack or a Mexican blend also work well)
- 2 tablespoons neutral oil (like canola or avocado oil, for brushing shells)
- Toppings (Customize to Your Taste!):
- Shredded lettuce (romaine, iceberg, or mixed greens)
- Diced tomatoes
- Sliced jalapeños
- Sour cream or Greek yogurt (I love the tang of Greek yogurt as a lighter swap)
- Salsa or pico de gallo
- Chopped fresh cilantro
- Hot sauce (for spice lovers!)
- Avocado or guacamole
Ingredient Tips & Swaps: If you’re gluten-free, check that your taco shells are certified gluten-free. For a lighter option, ground turkey or chicken works beautifully. Want to go vegetarian? Replace the beef with cooked lentils or canned black beans and adjust seasoning. I’ve even tossed in a handful of frozen corn or diced bell peppers for extra texture and sweetness. And if you’re out of cheddar, any melty cheese will do—use what’s on hand!
Equipment Needed
- Large Skillet or Frying Pan: For browning the ground beef and sautéeing the onions—my well-seasoned cast iron never lets me down, but a nonstick pan works too.
- Wooden Spoon or Spatula: Makes breaking up the meat easy and prevents scratching your skillet.
- Measuring Cups & Spoons: For getting those spice ratios just right (I always lose my 1/2 teaspoon, so I keep an extra on hand—anyone else?).
- Baking Sheet: A rimmed baking sheet fits a dozen tacos perfectly. If you only have a smaller pan, bake in batches.
- Parchment Paper or Aluminum Foil: For easy cleanup—trust me, melted cheese can be stubborn!
- Pastry Brush: For brushing oil on the shells. Don’t have one? A paper towel dipped in oil works in a pinch.
- Cheese Grater: Freshly grated cheese melts better, but pre-shredded is fine if you’re in a rush.
- Mixing Bowls: For prepping toppings or mixing your own salsa.
Budget-Friendly Tips: I’ve used everything from thrifted baking sheets to dollar-store spatulas—fancy gear is nice, but truly, you can make these tacos with whatever you have. If your skillet is prone to sticking, just add a little extra oil. And parchment paper? Total lifesaver for cleanup (especially when the cheese bubbles over!).
Preparation Method
- Preheat the Oven: Set your oven to 425°F (220°C). Line a large baking sheet with parchment paper or foil for easy cleanup.
- Prepare the Shells: Arrange 10–12 taco shells upright on the baking sheet. Brush or lightly drizzle the outsides with oil—this is my secret for super crispy shells. Set aside.
- Make the Beef Filling:
- Heat your skillet over medium-high. Add 1 tablespoon oil, then toss in the diced onion. Sauté for 2–3 minutes until translucent and fragrant.
- Add the ground beef to the skillet, breaking it apart with your spoon. Cook for about 5–7 minutes until browned and no longer pink. (If there’s excess grease, drain it off carefully.)
- Stir in the minced garlic, chili powder, smoked paprika, cumin, oregano, salt, and pepper. Toast the spices for 1 minute until everything smells amazing.
- Pour in the tomato sauce (or salsa) and broth (if using). Stir to combine. Lower the heat and simmer for 3–4 minutes, or until the mixture thickens slightly. Taste and adjust seasoning if needed. Remove from heat.
- Assemble the Tacos:
- Gently fill each taco shell with about 2–3 tablespoons of the beef mixture. (Don’t overfill, or they’ll fall apart!)
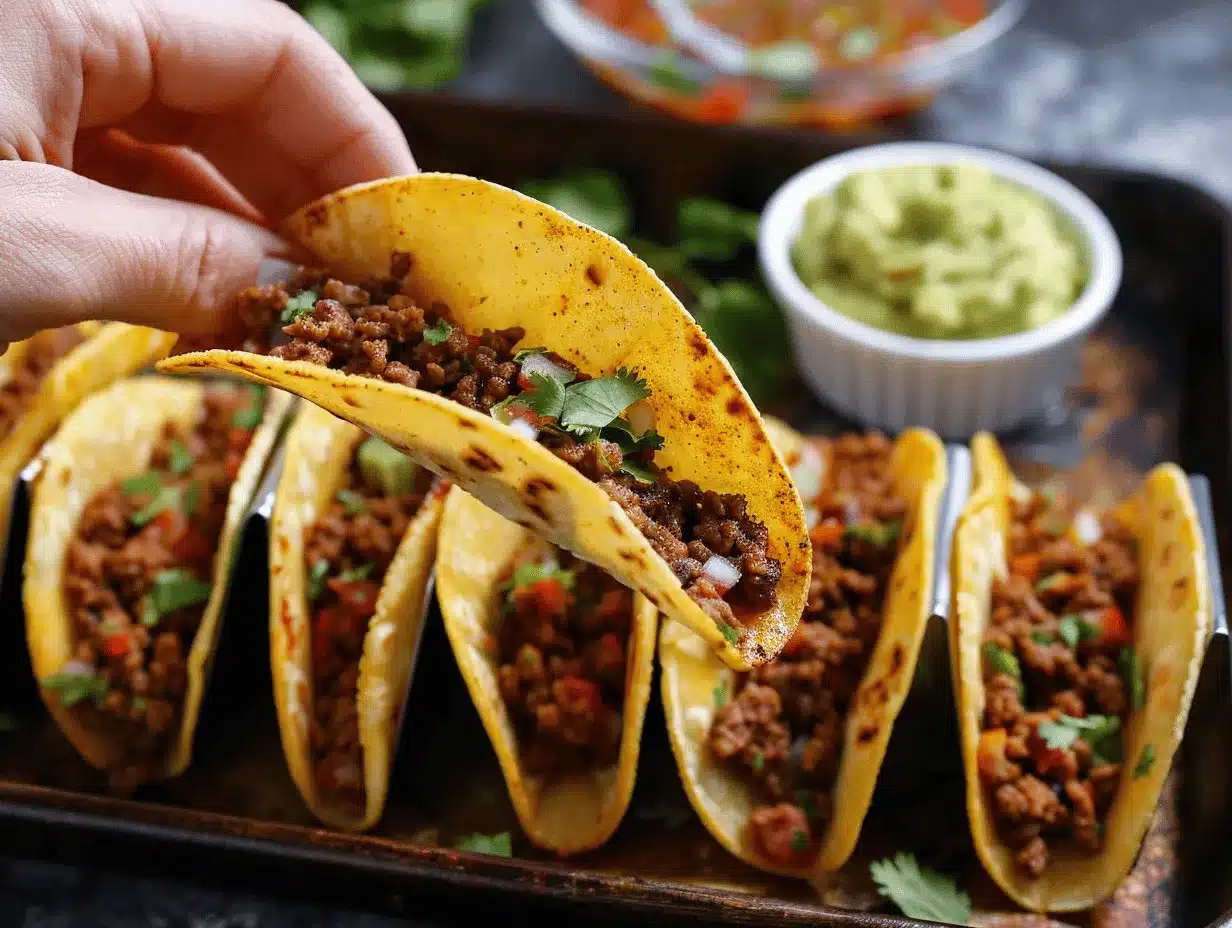
- Top generously with shredded cheese—about 2 tablespoons per taco. I like to tuck some cheese under the beef and some on top for extra gooeyness.
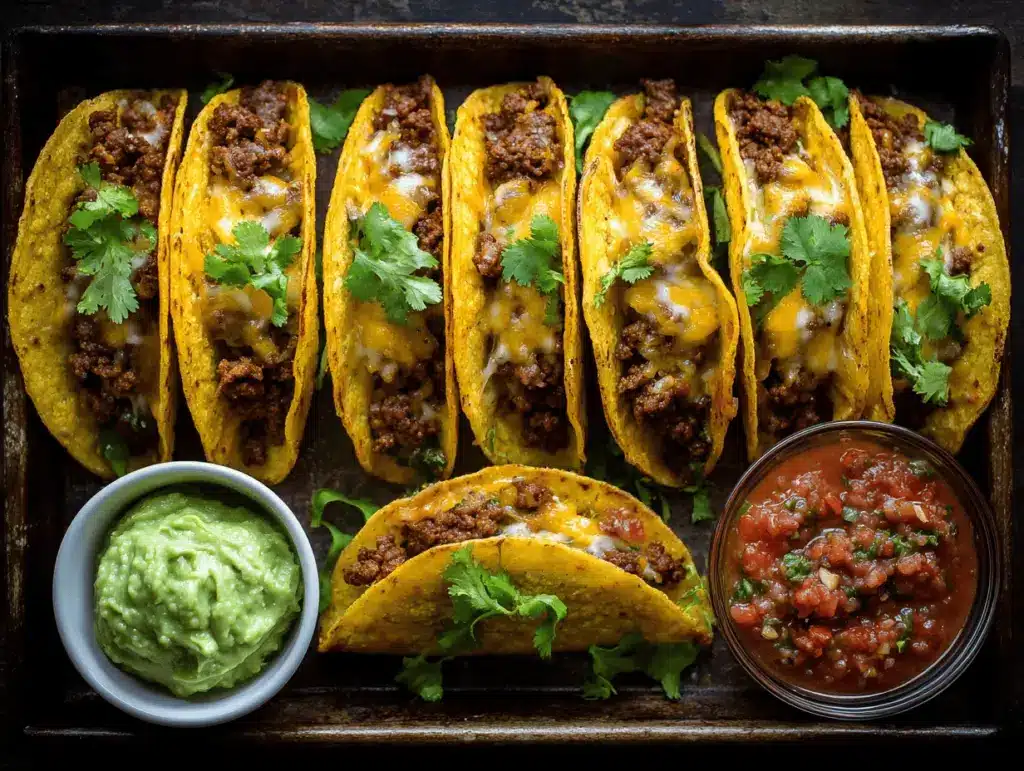
- Bake the Tacos: Place the filled tacos in the preheated oven and bake for 10–12 minutes. You’ll know they’re ready when the cheese is melted and bubbly and the shells are golden and crisp. If the tops start to brown too quickly, cover loosely with foil.
- Prep the Toppings: While the tacos bake, shred your lettuce, dice the tomatoes, slice jalapeños, and prep any other toppings you love. This is a great time to let kids help!
- Serve: Carefully remove the tacos from the oven (they’re hot!). Let them cool for a minute or two, then pile on your favorite toppings and dig in.
Preparation Notes: If your taco shells tend to tip over, nestle them close together on the baking sheet or use a taco rack. And don’t stress if some cheese leaks out—it forms the best crispy bits on the pan! For make-ahead, prep the beef filling in advance and store it in the fridge for up to 3 days; just reheat before assembling.
Cooking Tips & Techniques
- Don’t Skip the Oil: Brushing the taco shells with oil before baking is what gives you that irresistible crunch. I once forgot this step—let’s just say, the difference is huge.
- Use Freshly Grated Cheese: Pre-shredded works, but grating your own cheese helps it melt better and gives that pull-apart gooeyness everyone loves.
- Balance the Filling: Overstuffed tacos look tempting, but less is more. Too much filling makes the shells crack and spill (I learned this the messy way!).
- Batch Cooking: If you’re making a double batch, assemble and bake in stages so the shells stay crisp. Or, prep the filling ahead and bake fresh when ready to serve.
- Watch the Bake Time: Ovens can run hot or cold, so keep an eye out the last couple of minutes. The shells should be golden and the cheese bubbly—don’t let them burn!
- Spice It Up: Taste your beef filling before assembling. If you want more heat, add a pinch of cayenne or a dash of hot sauce.
- Clean-Up Hack: Line your baking sheet well—melted cheese can be stubborn to scrub off. Parchment paper is my trusty sidekick for taco night cleanup.
One of my early fails was not draining the beef well enough—extra grease made the shells soggy. Now, I always drain off excess fat for perfect results. And if you’re juggling side dishes, keep your toppings prepped ahead of time so you can serve hot tacos straight from the oven. Consistency tip: If you want every taco just right, use a cookie scoop for the filling—makes portioning a breeze!
Variations & Adaptations
- Gluten-Free: Use certified gluten-free corn taco shells and double-check your spices and tomato sauce.
- Vegetarian: Swap ground beef for cooked lentils or canned black beans (rinsed and drained). I love adding a handful of frozen corn for sweetness.
- Spicy Southwest: Add diced green chilies, smoked chipotle powder, or pickled jalapeños to the beef mixture. Top with pepper jack cheese for an extra kick.
- Turkey or Chicken: Ground turkey or chicken works beautifully in place of beef—just add a splash more oil if the meat is very lean.
- Dairy-Free: Use your favorite plant-based cheese and skip the sour cream. Avocado or a vegan yogurt sauce is a great topping.
For a fun twist, I sometimes crumble blue corn taco shells for a pop of color. In summer, I love topping with fresh mango salsa for a sweet-savory combo. And if you’ve got an air fryer, you can crisp up individual tacos for 3–4 minutes at 400°F (200°C) instead of baking—just keep an eye on them, since they go from perfect to burnt fast!
One of my personal favorites: I’ll add a layer of refried beans under the beef for a double-decker taco that’s extra filling. Trust me, these are a hit at parties and potlucks—everyone can find a version they love.
Serving & Storage Suggestions
Crispy baked ground beef tacos are best enjoyed hot and fresh, straight from the oven—the cheese is bubbling, and the shells are still shatteringly crisp. I usually serve them “build-your-own” style, with toppings on the side so everyone can customize their plate. Plating on a big tray with colorful toppings makes it Pinterest-worthy and perfect for entertaining.
Pair these tacos with classic sides like Mexican rice, refried beans, or a simple corn salad. For drinks, I love a cold glass of sparkling water with lime, or a fruity agua fresca to balance the spices. If you’re feeling fancy, a margarita never hurts!
Storing Leftovers: If you have leftover tacos, let them cool completely before storing. Transfer to an airtight container and refrigerate for up to 2 days. The shells will soften a bit, but you can re-crisp them—just pop them in a 400°F (200°C) oven for 5–7 minutes, or use an air fryer for a couple of minutes. Avoid microwaving (they’ll get soggy).
Make Ahead Tip: You can prepare the beef filling up to 3 days in advance and refrigerate. Assemble and bake the tacos just before serving for maximum crunch.
Honestly, the flavors deepen overnight, so leftovers make a killer lunch—just add fresh toppings for that just-baked vibe.
Nutritional Information & Benefits
Each crispy baked ground beef taco (without toppings) comes in at approximately 200–220 calories, 12g protein, 10g fat, and 15g carbs. Using lean ground beef and baking (instead of frying) keeps things lighter. Corn shells add fiber, and you can boost the veggie content with extra lettuce, tomatoes, or bell peppers.
Key health benefits? You get a good dose of protein, calcium from the cheese, and plenty of vitamins if you load up on fresh toppings. This recipe is naturally gluten-free if you use certified shells and can be made dairy-free with plant-based cheese. If you have food allergies, check your taco shells and spice blends for hidden gluten or dairy ingredients.
On a personal note, I find these tacos are a great way to sneak extra veggies into my kids’ meals—they’re so focused on the crunch and flavor, they don’t even notice the healthy stuff. It’s comfort food that fits into a balanced lifestyle, especially if you pile on the produce!
Conclusion
There’s a reason these crispy baked ground beef tacos are the ultimate weeknight favorite in my house—they’re quick, crave-worthy, and ridiculously adaptable. Whether you’re feeding a crowd or just want a fun, no-fuss dinner, this recipe delivers every single time. The crispy shells, savory beef, and gooey cheese make every bite a celebration.
Don’t be afraid to play with the fillings or toppings—make it your own! I love how this recipe turns even a regular Tuesday into a mini fiesta. Give it a try, and let me know if your family loves them as much as mine does.
If you make these crispy baked ground beef tacos, leave a comment below or share your twist on social media—I can’t wait to see your creations! Here’s to many happy taco nights ahead (and hopefully, fewer “what’s for dinner?” panics!).
Frequently Asked Questions
How do I keep taco shells from getting soggy in the oven?
Brush the outsides with oil and don’t overfill with juicy ingredients. Baking at a high temperature (425°F/220°C) helps the shells crisp up while sealing in the filling.
Can I use soft tortillas instead of crunchy taco shells?
Absolutely! You can use small flour or corn tortillas—just fold them over the filling and bake until golden. They’ll be more like baked taco “foldovers,” but still delicious.
What’s the best way to make these tacos ahead for a party?
Prep the beef filling and toppings ahead of time. Assemble and bake the tacos right before serving so the shells stay crispy and fresh.
Can I freeze these baked tacos?
I don’t recommend freezing assembled tacos (the shells get mushy), but you can freeze the cooked beef filling. Thaw and reheat, then assemble and bake fresh tacos when ready.
What toppings go best with crispy baked ground beef tacos?
Classic choices like lettuce, tomatoes, cheese, sour cream, salsa, jalapeños, and avocado are always winners. Feel free to get creative with pickled onions, hot sauce, or even a squeeze of lime for freshness!
Pin This Recipe!
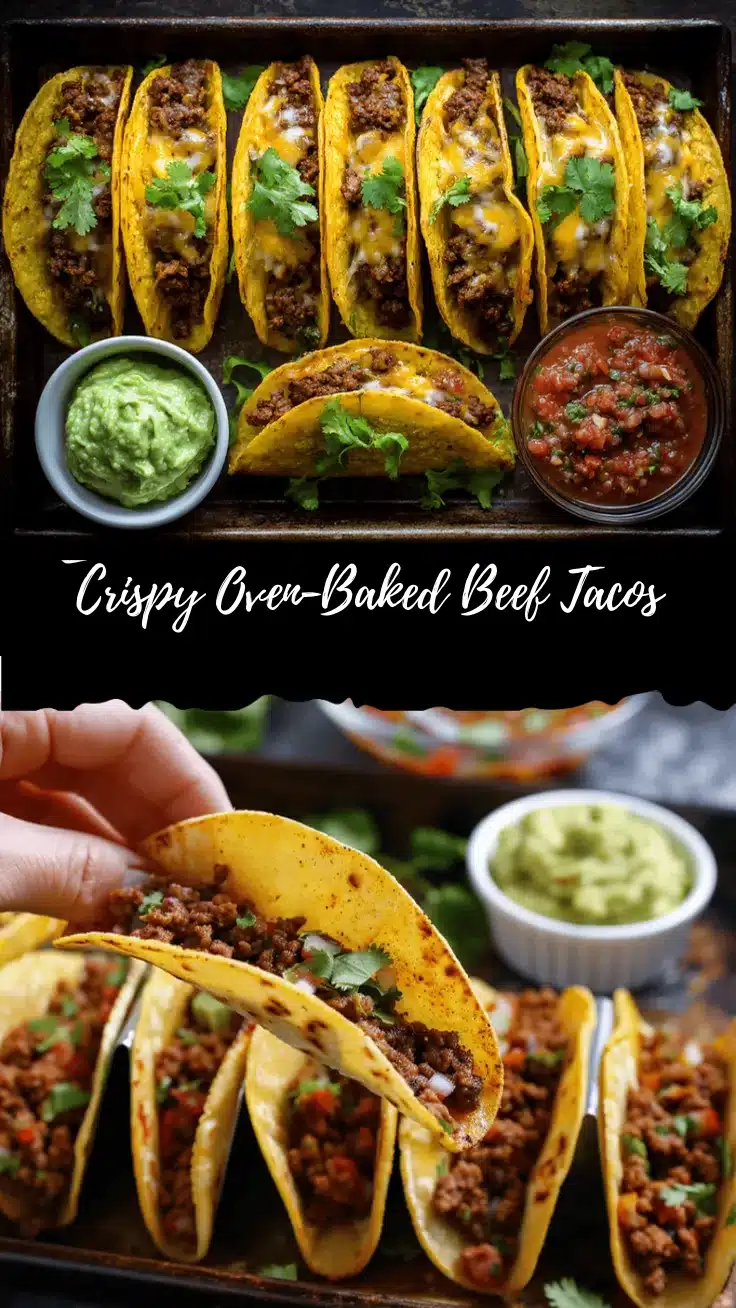
Crispy Baked Ground Beef Tacos

These crispy baked ground beef tacos are the ultimate weeknight dinner—savory, cheesy, and packed with flavor, all wrapped in a golden, crunchy shell. Easy to make and endlessly customizable, they’re a family favorite that comes together in under 40 minutes.
- Prep Time: 15 minutes
- Cook Time: 20 minutes
- Total Time: 35 minutes
- Yield: 10–12 tacos (about 4 servings) 1x
- Category: Main Course
- Cuisine: Mexican
Ingredients
- 1 pound ground beef (85% lean recommended)
- 1 small yellow onion, finely diced
- 2–3 cloves garlic, minced
- 1 tablespoon chili powder
- 1 teaspoon smoked paprika (or sweet paprika)
- 1 teaspoon ground cumin
- 1/2 teaspoon dried oregano
- 1/2 teaspoon salt, plus more to taste
- 1/4 teaspoon black pepper
- 1/2 cup tomato sauce or salsa
- 1/4 cup beef or chicken broth (optional)
- 10–12 crunchy taco shells
- 1 1/2 cups shredded cheddar cheese (or Monterey Jack/Mexican blend)
- 2 tablespoons neutral oil (canola or avocado oil, for brushing shells)
- Shredded lettuce (romaine, iceberg, or mixed greens)
- Diced tomatoes
- Sliced jalapeños
- Sour cream or Greek yogurt
- Salsa or pico de gallo
- Chopped fresh cilantro
- Hot sauce
- Avocado or guacamole
Instructions
- Preheat the oven to 425°F (220°C). Line a large baking sheet with parchment paper or foil.
- Arrange 10–12 taco shells upright on the baking sheet. Brush or lightly drizzle the outsides with oil.
- Heat a large skillet over medium-high heat. Add 1 tablespoon oil and the diced onion. Sauté for 2–3 minutes until translucent.
- Add ground beef to the skillet, breaking it apart with a spoon. Cook for 5–7 minutes until browned and no longer pink. Drain excess grease if needed.
- Stir in minced garlic, chili powder, smoked paprika, cumin, oregano, salt, and pepper. Cook for 1 minute until fragrant.
- Pour in tomato sauce (or salsa) and broth (if using). Stir to combine. Lower heat and simmer for 3–4 minutes until slightly thickened. Adjust seasoning to taste. Remove from heat.
- Fill each taco shell with about 2–3 tablespoons of beef mixture. Top with about 2 tablespoons shredded cheese per taco.
- Bake filled tacos in the preheated oven for 10–12 minutes, until cheese is melted and shells are golden and crisp. Cover loosely with foil if tops brown too quickly.
- While tacos bake, prepare toppings: shred lettuce, dice tomatoes, slice jalapeños, and prep other desired toppings.
- Remove tacos from oven and let cool for 1–2 minutes. Add your favorite toppings and serve immediately.
Notes
Brush taco shells with oil before baking for extra crunch. Don’t overfill tacos to prevent cracking. Prep beef filling ahead for quick assembly. For gluten-free, use certified shells. For vegetarian, substitute cooked lentils or black beans. Store leftovers in an airtight container and re-crisp in the oven. Customize toppings to taste.
Nutrition
- Serving Size: 1 taco (without toppings)
- Calories: 210
- Sugar: 2
- Sodium: 350
- Fat: 10
- Saturated Fat: 4
- Carbohydrates: 15
- Fiber: 2
- Protein: 12
Keywords: baked tacos, ground beef tacos, crispy tacos, weeknight dinner, Mexican, easy taco recipe, family dinner, gluten-free option