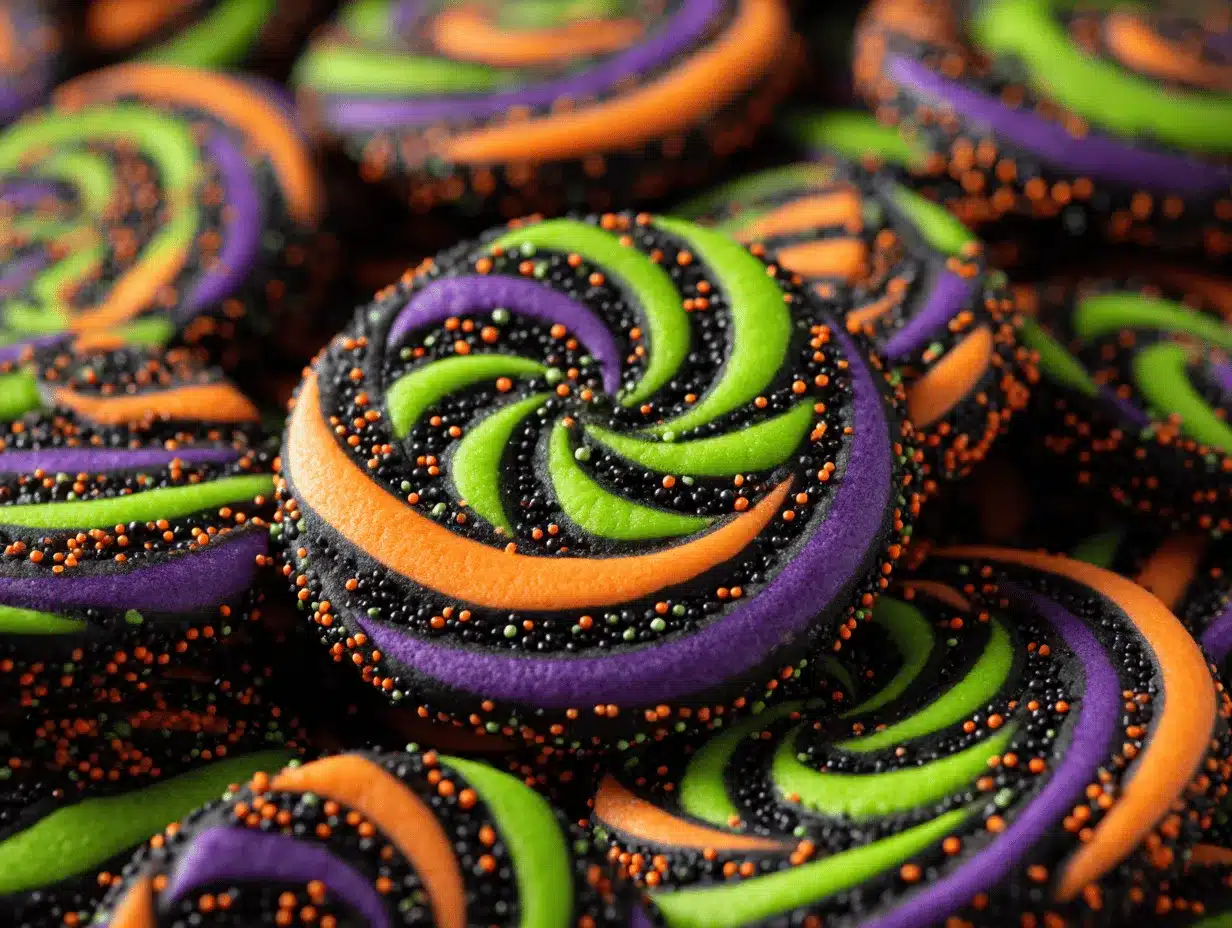
Rainbow swirls, neon sprinkles, and a buttery aroma that makes you want to twirl—honestly, that’s what my kitchen turns into every October when I bake a batch of Hocus Pocus Swirl Halloween Cookies. You know that feeling when a cookie looks almost too magical to eat? That’s exactly what these pinwheel party treats deliver. The first time I whipped up these spellbinding cookies, it was for my daughter’s Halloween bash, and everyone—from costumed toddlers to spooky grown-ups—was absolutely enchanted.
Hocus Pocus Swirl Halloween Cookies aren’t just festive; they’re the kind of treat that makes your dessert table the star of the party. I started making these after seeing a similar swirl at a local bakery and thinking, “I bet I can make it even more bewitching!” Turns out, swirling dough is way more fun than I thought and surprisingly easy once you get the hang of it. Over time, I tweaked the recipe for a softer bite and punchier colors, and now it’s my go-to for any Halloween gathering.
Why do I love these cookies so much? Besides being drop-dead gorgeous, the buttery vanilla flavor is pure comfort food—plus, they’re perfect for sharing. Whether you’re planning a haunted house party, need a last-minute classroom treat, or just want to jazz up movie night with a bit of witchy charm, these Hocus Pocus Swirl Halloween Cookies deliver every time. Trust me, after baking this recipe more than a dozen times for friends, family, and even a school bake sale, I can say with confidence: they’re as fun to make as they are to eat. Grab your favorite Halloween colors and let’s get swirling!
Why You’ll Love This Recipe
- Quick & Easy: Ready in under 90 minutes, including chill time. Perfect for busy families or last-minute party planners.
- Simple Ingredients: No need for specialty baking supplies—you probably have most of these in your pantry already.
- Perfect for Parties: These pinwheel cookies are a showstopper for Halloween gatherings, potlucks, and festive classroom treats.
- Crowd-Pleaser: Kids and adults can’t resist the vibrant swirls and soft, buttery texture.
- Unbelievably Delicious: The combination of vanilla and a hint of almond makes every bite melt-in-your-mouth good.
What sets these Hocus Pocus Swirl Halloween Cookies apart from other pinwheel cookies? It’s all in the technique—rolling the colored dough together for that mesmerizing swirl, and adding sprinkles right before baking for a pop of texture and extra magic. I always blend my food coloring into the dough before chilling, which means the colors come out bold and bright every time. Plus, the dough is forgiving, so even if your swirls aren’t perfect, the cookies still look delightfully spooky (and homemade!).
This recipe is the one I reach for when I want something that feels festive but doesn’t require endless decorating. It’s comfort food with a pinch of nostalgia and a heap of Halloween fun. You’ll find yourself smiling as you slice through the log of dough and reveal those hypnotic swirls—seriously, it’s a little bit addictive! Whether you’re making these for your annual party or just want to surprise your kids with something special, these cookies are guaranteed to cast a delicious spell.
What Ingredients You Will Need
Hocus Pocus Swirl Halloween Cookies use everyday ingredients to create a magical effect. The real fun comes from the colorful dough and playful toppings—so don’t be afraid to get creative with your favorite Halloween hues.
- For the Cookie Dough:
- 2 1/2 cups (310 g) all-purpose flour
- 1 cup (226 g) unsalted butter, softened (adds richness)
- 1 cup (200 g) granulated sugar
- 1 large egg, room temperature
- 2 teaspoons vanilla extract (or substitute with almond extract for a flavor twist)
- 1/4 teaspoon salt
- 1/2 teaspoon baking powder
- For the Swirl Colors:
- Gel food coloring in purple, orange, and green (gel works best for bold colors; I love AmeriColor or Wilton)
- For Decorating:
- Halloween-themed sprinkles (witch hats, bats, stars—whatever catches your eye!)
- Coarse sanding sugar (optional, for sparkle)
If you need to make these gluten-free, swap in a 1:1 gluten-free flour blend (like King Arthur’s). For dairy-free cookies, use plant-based butter (I’ve had good results with Earth Balance). If you want to skip artificial coloring, try natural food powders—spirulina for green, freeze-dried berries for purple, turmeric or carrot for orange. Don’t worry if you don’t have all three colors; two still look fantastic!
I recommend unsalted butter for the best texture, but salted will work in a pinch—just reduce the added salt. If you want a deeper flavor, add a touch of almond or lemon extract. And for a nut-free classroom treat, avoid almond extract and stick to vanilla. The sprinkles are totally optional, but they add that “spellbinding” party vibe. Trust me, the kids will go wild for them.
Equipment Needed
- Stand mixer or hand mixer: Both work fine; I use my trusty KitchenAid, but a hand mixer is just as good for small batches.
- Mixing bowls: You’ll need at least two—one for the dough, one for dividing and coloring.
- Measuring cups and spoons: Accurate measurements make all the difference.
- Plastic wrap or wax paper: For wrapping and chilling the dough.
- Rolling pin: If you don’t have one, a wine bottle works in a pinch.
- Baking sheet(s): Lined with parchment paper for easy clean-up.
- Sharp knife or dough scraper: For slicing the log into cookies.
- Silicone spatula: Handy for scraping the bowl and spreading dough.
If you don’t have a stand mixer, start with a hand mixer and switch to a sturdy spoon once the dough thickens. For the rolling pin, I’ve used a chilled glass bottle and honestly, it works just fine! Parchment paper is my secret weapon for keeping cookies from sticking and cleaning up quickly. If you’re working in a smaller kitchen, you can chill the dough on a plate instead of a baking sheet. Just don’t skip the chill time—trust me, it makes cutting those swirls so much easier.
Preparation Method
-
Make the Cookie Dough:
In a large mixing bowl, beat 1 cup (226 g) unsalted butter and 1 cup (200 g) granulated sugar until light and fluffy (about 2-3 minutes). Add 1 large egg and 2 teaspoons vanilla extract, mixing until smooth. In a separate bowl, whisk together 2 1/2 cups (310 g) all-purpose flour, 1/4 teaspoon salt, and 1/2 teaspoon baking powder. -
Combine Wet and Dry Ingredients:
Gradually add the dry ingredients to the butter mixture, mixing on low speed until just combined. The dough should be soft but not sticky. If it feels too crumbly, add a teaspoon of milk. -
Divide and Color the Dough:
Divide the dough evenly into three bowls. Add gel food coloring to each—purple, orange, and green—using a toothpick to control intensity. Mix until evenly colored, but don’t overwork (the dough can get tough). -
Chill the Dough:
Wrap each colored dough in plastic wrap and chill for at least 30 minutes. This helps the colors set and makes rolling easier. -
Roll Out and Layer:
On a lightly floured surface, roll each dough color into a rectangle (about 8×6 inches/20×15 cm, 1/4 inch thick). Stack the rectangles on top of each other, gently pressing to adhere. Use a rolling pin to even out the layers if needed. -
Form the Swirl Log:
Starting from the long edge, carefully roll the dough into a tight log. Wrap the log in plastic wrap and chill for another 15-30 minutes. A firmer log makes slicing easier and keeps the swirls neat. -
Slice and Decorate:
Preheat your oven to 350°F (175°C). Unwrap the dough log and slice into 1/4-inch (0.6 cm) rounds with a sharp knife. If the dough squishes, chill it a bit longer. Place cookies on parchment-lined baking sheets, leaving 1 inch (2.5 cm) between each. Top with Halloween sprinkles and sanding sugar as desired. -
Bake:
Bake for 10-12 minutes, until edges are just set and centers look slightly soft. Rotate the tray halfway through if your oven cooks unevenly. The cookies shouldn’t brown—watch closely! -
Cool:
Let cookies cool on the baking sheet for 5 minutes, then transfer to a wire rack. They’ll firm up as they cool.
Prep note: If the dough cracks while rolling, patch it gently—imperfections add charm! If colors bleed together too much, chill the layers longer before rolling the log. I’ve had my share of lopsided swirls, and honestly, they taste just as good. For efficiency, I roll all my dough rectangles together on one big sheet of parchment—less mess and faster clean-up.
Cooking Tips & Techniques
Getting those hypnotic swirls right is half the fun (and a little bit of a learning curve). Here’s what I’ve learned after a few Halloween cookie fails and triumphs:
- Chill, Don’t Rush: Chilling the dough twice—once after coloring, once after rolling—makes slicing so much easier. If you skip this, the cookies can look more “scribble” than swirl.
- Use Gel Colors: Liquid food coloring can make the dough sticky and pale. Gel is the way to go for vivid hues.
- Stack Neatly, Roll Tightly: When stacking the colored dough rectangles, try to line up the edges. Roll the log slowly and firmly, but don’t worry if it’s not perfect—wonky swirls look homemade!
- Slice with Confidence: Use a sharp, straight-edged knife. If your slices get squished, chill the log a bit longer.
- Sprinkle Strategically: Add sprinkles right before baking. I once added them before slicing and ended up with sprinkle “confetti” everywhere but the cookies.
I’ve had a batch where my dough got too warm and the swirls blurred into each other. Lesson learned: colder dough = cleaner swirls. If you’re working in a hot kitchen, pop the dough in the freezer for 5 minutes before rolling. For multitasking, color and chill the dough ahead of time; then, assemble and bake the next day. Consistency tip: Always measure flour by spooning and leveling—too much flour makes the cookies dry. And hey, if you end up with a few “monster” cookies, just call them intentional. It’s Halloween, after all!
Variations & Adaptations
Want to make these Hocus Pocus Swirl Halloween Cookies your own? Here are some easy ways to switch things up:
- Dietary Variations: Use gluten-free all-purpose flour for a celiac-friendly version. For dairy-free, swap unsalted butter with plant-based butter and check your sprinkles for hidden dairy.
- Seasonal Swaps: Change up the colors—think red, green, and white for Christmas, or pastel shades for spring parties. This dough is super versatile and works for any holiday.
- Flavor Twists: Add 1/2 teaspoon almond or lemon extract to the dough for extra zing. You can even mix in mini chocolate chips for a decadent swirl.
- Different Cooking Methods: If you want softer cookies, bake for 9 minutes; for crisp edges, go up to 13. Air fryer fans can bake small batches at 320°F (160°C) for 7-8 minutes—just watch the color!
- Allergen Substitutions: For nut-free treats, skip almond extract and use only vanilla. If someone’s allergic to food dye, opt for natural powders or leave the dough plain and decorate with colored sugar.
My personal favorite? A pumpkin spice swirl with orange and white dough, plus cinnamon sugar on top. It’s like a pumpkin latte in cookie form! Halloween is all about having fun—don’t stress about perfection. Let the kids help with rolling and slicing (just expect a little chaos). Your cookies will be one-of-a-kind, and that’s what makes them magical.
Serving & Storage Suggestions
Serve Hocus Pocus Swirl Halloween Cookies at room temperature for the best texture—soft, buttery, with just enough crunch from the sprinkles. Pile them on a spooky platter or tuck into cellophane bags for party favors. These cookies steal the spotlight on dessert tables and pair perfectly with apple cider, hot chocolate, or—my favorite—a big mug of coffee.
For storage, keep cookies in an airtight container at room temp for up to 5 days. They stay soft and flavorful, and the colors remain vibrant. You can also freeze the sliced, unbaked cookies for up to 2 months; bake directly from frozen, adding a minute to the bake time. If you want to freeze baked cookies, layer with wax paper to prevent sticking.
Reheating isn’t necessary, but if you love warm cookies, zap one in the microwave for 8 seconds—just watch out for melting sprinkles. Over time, the flavors meld and the cookies actually taste richer after a day. I often bake a double batch and save some for movie night later in the week. They’re just as spellbinding days later!
Nutritional Information & Benefits
Each Hocus Pocus Swirl Halloween Cookie (about 30 g) contains approximately:
- 120 calories
- 6 g fat
- 15 g carbohydrates
- 1 g protein
- 8 g sugar
Made with real butter and eggs, these cookies offer a satisfying treat without loads of preservatives. The recipe can be made gluten-free or dairy-free as needed—just swap the flour or butter, as mentioned above. Sprinkles may contain allergens (like soy or milk), so check labels if serving to guests with sensitivities.
As a parent, I love having a homemade treat that’s easy to customize for food allergies or dietary needs. Sure, these are a sweet indulgence, but sometimes, celebrating with a magical cookie is just what everyone needs. Moderation and mindful ingredient swaps make them a fun, occasional treat for all ages.
Conclusion
Hocus Pocus Swirl Halloween Cookies bring a little magic to any party, and honestly, they’re as much fun to make as they are to eat. Whether you’re a seasoned baker or just trying out something festive for the first time, this recipe is totally approachable. The bright colors, hypnotic swirls, and soft, buttery texture make these cookies unforgettable—and a guaranteed hit wherever you serve them.
Feel free to make these your own—play with colors, flavors, and toppings until you have your perfect swirl. I love baking these with my kids, letting them choose sprinkle combos, and watching their faces light up when we slice the dough. It’s not about perfection; it’s about creating memories and sharing something spellbinding.
If you give these Hocus Pocus Swirl Halloween Cookies a try, drop me a comment below or tag me on social media. I’d love to see your swirls and hear about your party adventures! Happy baking and happy haunting!
Frequently Asked Questions
How do I get bold colors in my Hocus Pocus Swirl Halloween Cookies?
Use gel food coloring for vibrant hues. Mix thoroughly before chilling, and don’t be afraid to add a little extra if you want a punchier look.
Can I make the cookie dough ahead of time?
Yes! You can prepare and chill the colored dough up to 2 days in advance. Assemble and bake when you’re ready for fresh cookies.
Can I freeze the dough or cookies?
Absolutely. Slice the dough log and freeze the rounds on a tray, then transfer to a bag for up to 2 months. Bake from frozen, adding a minute or so to the bake time.
What if my swirls look messy or uneven?
No worries—imperfect swirls are part of the charm! If the dough is too soft, chill it longer. Even wonky cookies taste amazing and add to the homemade feel.
Can I use natural food coloring?
Yes! Try spirulina for green, freeze-dried berries for purple, and turmeric or carrot powder for orange. The colors will be softer but still festive.
Pin This Recipe!
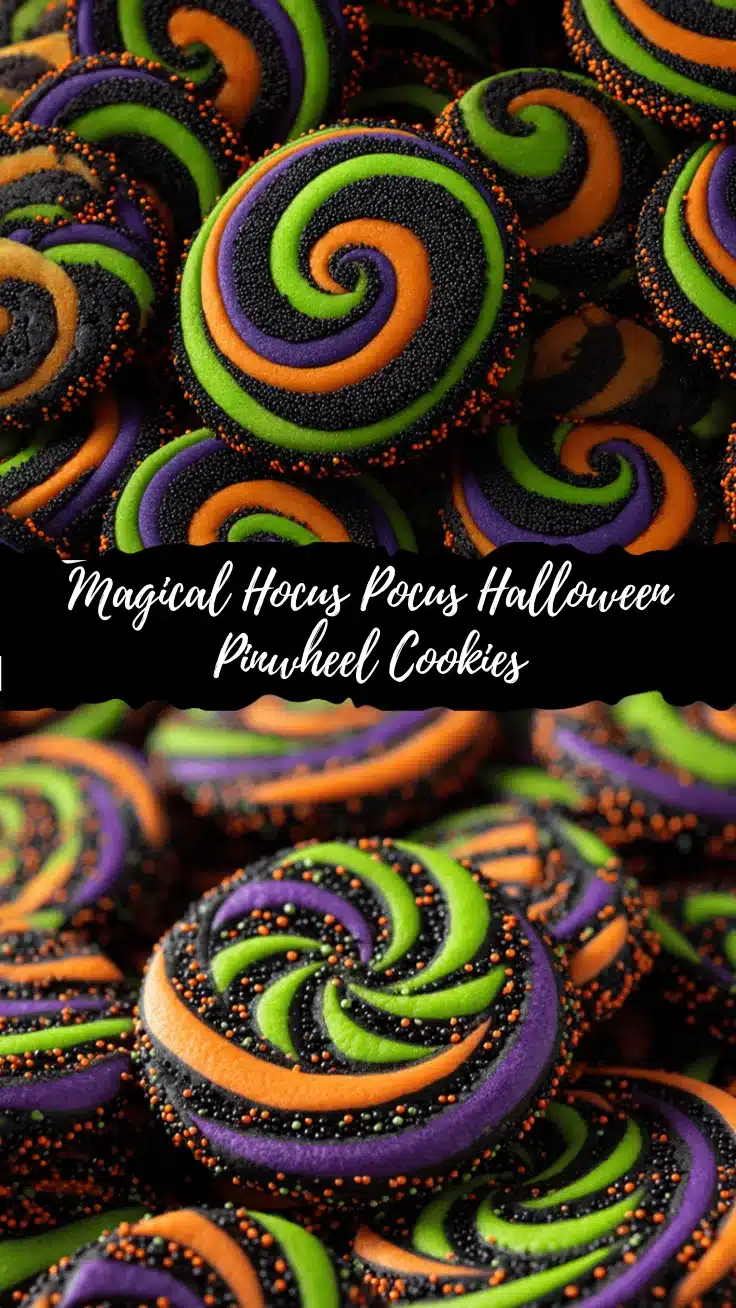
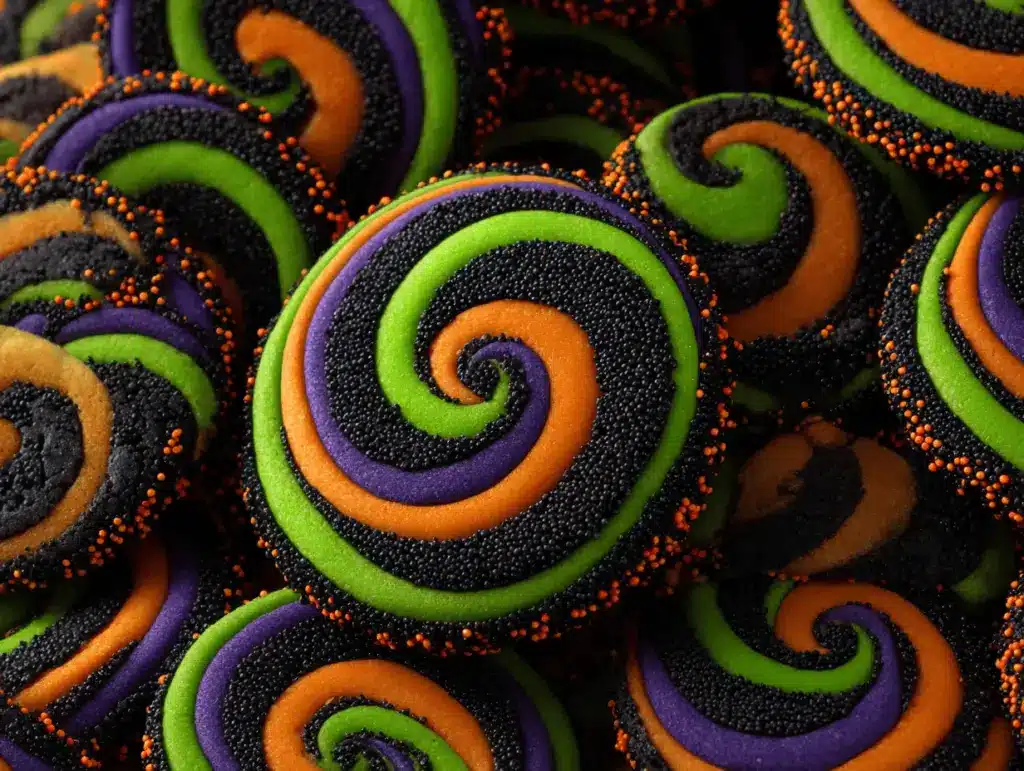
Hocus Pocus Swirl Halloween Cookies – Easy Pinwheel Party Treats
These Hocus Pocus Swirl Halloween Cookies are buttery, soft pinwheel cookies with vibrant swirls and festive sprinkles—perfect for Halloween parties, classroom treats, or a magical movie night. Easy to make and endlessly customizable, they’re as fun to bake as they are to eat.
- Prep Time: 30 minutes
- Cook Time: 12 minutes
- Total Time: 1 hour 15 minutes
- Yield: 30 cookies 1x
- Category: Dessert
- Cuisine: American
Ingredients
- 2 1/2 cups (310 g) all-purpose flour
- 1 cup (226 g) unsalted butter, softened
- 1 cup (200 g) granulated sugar
- 1 large egg, room temperature
- 2 teaspoons vanilla extract (or substitute with almond extract)
- 1/4 teaspoon salt
- 1/2 teaspoon baking powder
- Gel food coloring in purple, orange, and green
- Halloween-themed sprinkles
- Coarse sanding sugar (optional)
Instructions
- In a large mixing bowl, beat unsalted butter and granulated sugar until light and fluffy (about 2-3 minutes).
- Add the egg and vanilla extract, mixing until smooth.
- In a separate bowl, whisk together all-purpose flour, salt, and baking powder.
- Gradually add the dry ingredients to the butter mixture, mixing on low speed until just combined. If the dough is too crumbly, add a teaspoon of milk.
- Divide the dough evenly into three bowls. Add gel food coloring to each (purple, orange, and green) and mix until evenly colored.
- Wrap each colored dough in plastic wrap and chill for at least 30 minutes.
- On a lightly floured surface, roll each dough color into a rectangle (about 8×6 inches, 1/4 inch thick). Stack the rectangles, gently pressing to adhere. Use a rolling pin to even out the layers if needed.
- Starting from the long edge, carefully roll the dough into a tight log. Wrap the log in plastic wrap and chill for another 15-30 minutes.
- Preheat oven to 350°F (175°C). Unwrap the dough log and slice into 1/4-inch rounds with a sharp knife. Place cookies on parchment-lined baking sheets, leaving 1 inch between each. Top with Halloween sprinkles and sanding sugar as desired.
- Bake for 10-12 minutes, until edges are just set and centers look slightly soft. Rotate the tray halfway through if needed.
- Let cookies cool on the baking sheet for 5 minutes, then transfer to a wire rack to cool completely.
Notes
Chill the dough twice for the cleanest swirls. Use gel food coloring for bold colors. If the dough cracks while rolling, patch gently—imperfections add charm. For gluten-free or dairy-free adaptations, use 1:1 gluten-free flour or plant-based butter. Cookies can be frozen before or after baking.
Nutrition
- Serving Size: 1 cookie (about 30 g)
- Calories: 120
- Sugar: 8
- Sodium: 40
- Fat: 6
- Saturated Fat: 3.5
- Carbohydrates: 15
- Protein: 1
Keywords: Halloween cookies, swirl cookies, pinwheel cookies, party treats, easy Halloween dessert, kid-friendly, colorful cookies, butter cookies, holiday baking, festive cookies