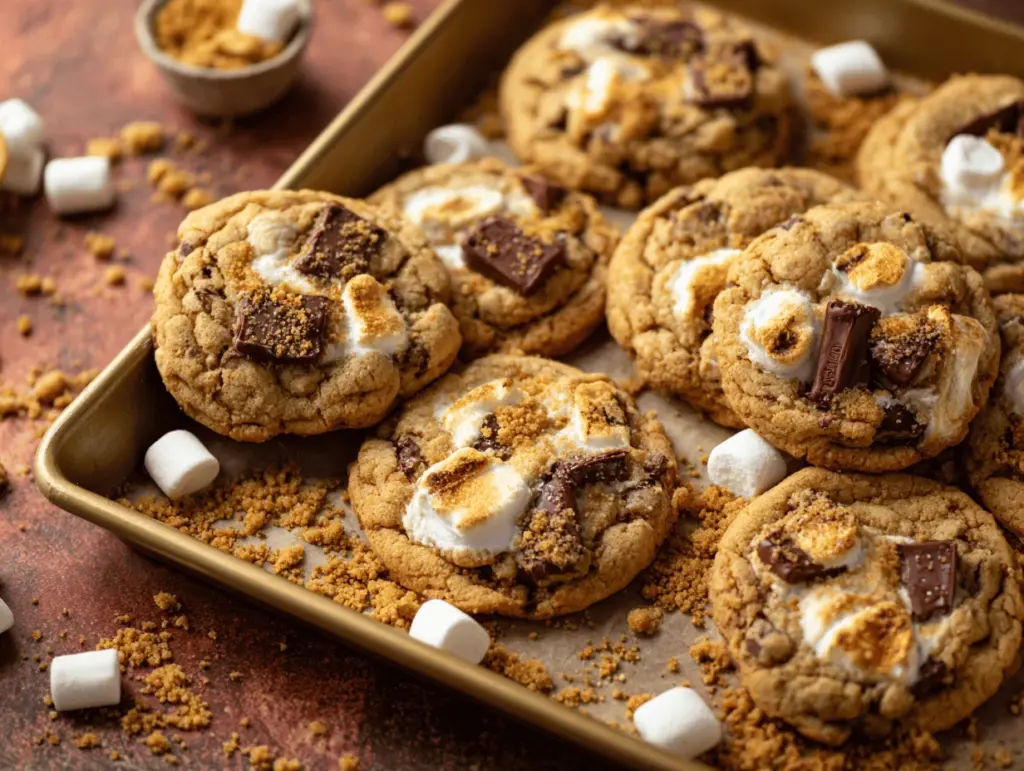
The scent of warm, melty chocolate, toasted marshmallows, and rich peanut butter wafting from my kitchen is enough to stop anyone in their tracks—seriously, it’s like summer camp nostalgia wrapped in a cookie. The first time I made peanut butter s’mores cookies, it was on a whim during a rainy weekend, stuck inside with restless kids and a craving for something sweet but a little out of the ordinary. What came out of the oven was pure happiness: crispy edges, a soft, gooey center, and that classic s’mores flavor kicked up a notch by creamy peanut butter. I swear, my family barely let them cool before the tray was empty.
This peanut butter smores cookies recipe quickly became our go-to for movie nights, birthday parties, or just because it’s Tuesday. It’s honestly the best way to bring a bit of campfire magic indoors—no smoky clothes or mosquito bites required. And, let’s face it, peanut butter just makes everything better. After dozens of batches (and a few tweaks), I’ve nailed down the perfect balance: chewy cookie, melty chocolate, gooey marshmallow, and the unmistakable salty-sweetness of peanut butter. If you’re a busy parent, a college student, or just a treat-yourself type, you’ll love how easy and forgiving this recipe is. No fancy steps or rare ingredients—just pure, gooey joy in every bite.
I’ve honestly lost count of how many times I’ve made these, and each time they manage to bring out smiles all around. Whether you’re trying to impress guests, spoil your kids, or treat yourself after a long week, these peanut butter s’mores cookies deliver the kind of cozy comfort that everyone craves. Trust me, this is one recipe you’ll want to save and make again (and again!).
Why You’ll Love This Peanut Butter S’mores Cookies Recipe
- Quick & Easy: You can whip up a batch of these cookies in less than 30 minutes—seriously, it’s almost too easy. Perfect for last-minute dessert emergencies or spontaneous baking sessions.
- Simple Ingredients: Everything you need is probably in your pantry already. No hunting for obscure flours or hard-to-find candy bars.
- Perfect for Any Occasion: These cookies shine at backyard barbecues, cozy campfire nights, birthday parties, or just a regular afternoon snack attack.
- Crowd-Pleaser: I’ve yet to meet a kid or adult who doesn’t fall in love with these. They disappear from the cookie tray in record time—no leftovers, ever!
- Unbelievably Delicious: The combination of creamy peanut butter, gooey marshmallow, and rich chocolate is just next-level comfort food. Every bite is a little celebration.
What sets this peanut butter smores cookies recipe apart? For starters, I blend the peanut butter into the dough for an ultra-smooth, rich base that’s never dry or crumbly. The marshmallows get slightly toasted and oozy (like real campfire s’mores!), and the chocolate melts into dreamy pockets throughout. I once even tried stuffing a mini peanut butter cup in the middle for an extra surprise—let’s just say that batch vanished even faster.
If you’re like me and love recipes that deliver on taste without a lot of fuss, this one’s a keeper. It takes the nostalgic flavors of s’mores and gives them a peanut butter twist that honestly makes them even better. You get all the fun of s’mores, but none of the sticky fingers or burnt marshmallows—just gooey, golden perfection. This is the kind of treat you’ll want to make for friends, family, or whenever you need a little pick-me-up. It’s that good.
What Ingredients You Will Need for Peanut Butter S’mores Cookies
This recipe uses simple, wholesome ingredients that bring big flavor and the kind of chewy, gooey texture you expect from the perfect cookie. Most of these are pantry staples, and you can easily swap in what you have on hand for a custom twist.
- Creamy peanut butter (make sure it’s the classic, not the natural kind for best texture—Jif or Skippy work great)
- Unsalted butter, softened (adds richness and moisture; if you’re using salted butter, just skip the added salt)
- Light brown sugar (gives the cookies a caramelly depth and keeps them chewy)
- Granulated sugar (for sweetness and a bit of crispiness on the edges)
- Large eggs, room temperature (binds everything together and helps with that soft, tender crumb)
- Pure vanilla extract (don’t skimp—good vanilla makes all the difference)
- All-purpose flour (I recommend King Arthur for consistent results; you can sub with a 1:1 gluten-free blend if needed)
- Baking soda (for lift)
- Salt (balances the sweetness and brings out those nutty notes)
- Mini marshmallows (these melt into gooey pockets—don’t use regular size, or you’ll have marshmallow overload!)
- Semi-sweet chocolate chips or chunks (I love Ghirardelli or Trader Joe’s; you can use a chopped chocolate bar for bigger pools of chocolate)
- Graham cracker pieces (just break them up by hand for those classic s’mores bites—don’t crush them into dust!)
Optional add-ins & substitutions:
- Use almond butter or sunflower seed butter for a peanut-free version.
- If you want a gluten-free option, sub in your favorite 1:1 gluten-free flour blend and certified GF graham crackers.
- Swap milk chocolate chips for semi-sweet if you prefer a sweeter, more classic s’mores flavor.
- Add a sprinkle of flaky sea salt on top before baking for a bakery-style finish.
These ingredients are super flexible, so don’t worry if you need to make a little swap. The most important thing? Use good peanut butter and don’t skimp on the marshmallows!
Equipment Needed
- Large mixing bowl (for mixing your dough—if you have a stand mixer, even better, but a sturdy spoon works fine too)
- Electric hand mixer or stand mixer (for creaming the butter and sugars—makes it much easier, but you can do it by hand if you’re feeling strong)
- Measuring cups and spoons (accuracy matters for the best cookie texture; I love using metal measuring cups for dry and glass for wet)
- Baking sheet(s) (line with parchment paper or a silicone baking mat for easy cleanup and to prevent sticking)
- Cookie scoop or spoon (a medium cookie scoop makes perfectly even cookies, but two regular spoons get the job done too)
- Wire cooling rack (lets the cookies set up perfectly without getting soggy on the bottom)
- Rubber spatula (great for scraping the bowl and folding in those gooey marshmallows and chocolate chips)
If you don’t have a stand mixer, don’t stress—I’ve made these plenty of times with just a wooden spoon and some elbow grease. For the baking sheets, I prefer heavy-duty, light-colored ones (they keep the bottoms from browning too fast). Parchment paper is a must for easy release, especially with sticky marshmallows—learned that the hard way! And if you’re on a budget, dollar store measuring cups and a simple hand whisk work in a pinch. Just be sure to wash sticky peanut butter off your tools right away before it dries (trust me, it’s a pain if you forget!).
Preparation Method
-
Preheat your oven: Set to 350°F (175°C). Line two baking sheets with parchment paper for easy cleanup.
Pro tip: I always preheat first so the oven’s ready to go. Cold oven = sad cookies. -
Cream the wet ingredients: In your large bowl (or stand mixer), combine 1/2 cup (115g) unsalted butter, 1 cup (250g) creamy peanut butter, 1 cup (200g) light brown sugar, and 1/2 cup (100g) granulated sugar. Beat until light and fluffy, about 2-3 minutes.
Look for a pale, creamy mixture—this means the sugar’s dissolved and your cookies will be chewy, not gritty. -
Add eggs and vanilla: Crack in 2 large eggs (room temp is best) and 2 teaspoons vanilla extract. Beat just until incorporated.
Don’t over-mix once the eggs go in; you want the texture tender, not tough. -
Mix dry ingredients: In a separate bowl, whisk together 2 cups (250g) all-purpose flour, 1 teaspoon baking soda, and 1/2 teaspoon salt.
Mixing separately helps avoid pockets of baking soda—nobody wants a weird salty bite. -
Combine wet and dry: Gradually add the dry mixture to the wet, mixing on low or by hand. Stop as soon as you don’t see streaks of flour.
Over-mixing here = dense cookies. It’s okay if a few streaks remain. -
Fold in the goodies: Add 1 cup (175g) semi-sweet chocolate chips, 1 cup (50g) mini marshmallows, and 1/2 cup (60g) broken graham cracker pieces. Use a spatula to gently fold them in.
If you want extra-gooey cookies, press a few extra marshmallows and chocolate chips on top of each dough ball before baking. -
Scoop and shape: Scoop tablespoon-sized dough balls (about 1.5 tablespoons or 30g each) onto prepared baking sheets, spacing about 2 inches (5cm) apart.
The dough will be soft and sticky—lightly dampen your hands if you need to roll them. -
Bake: Bake one sheet at a time, 10-12 minutes, until edges are golden but centers look slightly underbaked.
The marshmallows will puff and may ooze a little—don’t worry, that’s the gooey magic! -
Cool: Let cookies cool on the sheet for 5 minutes (they’ll be very soft). Transfer to a wire rack to cool completely.
If a bit of marshmallow sticks, use a thin spatula to gently lift them off the tray. -
Enjoy! Serve warm for max gooeyness. I love mine with a glass of cold milk or a mug of hot cocoa.
Confession: I’ve been known to eat one straight off the tray—just don’t burn your tongue!
Troubleshooting: If the cookies spread too much, chill the dough for 30 minutes. If marshmallows leak, just nudge them back in while cooling. For the best chewy texture, avoid over-baking (they’ll firm up as they cool!).
Cooking Tips & Techniques
After baking batch after batch (and, honestly, eating my fair share of “test” cookies), I’ve picked up some tricks for peanut butter smores cookies that make all the difference:
- Room temperature ingredients matter. Soft butter and eggs help everything blend smoothly. Cold eggs can make the dough stiff—been there, done that. If you forget, just put eggs in warm water for 10 minutes.
- Don’t over-mix the dough. Once the flour goes in, mix just until combined. Overworking the dough makes cookies tough instead of chewy and tender.
- Add extra marshmallows on top. If you want that bakery-style look, press a few marshmallows and chocolate chips on top of your cookie dough balls before baking. They’ll toast up beautifully and look extra inviting.
- Rotate your pans halfway through baking. Not all ovens bake evenly—rotating ensures each cookie bakes up golden and gooey.
- Let them cool on the tray first. Cookies will be super soft right out of the oven. If you move them too early, they’ll fall apart (I learned this the messy way!).
- For thicker cookies, chill the dough. If you like your cookies extra thick and gooey, pop the dough in the fridge for 30-60 minutes before baking. It’s totally worth the wait.
- Don’t worry about perfect shapes. The marshmallows might ooze or caramelize at the edges—this is part of the charm! Rustic is good here.
One time, I baked these while multitasking—wrangling kids, answering emails, the works—and forgot to rotate the pan. Half the cookies were perfect, the rest a little too “well-done.” Lesson learned: set a timer and peek in halfway! Little things like that can make a big difference for bakery-quality results right at home.
Variations & Adaptations
One of the best things about peanut butter smores cookies is how easy they are to customize. Here are some favorite twists I’ve tried (and loved):
- Gluten-Free: Swap the all-purpose flour for a 1:1 gluten-free blend and use gluten-free graham crackers. I’ve made this version for friends with allergies, and it’s just as gooey and delicious.
- Nut-Free: Use sunflower seed butter or Wowbutter instead of peanut butter, and make sure your chocolate and grahams are nut-safe. The flavor is a little different, but still wonderfully rich and satisfying.
- Chocolate Overload: Substitute half the peanut butter with Nutella or chocolate spread for an extra-chocolatey twist. You’ll end up with a fudgy, decadent treat—perfect for chocoholics.
- Seasonal Add-ins: In autumn, I like to add a pinch of cinnamon and swap the chocolate chips for white chocolate and dried cranberries. In summer, try adding a few crushed freeze-dried strawberries for PB&J s’mores vibes.
- Vegan Adaptation: Use vegan butter, a flax egg (1 tablespoon flaxseed meal + 3 tablespoons water), and vegan marshmallows. I haven’t tried this one myself, but my vegan friends swear by it.
One personal favorite? I once added a handful of chopped peanut butter cups to the dough—oh wow, that batch didn’t last a day. Don’t be afraid to experiment! The base cookie dough is super forgiving, so you can easily make it your own.
Serving & Storage Suggestions
For the ultimate ooey-gooey experience, serve your peanut butter smores cookies warm, right out of the oven (or zap in the microwave for 10 seconds if they’ve cooled). Pair with a glass of cold milk, a mug of hot cocoa, or even a scoop of vanilla ice cream for an over-the-top dessert.
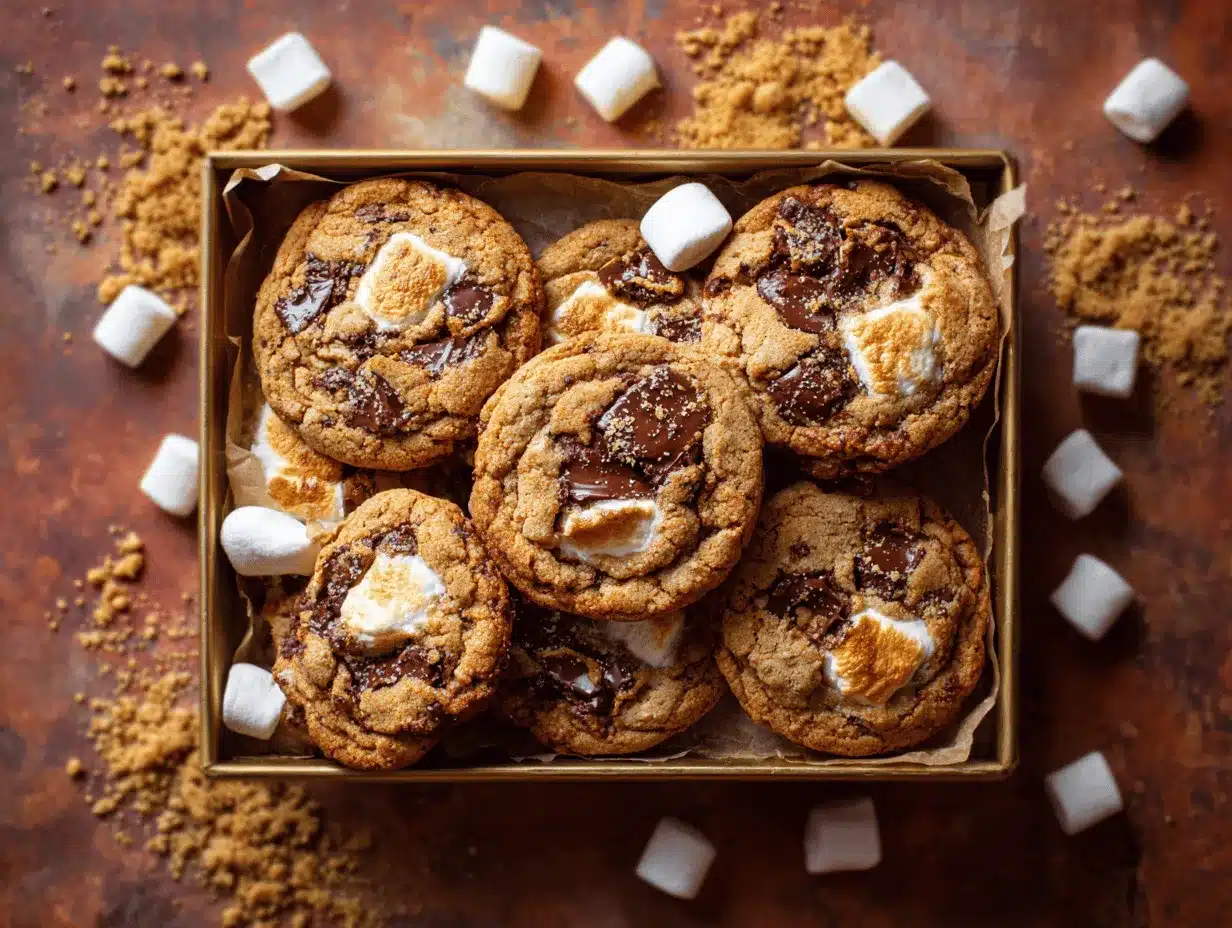
Want to make them extra special for a party? Stack them on a pretty plate, sprinkle with a few extra graham cracker crumbs, and add some mini marshmallows for a cute, campfire-inspired look. They also make adorable edible gifts—just tuck a few into a cellophane bag with a ribbon.
To store: Keep cookies in an airtight container at room temperature for up to 4 days. If you want to keep them longer, freeze in a zip-top bag (layer with parchment to prevent sticking) for up to 2 months. To enjoy, let them thaw at room temp or warm briefly in the oven or microwave for that fresh-baked gooeyness.
Honestly, the flavors deepen and get even better after a day or two—the marshmallows stay soft, the chocolate melds with the peanut butter, and the cookies stay chewy. (Just try not to eat them all in one sitting!)
Nutritional Information & Benefits
Each peanut butter smores cookie has approximately 170 calories, with 3g protein, 8g fat, and 22g carbs (values will vary based on brands and add-ins). The peanut butter adds a little protein and healthy fat, while the marshmallows and chocolate are all about fun and comfort. If you use whole-grain or gluten-free flour, you can sneak in a little extra fiber, too.
This recipe can fit into a vegetarian diet, and with the right substitutions, it’s easy to make gluten-free, dairy-free, or nut-free. The main allergens are peanuts, gluten, eggs, and dairy, so always double-check ingredient labels if you have sensitivities in your crew.
From a wellness perspective, I think treats like these peanut butter smores cookies have a place in a balanced lifestyle. They’re for sharing, for celebrating, and for those moments when you just need a little extra joy—no guilt required.
Conclusion
If you’re searching for a dessert that brings all the best parts of campfire s’mores—gooey chocolate, toasted marshmallow, and that peanut butter twist—these peanut butter smores cookies are it. They’re easy to make, totally customizable, and the kind of cookie that makes people ask for the recipe (every single time).
Don’t be afraid to play with flavors or swap ingredients to fit your cravings or dietary needs. I love these cookies because they’re as fun to bake as they are to eat—and, honestly, nothing beats that first warm, melty bite.
Give this recipe a try, and let me know what you think! Did you add your own spin? Share your results in the comments or tag me on social—can’t wait to see your gooey creations. Here’s to making sweet memories, one cookie at a time!
Frequently Asked Questions – Peanut Butter S’mores Cookies
Can I use natural peanut butter for these cookies?
It’s best to stick with classic creamy peanut butter (like Jif or Skippy) for this recipe. Natural peanut butter tends to separate and can make the cookies spread too much or turn oily. If you only have natural, just be sure to stir it really well and expect a slightly different texture.
How do I keep the marshmallows from melting too much?
Mini marshmallows will puff and melt slightly—that’s part of the gooey charm! To keep them from melting completely, you can freeze them before folding into the dough. Also, pressing a few on top just before baking helps them toast up nicely without total meltdown.
Can I make the dough ahead of time?
Absolutely! You can refrigerate the cookie dough for up to 48 hours. Just let it sit at room temp for about 10-15 minutes before scooping and baking, especially if the dough is very firm.
What’s the best way to freeze these cookies?
You can freeze the baked cookies or the raw dough balls. For baked cookies, cool completely and freeze in a zip-top bag for up to 2 months. For dough, scoop onto a tray, freeze solid, then transfer to a bag—bake from frozen, just add 1-2 extra minutes to the baking time.
Can I use regular-sized marshmallows?
Mini marshmallows work best, but if you only have regular, just chop them into smaller pieces. Too-large chunks of marshmallow can ooze out and make the cookies messier (but still tasty!).
Pin This Recipe!

Peanut Butter Smores Cookies

These Peanut Butter Smores Cookies combine creamy peanut butter, gooey marshmallows, melty chocolate, and crunchy graham crackers for a nostalgic, campfire-inspired treat you can bake indoors. With crispy edges and a soft, chewy center, they’re easy to make and guaranteed to disappear fast.
- Prep Time: 15 minutes
- Cook Time: 12 minutes
- Total Time: 27 minutes
- Yield: 24 cookies 1x
- Category: Dessert
- Cuisine: American
Ingredients
- 1 cup creamy peanut butter (Jif or Skippy recommended)
- 1/2 cup (1 stick) unsalted butter, softened
- 1 cup light brown sugar
- 1/2 cup granulated sugar
- 2 large eggs, room temperature
- 2 teaspoons pure vanilla extract
- 2 cups all-purpose flour
- 1 teaspoon baking soda
- 1/2 teaspoon salt
- 1 cup mini marshmallows
- 1 cup semi-sweet chocolate chips or chunks
- 1/2 cup graham cracker pieces
Instructions
- Preheat oven to 350°F (175°C). Line two baking sheets with parchment paper.
- In a large bowl or stand mixer, cream together the butter, peanut butter, brown sugar, and granulated sugar until light and fluffy (about 2-3 minutes).
- Add eggs and vanilla extract; beat just until incorporated.
- In a separate bowl, whisk together flour, baking soda, and salt.
- Gradually add the dry ingredients to the wet mixture, mixing on low or by hand until just combined.
- Fold in chocolate chips, mini marshmallows, and graham cracker pieces with a spatula.
- Scoop tablespoon-sized balls of dough (about 1.5 tablespoons each) onto prepared baking sheets, spacing 2 inches apart. Optionally, press extra marshmallows and chocolate chips on top.
- Bake one sheet at a time for 10-12 minutes, until edges are golden and centers look slightly underbaked.
- Let cookies cool on the baking sheet for 5 minutes, then transfer to a wire rack to cool completely.
- Serve warm for maximum gooeyness.
Notes
For thicker cookies, chill the dough for 30-60 minutes before baking. Press extra marshmallows and chocolate chips on top for a bakery-style look. If cookies spread too much, chill the dough. Store in an airtight container for up to 4 days or freeze for up to 2 months. Use gluten-free flour and graham crackers for a gluten-free version. For nut-free, use sunflower seed butter.
Nutrition
- Serving Size: 1 cookie
- Calories: 170
- Sugar: 13
- Sodium: 120
- Fat: 8
- Saturated Fat: 3
- Carbohydrates: 22
- Fiber: 1
- Protein: 3
Keywords: peanut butter, smores, cookies, dessert, campfire, marshmallow, chocolate, easy, chewy, kid-friendly


