Introduction
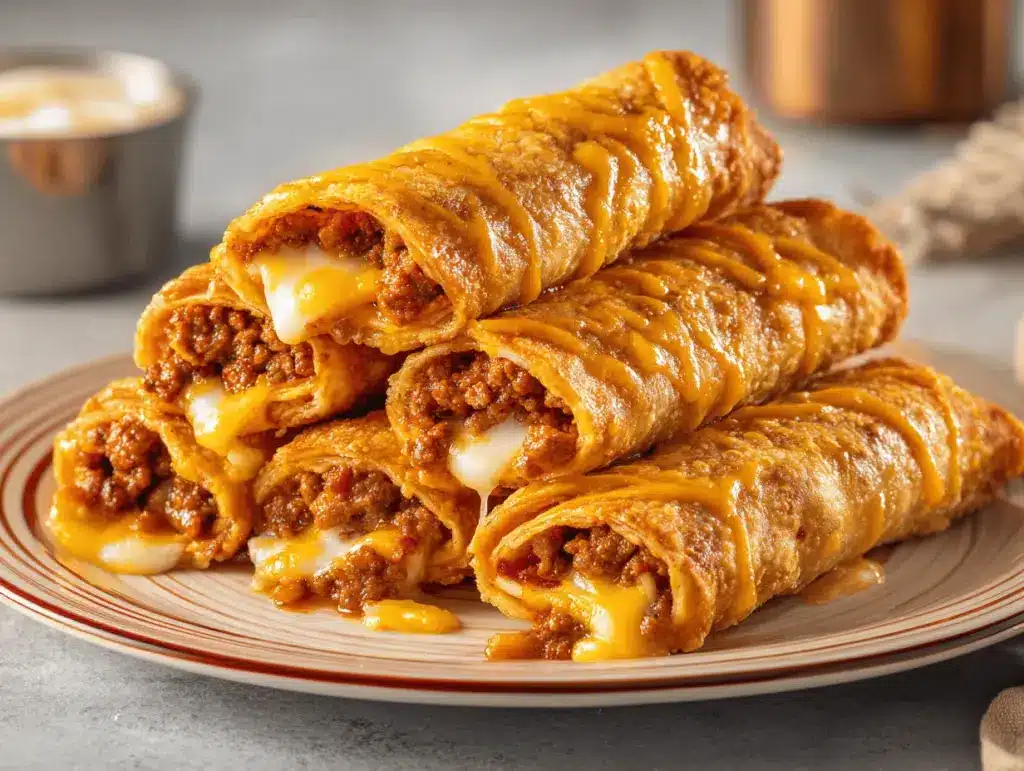
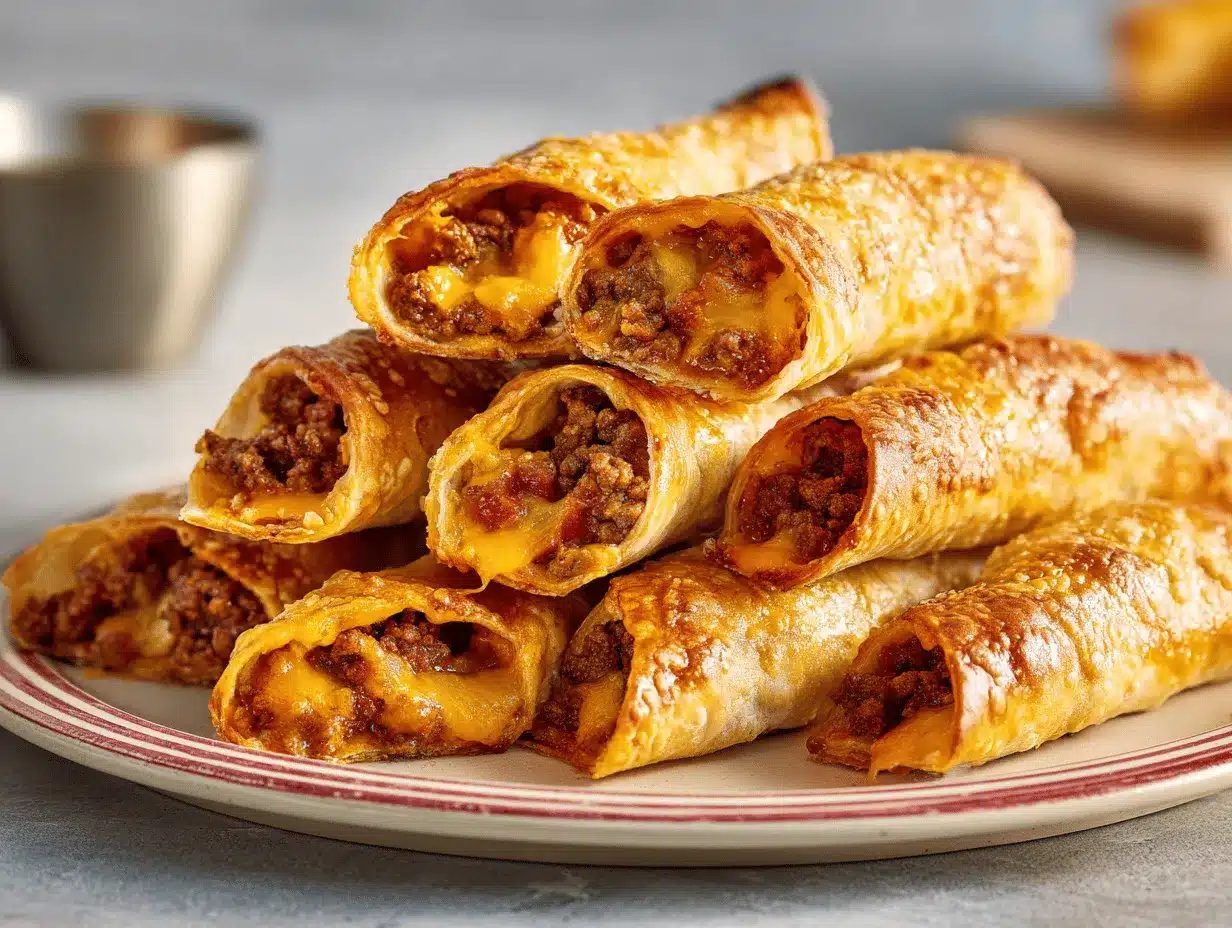
The first time I pulled a batch of cheesy taco sticks from my oven, the kitchen smelled like my favorite Tex-Mex restaurant had moved right in. You know how some recipes just stick in your memory—crispy on the outside, gooey cheese on the inside, and all those classic taco flavors? These cheesy taco sticks are exactly that kind of magic.
I stumbled on the idea during a game night when I needed something easy but still bold enough to impress a hungry crowd. Honestly, I was out of tortilla chips and decided to roll my favorite taco filling into pizza dough instead. It was a hit, and now, cheesy taco sticks are my go-to for parties and last-minute gatherings.
What I love most is how approachable this recipe is—no fancy ingredients, no complicated steps, just big flavors and melty cheese wrapped in golden bread. Whether you’re feeding a group of teens after soccer practice or want a snack that disappears faster than you can say “seconds,” these cheesy taco sticks deliver every time. They’re especially perfect for picky eaters or anyone who likes classic comfort food with a twist.
After making them more times than I can count—swapping in different cheeses, tweaking the spices, testing freezer-friendliness—I can confidently say this cheesy taco sticks recipe is a staple in my kitchen. If you love tacos, cheese, and finger foods, you’re in for a treat!
Why You’ll Love This Recipe
I’ve been making party appetizers for years, and these cheesy taco sticks are honestly in a league of their own. Here’s the scoop on why they’re always devoured at my place (and why I keep the recipe on speed dial).
- Quick & Easy: Ready in about 30 minutes. They’re perfect when you need an appetizer that won’t keep you tied to the kitchen all night.
- Simple Ingredients: Everything is easy to find at any grocery store—no wild goose chases for specialty items.
- Perfect for Parties: Whether it’s game day, movie night, or a potluck, these cheesy taco sticks fit right in. Guests always ask for the recipe!
- Crowd-Pleaser: Even picky kids (and adults) go back for seconds. The flavors are familiar and comforting, with just enough zest to keep things interesting.
- Unbelievably Delicious: Each bite is loaded with savory taco meat, stretchy cheese, and a golden crust—honestly, it’s hard to stop at just one.
What makes this recipe stand out is the technique: sealing the taco filling inside pizza dough keeps everything gooey and mess-free. I usually brown the meat with a bit of onion and taco seasoning for extra depth, then layer in a generous amount of cheese (and sometimes even a sprinkle of jalapeños for the spice lovers). The result? A hand-held, dippable snack that’s way more fun than a traditional taco.
These cheesy taco sticks aren’t just tasty—they’re comfort food you can pick up and share. I’ve watched shy guests light up after one bite, and it’s become a requested favorite at every family gathering. It’s honestly the kind of recipe that makes you want to gather everyone around the table and just enjoy good food together.
What Ingredients You Will Need
This cheesy taco sticks recipe uses everyday ingredients that come together for bold flavor and melt-in-your-mouth texture. Most of these are pantry staples, and there’s plenty of flexibility to swap in your favorites or adapt for dietary needs.
- For the Filling:
- Ground beef (1 pound / 450 g) – I like using 85% lean for the best balance of flavor and tenderness.
- Yellow onion, finely chopped (1 small / about 75 g) – Adds sweetness and depth to the taco filling.
- Taco seasoning (2 tablespoons / 16 g) – Use your go-to blend or homemade seasoning for control over the heat and salt.
- Water (1/4 cup / 60 ml) – Helps distribute the seasoning and keep the filling juicy.
- For the Cheesy Goodness:
- Shredded cheddar cheese (1 1/2 cups / 180 g) – I recommend sharp cheddar for maximum flavor. Monterey Jack or a Mexican blend also work beautifully.
- Mozzarella cheese, shredded (1/2 cup / 60 g) – For that extra stretchy, gooey factor.
- For the Dough:
- Refrigerated pizza dough (1 can / about 13.8 oz or 390 g) – Pillsbury or store-brand both work fine. If you prefer, homemade dough is great too!
- For Assembly:
- Unsalted butter, melted (2 tablespoons / 28 g) – Brushed on top for golden color and flavor.
- Garlic powder (1/2 teaspoon / 1.5 g) – Mixed with the butter for a little extra oomph.
- Fresh parsley or cilantro, chopped (optional, for garnish) – Adds a pop of color and freshness.
- For Dipping (Optional but Highly Recommended):
- Salsa, guacamole, sour cream, or queso dip – Pick your favorite, or set out a few options if you’re serving a crowd.
Ingredient notes: If you need to make these gluten-free, look for a gluten-free pizza dough (like the ones from Schär or Cup4Cup). For a spicier kick, add a can of diced green chiles or a sprinkle of chili flakes to the meat mixture. I sometimes swap in ground turkey or even plant-based crumbles for a lighter—or vegetarian—take. The cheese combo is flexible, so use what you have!
I’ve found that using freshly shredded cheese (not pre-shredded) gives the best melt and flavor, but don’t stress if you only have bagged cheese on hand. It will still be delicious!
Equipment Needed
Making cheesy taco sticks doesn’t require a ton of fancy gear, which is part of the charm. Here’s what you’ll need:
- Baking sheet – A standard half-sheet pan is perfect. If you don’t have one, a pizza pan or even a casserole dish will work in a pinch.
- Nonstick parchment paper or silicone baking mat – Helps prevent sticking and makes cleanup a breeze. I used to skip this step and always regretted it when cheese oozed out!
- Skillet – For browning the ground beef. Cast iron gives a nice sear, but any large nonstick or stainless skillet will do.
- Mixing bowls – For combining the cheeses and mixing the filling.
- Rolling pin – Useful for rolling out pizza dough evenly, but you can use a wine bottle in a pinch (been there, done that!).
- Pastry brush – For brushing on that buttery garlic goodness. If you don’t have one, use the back of a spoon.
- Sharp knife or pizza cutter – To portion the dough and slice the finished sticks for serving.
Budget tip: You don’t need anything fancy—my first batch was made with a thrifted pan and a butter knife! If you use a silicone mat, wash it with hot, soapy water after cheesy recipes to keep it in good shape.
Preparation Method
-
Preheat and Prep:
Preheat your oven to 400°F (200°C). Line a baking sheet with parchment paper or a silicone baking mat so the cheesy taco sticks won’t stick. -
Cook the Taco Filling:
In a large skillet over medium heat, add 1 pound (450 g) ground beef and 1 small chopped onion. Cook for 5-7 minutes, breaking up the meat as you go, until browned and the onion is soft. Drain any excess fat if needed. -
Season:
Sprinkle 2 tablespoons (16 g) taco seasoning over the meat, then add 1/4 cup (60 ml) water. Stir and simmer for 2-3 minutes until thickened and fragrant. Taste and adjust salt if needed. Remove from heat and let cool slightly—it shouldn’t be piping hot or it’ll melt the cheese too soon. -
Mix the Cheese:
In a small bowl, mix together 1 1/2 cups (180 g) shredded cheddar and 1/2 cup (60 g) mozzarella. (If you like a little heat, add a pinch of chili flakes or some diced jalapeños at this point.) -
Roll Out the Dough:
Lightly flour your work surface. Unroll the pizza dough (about 13.8 oz / 390 g) and use a rolling pin to shape it into a large rectangle, roughly 14 x 9 inches (35 x 23 cm). If the dough springs back, let it rest for a couple of minutes and try again. -
Portion and Fill:
With a sharp knife or pizza cutter, slice the dough into 8 equal rectangles. Spoon about 2 heaping tablespoons of the taco filling down the center of each rectangle, then sprinkle generously with the cheese blend. -
Shape the Taco Sticks:
Carefully fold each rectangle over the filling, pinching the edges to seal. Roll gently so the seam is underneath and the stick is mostly sealed (some cheese may ooze out during baking—that’s part of the charm). -
Arrange and Brush:
Place the filled sticks seam side down on the prepared baking sheet, spacing them about 1 inch (2.5 cm) apart.
Mix 2 tablespoons (28 g) melted butter with 1/2 teaspoon (1.5 g) garlic powder. Brush the tops generously with the butter mixture. -
Bake:
Bake in the preheated oven for 12-15 minutes, or until the tops are golden brown and the cheese is bubbling at the ends. Oven times can vary, so start checking at the 12-minute mark. -
Garnish and Serve:
Remove from the oven and cool for a couple of minutes (they’re molten inside right out of the oven!). Sprinkle with chopped parsley or cilantro if desired. Slice and serve warm with your favorite dips.
Troubleshooting: If the dough tears, just pinch it together—nobody will see it once baked. If the sticks are browning too quickly, tent with foil for the last few minutes. And if a little cheese escapes, consider it a chef’s treat!
Personal tip: I prep the filling ahead and keep it in the fridge, so assembly is lightning-fast when I want to bake a batch right before guests arrive.
Cooking Tips & Techniques
Over the years, I’ve learned a few tricks to guarantee cheesy taco stick success—trust me, these little tweaks make a big difference!
- Seal Well: Take the time to pinch the dough seams tightly so the filling stays put. Sometimes I even use a fork to crimp the edges (like a hand pie) for extra insurance.
- Don’t Overfill: It’s tempting to pile in the cheese and meat, but too much filling can make the sticks burst open. Stick to 2 heaping tablespoons of filling per stick for best results.
- Rest the Dough: If your dough keeps shrinking back as you roll it, let it rest for 5 minutes. This relaxes the gluten and makes it easier to shape.
- Fresh Cheese: Freshly shredded cheese melts better and gives a creamier texture. Pre-shredded cheese works but might be a bit less gooey.
- Bake Until Deeply Golden: Don’t pull them too early—let the tops get that deep golden color for maximum flavor and crunch.
- Keep Warm for Parties: These stay melty if you keep them on a low oven (about 200°F/93°C) until serving. Just pop them on a wire rack so the bottoms don’t get soggy.
- Multitask Like a Pro: While the filling is cooling, shred your cheese and set up your dipping sauces. Everything comes together faster this way.
My biggest early mistake? Overfilling and under-sealing, which led to a little explosion of cheese in the oven (delicious, but messy). Now, I always double-check my seams and keep a bit of cheese aside for sprinkling on top. Consistency is all about practice—and not stressing over minor imperfections. They’ll still taste amazing!
Variations & Adaptations
If you like to switch things up (I definitely do!), cheesy taco sticks are super versatile. Here are some of my favorite tweaks:
- Vegetarian: Swap the ground beef for plant-based crumbles, black beans, or even sautéed mushrooms and peppers. Just season as you would taco meat!
- Low-Carb and Gluten-Free: Use a low-carb or gluten-free pizza dough—there are great options at most supermarkets now. I’ve tried Caulipower’s version for friends with gluten sensitivities.
- Spicy Kick: Add diced green chiles, jalapeños, or a dash of hot sauce to the filling. Pepper Jack cheese is another fun way to add heat.
- Breakfast Taco Sticks: Fill with scrambled eggs, cooked sausage, and cheese for a breakfast-friendly version. My kids love these with a side of salsa.
- Chicken Taco Sticks: Use shredded rotisserie chicken tossed with taco seasoning instead of ground beef. It’s a great way to use up leftovers!
- Allergen Swaps: For dairy-free, use vegan cheese and check ingredient labels on your dough. For nut allergies, this recipe is naturally nut-free, but always check your products to be safe.
One of my favorite personal twists? Using leftover pulled pork with a smoky BBQ rub and a blend of cheddar and gouda cheese. It’s not traditional, but it’s always a hit at summer cookouts!
Serving & Storage Suggestions
Cheesy taco sticks are best served warm, fresh from the oven—the cheese is melty, the crust is crisp, and the aroma is irresistible. I like to pile them on a big platter with a trio of dips (salsa, guacamole, and sour cream are always a hit). Add a sprinkle of fresh herbs for a pop of color, and serve with lime wedges for a zesty touch.
If you’re feeding a crowd, keep them warm in a low oven (200°F/93°C) on a wire rack so they stay crispy. They pair beautifully with crunchy salad, Mexican rice, or even a pitcher of margaritas if you’re in the mood!
For storage, let leftovers cool completely before transferring to an airtight container. Refrigerate for up to 3 days. To reheat, bake at 350°F (175°C) for 8-10 minutes, or microwave in 30-second bursts (the oven keeps them crispier). These also freeze well—wrap individually and freeze for up to 2 months. Reheat from frozen at 375°F (190°C) for about 15 minutes.
One little secret? The flavors actually deepen after a day in the fridge, so leftovers are extra tasty!
Nutritional Information & Benefits
Each cheesy taco stick (based on 8 servings) has approximately:
- Calories: 250
- Protein: 13g
- Fat: 14g
- Carbohydrates: 18g
- Sugar: 1g
- Fiber: 1g
These numbers are estimates and will vary based on your ingredients. The recipe is a good source of protein from the beef and cheese, and you can lighten it up with ground turkey or leaner meats if you like.
If you’re watching carbs or gluten, simply use an alternative dough. For those with dairy or lactose issues, there are excellent plant-based cheeses available now.
Cheesy taco sticks are indulgent, sure, but they’re also packed with flavor and protein—definitely a better-for-you splurge compared to most takeout appetizers. For me, they’re all about balance: a fun treat to share, and easy to adapt for a healthier twist when needed.
Conclusion
Cheesy taco sticks are my secret weapon for parties, game days, or just those nights when you want something seriously satisfying (but not fussy). From their crispy golden crust to that gooey, cheesy taco filling, they’re always a hit—trust me, you’ll want to make a double batch!
I hope you feel inspired to make these your own—swap in different fillings, play with the cheese, or serve with your favorite dips. That’s honestly the best part of this recipe: it’s endlessly customizable and always delicious.
Let me know in the comments if you try your own twist or if your family becomes as obsessed as mine did! And if you love this recipe, please share it with your friends or pin it for later—you never know who’ll fall for cheesy taco sticks next.
Happy snacking, and remember: good food is meant to be shared!
Frequently Asked Questions
How do I keep the cheesy taco sticks from leaking in the oven?
Make sure to pinch the dough seams tightly and place the sticks seam-side down on the baking sheet. If a little cheese sneaks out, that’s totally normal and still tasty!
Can I make cheesy taco sticks ahead of time?
Yes! Assemble them, cover well, and refrigerate for up to 8 hours before baking. You can also freeze unbaked sticks for quick appetizers later—just add a few extra minutes to the bake time.
What’s the best dip to serve with cheesy taco sticks?
Salsa, guacamole, sour cream, or queso dip are classic choices. I sometimes mix up a spicy ranch or chipotle mayo for something different!
Can I use homemade pizza dough instead of refrigerated?
Absolutely. Homemade dough gives a slightly chewier bite and richer flavor. Just roll it out thin and proceed with the recipe as written.
Are cheesy taco sticks good for kids’ lunches?
They’re awesome for lunchboxes! Just cool completely and pack with a little container of salsa or ranch. Kids love dipping them, and they’re less messy than regular tacos.
Pin This Recipe!
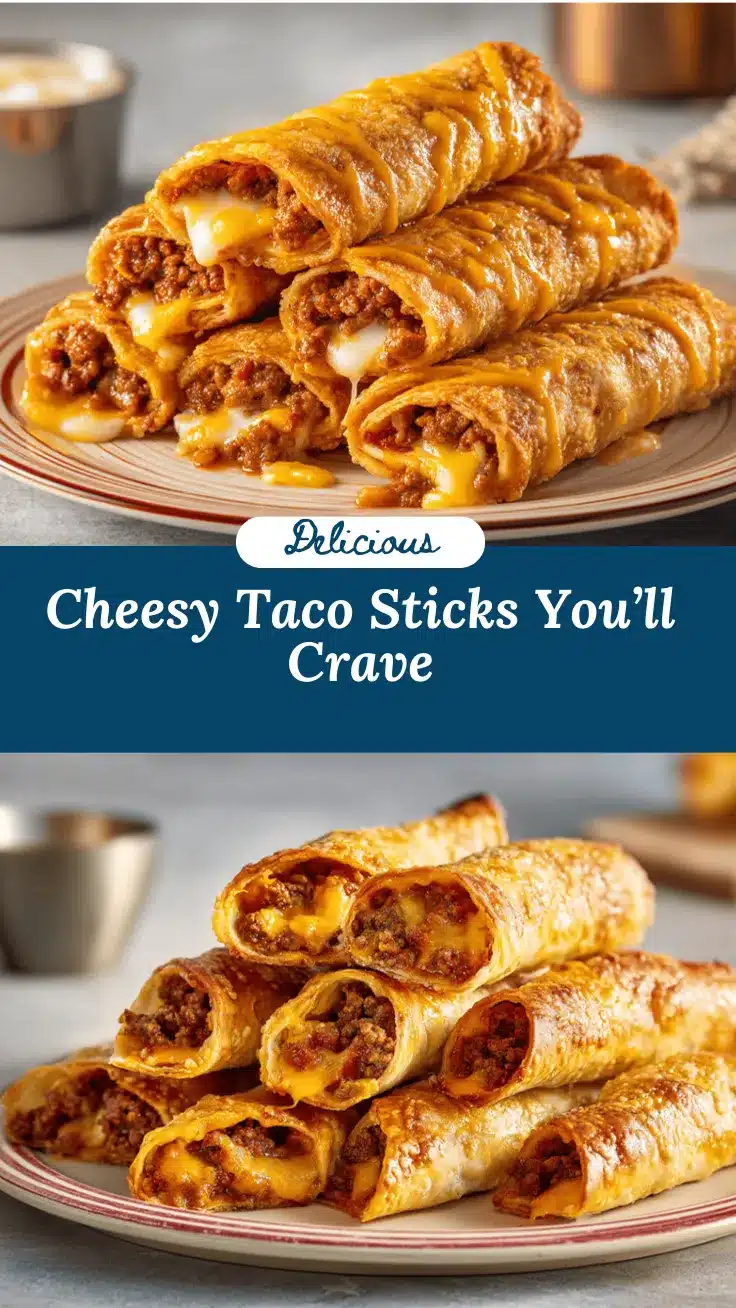
Cheesy Taco Sticks

Cheesy taco sticks are a crowd-pleasing party appetizer featuring savory taco meat and gooey cheese wrapped in golden pizza dough. They’re quick, easy, and perfect for game days, gatherings, or a fun family snack.
- Prep Time: 15 minutes
- Cook Time: 15 minutes
- Total Time: 30 minutes
- Yield: 8 servings 1x
- Category: Appetizer
- Cuisine: Tex-Mex
Ingredients
- 1 pound ground beef (85% lean recommended)
- 1 small yellow onion, finely chopped
- 2 tablespoons taco seasoning
- 1/4 cup water
- 1 1/2 cups shredded cheddar cheese (sharp recommended)
- 1/2 cup shredded mozzarella cheese
- 1 can refrigerated pizza dough (about 13.8 oz)
- 2 tablespoons unsalted butter, melted
- 1/2 teaspoon garlic powder
- Fresh parsley or cilantro, chopped (optional, for garnish)
- Salsa, guacamole, sour cream, or queso dip (for serving, optional)
Instructions
- Preheat your oven to 400°F (200°C). Line a baking sheet with parchment paper or a silicone baking mat.
- In a large skillet over medium heat, cook the ground beef and chopped onion for 5-7 minutes, breaking up the meat, until browned and the onion is soft. Drain excess fat if needed.
- Add taco seasoning and water to the skillet. Stir and simmer for 2-3 minutes until thickened and fragrant. Remove from heat and let cool slightly.
- In a bowl, mix together the shredded cheddar and mozzarella cheeses.
- Lightly flour your work surface. Unroll the pizza dough and use a rolling pin to shape it into a large rectangle, about 14 x 9 inches.
- Cut the dough into 8 equal rectangles. Spoon about 2 heaping tablespoons of the taco filling down the center of each rectangle, then sprinkle generously with the cheese blend.
- Fold each rectangle over the filling, pinching the edges to seal. Roll gently so the seam is underneath.
- Place the filled sticks seam side down on the prepared baking sheet, spacing them about 1 inch apart.
- Mix melted butter with garlic powder and brush the tops of the sticks generously.
- Bake for 12-15 minutes, or until golden brown and the cheese is bubbling at the ends.
- Cool for a couple of minutes, garnish with parsley or cilantro if desired, then slice and serve warm with your favorite dips.
Notes
Seal the dough seams tightly to prevent leaking. Don’t overfill the sticks. Freshly shredded cheese melts best. For gluten-free, use gluten-free pizza dough. For vegetarian, substitute plant-based crumbles or beans. These freeze well and can be reheated in the oven for best texture.
Nutrition
- Serving Size: 1 taco stick
- Calories: 250
- Sugar: 1
- Sodium: 500
- Fat: 14
- Saturated Fat: 7
- Carbohydrates: 18
- Fiber: 1
- Protein: 13
Keywords: cheesy taco sticks, party appetizer, taco sticks, easy appetizer, Tex-Mex snack, finger food, game day recipe, pizza dough taco, kid friendly, crowd pleaser