You know that moment when you walk into a party and catch a whiff of something cheesy, savory, and totally addictive baking in the oven? That’s exactly what happens every time I make my taco sticks recipe. The golden, crisp dough, the oozy cheese, the spiced beef—honestly, it’s like taco night and breadsticks got together to throw the best appetizer bash ever. I still remember the first time I whipped up a batch for game night. I barely set the tray down before people started grabbing, dipping, and coming back for seconds (and thirds, let’s be real). Taco sticks have that magic—everyone wants in!
I stumbled onto this taco sticks recipe by accident, actually. I had leftover taco filling, a tube of pizza dough, and a hungry family staring at me. A little rolling, a quick bake, and suddenly I had an easy, cheesy appetizer that instantly became party legend. Since then, I’ve tinkered with the filling, switched up cheeses, and even made a few vegetarian versions. The best part? You don’t need any fancy ingredients or chef skills—just a love of tacos and a craving for something fun to share. These taco sticks are perfect for casual get-togethers, birthday parties, or any night when you want to make snack time feel special.
If you’re looking for a recipe that’s impossible to mess up, friendly to picky eaters, and guaranteed to disappear fast, this taco sticks recipe is it. I’ve tested it at family reunions, potlucks, and even my kids’ lunchboxes. They’re simple, portable, and absolutely loaded with flavor. Whether you’re making them for a big crowd or just a snacky Friday night, you’ll find yourself reaching for this recipe again and again. Let’s get into why you’ll love it so much!
Why You’ll Love This Taco Sticks Recipe
- Quick & Easy: Taco sticks come together in under 40 minutes, including prep and bake time. Perfect for when you need a last-minute appetizer or snack that looks (and tastes) like you planned ahead.
- Simple Ingredients: No crazy shopping trips required—most of these are pantry and fridge staples. Ground beef (or turkey), cheese, pizza dough, and taco seasoning are all you really need. Easy swaps work too!
- Perfect for Parties: These make the ultimate finger food for gatherings—think birthday parties, Super Bowl Sunday, neighborhood potlucks, or holiday spreads. You can even prep them ahead and bake just before serving.
- Crowd-Pleaser: Seriously, I’ve never had a batch last more than ten minutes. Kids, teens, adults—everyone is drawn in by the cheesy, savory aroma. My picky niece even asked for the recipe!
- Unbelievably Delicious: The combo of seasoned taco meat and gooey cheese wrapped in golden, pillowy dough is comfort food at its finest. It’s like the best parts of tacos and breadsticks, all in one irresistible bite.
What really makes this taco sticks recipe stand out is the method. Instead of just stuffing dough with filling and hoping for the best, I like to roll the dough thin, spread the filling in a line, and seal everything tight so you get the perfect cheese pull and no leaks. I’ve played with spice levels, different cheeses, and even a bit of cream cheese for richness. Every batch gets better, and I love that you can tweak it to your taste—add jalapeños for heat, use turkey for a lighter twist, or toss in some black beans for a hearty vegetarian option.
This isn’t just another party appetizer. It’s the one that makes people ask, “Where did you get this recipe?” It’s comfort food that’s a little bit playful, a lot satisfying, and always a hit. Whether you serve them with a side of salsa, guacamole, or ranch, these taco sticks are bound to steal the show. Trust me, once you try them, you’ll want to make them for every occasion!
What Ingredients You Will Need
This taco sticks recipe is all about simple, bold flavors. You probably have most of these ingredients already! Here’s what you’ll need to make a big batch of cheesy, crave-worthy taco sticks:
- For the Taco Filling:
- 1 pound (450g) ground beef (or ground turkey for a lighter option)
- 1 packet (about 1 oz/28g) taco seasoning (homemade or store-bought – I like to use low-sodium for more control)
- 1/3 cup (80ml) water
- 1/2 cup (60g) canned black beans, drained and rinsed (optional, adds texture and fiber)
- For the Cheese:
- 1 1/2 cups (170g) shredded cheddar cheese (or a Mexican blend for extra flavor and meltiness)
- 1/2 cup (55g) shredded mozzarella cheese (adds stretchy cheese pulls – totally optional but I love the effect!)
- For the Dough:
- 1 tube (about 13.8 oz/390g) refrigerated pizza dough (classic, thin, or even crescent roll dough works in a pinch)
- Flour, for dusting (just a bit to keep things from sticking)
- For Topping & Baking:
- 2 tablespoons (28g) unsalted butter, melted (for brushing)
- 1 teaspoon garlic powder (mix into the butter for extra flavor)
- 1 tablespoon chopped fresh cilantro or parsley (optional, for a pop of color and freshness)
- For Dipping (Optional but Highly Recommended):
- Salsa (mild, medium, or spicy – you pick!)
- Sour cream
- Guacamole
- Ranch dressing (my kids’ favorite, surprisingly!)
If you’re feeling creative, you can easily swap or add ingredients. Gluten-free? Use a gluten-free pizza dough. Vegetarian? Skip the meat and double the beans and cheese. Want it spicy? Toss in some chopped jalapeños or hot sauce. I’ve even tried this with leftover shredded chicken taco filling—works like a charm!
When it comes to brands, I’ve had the best luck with Pillsbury pizza dough (it’s easy to find and always bakes up tender) and Tillamook cheddar for a super melty, flavorful cheese. For taco seasoning, Trader Joe’s and Old El Paso both get my vote. But honestly, use what you like and what’s on hand. These taco sticks are forgiving and flexible—no need to stress if you’re missing something small. That’s part of the magic!
Equipment Needed
One of the best things about this taco sticks recipe is how little equipment you need. It’s all basic kitchen stuff:
- Baking Sheet: Any standard-size sheet works—line it with parchment for easy cleanup.
- Large Skillet: For browning the meat and mixing in seasoning; nonstick or cast iron both do the trick.
- Mixing Bowl: For combining cheese or mixing in beans, if you want to prep in advance.
- Rolling Pin: Helps roll the dough evenly. If you don’t have one, a floured glass bottle is my old-school backup.
- Pastry Brush: For brushing melted butter over the sticks—if you don’t have one, a spoon works in a pinch.
- Parchment Paper: Highly recommended for non-stick baking and quick cleanup.
- Sharp Knife or Pizza Cutter: For slicing dough and cutting finished sticks.
Nothing here is fancy, and I promise you don’t need a stand mixer or food processor. I’ve even made these at a friend’s house with nothing but a wine bottle to roll the dough! For maintenance, if you use a cast iron skillet, just give it a light oiling after so it stays seasoned. And when it comes to budget, Aldi’s baking sheets and rolling pins work just as well as pricier brands. No need to splurge—these taco sticks turn out awesome with whatever basics you’ve got.
How to Make Taco Sticks – Step-by-Step
-
Preheat and Prep:
Preheat your oven to 400°F (200°C). Line a baking sheet with parchment paper for easy cleanup. Grab all your ingredients so everything’s ready to go. This keeps things moving and prevents a mad dash for missing cheese! -
Cook the Taco Filling:
Heat a large skillet over medium heat. Add 1 pound (450g) ground beef (or turkey). Break it up and cook until browned—about 5-7 minutes. Drain off any excess fat. Sprinkle in 1 packet taco seasoning and add 1/3 cup (80ml) water. Stir well and simmer for 2-3 minutes until thickened.
Prep Tip: If using black beans, stir in 1/2 cup (60g) now. Let the mixture cool for 5 minutes before assembling. -
Roll Out the Dough:
Lightly flour your work surface. Unroll the pizza dough and use a rolling pin to stretch it into a rectangle (about 14×9 inches/35x23cm). Try to keep the thickness even for consistent baking.
Warning: Don’t roll too thin or the sticks may tear. -
Add Cheese and Filling:
Sprinkle the dough evenly with 1 1/2 cups (170g) cheddar cheese and 1/2 cup (55g) mozzarella. Spoon cooled taco meat mixture in a line down the long side of the rectangle, leaving a 1/2-inch (1cm) border. -
Shape and Seal:
Fold the dough over the filling to form a log, pinching the edges to seal. Use a sharp knife or pizza cutter to cut the log into 8-10 sticks, each about 1.5 inches (4cm) wide.
Personal Tip: If any filling escapes, just tuck it back in—no one will know! -
Bake:
Place sticks seam-side down on the prepared baking sheet. Mix 2 tablespoons (28g) melted butter with 1 teaspoon garlic powder. Brush over the tops of the sticks.
Bake in the center of the oven for 14-16 minutes, until golden and bubbly.
Sensory Cue: The kitchen will smell like cheesy, taco heaven when they’re done! -
Finish and Serve:
Remove from oven and immediately sprinkle with fresh cilantro or parsley, if using. Cool for 3-5 minutes—they’ll be molten hot inside!
Serve with salsa, sour cream, guacamole, or ranch for dipping. Watch them disappear!
If your taco sticks leak a little cheese, don’t stress—it just means the filling is extra gooey. For crisper bottoms, bake directly on the pan for the last 2 minutes. If you’re making a double batch, rotate the pans halfway through for even browning. Trust me, once you see how easy these are, you’ll make them on repeat for every party!
Cooking Tips & Techniques for Taco Sticks
- Don’t Overfill: Less is more when stuffing the dough. Too much filling can lead to blowouts (been there, learned that the hard way!).
- Let Meat Cool: Warm filling can make the dough soggy and hard to seal. Give it a few minutes to cool before assembling.
- Seal Well: Pinch those seams tightly! If you’re nervous, you can use a fork to crimp the edges for extra insurance.
- Even Sizing: Aim for sticks that are roughly the same size so they bake evenly. I eyeball it, but you can use a ruler if you’re a perfectionist.
- Cheese Mix: Mixing cheddar with mozzarella gives the best of both worlds—flavor and stretch. If you love spice, pepper jack is a fun swap.
- Multi-task Like a Pro: While the meat cools, prep your cheese and roll out the dough. Assembly goes much faster this way.
- Watch the Bake: Ovens run hot and cold. Start checking at 12 minutes. The sticks should be golden on top and bubbling at the seams.
- Personal Fail: The first time I made these, I let the filling get too close to the edge—major cheese lava in the oven. Now I always leave a border and use parchment paper for easy cleanup.
- Make Ahead: You can assemble the sticks a few hours ahead, cover, and refrigerate. Bake just before serving for the best texture.
Consistency is key for this taco sticks recipe. If you want crispier sticks, brush the tops with extra butter halfway through baking. For softer, pillowy bread, cover the pan loosely with foil for the first 8 minutes, then finish uncovered. And if you need to keep them warm for a party, just pop them in a 200°F (93°C) oven until ready to serve—no soggy breadsticks here!
Variations & Adaptations
Taco sticks are basically a blank canvas for flavor. Here are three of my favorite ways to change it up:
- Vegetarian Taco Sticks: Skip the meat and double the black beans and cheese. Add some corn, chopped bell peppers, or even sautéed mushrooms for more bite. Vegetarian friends always rave about this version!
- Spicy Jalapeño Cheddar: Add 1-2 tablespoons diced pickled jalapeños and swap some cheddar for pepper jack. Drizzle with hot sauce before serving if you’re a heat lover.
- Chicken Fajita Sticks: Use cooked, shredded chicken with fajita seasoning, strips of sautéed onion and bell pepper, and Monterey Jack cheese. It’s a lighter twist that works great for meal prep!
For dietary swaps, gluten-free pizza dough works well, though it’s a bit more delicate (just handle gently). You can use dairy-free cheese shreds if you’re avoiding dairy. My friend with a nut allergy makes these all the time—just check your taco seasoning for hidden allergens, and you’re good!
Personally, I love tossing in a handful of fresh chopped cilantro into the filling for a punch of flavor. Or, if I’m feeling fancy, I’ll brush the tops with a little chipotle butter. The base recipe is so forgiving—don’t be afraid to play around and make it your own!
Serving & Storage Suggestions
These taco sticks are at their absolute best served hot and fresh from the oven. That’s when the cheese is gooey, the bread is soft, and the flavors are popping. I like to pile them high on a platter with little bowls of salsa, guacamole, and ranch for dipping—super Pinterest-worthy, trust me!
They’re perfect alongside a simple salad, chips and queso, or even as a fun side to a big chili dinner. If you’re hosting a party, set them out with toothpicks for easy grabbing, and watch how quickly they disappear!
For storing leftovers (on the rare chance you have any!), let the taco sticks cool fully, then wrap tightly and refrigerate for up to 3 days. To reheat, pop them in a 350°F (175°C) oven for 8-10 minutes or use the air fryer for the best crispiness. You can also freeze unbaked sticks—just thaw and bake as usual, adding a few extra minutes if needed. The flavors actually get even better as they sit, so don’t be shy about making a double batch for easy lunches later in the week!
Nutritional Information & Benefits
Each taco stick (based on a batch of 10) comes in around 200-250 calories, with about 12g protein, 16g carbs, and 11g fat. That’s a pretty satisfying snack or light meal, especially for something so fun and portable!
The ground beef and cheese pack in protein and calcium, while beans add fiber and extra nutrients. Opting for lean turkey or chicken lightens things up. If you use gluten-free dough or dairy-free cheese, it’s easy to fit different dietary needs. Allergens include wheat and dairy—just adjust as needed for your family.
I love that these taco sticks are filling but not heavy, and they really hit the spot for a savory craving. They’re also a sneaky way to get kids to eat a little extra protein and fiber, especially when you tuck in beans or veggies. From a wellness perspective, I’d say these are a crowd-pleaser that you can feel good about sharing—everything in moderation, right?
Conclusion
If you’re looking for an appetizer that checks all the boxes—easy, cheesy, fun, and totally irresistible—this taco sticks recipe is it. It’s the kind of snack that turns a simple get-together into a party, and it’s always the first thing to vanish from the table. I honestly love how customizable it is, from the spice level to the filling, so you can make it your own every time.
Don’t be afraid to get creative—try different cheeses, add veggies, switch up the dip. That’s half the fun! I make these for everything from after-school snacks to big family gatherings, and they never disappoint. I hope you’ll fall in love with them just like we have.
Give this taco sticks recipe a try and let me know how you customize yours! Leave a comment, pin it for later, or share your own flavor twists. Happy baking, and may your parties always be cheesy and delicious!
Frequently Asked Questions about Taco Sticks
Can I make taco sticks ahead of time?
Yes! You can assemble the sticks up to 6 hours in advance, cover with plastic wrap, and refrigerate. Bake just before serving for the best flavor and texture.
What’s the best dipping sauce for taco sticks?
Salsa and guacamole are classic, but ranch, queso, or spicy chipotle mayo are all hits too. Let your crowd pick their favorites!
Can I freeze taco sticks?
Definitely. Freeze unbaked sticks on a tray, then transfer to a bag once solid. Bake from frozen, adding a couple extra minutes, or thaw first for even baking.
How do I make these taco sticks vegetarian?
Skip the meat and double the beans, or use a plant-based meat substitute. Add extra veggies like corn, peppers, or mushrooms for more flavor and texture.
What if I don’t have pizza dough?
Crescent roll dough, biscuit dough, or even homemade bread dough will work in a pinch. Just roll thin and watch the bake time—every dough is a little different!
PrintTaco Sticks Recipe – Easy Cheesy Appetizer for Parties

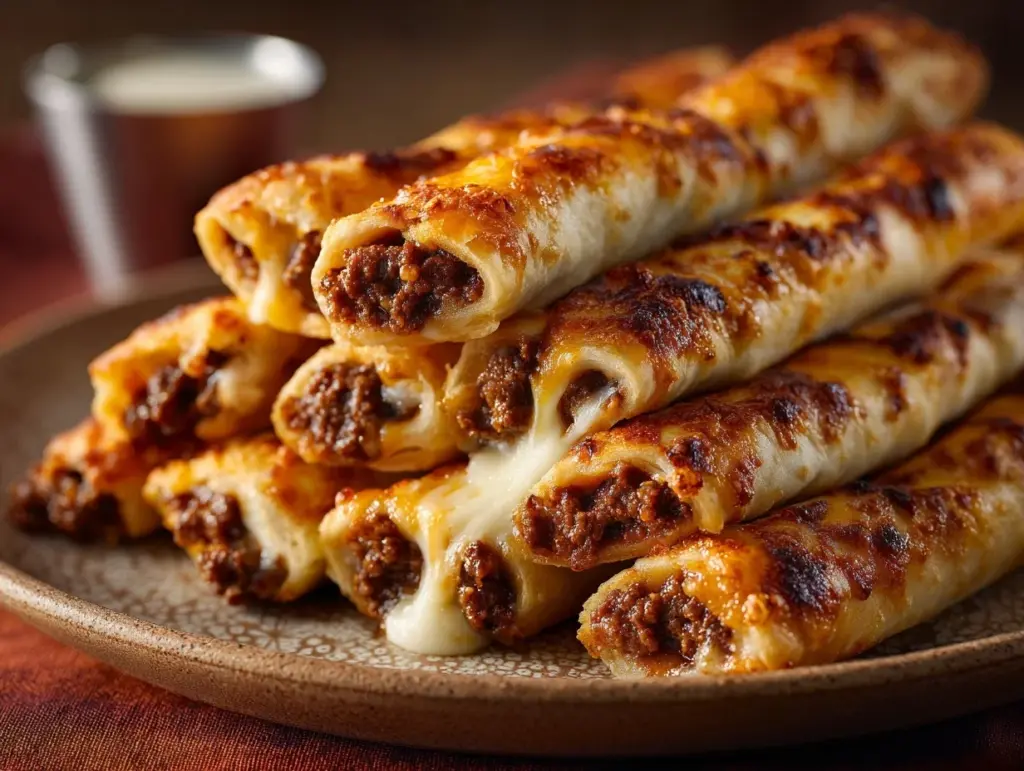
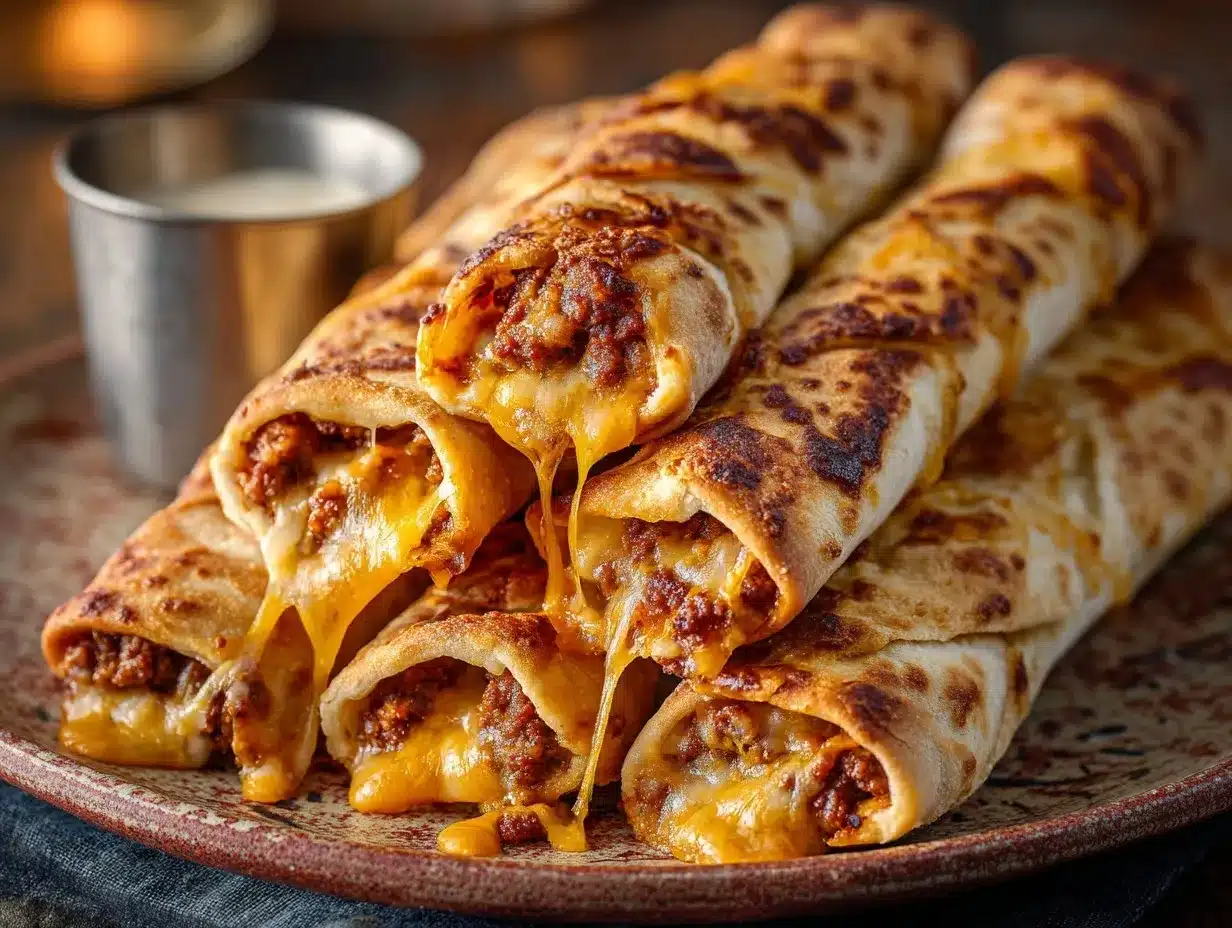
These taco sticks are a fun, cheesy appetizer that combines seasoned taco meat, gooey cheese, and golden pizza dough into irresistible finger food. Perfect for parties, game nights, or anytime you want a crowd-pleasing snack.
- Prep Time: 20 minutes
- Cook Time: 16 minutes
- Total Time: 36 minutes
- Yield: 8-10 sticks (about 4-5 servings) 1x
- Category: Appetizer
- Cuisine: Mexican-American
Ingredients
- 1 pound ground beef (or ground turkey)
- 1 packet (about 1 oz) taco seasoning (homemade or store-bought, low-sodium preferred)
- 1/3 cup water
- 1/2 cup canned black beans, drained and rinsed (optional)
- 1 1/2 cups shredded cheddar cheese (or Mexican blend)
- 1/2 cup shredded mozzarella cheese (optional)
- 1 tube (about 13.8 oz) refrigerated pizza dough (classic, thin, or crescent roll dough)
- Flour, for dusting
- 2 tablespoons unsalted butter, melted
- 1 teaspoon garlic powder
- 1 tablespoon chopped fresh cilantro or parsley (optional)
- Salsa (for dipping, optional)
- Sour cream (for dipping, optional)
- Guacamole (for dipping, optional)
- Ranch dressing (for dipping, optional)
Instructions
- Preheat your oven to 400°F (200°C). Line a baking sheet with parchment paper.
- Heat a large skillet over medium heat. Add ground beef (or turkey) and cook until browned, about 5-7 minutes. Drain excess fat.
- Add taco seasoning and water to the skillet. Stir and simmer for 2-3 minutes until thickened. If using black beans, stir them in now. Let the mixture cool for 5 minutes.
- Lightly flour your work surface. Unroll the pizza dough and roll it into a rectangle about 14×9 inches.
- Sprinkle the dough evenly with cheddar and mozzarella cheese.
- Spoon the cooled taco meat mixture in a line down the long side of the rectangle, leaving a 1/2-inch border.
- Fold the dough over the filling to form a log, pinching the edges to seal. Cut the log into 8-10 sticks, each about 1.5 inches wide.
- Place sticks seam-side down on the prepared baking sheet.
- Mix melted butter with garlic powder and brush over the tops of the sticks.
- Bake for 14-16 minutes, until golden and bubbly.
- Remove from oven and sprinkle with fresh cilantro or parsley, if using. Cool for 3-5 minutes before serving.
- Serve with salsa, sour cream, guacamole, or ranch for dipping.
Notes
Let the taco meat cool before assembling to prevent soggy dough. Don’t overfill the sticks to avoid leaks. For a vegetarian version, skip the meat and double the beans and cheese. You can assemble ahead and bake just before serving. For crispier bottoms, bake directly on the pan for the last 2 minutes.
Nutrition
- Serving Size: 1 stick
- Calories: 225
- Sugar: 2
- Sodium: 480
- Fat: 11
- Saturated Fat: 5
- Carbohydrates: 16
- Fiber: 2
- Protein: 12
Keywords: taco sticks, cheesy appetizer, party food, taco breadsticks, easy snack, game day, finger food, kid friendly, ground beef, pizza dough