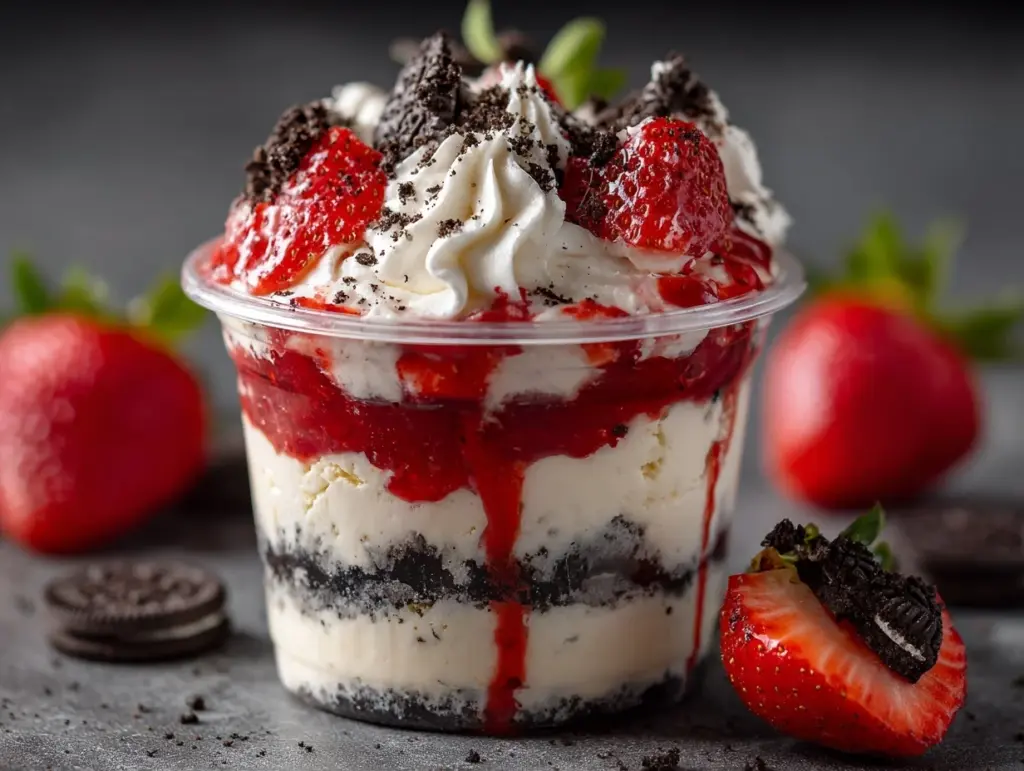
The first time I bit into a strawberry Oreo cheesecake cup, I swear my taste buds did a little happy dance. Imagine the creamy tang of cheesecake, the crunch of Oreo cookies, and fresh, juicy strawberries all in one dreamy dessert cup. It’s the kind of treat that stops you in your tracks, makes you close your eyes, and just savor the moment. I stumbled onto this recipe by accident—one night I was craving something sweet, but I didn’t want to commit to a whole cheesecake. Enter my irresistible strawberry Oreo cheesecake cup recipe—a quick, easy, and absolutely delightful solution.
I’ve made this dessert for birthday parties, lazy Sunday afternoons, and even as a surprise for my kids after a tough school week. Each time, it’s met with huge smiles and requests for seconds (sometimes thirds!). There’s something about the combo of cookies, fruit, and fluffy cheesecake that wins everyone over. Plus, it’s totally doable even if you’re not a baking whiz—you don’t need to fuss with a water bath or fancy pans.
This strawberry Oreo cheesecake cup recipe is perfect for busy families, last-minute guests, or anyone who just wants an easy, crowd-pleasing dessert. I’ve tested it more times than I can count, tweaking the ratios and methods until it hit that perfect balance of creamy and crunchy, sweet and tangy. Trust me, you’ll want to keep this one handy for any dessert emergency (or just a Tuesday night treat!).
If you love strawberry desserts, Oreo cookies, or cheesecake in any form, this recipe is going to be your new go-to. I can’t wait to share all my tips, tricks, and personal secrets for making these dreamy strawberry Oreo cheesecake cups just right.
Why You’ll Love This Recipe
- Quick & Easy: These strawberry Oreo cheesecake cups come together in about 20 minutes. No oven, no complicated steps—just mix, layer, and chill.
- Simple Ingredients: Nothing fancy required. You probably have most of what you need in your kitchen already.
- Perfect for Any Occasion: Whether it’s a picnic, potluck, sleepover, or just a “treat yourself” kind of day, this dessert fits right in.
- Crowd-Pleaser: Kids love the cookies, adults love the creamy cheesecake—everyone’s happy. I’ve even had folks who claim they “don’t like cheesecake” ask for seconds!
- Unbelievably Delicious: The combination of crunchy Oreo base, fluffy cheesecake filling, and juicy strawberries is pure magic. It’s comfort food that feels a little fancy without any stress.
This strawberry Oreo cheesecake cup recipe stands out because of its layered texture and the way the flavors play together. The secret? I blend the Oreo cookies into a fine crumb for that melt-in-your-mouth base, then whip the cream cheese until it’s extra light and fluffy. Instead of just plopping cut strawberries on top, I toss them with a touch of sugar and lemon for a bright, fresh finish.
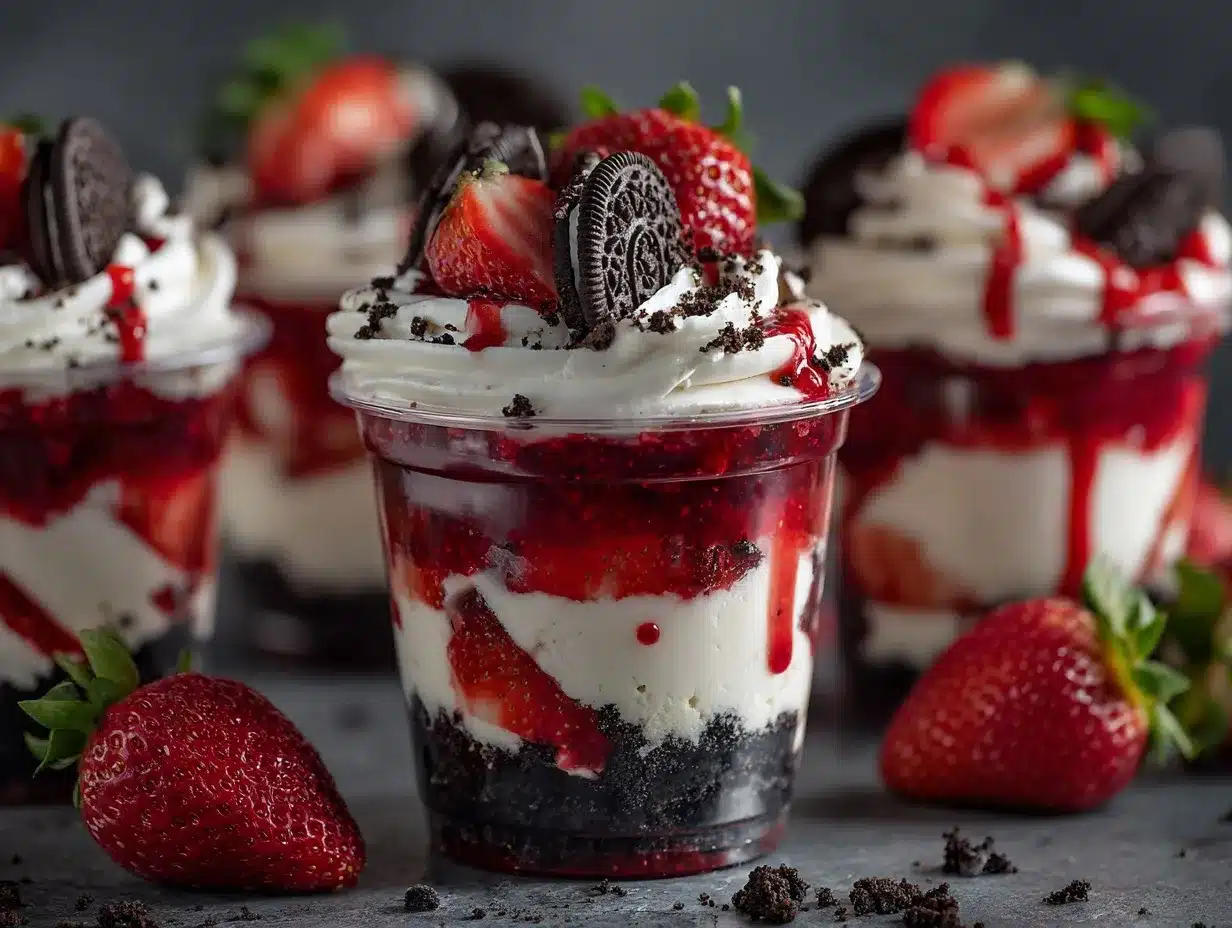
What makes these cheesecake cups so special is how customizable they are—you can make them ahead, scale the batch up or down, and play with the mix-ins. Plus, you don’t need to stress about slicing and serving a messy cheesecake. Everyone gets their own pretty little cup (and honestly, who doesn’t love their own dessert?).
Honestly, these strawberry Oreo cheesecake cups are the kind of treat that makes you pause and appreciate the simple joys. It’s the best of all worlds—crunchy, creamy, fruity, and just a little bit decadent. After trying a ton of different cheesecake recipes, this is the one my family requests most often. I hope you’ll love it as much as we do!
What Ingredients You Will Need
This strawberry Oreo cheesecake cup recipe uses simple, everyday ingredients to pack in big flavor and dreamy texture. No complicated shopping list here—just pantry staples and a few fresh favorites.
- Oreo Cookies (12 cookies, about 120g): These form the crunchy, chocolatey base. I like using classic Oreos, but you can try Golden Oreos for a twist.
- Unsalted Butter (3 tablespoons, 42g, melted): Helps bind the Oreo crumbs together. If you’re dairy-free, swap in coconut oil.
- Cream Cheese (1 block, 8 oz or 225g, room temperature): The star of the cheesecake layer. Let it sit out for 30 minutes for easy mixing.
- Powdered Sugar (1/3 cup, 40g): Sweetens the cheesecake filling without making it gritty.
- Pure Vanilla Extract (1 teaspoon): Adds warmth and depth to the creamy layer. I love Nielsen-Massey, but any good vanilla works.
- Heavy Whipping Cream (1/2 cup, 120ml, cold): Whipped in for a fluffier, mousse-like texture. You could use a coconut-based whipping cream for a dairy-free option.
- Fresh Strawberries (1 1/2 cups, about 225g, hulled and diced): Juicy, sweet, and just a little tart. If strawberries aren’t in season, try raspberries or even peaches.
- Granulated Sugar (1 tablespoon, 12g): Optional, for tossing with strawberries if they need a little extra sweetness.
- Lemon Juice (1 teaspoon): Brightens up the strawberries and cuts the richness. Fresh is best, but bottled works in a pinch.
Optional Toppings:
- Extra Oreo crumbs or mini Oreos for garnish
- Whipped cream for a pretty swirl (homemade or store-bought)
- Chocolate shavings for an extra decadent touch
Ingredient tips: For the best cheesecake texture, always use full-fat cream cheese. If you’re gluten-free, check your Oreos (there’s a GF version now!). Vegan? Use a dairy-free cream cheese and plant-based cream—just keep in mind the flavor will change a little. I’ve found that even the simplest ingredients shine in this recipe, especially when you use ripe, in-season strawberries.
Honestly, there’s no shame in using what you have. I’ve made these with frozen strawberries (thaw and drain first), low-fat cream cheese (a bit less rich), and even tried them with chocolate sandwich cookies from the store brand. It always works out deliciously!
Equipment Needed
- Mixing Bowls: You’ll need at least two—one for the cookie base, another for the cheesecake filling. I’ve used glass and stainless steel, both work fine.
- Hand Mixer or Stand Mixer: Whipping the cream cheese and cream is way easier with a mixer. If you’re using a stand mixer, use the paddle for cream cheese, then switch to the whisk for cream.
- Food Processor or Rolling Pin: For crushing Oreos, a food processor makes quick work of it, but a zip-top bag and rolling pin work just as well (and it’s fun for kids!).
- Measuring Cups and Spoons: Precision matters for cheesecake! Even after years of baking, I still double-check my measurements.
- Rubber Spatula: Great for scraping every last bit of cheesecake filling out of the bowl.
- Small Dessert Cups or Jars (6-8 oz each): Mason jars, ramekins, or even clear plastic cups for parties. If you’re in a pinch, wine glasses look extra cute.
- Spoon or Small Offset Spatula: For layering and smoothing the fillings.
Don’t sweat it if you don’t have a food processor—smashing cookies by hand is oddly satisfying (just don’t let the bag burst!). I’ve made these with dollar-store measuring cups and thrifted glass jars, so you definitely don’t need fancy tools. If you use glassware, be gentle when layering to keep those pretty sides clean for your Pinterest-worthy photos!
Preparation Method
-
Crush the Oreo Cookies:
Place 12 Oreo cookies into a food processor and pulse until you get fine crumbs. No food processor? Put the cookies in a zip-top bag and crush them with a rolling pin or heavy saucepan. You want the crumbs to look like potting soil—dark, crumbly, no big chunks. -
Mix in Melted Butter:
Pour 3 tablespoons (42g) melted butter into the cookie crumbs. Stir until the crumbs are evenly moistened. The mixture should clump together when pressed with a spoon. -
Divide the Base:
Spoon about 2 tablespoons of the Oreo crumb mixture into the bottom of each dessert cup (6-8 oz size). Press down firmly with the back of a spoon or your fingers to create a compact layer. Pop the cups in the fridge to firm up while you work on the filling. -
Make the Cheesecake Filling:
In a large bowl, beat 8 oz (225g) room-temperature cream cheese with a hand mixer on medium speed until smooth—about 1 minute. Add 1/3 cup (40g) powdered sugar and 1 teaspoon vanilla extract. Beat until fully combined and fluffy, scraping down the sides once or twice. -
Whip the Cream:
In a separate bowl, whip 1/2 cup (120ml) cold heavy whipping cream until stiff peaks form—about 3-4 minutes. Don’t overwhip or it can turn grainy (it should look smooth and hold its shape). If you’re using a stand mixer, don’t walk away! -
Fold Whipped Cream Into Cheesecake:
Gently fold the whipped cream into the cream cheese mixture with a spatula, using big, slow strokes. This keeps the filling light and airy. If you overmix, it can deflate—so take your time. -
Layer the Cheesecake:
Spoon about 1/4 cup of the cheesecake filling over each Oreo base. Smooth the tops with a spoon or offset spatula. If you want extra neat layers, use a piping bag or a zip-top bag with the corner snipped off. -
Prepare the Strawberries:
Hull and dice 1 1/2 cups (225g) fresh strawberries. Toss with 1 tablespoon (12g) sugar and 1 teaspoon lemon juice in a bowl. Let sit for 5-10 minutes until the berries are juicy and glossy. If your strawberries are already super sweet, you can skip the sugar. -
Top and Garnish:
Spoon a generous layer of strawberries over each cheesecake cup. Add extra Oreo crumbs, whipped cream, or chocolate shavings if you’re feeling fancy. -
Chill and Serve:
Refrigerate the assembled cups for at least 1 hour for the best texture (if you’re in a rush, 30 minutes will do). The flavors meld and the filling sets up nicely—so don’t skip this step if you can help it! Serve chilled and enjoy every dreamy bite.
Troubleshooting Tips: If your cheesecake filling looks lumpy, your cream cheese might have been too cold. Let it come to room temp next time. If the base is too crumbly, add another teaspoon of melted butter. Don’t worry—these cups are very forgiving!
Personal Note: I always make a double batch—these disappear fast. Plus, they keep well in the fridge for a couple days, so you can sneak a bite whenever you need a little pick-me-up.
Cooking Tips & Techniques
- Room Temperature Cream Cheese: Cold cream cheese leads to lumpy filling. I learned that the hard way—once, my filling looked like cottage cheese. Now, I always let it sit out for at least 30 minutes before starting.
- Don’t Overwhip! When whipping the cream, stop as soon as you see stiff peaks. If you go too far, it’ll turn to butter. I’ve done it—trust me, it’s not pretty.
- Use Fresh Strawberries When Possible: They give the best flavor and texture. If using frozen, thaw completely and drain well to avoid making the top layer watery.
- Layering for Looks: For Pinterest-perfect presentation, use clear cups or jars and layer carefully. Wipe the insides of the cups with a paper towel if you get smudges. Looks matter!
- Batching Tips: You can double or triple this recipe for a crowd or halve it for a quiet night in. The proportions stay the same—just use bigger bowls.
- Make Ahead: These hold up beautifully in the fridge for up to 2 days. I sometimes prep the cookie base and cheesecake filling ahead, then assemble just before serving for the freshest results.
- Consistency Counts: Don’t rush the chilling. An hour in the fridge really does make the texture firmer and the flavor deeper.
Honestly, I’ve messed up every step at least once—lumpy filling, runny cream, strawberries that were too tart. But here’s the thing: it always turns out tasty. Cheesecake cups are forgiving, so don’t stress about perfection. The little quirks just make them more homemade and irresistible!
Variations & Adaptations
- Gluten-Free: Use gluten-free Oreo-style cookies (they’re everywhere now!) and double-check your cream cheese and vanilla extract labels.
- Vegan: Swap in dairy-free cream cheese, coconut or soy-based whipping cream, and plant-based butter. The filling will be slightly tangier—still delicious!
- Chocolate Strawberry: Add 2 tablespoons cocoa powder to the cheesecake filling for an extra chocolatey twist, or swirl in a tablespoon of melted chocolate before layering.
- Lemon Berry: Add the zest of one lemon to the cheesecake filling and top with a mix of strawberries and blueberries for a bright, summery vibe.
- Mini Cheesecake Bites: Spoon the mixture into mini muffin liners for bite-sized party snacks. Just freeze until set and peel off the liners before serving.
- Allergen-Friendly: For nut allergies, this recipe is naturally nut-free (always check your labels just in case). Dairy allergy? Go for those vegan swaps mentioned above.
I once tossed in a handful of mini chocolate chips between the cheesecake and strawberry layers—my kids now demand it every time. You can also try swapping in crushed graham crackers or shortbread cookies for the base if Oreos aren’t your thing. The possibilities are endless, and honestly, experimenting is half the fun!
Serving & Storage Suggestions
These strawberry Oreo cheesecake cups are best served chilled. I like to add a little whipped cream and a sprinkle of Oreo crumbs on top, just before serving, for a picture-perfect presentation. If you’re feeling fancy, a mint sprig or a drizzle of strawberry sauce takes it up a notch.
Pair with a cup of coffee, a glass of cold milk, or even a bubbly rosé if you’re celebrating. For parties, set up a dessert bar with extra toppings—mini chocolate chips, crushed nuts, or mixed berries—so everyone can customize their cup.
To store, cover each cup tightly with plastic wrap or lids and keep in the refrigerator for up to 2 days. If you plan to keep them longer, freeze the assembled cups (without strawberries) for up to a month. Thaw overnight in the fridge, then add fresh strawberries just before serving.
Reheating isn’t needed—these are meant to be enjoyed cold. If the strawberries release extra juice, just spoon it off before serving. Honestly, the flavors get even better after a day as everything melds together—just watch out, they tend to disappear fast!
Nutritional Information & Benefits
Each strawberry Oreo cheesecake cup (serving size: 1 cup) contains approximately:
- Calories: 310
- Fat: 19g
- Saturated Fat: 11g
- Carbohydrates: 32g
- Sugar: 21g
- Protein: 4g
Thanks to fresh strawberries, you’ll get a dose of vitamin C and antioxidants, while the cream cheese offers a bit of protein and calcium. This recipe can be made gluten-free and vegetarian with the right swaps. If you have dairy or gluten allergies, just follow the adaptation tips above.
From a wellness perspective, this isn’t an everyday snack, but it’s a lovely treat for special moments. I love that you can control the portion size and sweetness, and the strawberries give a fresh, wholesome balance to the creamy and crunchy elements.
Conclusion
If you’re looking for a dessert that’s easy, eye-catching, and downright irresistible, this strawberry Oreo cheesecake cup recipe is it. It’s simple enough for busy weeknights but impressive enough for special occasions. The layers of crunchy Oreos, dreamy cheesecake, and juicy strawberries are guaranteed to make everyone smile.
Don’t be afraid to make it your own—switch up the fruit, try a different cookie base, or add your favorite toppings. That’s what makes this recipe so much fun (and why I keep coming back to it). Honestly, it’s the dessert I turn to when I want something that feels special without a ton of fuss.
I’d love to hear how your strawberry Oreo cheesecake cups turn out! Leave a comment below, share your own twists, or tag me if you post your dreamy dessert on Pinterest. You’re going to love every creamy, crunchy, berry-filled bite—promise!
FAQs
Can I make strawberry Oreo cheesecake cups ahead of time?
Yes! You can prep these up to 2 days in advance. Just keep them covered in the fridge and add fresh strawberries right before serving for the best texture.
What if I don’t have fresh strawberries?
You can use thawed, well-drained frozen strawberries or swap in other berries like raspberries or blueberries. The flavor will change a bit, but it’s always delicious.
Can I use low-fat cream cheese?
You can, but the filling will be a little less rich and creamy. Full-fat works best for that classic cheesecake texture, but low-fat is still tasty if you’re looking to lighten things up.
Are these cheesecake cups gluten-free?
They can be! Just use gluten-free Oreo-style cookies and double-check the labels on your other ingredients. The rest of the recipe is naturally gluten-free.
How long do leftovers last?
Stored in the fridge, these strawberry Oreo cheesecake cups keep well for up to 2 days. If you want to freeze them, leave off the strawberry topping and add it fresh after thawing.
Pin This Recipe!
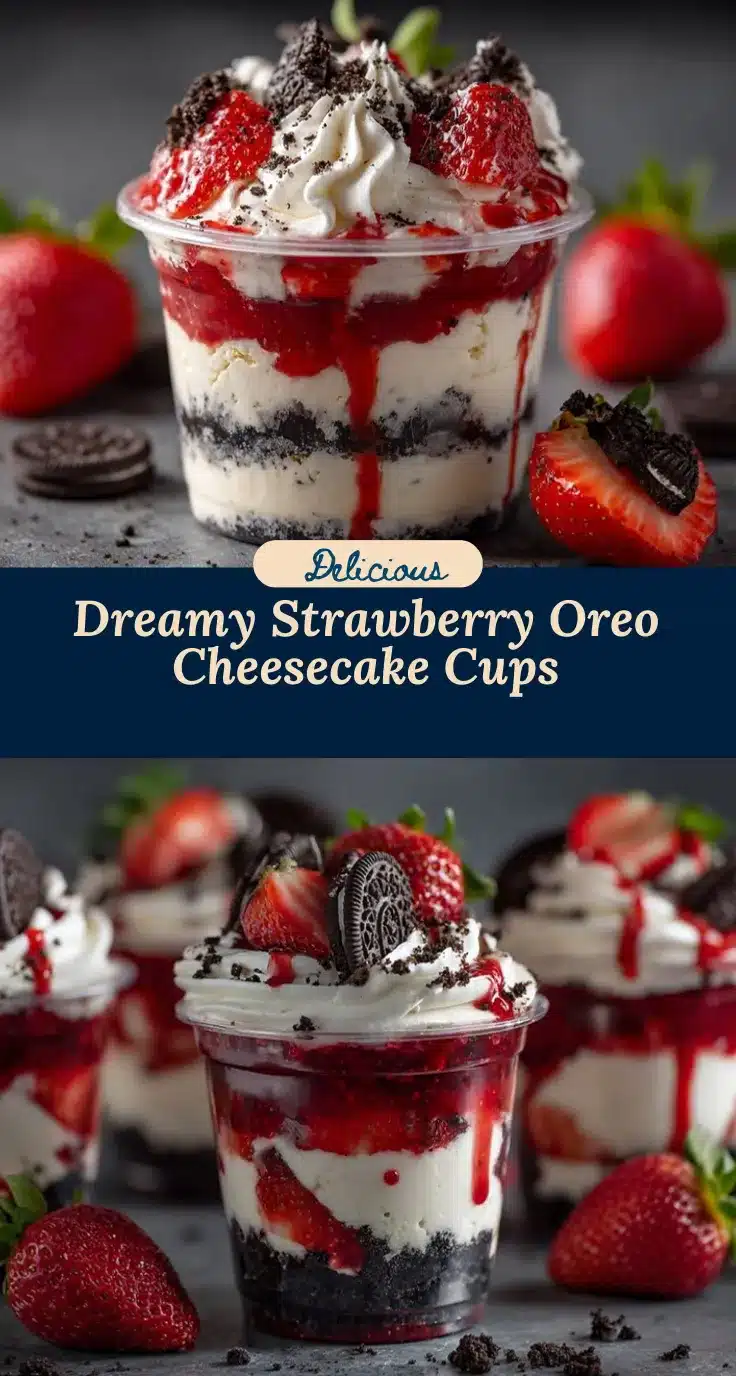
Strawberry Oreo Cheesecake Cup

These Strawberry Oreo Cheesecake Cups are a quick, no-bake dessert featuring layers of crunchy Oreo cookie base, creamy cheesecake filling, and juicy strawberries. Perfect for parties or a weeknight treat, they come together in about 20 minutes and are always a crowd-pleaser.
- Prep Time: 20 minutes
- Cook Time: 0 minutes
- Total Time: 1 hour 20 minutes (includes chilling)
- Yield: 6 servings 1x
- Category: Dessert
- Cuisine: American
Ingredients
- 12 Oreo cookies (about 120g)
- 3 tablespoons unsalted butter, melted (42g)
- 8 oz (225g) cream cheese, room temperature
- 1/3 cup powdered sugar (40g)
- 1 teaspoon pure vanilla extract
- 1/2 cup heavy whipping cream (120ml), cold
- 1 1/2 cups fresh strawberries (about 225g), hulled and diced
- 1 tablespoon granulated sugar (12g, optional, for strawberries)
- 1 teaspoon lemon juice
- Optional toppings: extra Oreo crumbs or mini Oreos, whipped cream, chocolate shavings
Instructions
- Place Oreo cookies in a food processor and pulse until fine crumbs form. Alternatively, crush cookies in a zip-top bag with a rolling pin.
- Stir melted butter into the cookie crumbs until evenly moistened and the mixture clumps together.
- Spoon about 2 tablespoons of the Oreo mixture into the bottom of each dessert cup (6-8 oz size) and press down firmly to form a base. Chill cups in the fridge while preparing the filling.
- In a large bowl, beat cream cheese with a hand mixer on medium speed until smooth, about 1 minute. Add powdered sugar and vanilla extract, then beat until fluffy and fully combined.
- In a separate bowl, whip cold heavy cream until stiff peaks form, about 3-4 minutes.
- Gently fold the whipped cream into the cream cheese mixture with a spatula, using slow strokes to keep the filling light and airy.
- Spoon about 1/4 cup of the cheesecake filling over each Oreo base and smooth the tops.
- Hull and dice strawberries. Toss with granulated sugar and lemon juice in a bowl. Let sit for 5-10 minutes until juicy and glossy.
- Spoon a generous layer of strawberries over each cheesecake cup. Add optional toppings if desired.
- Refrigerate the assembled cups for at least 1 hour before serving for best texture. Serve chilled.
Notes
For best results, use full-fat cream cheese and let it come to room temperature before mixing. Don’t overwhip the cream. These cups can be made gluten-free with GF Oreo-style cookies and can be made ahead up to 2 days. Chill for at least 1 hour for the best texture. Optional toppings like whipped cream, extra Oreo crumbs, or chocolate shavings add a fun touch.
Nutrition
- Serving Size: 1 cup (1/6 of recipe)
- Calories: 310
- Sugar: 21
- Sodium: 210
- Fat: 19
- Saturated Fat: 11
- Carbohydrates: 32
- Fiber: 1
- Protein: 4
Keywords: strawberry cheesecake cups, Oreo cheesecake, no-bake dessert, easy cheesecake, party dessert, summer dessert, individual cheesecake, strawberry Oreo dessert


