The first time I pulled a batch of chocolate chip cheesecake bars from the oven, the sweet, buttery aroma was so inviting I almost dove in headfirst—patience isn’t my strong suit around dessert! These bars are what happens when creamy cheesecake, gooey chocolate chips, and a soft cookie base decide to team up for the ultimate dessert treat. If you love chocolate chip cookies and adore cheesecake (don’t we all?), this recipe is basically your dessert soul mate.
I actually stumbled onto chocolate chip cheesecake bars during a family game night. I needed something easy, quick, and guaranteed to silence the “Is it ready yet?” chorus from the kids. After a few rounds of tweaking—less sugar here, a splash of vanilla there—I landed on this easy dessert bar recipe that’s now a full-on family favorite. Trust me, I’ve made these at least twenty times, and every batch disappears in record speed. Whether you’re hosting a holiday party or just want a sweet treat for movie night, these bars deliver.
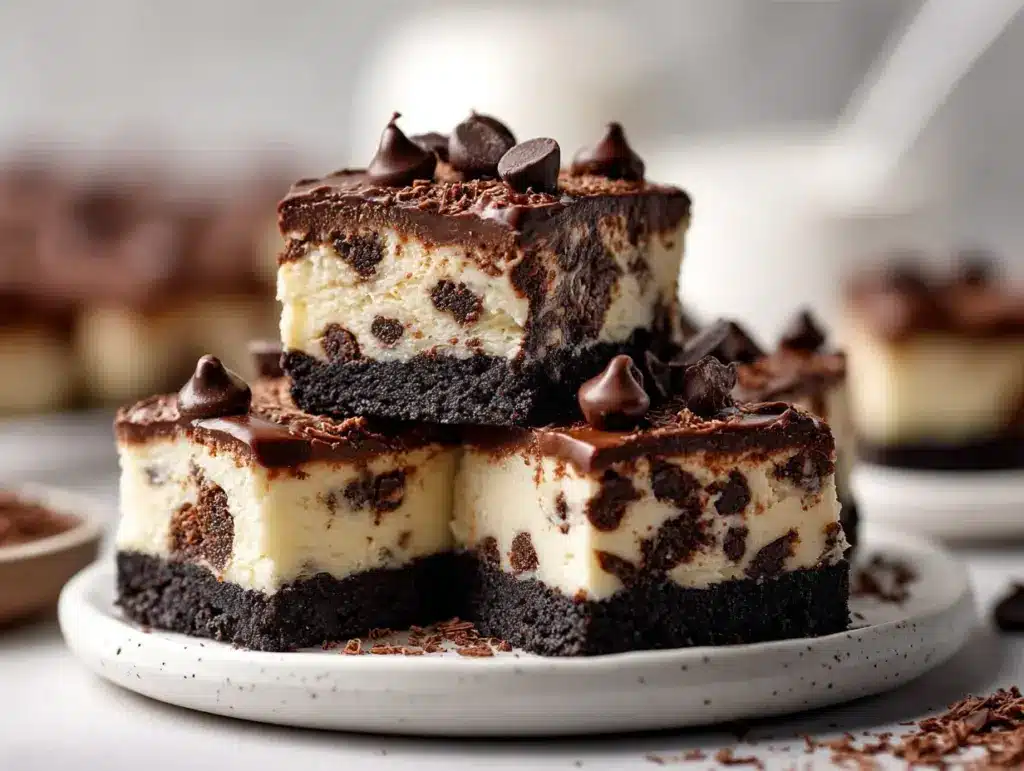
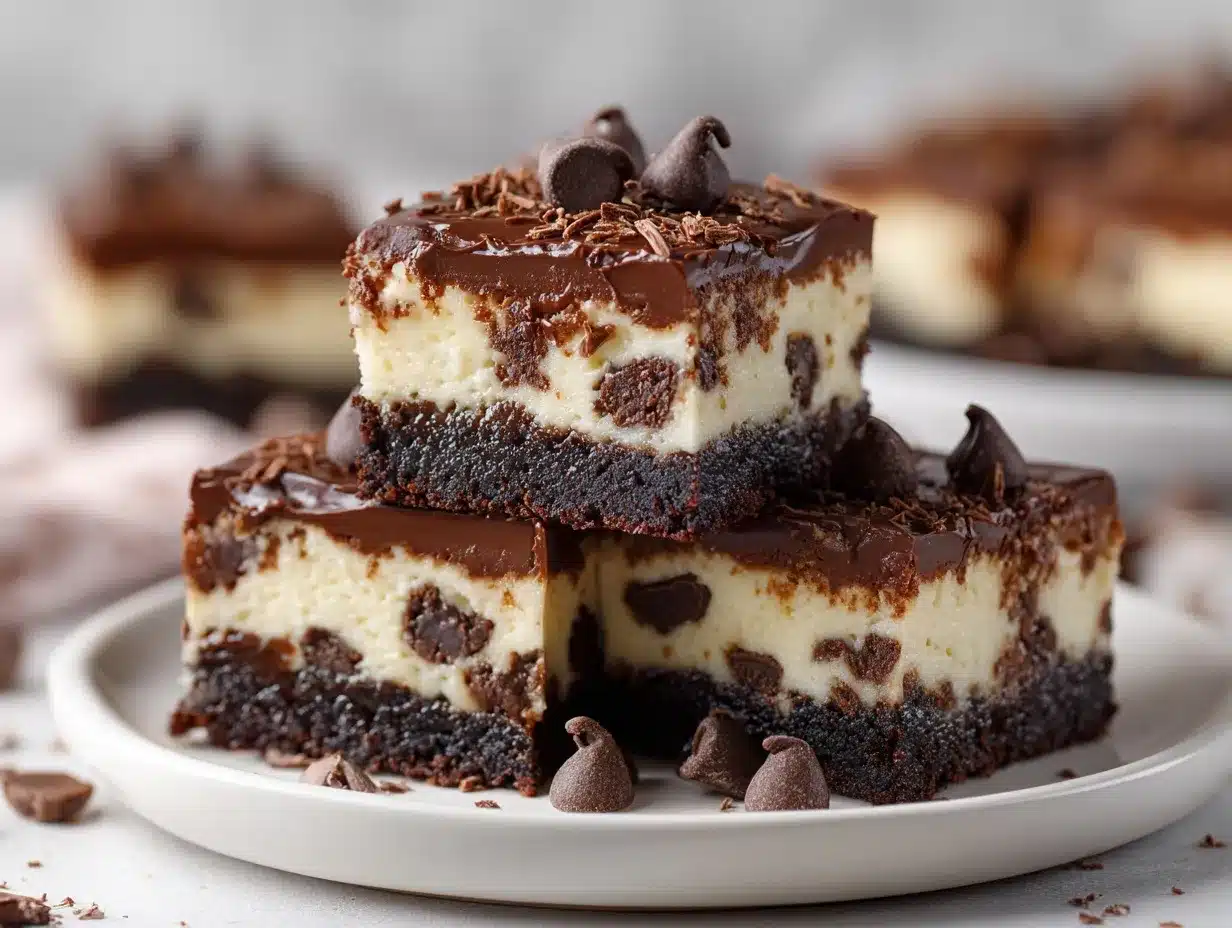
What I love most about chocolate chip cheesecake bars is their versatility. They’re simple enough for a weeknight, but decadent enough for a special occasion. The layers are pure magic: a chewy cookie base, a creamy cheesecake center, and a sprinkle of chocolate chips to finish. It’s comfort food and celebration all in one bite. Plus, you don’t need any fancy ingredients or equipment—just a craving for something sweet. If you’re looking for a dessert that’ll impress guests (or just your own taste buds), this is it!
Why You’ll Love This Chocolate Chip Cheesecake Bars Recipe
Let’s be honest, there are about a million dessert bar recipes out there, but these chocolate chip cheesecake bars stand out for so many reasons. After years of baking for picky eaters and dessert lovers alike, I can safely say this is one of those rare recipes that ticks every box.
- Quick & Easy: You can mix, assemble, and bake these bars in under an hour. No water bath, no complicated steps—just straightforward deliciousness.
- Simple Ingredients: Everything you need is probably already in your pantry or fridge. No last-minute grocery runs required.
- Perfect for Parties: These bars cut cleanly and travel well, making them a superstar for potlucks, bake sales, or birthday parties.
- Crowd-Pleaser: Kids cheer, grown-ups swoon. Every time I bring these out, there’s a happy silence followed by “Can I have another?”
- Unbelievably Delicious: The combination of soft cookie, creamy cheesecake, and melty chocolate is just unbeatable. Seriously, you’ll want to savor every bite.
What makes this chocolate chip cheesecake bars recipe different? I use a little trick—softened cream cheese blended super smooth, plus mini chocolate chips so you get chocolate in every bite. The cookie dough is just sweet enough, so it balances the tangy cheesecake perfectly. And if you’re wondering whether this is a “special occasion only” treat, nope! It’s easy enough for an everyday dessert fix but impressive enough for your fanciest gatherings.
Honestly, these bars are the kind of dessert that brings people together. Whether you’re celebrating, commiserating, or just treating yourself after a long day, they’re the edible version of a warm hug. I’ve lost count of the times these saved my reputation at a potluck or helped me win over a skeptical dessert doubter. If you’re ready to become everyone’s favorite baker, this is your recipe!
What Ingredients You Will Need
This chocolate chip cheesecake bars recipe uses everyday ingredients that transform into something extraordinary. Here’s what you’ll need (and a few tips I’ve picked up after baking these a zillion times):
- For the Cookie Base and Topping:
- 2 1/4 cups (280g) all-purpose flour (sifted for best texture)
- 1/2 teaspoon baking soda
- 1/2 teaspoon salt
- 3/4 cup (170g) unsalted butter, melted and cooled (adds richness and chewiness)
- 1 cup (200g) packed light brown sugar (for that caramel flavor)
- 1/4 cup (50g) granulated sugar
- 1 large egg, room temperature
- 2 teaspoons pure vanilla extract (I love Nielsen-Massey for the best aroma)
- 1 cup (170g) mini semi-sweet chocolate chips (mini chips mean more chocolate in every bite!)
- For the Cheesecake Layer:
- 8 oz (225g) cream cheese, softened (full-fat for creaminess; I use Philadelphia most often)
- 1/4 cup (50g) granulated sugar
- 1 large egg, room temperature
- 1 teaspoon pure vanilla extract
Ingredient Tips & Substitutions:
- If you need to make this gluten-free, swap the all-purpose flour for a trusted 1:1 gluten-free baking blend (like King Arthur).
- Dairy-free? Try plant-based cream cheese and vegan butter—results are slightly different, but still delicious.
- For a nutty twist, add 1/2 cup chopped toasted pecans or walnuts to the cookie base.
- If you only have regular-sized chocolate chips, give them a rough chop for better distribution.
- Don’t skimp on the vanilla—it really brings everything together!
Honestly, the best part is you can tweak as needed. I’ve even tossed in peanut butter chips or swirled a little raspberry jam into the cheesecake layer for fun. Make it your own, or keep it classic—either way, you’re in for a treat.
Equipment Needed
You don’t need a fancy kitchen to whip up these easy dessert bars. Here’s what I always use:
- 9×9-inch (23x23cm) square baking pan (metal or glass; metal gives crispier edges)
- Parchment paper (makes removing the bars a breeze)
- Mixing bowls (one large, one medium)
- Hand mixer or stand mixer (for the smoothest cheesecake layer; a sturdy whisk works in a pinch)
- Rubber spatula (for scraping every bit of goodness out of the bowls)
- Measuring cups and spoons (accuracy matters with baking!)
- Offset spatula or the back of a spoon (for spreading layers evenly)
- Wire rack (for cooling)
If you only have an 8×8-inch pan, you can use it—the bars will just be a bit thicker, so adjust baking time slightly. I’ve baked these in glass pans and metal ones; just be aware that glass may require a couple extra minutes in the oven. Parchment paper is my secret for neat, easy slicing—don’t skip it if you want photo-worthy bars!
My hand mixer has survived many a cheesecake bar adventure, but you could go old school with a whisk and strong arms. For budget-friendly tools, I love OXO and Wilton—durable and wallet-friendly.
Preparation Method
- Prepare your pan: Line a 9×9-inch (23x23cm) baking pan with parchment paper, leaving a little overhang for easy lifting later. Preheat your oven to 350°F (175°C).
- Make the cookie base: In a large mixing bowl, whisk together 2 1/4 cups (280g) all-purpose flour, 1/2 teaspoon baking soda, and 1/2 teaspoon salt. Set aside.
- In another bowl, whisk together 3/4 cup (170g) melted butter, 1 cup (200g) light brown sugar, and 1/4 cup (50g) granulated sugar until smooth. Add 1 egg and 2 teaspoons vanilla, mixing well.
- Gradually add the dry ingredients to the wet mixture, stirring until just combined. The dough will be thick—don’t overmix! Fold in 3/4 cup (128g) mini chocolate chips, reserving the remaining 1/4 cup for topping.
- Press about 2/3 of the cookie dough evenly into the bottom of your prepared pan. Use the bottom of a measuring cup or your hands (a little butter on your fingers helps prevent sticking). Reserve the rest for topping.
- Make the cheesecake layer: In a medium bowl, beat 8 oz (225g) softened cream cheese with 1/4 cup (50g) sugar until smooth and creamy (about 2 minutes). Add 1 egg and 1 teaspoon vanilla and mix until just combined—don’t overbeat or the cheesecake may crack.
- Pour the cheesecake mixture over the cookie base. Gently spread it to the edges with an offset spatula or the back of a spoon.
- Drop small blobs of the remaining cookie dough on top of the cheesecake layer. It doesn’t need to cover completely—some cheesecake peeking through looks beautiful! Sprinkle the reserved chocolate chips over the top.
- Bake for 32-36 minutes, or until the edges are golden and the center looks set but still slightly jiggly. If your oven runs hot, check at 30 minutes. (A toothpick inserted into the cheesecake should come out mostly clean.)
- Remove from the oven and cool completely in the pan on a wire rack—this is the hardest part! For clean bars, chill in the fridge for at least 2 hours before slicing.
- Lift out using the parchment overhang, slice into 16 squares, and serve.
Troubleshooting: If your cheesecake layer cracks, it’s probably from overmixing or overbaking. If the bars seem too gooey, chill longer before slicing—the layers firm up as they cool. And remember, a little imperfection is totally normal (and delicious) here!
My tip: For super-neat slices, wipe your knife with a damp cloth between cuts. If you want extra gooey bars, underbake by 1-2 minutes and let them set up in the fridge. So good!
Cooking Tips & Techniques
After countless batches of chocolate chip cheesecake bars—some perfect, some hilariously messy—I’ve got a few tips up my sleeve to help you bake with confidence:
- Room Temperature Ingredients: Let your eggs and cream cheese warm up before mixing. Cold ingredients can lead to lumpy cheesecake and uneven texture.
- Don’t Overmix: Mix everything just until combined. Overbeating the cheesecake layer can cause cracks or a dense texture. Trust me, I learned this the hard way!
- Layer Evenly: Spreading the base and cheesecake layers as evenly as possible helps the bars bake uniformly. Use a small offset spatula or the back of a spoon for best results.
- Watch the Bake Time: All ovens are a little different, so start checking at the early end of the baking window. The bars should look set at the edges and slightly jiggly in the center—that means they’ll finish setting as they cool.
- Cool Completely: I know it’s tough, but letting the bars cool and chill makes all the difference. Warm bars can fall apart (been there!), but chilled bars slice like a dream.
- Multitasking: While the bars bake, I use the time to clean up or prep another dish. That way, dessert feels like less of a mess and more of a reward.
- Consistency: Measure your flour by spooning it into the cup and leveling off. Packing flour can lead to dry, crumbly bars, and nobody wants that.
- Personal Oops: Once, I overbaked a batch by 10 minutes and the bars were dry—still tasty, but not that magic texture. Lesson learned: set a timer and trust your nose!
With these little tricks, you’ll get bakery-worthy chocolate chip cheesecake bars every single time. And hey, if they’re a little messy, they’ll still taste amazing—promise!
Variations & Adaptations
One of the best things about this chocolate chip cheesecake bars recipe is how easy it is to make it your own. Here are some tasty twists and practical swaps:
- Gluten-Free: Use a 1:1 gluten-free baking flour in place of all-purpose. King Arthur or Bob’s Red Mill are my go-to brands. The texture stays surprisingly soft!
- Peanut Butter Swirl: Drop dollops of peanut butter on top of the cheesecake layer before adding the cookie dough blobs. Swirl gently with a knife for a nutty kick.
- Seasonal Flavor: In fall, stir in a teaspoon of pumpkin pie spice to the cookie dough and top with a sprinkle of cinnamon sugar. For summer, try folding in some fresh raspberries to the cheesecake layer.
- Dairy-Free: Swap in plant-based cream cheese and vegan butter, and use dairy-free chocolate chips—enjoy Life and Miyoko’s are solid choices. Just note, the bars will be slightly softer.
- Nutty Bars: Add 1/2 cup of chopped pecans, walnuts, or almonds into the cookie dough for extra crunch.
- Personal Favorite: Once, I added a handful of chopped dried cherries to the cheesecake layer, and whoa—it was like Black Forest bars! Highly recommend if you love a little sweet-tart action.
Don’t be afraid to experiment—if you like a certain flavor combo, chances are it’ll work well here. And if you need to avoid certain allergens, there’s a swap for just about everything. That’s what makes this recipe a repeat star in my kitchen!
Serving & Storage Suggestions
Serving: These chocolate chip cheesecake bars are best served slightly chilled or at room temperature—straight from the fridge they’re extra fudgy, but letting them sit for 10 minutes brings out all the flavors. They look extra cute on a dessert tray, especially with a dusting of powdered sugar or a drizzle of melted chocolate for special occasions.
Pair with coffee, a tall glass of cold milk, or even a scoop of vanilla ice cream for a truly decadent treat. I love serving these at birthday parties, baby showers, or just as a sweet ending to a cozy dinner. They’re easy to pack for picnics and lunchboxes, too.
Storage: Store leftovers in an airtight container in the fridge for up to 5 days—they actually taste better on day two, as the flavors meld together. For longer storage, layer bars between sheets of parchment paper and freeze for up to 2 months. Thaw overnight in the fridge before serving.
Reheating: If you like your bars a little warm and gooey, pop a slice in the microwave for 10-15 seconds. (Just don’t overdo it, or the cheesecake layer can get too soft.) Honestly, they rarely last long enough to worry about leftovers in my house!
Nutritional Information & Benefits
Each chocolate chip cheesecake bar (based on a batch of 16) has an estimated 220-240 calories, with about 14g fat, 25g carbs, and 3g protein. Keep in mind, these numbers can shift depending on the chocolate chips and substitutions you use.
Health highlights: Cream cheese and eggs add a little protein and calcium. If you use a higher-quality dark chocolate chip, you’ll get a dose of antioxidants, too! You can lighten things up by using reduced-fat cream cheese or swapping half the flour for whole wheat pastry flour (it actually works—promise!).
Dietary notes: As written, this recipe contains gluten, dairy, and eggs. There are easy swaps for gluten-free and dairy-free diets, but always check labels on your chocolate chips and cream cheese. For nut allergies, simply skip any nut add-ins.
From a personal wellness standpoint, I see these bars as a fun treat—perfect for sharing, and a great way to satisfy a sweet tooth without going overboard. Everything in moderation, right?
Conclusion
If you’ve been hunting for a dessert that’s easy, reliable, and guaranteed to make everyone smile, chocolate chip cheesecake bars are it. They’re the best of both worlds—chewy, creamy, and bursting with chocolate in every bite. I love that you can whip them up on a whim or dress them up for special occasions, and there’s always room to customize to your taste or dietary needs.
Honestly, this recipe is one I come back to again and again. It’s simple comfort, just a little bit fancy, and always a hit. If you give these bars a try, let me know how yours turn out! Drop a comment, share your own twists, or tag me if you post them online—I’d love to see your creations.
Life’s too short to skip dessert—so go ahead, bake a batch of chocolate chip cheesecake bars and enjoy every sweet, gooey bite!
Frequently Asked Questions
Can I use store-bought cookie dough for the base?
Yes, you can use refrigerated chocolate chip cookie dough in a pinch. The bars will be a bit sweeter and softer, but still delicious!
How do I know when the bars are done baking?
The edges should look golden, and the center should be just set with a slight jiggle. If you insert a toothpick into the cheesecake, it should come out mostly clean.
Can I double this recipe for a crowd?
Absolutely—just use a 9×13-inch baking pan and watch the bake time (it may take 5-8 minutes longer). These bars are great for parties and potlucks!
What’s the best way to cut neat bars?
Chill the bars completely, then use a sharp knife and wipe it clean between slices. Parchment paper helps lift them out of the pan easily for perfect squares.
Can I freeze chocolate chip cheesecake bars?
Yes! Once cooled, layer the bars between parchment in an airtight container and freeze for up to 2 months. Thaw in the fridge before serving for the best texture.
Pin This Recipe!
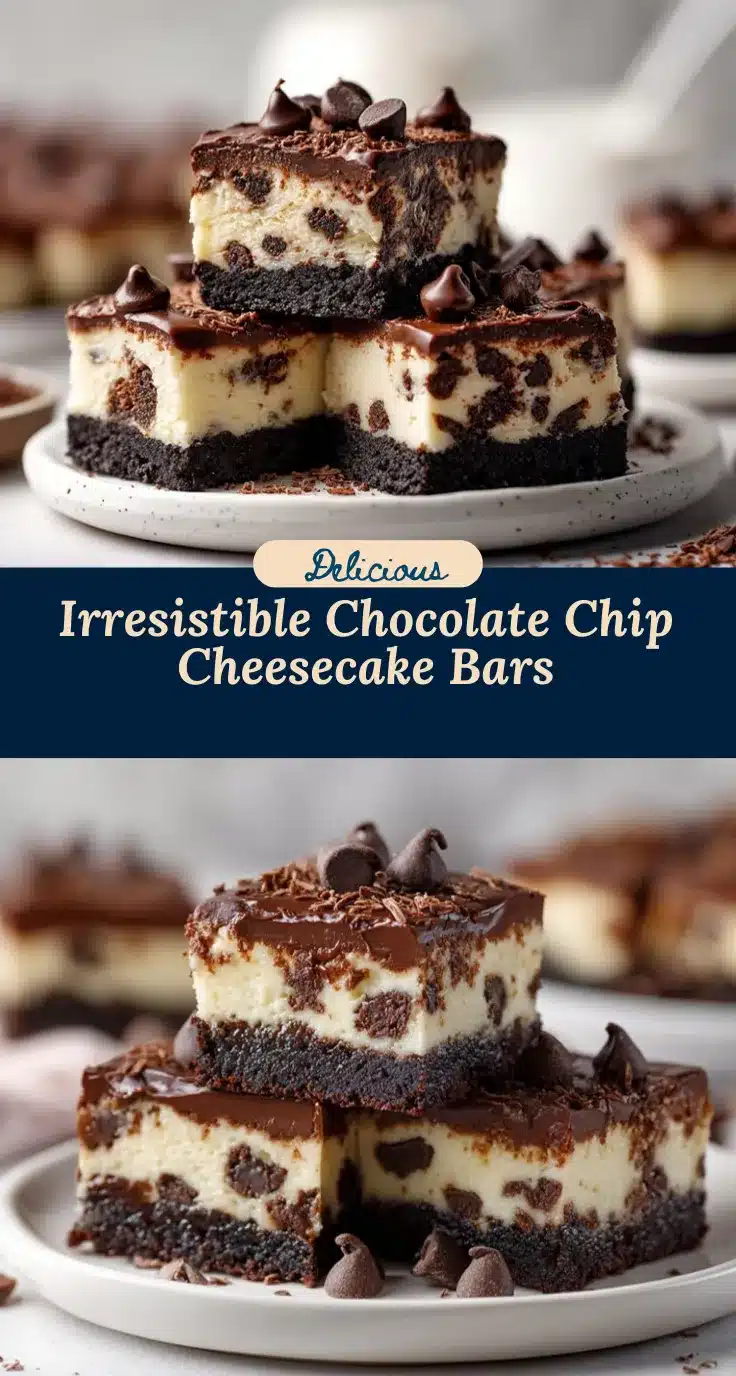
Chocolate Chip Cheesecake Bars
These chocolate chip cheesecake bars combine a chewy cookie base, creamy cheesecake center, and plenty of chocolate chips for the ultimate easy dessert. Perfect for parties, potlucks, or a sweet treat at home, they’re quick to make and always a crowd-pleaser.
- Prep Time: 20 minutes
- Cook Time: 32-36 minutes
- Total Time: 55 minutes
- Yield: 16 bars 1x
- Category: Dessert
- Cuisine: American
Ingredients
- 2 1/4 cups (280g) all-purpose flour, sifted
- 1/2 teaspoon baking soda
- 1/2 teaspoon salt
- 3/4 cup (170g) unsalted butter, melted and cooled
- 1 cup (200g) packed light brown sugar
- 1/4 cup (50g) granulated sugar
- 1 large egg, room temperature
- 2 teaspoons pure vanilla extract
- 1 cup (170g) mini semi-sweet chocolate chips, divided (3/4 cup for dough, 1/4 cup for topping)
- 8 oz (225g) cream cheese, softened
- 1/4 cup (50g) granulated sugar
- 1 large egg, room temperature
- 1 teaspoon pure vanilla extract
Instructions
- Line a 9×9-inch (23x23cm) baking pan with parchment paper, leaving overhang for easy lifting. Preheat oven to 350°F (175°C).
- In a large mixing bowl, whisk together flour, baking soda, and salt. Set aside.
- In another bowl, whisk together melted butter, brown sugar, and granulated sugar until smooth. Add egg and vanilla, mixing well.
- Gradually add dry ingredients to wet mixture, stirring until just combined. Fold in 3/4 cup mini chocolate chips, reserving 1/4 cup for topping.
- Press about 2/3 of the cookie dough evenly into the bottom of the prepared pan. Reserve the rest for topping.
- In a medium bowl, beat softened cream cheese with 1/4 cup sugar until smooth and creamy (about 2 minutes). Add egg and vanilla, mixing until just combined.
- Pour cheesecake mixture over the cookie base and gently spread to the edges.
- Drop small blobs of remaining cookie dough on top of the cheesecake layer. Sprinkle reserved chocolate chips over the top.
- Bake for 32-36 minutes, or until edges are golden and center is set but slightly jiggly. A toothpick inserted into the cheesecake should come out mostly clean.
- Cool completely in the pan on a wire rack. For clean bars, chill in the fridge for at least 2 hours before slicing.
- Lift out using parchment overhang, slice into 16 squares, and serve.
Notes
For best results, use room temperature eggs and cream cheese. Don’t overmix the cheesecake layer to avoid cracks. Chill bars before slicing for neat squares. You can substitute gluten-free flour or dairy-free alternatives as needed. Store leftovers in the fridge for up to 5 days or freeze for up to 2 months.
Nutrition
- Serving Size: 1 bar (1/16 of recipe)
- Calories: 230
- Sugar: 16
- Sodium: 120
- Fat: 14
- Saturated Fat: 8
- Carbohydrates: 25
- Fiber: 1
- Protein: 3
Keywords: chocolate chip cheesecake bars, dessert bars, easy cheesecake bars, party dessert, cookie bars, cheesecake squares, potluck dessert, chocolate chip bars


