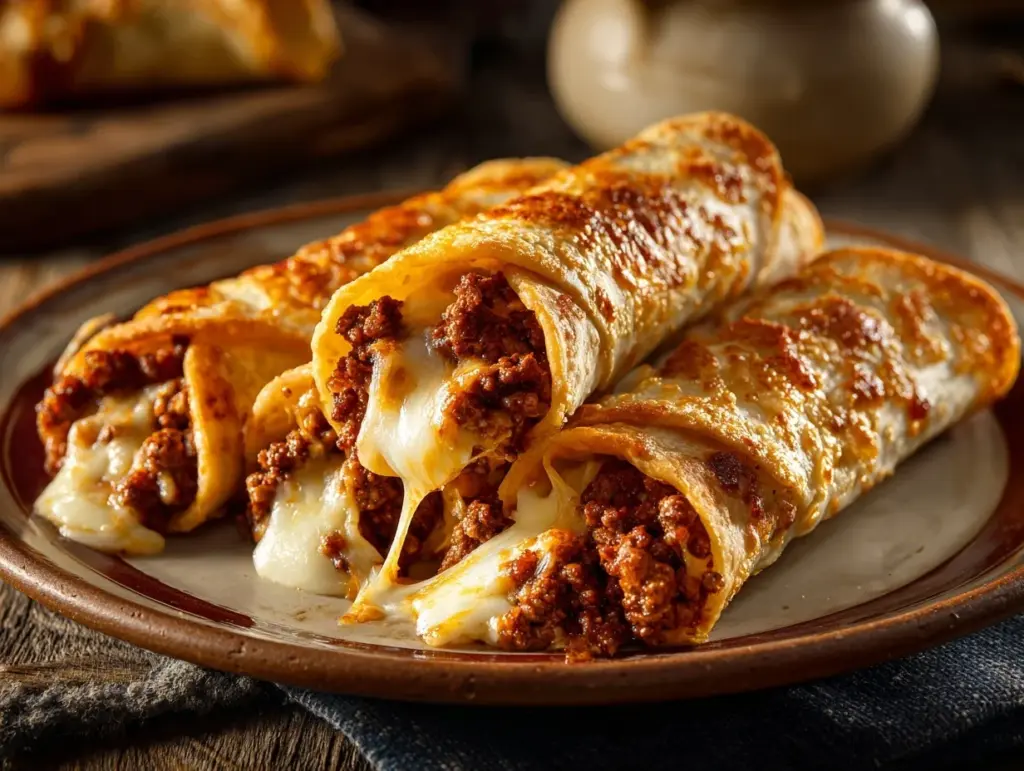
Hot, gooey cheese stretching between your fingers, savory taco meat tucked inside golden-brown bread—can you picture it? The very first time I pulled a tray of cheesy taco sticks out of the oven, my kitchen smelled like a Tex-Mex restaurant on a Friday night. I swear, the sizzle and aroma had my kids hovering by the counter, begging for “just one taste.” And honestly, who can blame them?
I first whipped up this cheesy taco sticks recipe during a game night, thinking it’d be a fun twist on the usual chips and dip. Guess what? They were gone before halftime. Since then, these taco sticks have become my go-to appetizer for parties, potlucks, and, let’s face it, last-minute “I need something amazing fast” moments. There’s something about a cheesy, handheld snack that brings everyone together—you can see it in the way people grin when they take that first bite.
What makes cheesy taco sticks so special? It’s the perfect mash-up of melty cheese, seasoned taco beef, and soft bread—all in a portable, dunkable package. They’re easy enough for weeknight snacking, but impressive enough for holiday gatherings. Plus, you can prep them ahead of time (major bonus for busy hosts like me). If you’re looking for a crowd-pleasing, easy party appetizer that everyone raves about, you’re in the right place. Let me show you why you’ll love this recipe as much as I do!
Why You’ll Love This Cheesy Taco Sticks Recipe
After testing and tweaking this cheesy taco sticks recipe more times than I can count, I can promise: you’re about to discover your new favorite party appetizer. Here’s why these taco sticks always steal the show (and why I make double batches now):
- Quick & Easy: Ready in under 40 minutes, including prep and bake time. Perfect when you need a no-fuss appetizer that feels special.
- Simple Ingredients: Everything’s easy to find—no specialty store runs. Most are probably living in your fridge or pantry right now.
- Perfect for Parties: These cheesy taco sticks are made for sharing—think birthday bashes, Super Bowl parties, and backyard BBQs.
- Crowd-Pleaser: Kids love them, adults love them, and honestly, even picky eaters ask for seconds. I’ve yet to see leftovers.
- Unbelievably Delicious: The combo of spicy taco meat, bubbling cheddar, and buttery bread is pure comfort food magic. Each bite is cheesy, savory, and just a little bit addictive.
This isn’t your average taco night. My secret is blending the taco beef with just enough seasoning (not too salty, not too bland), and wrapping everything in store-bought pizza dough for the ultimate shortcut. I always brush the tops with garlic butter before baking—it gives you that irresistible golden crust.
But honestly, the best thing about these cheesy taco sticks? They turn any gathering into a party. Friends ask for the recipe. Kids fight over the last piece. And you get to relax, knowing you’ve served up something unforgettable—without spending hours in the kitchen. That’s my kind of win!
What Ingredients You Will Need
This cheesy taco sticks recipe keeps things simple, but every ingredient earns its spot. Here’s what you’ll need for the magic to happen:
- For the Taco Filling:
- Ground beef (about 1 pound/450g) – I like 85% lean for the best flavor and juiciness
- Taco seasoning (2-3 tablespoons/16-24g) – Use your favorite packet or homemade blend (I love the smoky flavor of McCormick!)
- Water (¼ cup/60ml) – Helps the seasoning coat the beef perfectly
- Optional: small diced onion or minced garlic (for extra depth)
- For the Cheesy Goodness:
- Cheddar cheese sticks or mozzarella string cheese (8 sticks/225g) – Cut in half if you like a lighter cheese pull
- Shredded Mexican blend cheese (1 cup/115g) – For extra gooey filling (trust me, don’t skip this!)
- For the Dough:
- Refrigerated pizza dough (2 cans, 13.8oz/390g each) – Pillsbury or store brand both work great
- Flour (for dusting) – Just a sprinkle to keep things from sticking
- For the Topping:
- Butter (3 tablespoons/45g, melted) – For brushing the tops (use unsalted or salted, both work)
- Garlic powder (½ teaspoon/2g) – Mixed with butter for flavor
- Chopped fresh parsley (1 tablespoon/4g, optional) – For a pop of color
- For Dipping:
- Salsa, sour cream, or guacamole – Pick your favorite or serve all three
Ingredient Tips: If you’re gluten-free, swap in your favorite gluten-free pizza dough. Want a spicier kick? Add chopped jalapeños to the beef or use pepper jack cheese. I’ve also tried this with ground turkey—still delicious! For a vegetarian version, use plant-based crumbles and vegetarian taco seasoning.
I always say, use what you’ve got. These taco sticks are forgiving, so feel free to play around with the cheeses or add-ins. The key is getting that cheesy stretch and bold taco flavor in every bite!
Equipment Needed
You don’t need a fancy kitchen to whip up these cheesy taco sticks. In fact, most of these tools are basics you probably already own:
- Large skillet or frying pan – For browning the taco meat (nonstick is my go-to for easy cleanup)
- Mixing spoon or spatula – To break up and stir the beef
- Baking sheet – A rimmed sheet keeps everything tidy (I use a standard 13×18-inch/33x46cm size)
- Parchment paper or silicone baking mat – For stick-free baking and easier cleanup
- Pastry brush – For that buttery garlic topping (if you don’t have one, just use a spoon!)
- Sharp knife or pizza cutter – To portion and shape the dough
- Measuring cups and spoons – For perfect seasoning and cheese ratios
If you don’t have a pastry brush, a clean paper towel or even your fingers can work in a pinch for buttering the tops. And if you’re without a silicone mat, parchment or even lightly greased foil will do. I once made these at a friend’s house with a cast iron pan instead of a sheet—totally worked! Honestly, these taco sticks aren’t fussy about equipment. Just make sure your oven is preheated and you’re good to go.
How to Make Cheesy Taco Sticks – Step-by-Step Instructions

-
Prepare the Taco Meat (10 minutes):
Heat your skillet over medium-high. Add 1 pound (450g) ground beef and cook, breaking it up with your spatula, until browned (about 5 minutes). Drain excess grease if needed. Sprinkle in 2-3 tablespoons (16-24g) taco seasoning and pour in ¼ cup (60ml) water. Stir well and simmer for 2-3 minutes, until the beef is saucy and fragrant. Remove from heat and let cool a few minutes—warm, not piping hot, is best for filling. -
Prep the Dough (5 minutes):
While the beef cools, unroll your 2 cans (13.8oz/390g each) pizza dough onto a lightly floured surface. If the dough shrinks back, let it rest a few minutes. Slice each sheet into 8 rectangles (for 16 sticks total) using a sharp knife or pizza cutter. -
Assemble the Taco Sticks (10 minutes):
Scoop about 2 tablespoons (30g) taco meat onto the center of each dough rectangle. Lay a cheese stick (or half a stick) over the beef. Sprinkle a bit of shredded cheese for extra gooeyness. Fold the sides of the dough over the filling, pinch the seams closed, and gently roll into a log. Make sure they’re sealed well to keep all that cheesy goodness inside! -
Get Ready to Bake (5 minutes):
Line your baking sheet with parchment or a silicone mat. Arrange taco sticks seam-side down, leaving a little space between each. Melt 3 tablespoons (45g) butter and stir in ½ teaspoon (2g) garlic powder. Brush the tops generously with this buttery mix. -
Bake (15-18 minutes):
Slide the tray into your preheated oven at 425°F (220°C). Bake for 15-18 minutes, until golden brown and bubbling at the edges. If you want extra color, broil for 1-2 minutes at the end—just watch closely! -
Finish & Serve (2 minutes):
Let the cheesy taco sticks cool for 2-3 minutes (the cheese will be molten hot). Sprinkle with chopped parsley for a fresh look. Serve warm with salsa, sour cream, or guacamole for dunking.
Prep Notes: If the dough tears, just pinch it back together—nobody’s perfect! If your sticks pop open while baking, don’t stress. They’ll still taste amazing (and that oozy cheese looks delicious anyway). For a crispier finish, use an egg wash instead of butter before baking.
Expert Cooking Tips & Techniques
Here’s where a few pro tricks really help make your cheesy taco sticks flawless every time:
- Seal Tightly: Press the dough seams together firmly. A little water on your fingertips helps the dough stick if it’s dry.
- Don’t Overfill: It’s tempting, but too much filling makes them burst open. About 2 tablespoons (30g) filling per stick is the sweet spot.
- Let Filling Cool: Warm, not hot, taco meat prevents the cheese from melting out before baking.
- Even Sizing: Try to cut your dough rectangles evenly so they bake at the same rate—nobody likes a burnt edge or soggy middle!
- Keep Cheese Inside: Tuck the cheese under the meat and pinch the dough well—less ooze, more cheesy pull inside.
- Bake on the Middle Rack: This gives you the best golden color without burning the bottoms. If you notice uneven browning, rotate the tray halfway through.
- Make Ahead: Assemble and refrigerate the uncooked sticks for up to 6 hours. Bake right before serving for fresh, melty results.
- Double Batch for Parties: These disappear fast! I always make extra for bigger groups—or for next day snacking.
I’ve had a few sticks pop their seams in the oven, but honestly, nobody’s ever complained! If you want perfect presentation, pay extra attention to sealing the ends. And if your first batch isn’t picture-perfect, don’t stress—practice makes cheesy perfection. Trust me, the flavor’s what people remember!
Variations & Adaptations
One of the things I love most about this cheesy taco sticks recipe is how easy it is to customize! Here are my favorite twists and swaps:
- Vegetarian Version: Use plant-based crumbles or black beans instead of ground beef. Add a dash of smoked paprika for that “meaty” flavor.
- Spicy Kick: Mix chopped pickled jalapeños or a dash of chipotle chili powder into the taco meat. Pepper jack cheese also brings serious heat!
- Breakfast Taco Sticks: Swap the beef for scrambled eggs, crumbled cooked bacon, and cheddar. Serve with salsa for a brunchy appetizer.
- Low-Carb Option: Use low-carb or keto-friendly dough and stick to full-fat cheese for a satisfying, guilt-free treat.
- Gluten-Free Adaptation: Replace the pizza dough with your favorite gluten-free baking mix or store-bought dough. Check all labels for allergens just to be safe.
- Cheese Swap: Try Monterey Jack, Colby, or even a smoky gouda for a different flavor profile. I’ve even made these with vegan cheese for a dairy-free party guest—it worked great!
My personal favorite? The breakfast version with eggs and bacon for weekend brunches. The kids love helping assemble those! Don’t be afraid to mix and match fillings or dip sauces—this recipe is made for creativity.
Serving & Storage Suggestions
These cheesy taco sticks are best served warm, fresh from the oven when the cheese is perfectly melty. Arrange them on a platter with bowls of salsa, guacamole, and sour cream for dipping—people love to pick their favorite combo.
For presentation, sprinkle with extra chopped parsley or even a little crumbled cotija cheese. Pair with a pitcher of margaritas or a fruity punch for parties, or keep things kid-friendly with sparkling lemonade. They also pair well with a crisp salad or simple rice dish if you want to round out the meal.
If you have leftovers (rare, but it happens!), let them cool completely before storing in an airtight container in the fridge for up to 3 days. To freeze, wrap each stick tightly in foil and store in a freezer bag—reheat straight from frozen in a 350°F (175°C) oven for 10-12 minutes. For the best texture, avoid microwaving—oven reheating keeps the bread crisp and the cheese gooey. I find the flavors actually get a bit deeper after a day in the fridge, so don’t be afraid to make ahead!
Nutritional Information & Benefits
Each cheesy taco stick (based on 16 sticks per batch) contains approximately:
- Calories: 180
- Protein: 8g
- Fat: 9g
- Carbohydrates: 16g
- Fiber: 1g
Key ingredients like lean ground beef and cheese provide protein and calcium, while using pizza dough instead of deep-frying keeps these lighter than traditional snacks. You can use low-fat cheese or whole wheat dough for a healthier twist. Just be mindful if you’re gluten or dairy sensitive—opt for gluten-free dough and plant-based cheese as needed. I love that these taco sticks satisfy cravings in a portion-controlled, hand-held package—perfect for mindful indulging during parties!
Conclusion
If you’re after an easy party appetizer that disappears fast and pleases everyone, these cheesy taco sticks are it. They’re fun to make, even more fun to eat, and endlessly customizable for any occasion or diet. I love how they bring people together—whether it’s a holiday bash or just a cozy night in with family.
Don’t be afraid to get creative with fillings and dips—make this cheesy taco sticks recipe your own. I’d love to hear how you serve them, what variations you try, or if your crowd is as obsessed as mine. Leave a comment below, share your party photos, and tag me if you post your cheesy creations online!
Happy snacking, and remember—life’s too short for boring appetizers. Go for the cheese pull, every time!
Frequently Asked Questions
Can I make cheesy taco sticks ahead of time?
Yes! Assemble the taco sticks and refrigerate them on a tray (covered) for up to 6 hours. Bake just before serving for the freshest taste and texture.
What kind of cheese works best for taco sticks?
Cheddar and mozzarella string cheese are classic, but Monterey Jack, pepper jack, or a Mexican blend are also delicious! Use your favorite for the best cheese pull.
Can I freeze leftover taco sticks?
Absolutely. Cool completely, wrap tightly in foil, and freeze in a bag for up to 2 months. Reheat in the oven at 350°F (175°C) for 10-12 minutes—no need to thaw first.
How spicy are cheesy taco sticks?
That depends on your taco seasoning and cheese choice! For a mild version, stick with classic cheddar and mild seasoning. Want heat? Add jalapeños or use spicy cheese.
What dipping sauces go well with cheesy taco sticks?
Salsa, sour cream, and guacamole are top picks. For something different, try queso dip, ranch dressing, or chipotle mayo. The more dips, the better!
Pin This Recipe!
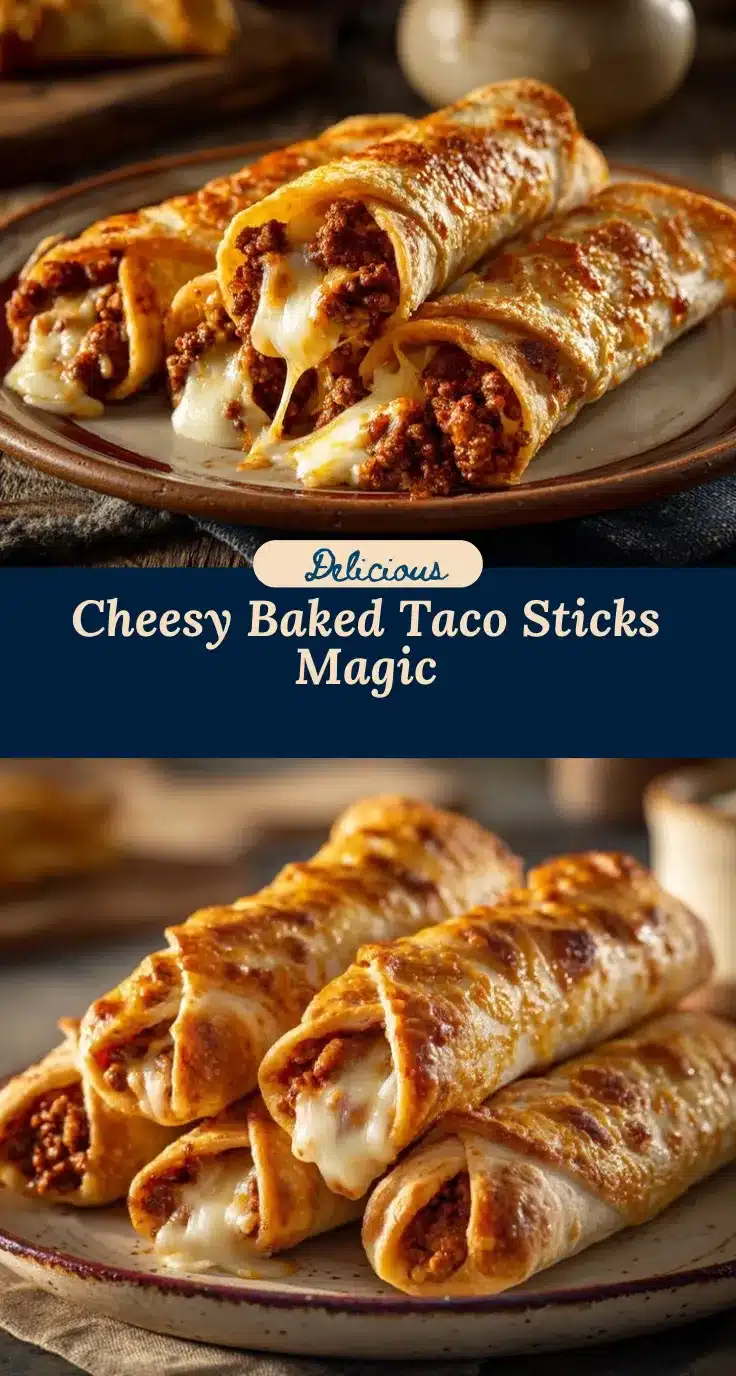
Cheesy Taco Sticks

Cheesy Taco Sticks are a crowd-pleasing party appetizer featuring seasoned taco beef and gooey cheese wrapped in golden pizza dough. They’re quick, easy, and perfect for game nights, potlucks, or any gathering where you want a fun, handheld snack.
- Prep Time: 20 minutes
- Cook Time: 18 minutes
- Total Time: 38 minutes
- Yield: 16 taco sticks 1x
- Category: Appetizer
- Cuisine: Tex-Mex
Ingredients
- 1 pound ground beef (85% lean recommended)
- 2–3 tablespoons taco seasoning (1 packet or homemade)
- 1/4 cup water
- Optional: 1 small onion, diced or 2 cloves garlic, minced
- 8 cheddar cheese sticks or mozzarella string cheese (cut in half if desired)
- 1 cup shredded Mexican blend cheese
- 2 cans refrigerated pizza dough (13.8 oz each)
- Flour, for dusting
- 3 tablespoons butter, melted
- 1/2 teaspoon garlic powder
- 1 tablespoon chopped fresh parsley (optional)
- Salsa, sour cream, or guacamole for dipping
Instructions
- Preheat oven to 425°F (220°C).
- Heat a large skillet over medium-high heat. Add ground beef and cook, breaking it up, until browned (about 5 minutes). Drain excess grease if needed.
- Add taco seasoning and water to the beef. Stir well and simmer for 2-3 minutes until saucy and fragrant. Remove from heat and let cool slightly.
- Unroll pizza dough onto a lightly floured surface. Slice each sheet into 8 rectangles (16 total).
- Scoop about 2 tablespoons of taco meat onto the center of each dough rectangle. Place a cheese stick (or half) over the beef and sprinkle with shredded cheese.
- Fold the sides of the dough over the filling, pinch the seams closed, and gently roll into a log. Ensure seams are sealed.
- Line a baking sheet with parchment paper or a silicone mat. Arrange taco sticks seam-side down, spaced apart.
- Mix melted butter with garlic powder. Brush tops of taco sticks with the mixture.
- Bake for 15-18 minutes, until golden brown and bubbling. For extra color, broil for 1-2 minutes if desired.
- Let cool for 2-3 minutes. Sprinkle with parsley and serve warm with salsa, sour cream, or guacamole.
Notes
Seal the dough tightly to prevent cheese from leaking. Don’t overfill to avoid bursting. Let the filling cool before assembling. For a crispier finish, use an egg wash instead of butter. Make ahead by assembling and refrigerating up to 6 hours before baking. Variations include vegetarian, spicy, breakfast, low-carb, and gluten-free adaptations.
Nutrition
- Serving Size: 1 taco stick
- Calories: 180
- Sugar: 2
- Sodium: 390
- Fat: 9
- Saturated Fat: 4
- Carbohydrates: 16
- Fiber: 1
- Protein: 8
Keywords: cheesy taco sticks, party appetizer, taco sticks, easy appetizer, Tex-Mex snack, game day food, kid-friendly, cheese pull, pizza dough, handheld snack