Introduction
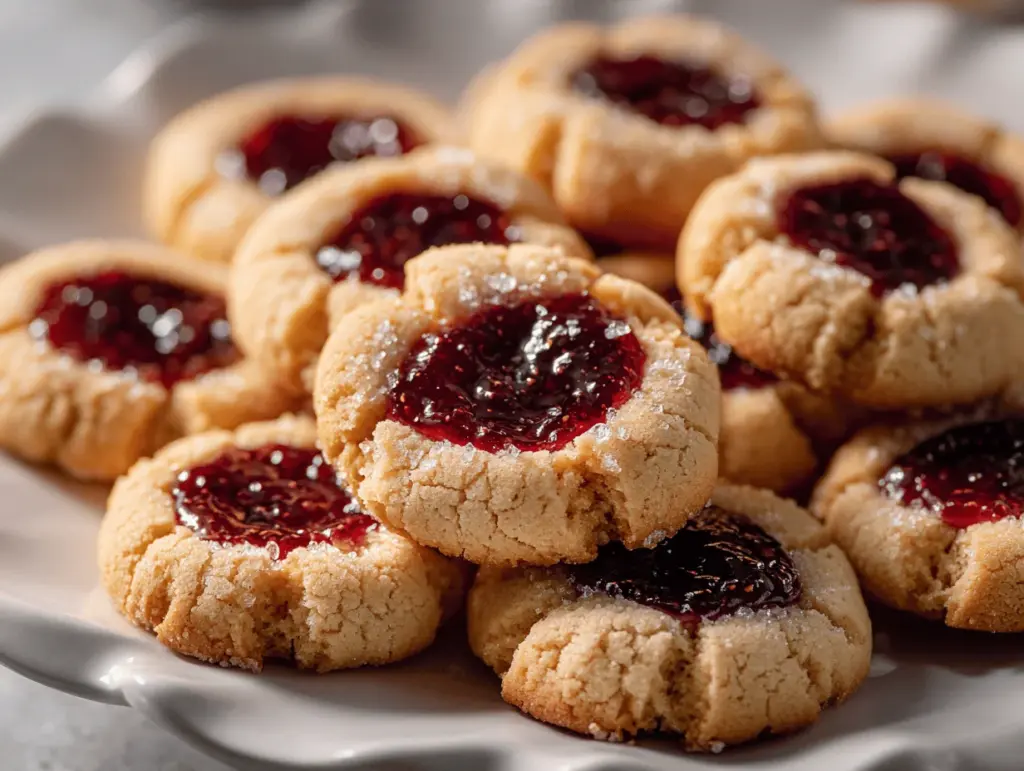
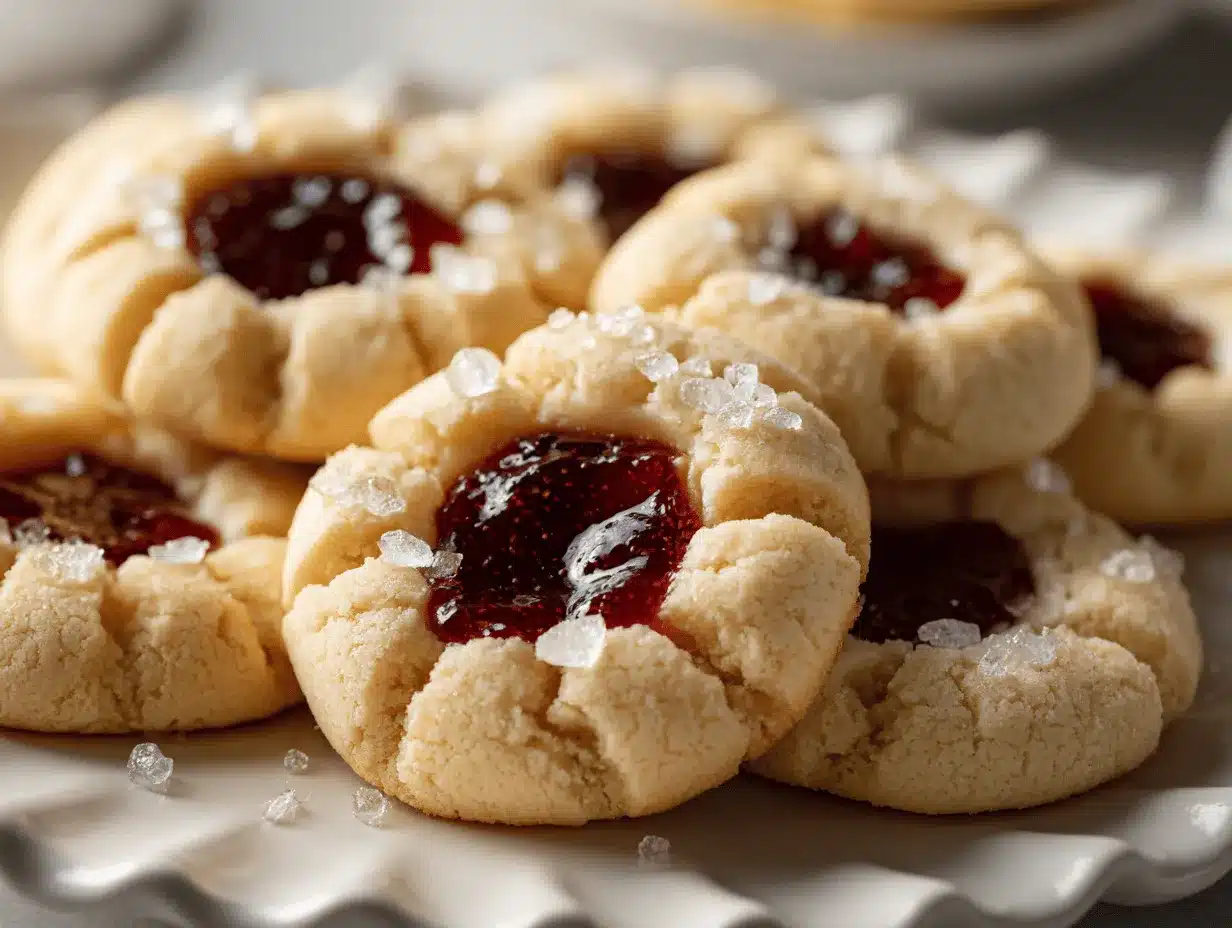
One bite of these raspberry jam cheesecake thumbprint cookies and you’ll honestly wonder why you ever bothered with store-bought treats. The sweet scent of baking cookies, mingled with the tang of raspberry jam and the creamy aroma of cheesecake, fills my kitchen every December—it’s the kind of happiness you can smell before you even taste it. I started making these during a chilly holiday season when my usual sugar cookies just seemed a little…well, boring. After all, who can say no to a treat that’s soft, buttery, and has a gooey, jewel-toned center?
The idea for raspberry jam cheesecake thumbprint cookies actually came when I combined my grandma’s classic thumbprint dough with a dollop of cheesecake filling. It sounded a little “extra,” but one test batch and I was completely hooked. They became the star of my holiday cookie trays and, honestly, the main reason neighbors stop by “just to chat.” The texture is a dreamy mix of melt-in-your-mouth shortbread, creamy cheesecake, and that burst of tart-sweet raspberry. If you love raspberry jam, you’ll adore how it plays off the delicate vanilla cookie base and rich cheesecake swirl.
These cookies are perfect for just about everyone—kids, picky eaters, or anyone who thinks the best part of dessert is a surprise in the middle. They’re my go-to for edible gifts and festive gatherings, but I’ve been known to whip up a batch just because it’s a rainy Tuesday. If you’re looking for a recipe that’s been tested (and devoured) dozens of times, these raspberry jam cheesecake thumbprint cookies are it. Trust me, your cookie jar will never see leftovers again.
Why You’ll Love This Recipe
- Quick & Easy: You can get these raspberry jam cheesecake thumbprint cookies ready for the oven in under an hour—no fancy equipment or complicated steps required.
- Simple Ingredients: Everything you need is probably already hanging out in your pantry or fridge. No wild goose chases through specialty aisles!
- Perfect for Celebrations: These cookies are a showstopper at holiday cookie swaps, brunches, or as a cozy treat with afternoon tea. They really shine on a festive cookie platter.
- Crowd-Pleaser: Every time I bring these to a gathering, both kids and adults go back for seconds (and thirds). The combo of jam and cheesecake is just irresistible.
- Unbelievably Delicious: The contrast of buttery cookie, creamy cheesecake, and tart raspberry jam makes every bite a little celebration. They’re the kind of cookies people remember—and request year after year.
What sets my raspberry jam cheesecake thumbprint cookies apart is the cheesecake filling. Instead of just a dollop of jam, you get a creamy center that’s as satisfying as a mini cheesecake—without needing a fork. I’ve played around with the dough to get it just right: not too crumbly, not too soft, and sturdy enough to hold that luscious filling. Plus, making the thumbprint isn’t just fun, it’s a little therapeutic. (Honestly, squishing the dough is my favorite part!)
These cookies are more than just sweet treats—they’re little moments of nostalgia and joy. Whether you’re impressing friends at a cookie exchange or sneaking one with your morning coffee, you’ll find yourself smiling after every bite. And if you’re anything like me, you’ll be making up excuses to bake them long after the holidays have passed.
What Ingredients You Will Need
This recipe pulls together everyday ingredients to create something truly special. The magic comes from a few pantry staples, plus that pop of raspberry jam and creamy cheesecake filling. Here’s what you’ll want to have ready:
- For the Cookie Dough:
- 1 cup (226g) unsalted butter, softened (adds richness and a melt-in-your-mouth base)
- 2/3 cup (135g) granulated sugar (for sweetness and structure)
- 1 large egg yolk, room temperature (for tenderness)
- 2 teaspoons pure vanilla extract (I like Nielsen-Massey for the best flavor)
- 2 cups (250g) all-purpose flour (King Arthur works well for a consistent crumb)
- 1/4 teaspoon fine sea salt (balances sweetness)
- For the Cheesecake Filling:
- 4 ounces (113g) cream cheese, softened (Philadelphia is always my pick for smoothness)
- 3 tablespoons (24g) powdered sugar (for a silky texture)
- 1/2 teaspoon vanilla extract (for that classic cheesecake taste)
- For the Jam Center:
- 1/3 cup (110g) raspberry jam (look for seedless if you prefer a smoother bite; Bonne Maman is a favorite)
If you want to get creative, you can swap in strawberry or apricot jam, or even a mixed berry preserve. For a gluten-free version, use a 1:1 gluten-free baking blend (like Bob’s Red Mill). If you need to go dairy-free, there are solid vegan butter and non-dairy cream cheese options out there—just know the texture will shift a little. The rest of the ingredients are true kitchen staples, making this recipe one you can whip up whenever the craving hits. I’ve also made these with homemade raspberry chia jam for a lower-sugar option, and they turn out just as delicious. The key is to use a jam that’s thick but spreadable, so it stays put in the cookie’s center.
Equipment Needed
- Stand mixer or hand mixer: Makes creaming the butter and sugar a breeze. If you’re mixing by hand, give those arms a quick stretch!
- Mixing bowls: At least two—one for the dough, one for the cheesecake filling.
- Baking sheets: I use heavy-duty rimmed sheets for even baking. Lighter sheets work, but you might need to watch for browning.
- Parchment paper or silicone baking mats: Keeps cookies from sticking and makes cleanup so much easier.
- Measuring cups and spoons: For accuracy, especially with flour and jam. Always fluff and spoon your flour for best results.
- Cookie scoop (1-inch or tablespoon size): Great for even cookie sizes, but a regular spoon works in a pinch.
- Small spoon or your thumb: For making the “thumbprint” in the dough. I sometimes use the back of a rounded measuring spoon for perfect circles.
- Wire cooling rack: Helps cookies cool evenly and stay crisp on the bottom.
If you don’t have a mixer, you can cream by hand (just takes a bit more elbow grease). Silicone mats are a game-changer for easy release, but parchment paper is totally fine. My favorite tip: always wash your baking sheets right away—jam can get sticky if left to cool! If you’re on a budget, check thrift stores for basic equipment. I’ve found some of my best mixing bowls secondhand.
Preparation Method
-
Prep Your Ingredients and Equipment
Set the oven to 350°F (175°C). Line two baking sheets with parchment paper or silicone mats. Bring the butter and cream cheese to room temperature for easy mixing—about 30 minutes on the counter usually does it. -
Make the Cookie Dough
In a large bowl, beat 1 cup (226g) unsalted butter and 2/3 cup (135g) granulated sugar together with a mixer until light and fluffy, about 2-3 minutes. Scrape down the sides. Add 1 egg yolk and 2 teaspoons vanilla extract, then mix until just combined. Add in 2 cups (250g) all-purpose flour and 1/4 teaspoon salt, mixing on low until a soft dough forms. (The dough should be smooth, not sticky. If it seems dry, add a teaspoon of milk.) -
Shape the Cookies
Scoop out 1-tablespoon portions of dough (about a 1-inch ball, 18g each). Roll into balls and place them 2 inches apart on the prepared baking sheets. Using your thumb or the back of a rounded 1/2 teaspoon, gently press an indent into the center of each ball. If the dough cracks, just smooth the edges back together—no big deal! -
Mix the Cheesecake Filling
In a small bowl, beat 4 ounces (113g) cream cheese, 3 tablespoons (24g) powdered sugar, and 1/2 teaspoon vanilla extract until very smooth and creamy. You want no lumps here—give it an extra mix if needed. -
Fill the Cookies
Spoon about 1/2 teaspoon of the cheesecake mixture into each thumbprint well. Top with 1/2 teaspoon raspberry jam. Be careful not to overfill—otherwise, you’ll get overflow during baking. -
Bake
Bake the cookies for 13-15 minutes, until the edges are just turning golden and the centers look set. (Keep an eye on the bottoms; you want pale gold, not brown.) Rotate the pans halfway through for even baking. -
Cool
Let cookies cool on the baking sheet for 5 minutes before transferring to a wire rack. This helps them firm up without breaking apart. They’ll set up as they cool. -
Serve or Store
Enjoy once cooled, or store in an airtight container for up to 4 days. For longer storage, read the tips below.
Personal tip: If your jam is especially runny, stir it first or heat it for just a few seconds in the microwave to thicken. If the dough is too soft to roll, chill it for 10 minutes. Occasionally, a thumbprint will puff up during baking—just press it back down gently with a spoon while still warm.
Cooking Tips & Techniques
- Room Temperature Matters: Butter and cream cheese should be soft but not greasy. Too cold, and your dough won’t cream properly; too warm, and cookies may spread too much.
- Don’t Overmix: After adding the flour, mix just until the dough comes together. Overmixing = tough cookies (and nobody wants that).
- Uniform Size: Use a cookie scoop for even portions. This ensures all your cookies bake at the same rate.
- Thumbprint Technique: If the dough cracks when you press it, that’s normal! Just smooth with your fingers. For perfect wells, a rounded measuring spoon works wonders.
- Jam Consistency: Use a jam that’s thick but spreadable. Thin jams can run and burn, while very stiff jams can be hard to dollop in the center. If yours is loose, microwave it for 10 seconds to thicken slightly.
- Watch the Bake Time: Every oven is different. I once left a batch in for an extra minute and got over-browned bottoms. Check at 13 minutes and go from there.
- Batch Baking: If making multiple trays, bake one at a time for best results, or rotate racks halfway through to avoid uneven browning.
- Personal Lesson: I once filled the indents too much and ended up with jam rivers running off the cookies. Less is more—about a half-teaspoon each of cheesecake and jam is perfect.
For multitasking, mix the cheesecake filling while your dough chills (if you decide to chill it). And don’t skip the wire rack! Letting cookies cool completely helps both the jam and cheesecake set, so they’re easier to stack and store.
Variations & Adaptations
- Dietary: For a gluten-free version, use a 1:1 gluten-free baking flour (I like Bob’s Red Mill). If you need dairy-free, try plant-based butter and vegan cream cheese—texture will be a little softer, but still tasty!
- Flavor: Switch up the jam! Strawberry, apricot, blackberry, or even lemon curd make fantastic centers. For extra flavor, add a pinch of lemon zest to the dough or cheesecake filling.
- Seasonal: During summer, I’ve made these with homemade peach preserves or a dollop of blueberry compote. For winter, cranberry jam is a tart and festive twist.
- Cooking Methods: These bake best in a conventional oven, but I’ve tried them in a countertop toaster oven for small batches—just watch the bake time, as it may be quicker.
- Personal Favorite: Sometimes I sprinkle chopped toasted pecans or slivered almonds over the cheesecake center before baking. Adds a lovely crunch!
If nut allergies are a concern, skip the nut options and check your jam for possible cross-contamination. For a lower-sugar version, use a reduced-sugar jam or homemade chia jam. The cookies are super flexible, so don’t be afraid to play with flavors to match your cravings or pantry situation.
Serving & Storage Suggestions
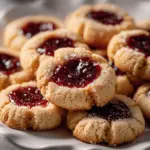
These raspberry jam cheesecake thumbprint cookies are best served at room temperature, when the cheesecake center is creamy and the jam is perfectly set. Arrange them on a festive platter and watch the colors pop—honestly, they look like little jewels on a cookie tray.
- Pairing Ideas: They’re lovely with coffee, tea, or a glass of cold milk. For a party, pair them with lemon bars or chocolate-dipped biscotti for a show-stopping dessert spread.
- Storage: Keep cookies in an airtight container in the fridge for up to 4 days, layered with parchment to prevent sticking. Bring to room temperature before serving for best texture.
- Freezing: Freeze baked cookies (without jam/cheesecake filling, if you like) for up to 2 months. Thaw at room temperature and add filling before serving, or freeze fully assembled for a week—just know the filling may become slightly softer.
- Reheating: If you love a warm cookie, pop one in the microwave for 10-15 seconds. The filling gets gooey and the aroma is unreal.
- Flavor Note: I’ve noticed the flavors deepen after a day—so they’re even better the next morning (if they last that long!).
Nutritional Information & Benefits
Each raspberry jam cheesecake thumbprint cookie contains approximately 120 calories, 6g fat, 2g protein, and 14g carbohydrates. They’re indulgent but not over-the-top, making them a sensible treat during the holidays or anytime you need a little pick-me-up.
The cream cheese provides a bit of protein and calcium, while raspberry jam is full of antioxidants from the berries. If you opt for a reduced-sugar or homemade jam, you’ll lower the sugar content even more. These cookies can be made gluten-free or dairy-free with the right substitutions—just double-check your labels if you have allergies. Personally, I love that these feel like a treat but don’t weigh me down, especially when I use a lighter jam or whole-wheat pastry flour in the dough.
Conclusion
So, why should you make these raspberry jam cheesecake thumbprint cookies? They’re a little bit nostalgic, a lot delicious, and honestly, the kind of cookie that makes people pause and savor. The mix of buttery base, creamy center, and tart-sweet jam is pure comfort—perfect for holidays or any time you need a sweet pick-me-up.
Don’t be afraid to put your own spin on them, whether that’s switching up the jam or adding a sprinkle of chopped nuts. My family loves them as part of our holiday traditions, but I bake them year-round just because they bring a little “happy” to any day.
If you try this recipe, I’d love to hear how it went—leave a comment, share a photo, or tell me about your own favorite variation! Now grab your mixing bowl and get baking—your next favorite cookie is just a thumbprint away.
Frequently Asked Questions
Can I use a different jam for the center?
Absolutely! Strawberry, apricot, blackberry, or even lemon curd are all fantastic options. Pick your favorite or use whatever you have on hand.
Do I need to chill the dough before baking?
Chilling isn’t required, but if your dough feels too soft or sticky, 10-15 minutes in the fridge helps the cookies hold their shape during baking.
Can I make these cookies gluten-free?
Yes! Use a 1:1 gluten-free baking flour blend in place of regular flour. The texture is slightly softer but still totally delicious.
How should I store leftovers?
Store cookies in an airtight container in the fridge for up to 4 days. Bring to room temperature before serving for the best flavor and texture.
Can I freeze these cookies?
You can freeze the baked cookies (with or without filling) for up to 1-2 months. Thaw at room temperature before enjoying. If freezing with filling, be aware the cheesecake center may soften a bit when thawed.
Pin This Recipe!

Raspberry Jam Cheesecake Thumbprint Cookies
These raspberry jam cheesecake thumbprint cookies combine a buttery vanilla cookie base with a creamy cheesecake filling and a jewel-toned raspberry jam center. Perfect for holidays or any time you want a show-stopping, crowd-pleasing treat.
- Prep Time: 20 minutes
- Cook Time: 15 minutes
- Total Time: 35 minutes
- Yield: 24 cookies 1x
- Category: Dessert
- Cuisine: American
Ingredients
- 1 cup (226g) unsalted butter, softened
- 2/3 cup (135g) granulated sugar
- 1 large egg yolk, room temperature
- 2 teaspoons pure vanilla extract
- 2 cups (250g) all-purpose flour
- 1/4 teaspoon fine sea salt
- 4 ounces (113g) cream cheese, softened
- 3 tablespoons (24g) powdered sugar
- 1/2 teaspoon vanilla extract
- 1/3 cup (110g) raspberry jam (seedless preferred)
Instructions
- Preheat oven to 350°F (175°C). Line two baking sheets with parchment paper or silicone mats. Bring butter and cream cheese to room temperature.
- In a large bowl, beat butter and granulated sugar together with a mixer until light and fluffy, about 2-3 minutes. Scrape down the sides.
- Add egg yolk and vanilla extract, then mix until just combined.
- Add flour and salt, mixing on low until a soft dough forms. If dough seems dry, add a teaspoon of milk.
- Scoop out 1-tablespoon portions of dough (about a 1-inch ball, 18g each). Roll into balls and place 2 inches apart on prepared baking sheets.
- Using your thumb or the back of a rounded 1/2 teaspoon, gently press an indent into the center of each ball. Smooth any cracks.
- In a small bowl, beat cream cheese, powdered sugar, and vanilla extract until very smooth and creamy.
- Spoon about 1/2 teaspoon of the cheesecake mixture into each thumbprint well. Top with 1/2 teaspoon raspberry jam. Do not overfill.
- Bake for 13-15 minutes, until edges are just turning golden and centers look set. Rotate pans halfway through for even baking.
- Let cookies cool on the baking sheet for 5 minutes before transferring to a wire rack to cool completely.
- Enjoy once cooled, or store in an airtight container for up to 4 days.
Notes
For best results, use room temperature butter and cream cheese. If dough is too soft, chill for 10 minutes. Use a thick, spreadable jam to prevent runny centers. Cookies can be made gluten-free with a 1:1 gluten-free flour blend. Store in an airtight container in the fridge for up to 4 days, or freeze for longer storage. Let cookies cool completely before stacking or storing.
Nutrition
- Serving Size: 1 cookie
- Calories: 120
- Sugar: 7
- Sodium: 60
- Fat: 6
- Saturated Fat: 4
- Carbohydrates: 14
- Protein: 2
Keywords: raspberry jam, cheesecake, thumbprint cookies, holiday cookies, easy baking, dessert, cream cheese cookies, Christmas cookies, jam cookies