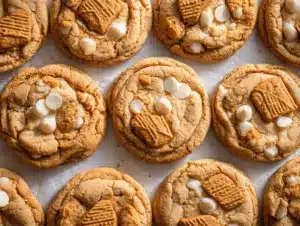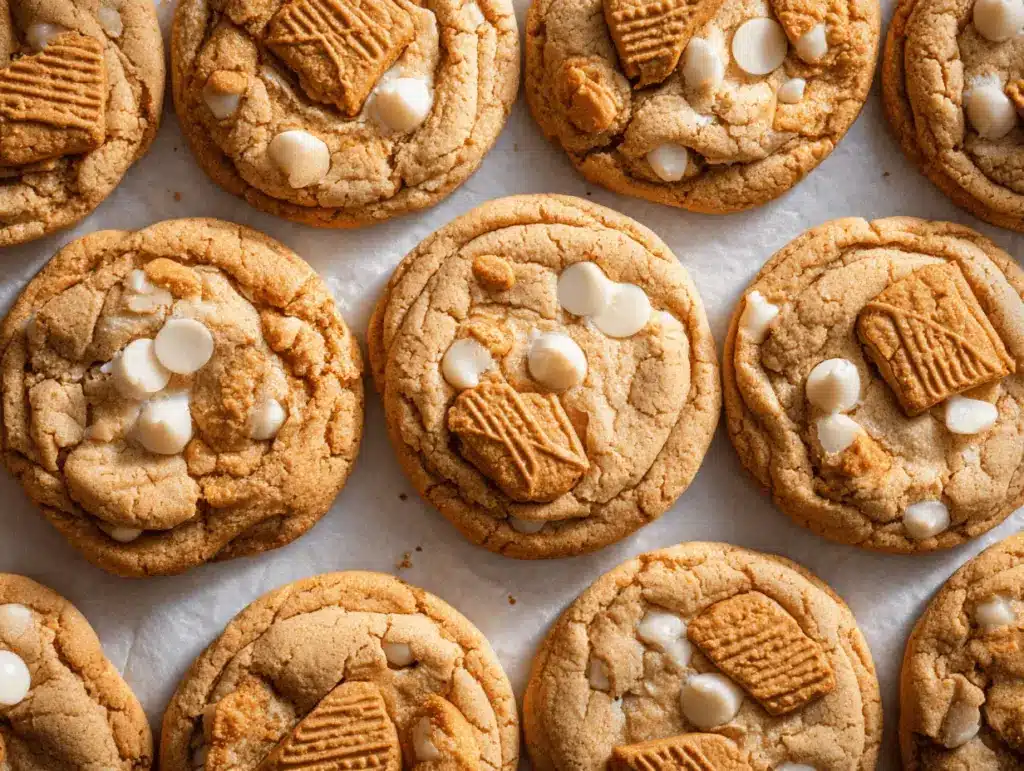
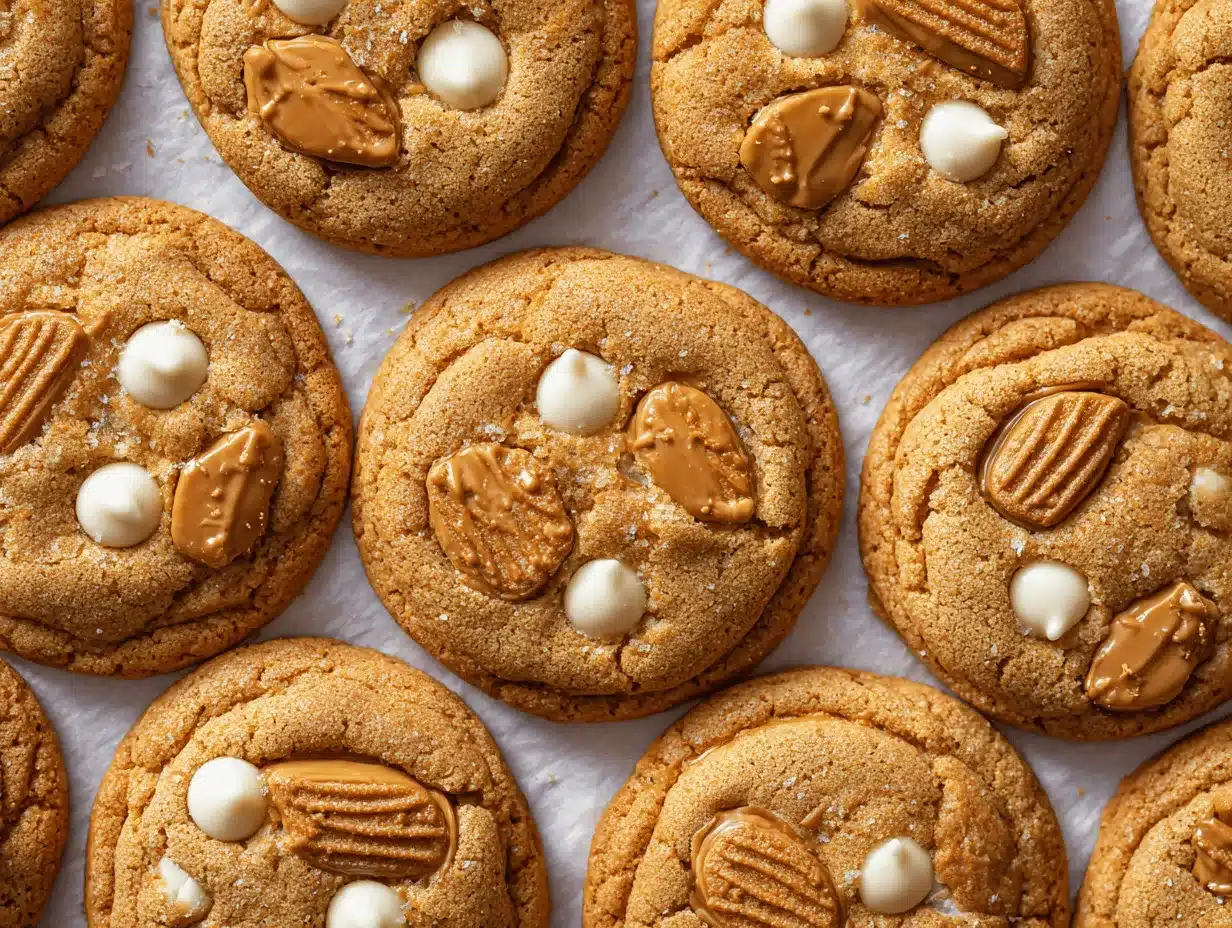
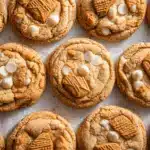
The first time I bit into a warm, gooey white chocolate chip Biscoff stuffed cookie, I was pretty much ruined for all other cookies. There’s something magical about that molten Biscoff center—gooey, spiced, with a caramel whisper—melting into sweet, creamy white chocolate chips. You know that feeling when your kitchen smells like happiness? That’s exactly what you get with these cookies.
I stumbled onto this recipe during a late-night craving for something sweet, cozy, and a little bit over-the-top. (Let’s just say leftovers are rare around here.) There’s a certain nostalgia to the combo too—like the best parts of cookies, blondies, and a secret spread, all mashed into one bite. After baking these for family movie nights, bake sales, and even as a “just because” treat, I can confidently say these white chocolate chip Biscoff stuffed cookies are a crowd-pleaser. Kids go wild for the melty centers, and adults? Let’s face it, we’re just as obsessed.
If you’re looking for a cookie that’s both familiar and a step above the usual, you’re in the right place. This recipe is beginner-friendly, doesn’t require any fancy gadgets, and uses ingredients you probably have in your pantry (with the possible exception of Biscoff, but trust me, it’s worth the trip). Whether you want to impress at a party, treat your family, or just indulge in a little self-care cookie therapy, these white chocolate chip Biscoff stuffed cookies totally deliver.
After many, many batches (I’ve learned a lot—hello, flat cookies and too-melty centers), I’m sharing all my best tips so you can nail these on your first try. Get ready for the best cookie moment of your week!
Why You’ll Love This Recipe
- Soft & Gooey Center: Each cookie hides a heart of creamy Biscoff spread that stays luxuriously gooey even after cooling. It’s like a flavor bomb in every bite.
- White Chocolate Bliss: The white chocolate chips melt into the dough, bringing a sweet, creamy contrast to the warm, spiced Biscoff. If you love that buttery richness, these are your dream cookies.
- No Mixer Required: You don’t need a fancy stand mixer—just a bowl, a whisk, and a little elbow grease. Simple wins, right?
- Perfect for Any Occasion: These cookies shine at bake sales, holiday parties, or as a cozy weekend project. I even pack them up for a little “just because” gift for friends. They always disappear fast.
- Packed with Flavor: Thanks to the brown sugar and Biscoff, you get a deep caramel note with a hint of cinnamon. It’s not just a sugar rush—it’s a well-balanced, crave-worthy cookie.
- Beginner-Friendly: I’ve tested this recipe a dozen times (and made all the classic mistakes) so you won’t have to. If you can roll dough, you can make these!
- Totally Customizable: Want to try dark chocolate chips? Swap them in. Need it nut-free? No problem. I’ll share all my favorite variations below.
What sets these white chocolate chip Biscoff stuffed cookies apart from the rest? It’s all about that stuffed center. Instead of just swirling Biscoff in, you freeze dollops of the spread so every single cookie has a molten surprise. The result? Cookies that literally make people stop mid-bite and ask, “How did you do that?” There’s a little magic in every batch, and honestly, that’s what keeps me baking them again and again.
It’s the kind of treat you bake for special moments—or just because you need a pick-me-up on a random Tuesday. These cookies have comfort written all over them, but with a twist that makes them feel just a bit special. Trust me: once you make these, you’ll crave them again and again.
What Ingredients You Will Need
This recipe keeps things simple, using everyday ingredients plus that iconic Biscoff spread for a little extra magic. Here’s what you’ll need for irresistible white chocolate chip Biscoff stuffed cookies:
- Biscoff Spread (smooth variety) – The star of the show! Look for Lotus Biscoff or a similar cookie butter. You’ll freeze dollops to make that gooey center. (Pro tip: don’t skip freezing, or it’ll leak out!)
- All-Purpose Flour (200g / 1 2/3 cups) – Basic pantry staple. If you want a gluten-free version, use a 1:1 baking blend like Bob’s Red Mill.
- Unsalted Butter (113g / 1/2 cup), melted and cooled – This gives the cookies a rich flavor and chewy edges. I love using European-style butter for a little extra depth.
- Brown Sugar (110g / 1/2 cup, packed) – Adds moisture and caramel notes. I use light brown, but dark brown sugar works for a deeper flavor.
- White Granulated Sugar (50g / 1/4 cup) – Balances the molasses in the brown sugar for that classic cookie sweetness.
- Large Egg (room temperature) – Just one, to bind everything together.
- Vanilla Extract (1 1/2 tsp) – Rounds out the flavors and brings everything together. I usually go for pure vanilla, but use what you have.
- Baking Soda (1/2 tsp) – For a little lift so they aren’t too dense.
- Salt (1/4 tsp) – Don’t skip this! It sharpens the flavors and balances the sweetness.
- White Chocolate Chips (135g / 3/4 cup) – I like Ghirardelli or Guittard for super creamy chips, but store brands work fine too. You can use chunks if you prefer bigger pockets of chocolate.
Optional/Swaps:
– For nut-free: Biscoff is already nut-free, but always check your brand to be sure.
– For dairy-free: Substitute vegan butter and a dairy-free white chocolate chip, like Enjoy Life.
– For extra crunch: Add 1/4 cup crushed Biscoff cookies to the dough.
– For a holiday spin: Mix in a pinch of cinnamon or ginger for extra spice.
I usually keep a jar of Biscoff and a bag of white chocolate chips in the pantry for “cookie emergencies.” If you’re someone who likes to swap things up, this recipe is super forgiving. Just don’t skip the freezing step for the Biscoff—it’s the secret to that perfect, gooey center.
Equipment Needed
- Large Mixing Bowl – For combining your wet and dry ingredients. I’ve used glass, metal, and even a big salad bowl in a pinch.
- Medium Bowl – Great for whisking together your dry ingredients separately to avoid clumping.
- Whisk and Rubber Spatula – Use a whisk for wet ingredients, then switch to a spatula for folding in flour and chocolate chips. If you don’t have a whisk, a sturdy fork will do.
- Baking Sheet – A rimmed half-sheet pan is my go-to. If you only have smaller pans, just bake in batches.
- Parchment Paper – For easy cleanup and no sticking. Foil works in a pinch, but parchment is best for even baking.
- Cookie Scoop (2 tbsp size) – Helps portion the dough evenly. A regular tablespoon or even your hands work fine, too.
- Teaspoon or Small Spoon – For dropping dollops of Biscoff spread.
- Freezer-safe Plate or Baking Sheet – To freeze the Biscoff filling.
- Wire Cooling Rack – Optional, but lets cookies cool evenly. A clean cutting board or plate can stand in.
If you’re missing a tool, don’t stress! I’ve made these using just a bowl, a spoon, and my hands. (Pro tip: keep your spatula clean by wiping it between mixing steps.) For easier cleanup, rinse bowls while your cookies bake—trust me, you’ll want to eat them warm rather than doing dishes later.
How to Make White Chocolate Chip Biscoff Stuffed Cookies
-
Freeze the Biscoff:
Line a small plate or baking sheet with parchment. Drop 12 heaping teaspoons (about 5g each) of Biscoff spread onto the parchment. Freeze for at least 30 minutes, until firm. (Don’t rush this step! If you skip freezing, the centers will ooze out too soon.) -
Preheat and Prep:
Preheat your oven to 350°F (175°C). Line a baking sheet with parchment paper. -
Mix Wet Ingredients:
In a large bowl, whisk together 1/2 cup (113g) melted unsalted butter, 1/2 cup (110g) packed brown sugar, and 1/4 cup (50g) white sugar until smooth and glossy, about 1 minute. Add 1 large egg and 1 1/2 tsp vanilla extract; whisk until fully combined. -
Combine Dry Ingredients:
In a medium bowl, whisk together 1 2/3 cups (200g) all-purpose flour, 1/2 tsp baking soda, and 1/4 tsp salt. -
Make the Dough:
Add the dry ingredients to the wet mixture. Use a spatula to fold until just combined—don’t overmix, or your cookies will be tough. The dough should be soft but not sticky. -
Stir in the Chips:
Gently fold in 3/4 cup (135g) white chocolate chips. Save a handful for pressing on top if you like pretty cookies. -
Shape the Cookies:
Scoop out 12 balls of dough (about 2 tbsp / 45g each). Flatten each ball in your palm, place a frozen Biscoff dollop in the center, and wrap the dough around it, sealing the edges. Roll gently into a ball. Place on the baking sheet, spaced at least 2 inches (5cm) apart. -
Bake:
Bake for 10-12 minutes, until the edges are just set and the centers look slightly underdone. (They’ll continue to set as they cool.) If you like extra gooey centers, pull them at 10 minutes. -
Cool:
Let cookies cool on the baking sheet for 5 minutes, then transfer to a wire rack. (If you try to move them too soon, they might break—trust me, I’ve done it!) Enjoy warm for peak gooeyness, or let cool for a firmer center.
Troubleshooting:
– If your dough feels too sticky, chill it for 10 minutes before shaping.
– If cookies spread too much, your butter was probably too warm. Next time, chill the shaped cookies for 10 minutes before baking.
– Don’t skip the parchment paper—it makes for easy cleanup and perfect bottoms every time.
Cooking Tips & Techniques
- Freeze Biscoff Thoroughly: I learned the hard way—don’t shortcut this step! I once tried baking with just refrigerated Biscoff, and it melted into the dough (delicious, but no molten center!). Freezing gives you that dramatic gooey middle.
- Don’t Overbake: Cookies should look a little underdone when you pull them out. The residual heat will finish them off. If you wait for golden tops, you’ll miss that soft, bakery-style texture.
- Chill the Dough (Optional): If your kitchen is warm or your butter was super hot, pop the shaped dough in the fridge for 10 minutes before baking. This keeps them thick and gooey.
- Use a Cookie Scoop: For the most consistent size (and perfect presentation!), use a scoop. If you don’t have one, just eyeball it—no judgment here.
- Press Extra Chips on Top: For bakery-style looks, press a few white chocolate chips onto the tops of the cookies before baking. They’ll stay visible and look extra tempting.
- Rotate the Pan: All ovens have hot spots. Rotate your baking sheet halfway through for even baking, especially if baking more than one batch.
- Don’t Rush Cooling: I know it’s hard, but let your cookies cool for at least five minutes before moving them. The Biscoff center is molten at first and firms up as it cools.
Honestly, my first batch was a disaster—too flat, no gooey center, and a sticky mess. But after a few tweaks (mostly freezing that Biscoff solid), I finally nailed the perfect thick, gooey, white chocolate chip Biscoff stuffed cookie. These tips will help you skip the learning curve and bake like a pro!
Variations & Adaptations
- Gluten-Free: Substitute a 1:1 gluten-free flour blend for the all-purpose flour. I’ve used Bob’s Red Mill with great results—just check that your baking soda and chocolate chips are GF too.
- Double Chocolate: Swap half the white chocolate chips for milk or dark chocolate chips, or use all dark chocolate for a richer cookie. (It’s a game changer for chocolate lovers!)
- Stuffed with Nutella: If you’re feeling adventurous, freeze teaspoons of Nutella instead of Biscoff for a chocolate-hazelnut twist. It’s just as gooey and totally addictive.
- Dairy-Free: Use vegan butter and dairy-free white chocolate chips—no one will notice the difference.
- Add Crunch: Stir in 1/4 cup chopped toasted pecans or crushed Biscoff cookies for extra texture.
- Holiday Spice: Add 1/2 tsp ground cinnamon or a pinch of ginger to the dough for a festive flavor.
I once made a batch using leftover caramel sauce instead of Biscoff—delicious, but definitely messier! That’s the fun of this recipe: you can play around and make it your own. If you have a favorite spread or cookie butter, go for it!
Serving & Storage Suggestions
Serving: These cookies are best served warm, when the white chocolate is just melted and the Biscoff center is gooey. If you’re making them for a party, bake right before guests arrive for maximum “wow” factor. They look gorgeous piled on a rustic wooden board or a pretty cake stand—trust me, they won’t last long.
Pairings: Serve with a cold glass of milk, a mug of coffee, or even a scoop of vanilla ice cream for an extra-special treat. They’re also amazing alongside a hot chai latte—the spices in the Biscoff play so well with the tea.
Storage:
- Store cooled cookies in an airtight container at room temperature for up to 3 days.
- For longer storage, refrigerate for up to a week (the centers stay gooey!).
- Freeze baked cookies for up to 3 months—just thaw and warm in the microwave for 10-15 seconds before serving.
- If storing dough balls, freeze them (already stuffed) and bake straight from frozen, adding 1-2 minutes to the bake time.
The flavors actually deepen after a day, so don’t be afraid to make these ahead. If you like your cookies extra-gooey, just pop them in the microwave for a few seconds before eating!
Nutritional Information & Benefits
Each white chocolate chip Biscoff stuffed cookie (based on a batch of 12) packs about 230 calories, with roughly 12g fat, 28g carbs, 2g protein, and 16g sugar. They’re indulgent, but hey, sometimes you need a treat!
Key Ingredients: Biscoff spread is nut-free (always double-check your jar), so this recipe is safe for most allergy-friendly gatherings. White chocolate chips add calcium, and brown sugar gives a little iron boost—small perks in a decadent cookie.
For those watching gluten or dairy, simple swaps can make these cookies fit your needs without sacrificing flavor. They’re not low-carb or low-sugar, but they’re the kind of treat that satisfies in just one (or two) cookies. I love having one as an afternoon pick-me-up—sometimes a little joy is the best wellness boost.
Conclusion
If you’re looking for a cookie recipe that truly delivers on gooey, rich, and crowd-pleasing, these white chocolate chip Biscoff stuffed cookies are it. They’re easy enough for a beginner, memorable enough for special occasions, and honestly, just pure comfort food in every bite.
I’ve made these cookies for birthdays, holidays, and plenty of “just because” afternoons. Every batch brings a little happiness—especially when you hit that melty, spiced center. Don’t be afraid to try your own twists or swap in new add-ins; this recipe is endlessly forgiving.
If you try these cookies, let me know in the comments! Share your favorite variations, tag a friend who needs a cookie pick-me-up, or just send a photo (because I never get tired of seeing happy cookie faces). Happy baking—go treat yourself!
Frequently Asked Questions
How do I keep the Biscoff center from leaking out?
Freeze the Biscoff dollops until they’re solid—at least 30 minutes. Make sure the cookie dough is sealed tightly around the filling. If needed, chill the dough balls for 10 minutes before baking.
Can I use chocolate chips instead of white chocolate chips?
Absolutely! Milk or dark chocolate chips both work great. The white chocolate just adds a creamy, sweet twist, but any chocolate will be delicious.
Can I make these cookies gluten-free?
Yes, just use a reliable 1:1 gluten-free flour blend for the all-purpose flour. Check that your baking soda and chocolate chips are gluten-free, too.
How do I store leftover cookies?
Store cooled cookies in an airtight container at room temperature for up to 3 days, or refrigerate for up to a week. They also freeze well—just rewarm before serving for that gooey center.
Can I prep the dough ahead of time?
Definitely! Shape and stuff the dough balls, then refrigerate for up to 2 days or freeze for up to 3 months. Bake straight from the fridge or freezer—just add a minute or two to the baking time.
PrintWhite Chocolate Chip Biscoff Stuffed Cookies
These soft and gooey cookies feature a molten Biscoff spread center surrounded by chewy cookie dough and creamy white chocolate chips. Perfect for bake sales, parties, or a cozy treat, they’re easy to make and always a crowd-pleaser.
- Prep Time: 20 minutes
- Cook Time: 12 minutes
- Total Time: 1 hour (includes freezing time)
- Yield: 12 cookies 1x
- Category: Dessert
- Cuisine: American
Ingredients
- 12 heaping teaspoons (about 5g each) Biscoff spread (smooth variety), frozen
- 1 2/3 cups (200g) all-purpose flour
- 1/2 cup (113g) unsalted butter, melted and cooled
- 1/2 cup (110g) packed brown sugar (light or dark)
- 1/4 cup (50g) white granulated sugar
- 1 large egg, room temperature
- 1 1/2 teaspoons vanilla extract
- 1/2 teaspoon baking soda
- 1/4 teaspoon salt
- 3/4 cup (135g) white chocolate chips
Instructions
- Line a small plate or baking sheet with parchment paper. Drop 12 heaping teaspoons (about 5g each) of Biscoff spread onto the parchment. Freeze for at least 30 minutes, until firm.
- Preheat your oven to 350°F (175°C). Line a baking sheet with parchment paper.
- In a large bowl, whisk together melted butter, brown sugar, and white sugar until smooth and glossy, about 1 minute. Add the egg and vanilla extract; whisk until fully combined.
- In a medium bowl, whisk together flour, baking soda, and salt.
- Add the dry ingredients to the wet mixture. Use a spatula to fold until just combined. The dough should be soft but not sticky.
- Gently fold in the white chocolate chips. Save a handful for pressing on top if desired.
- Scoop out 12 balls of dough (about 2 tablespoons each). Flatten each ball in your palm, place a frozen Biscoff dollop in the center, and wrap the dough around it, sealing the edges. Roll gently into a ball. Place on the baking sheet, spaced at least 2 inches apart.
- Bake for 10-12 minutes, until the edges are just set and the centers look slightly underdone.
- Let cookies cool on the baking sheet for 5 minutes, then transfer to a wire rack. Enjoy warm for a gooey center, or let cool for a firmer center.
Notes
Freeze the Biscoff spread thoroughly for a gooey center. Don’t overbake; cookies should look slightly underdone when removed from the oven. For gluten-free, use a 1:1 GF flour blend. For dairy-free, use vegan butter and dairy-free white chocolate chips. Store in an airtight container for up to 3 days or freeze for longer storage. Let cookies cool for at least 5 minutes before moving to avoid breaking.
Nutrition
- Serving Size: 1 cookie
- Calories: 230
- Sugar: 16
- Sodium: 90
- Fat: 12
- Saturated Fat: 7
- Carbohydrates: 28
- Protein: 2
Keywords: biscoff cookies, white chocolate chip cookies, stuffed cookies, gooey cookies, easy cookie recipe, dessert, bake sale, party cookies, nut-free cookies, beginner baking