“I wasn’t expecting dessert advice from my neighbor Jim—the guy who usually talks about fishing—but there I was, standing in his cozy kitchen on a Friday evening, watching him assemble what he called his ‘flag berry cheesecake bars.’ Honestly, it looked too good to be true: creamy cheesecake, vibrant berries arranged like a tiny flag, all on a buttery crust. Jim shrugged, saying it was his go-to for every summer get-together, and before I knew it, I was hooked.
That night, I ended up with blueberry-stained fingers, a cracked mixing bowl (don’t ask), and a newfound favorite dessert that I’ve been making ever since. Maybe you’ve been there—wanting something simple but impressive, a treat that looks like you spent hours but really came together quickly. These perfect flag berry cheesecake bars do just that. Trust me, whether it’s a July 4th picnic, a birthday party, or just a weekend craving, they bring smiles and a little festive flair without fuss.
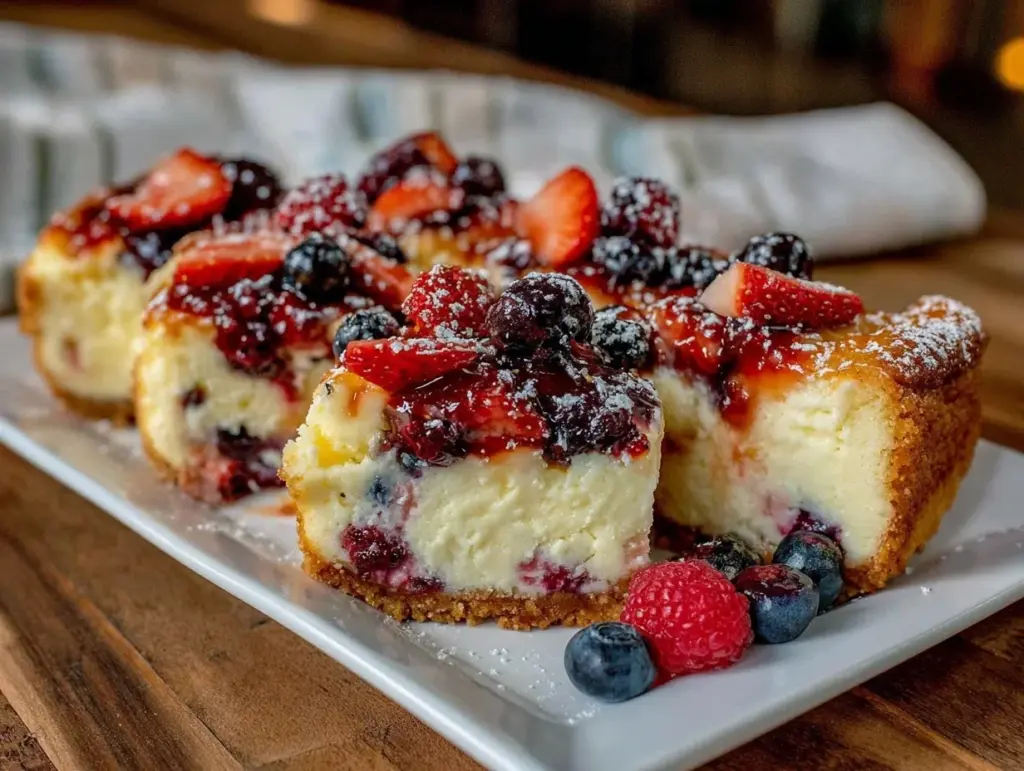
Let me tell you, the way the tart berries sit atop the rich, velvety cheesecake filling, all resting on a crumbly, buttery base, it’s just the kind of dessert that makes you pause and savor. Plus, it’s easy enough to whip up even when life’s throwing curveballs your way—like the time I forgot the sugar and had to salvage the filling with extra vanilla (spoiler: it still worked!). That’s what keeps me coming back to this recipe, and I’m betting you’ll feel the same.
Why You’ll Love This Recipe
From my kitchen experiments and many celebrations, I can say this recipe truly shines for a bunch of reasons. Here’s why I keep making these cheesecake bars and why you might want to too:
- Quick & Easy: This dessert comes together in under an hour, perfect for busy weeknights or last-minute plans.
- Simple Ingredients: No need to hunt for fancy items—most are pantry staples or fresh berries you can find anywhere.
- Perfect for Celebrations: Whether it’s a picnic, holiday party, or casual get-together, these bars feel special without stress.
- Crowd-Pleaser: Kids and adults alike rave about the balance of creamy, sweet, and tart flavors.
- Unbelievably Delicious: The smooth cheesecake layer paired with the fresh berries and buttery crust gives you that classic comfort food vibe with a fresh twist.
What sets this recipe apart is the way the berries are arranged—like a little flag waving atop the cheesecake, making it as visually delightful as it is tasty. Plus, blending the cream cheese just right (no lumps!) and a touch of lemon zest in the filling adds a brightness that makes each bite memorable. Honestly, it’s not just another cheesecake bar; it’s the one you’ll want to bring out whenever you want to impress without overcomplicating.
What Ingredients You Will Need
This recipe uses simple, wholesome ingredients to deliver bold flavor and satisfying texture without fuss. Most of these are pantry staples, and the fresh berries add that seasonal pop.
- For the Crust:
- 1 ½ cups graham cracker crumbs (about 10 full sheets, finely crushed) – I prefer Honey Maid for best texture
- ⅓ cup unsalted butter, melted (adds richness and helps bind the crust)
- 2 tablespoons granulated sugar (balances the buttery crust)
- For the Cheesecake Filling:
- 16 oz (450 g) cream cheese, softened (room temperature is key for smoothness)
- ⅔ cup granulated sugar
- 2 large eggs, room temperature
- 1 teaspoon pure vanilla extract (real vanilla makes a difference!)
- 1 teaspoon lemon zest (brightens the flavor)
- 2 tablespoons all-purpose flour (helps the filling set)
- For the Topping:
- 1 ½ cups fresh blueberries (for the blue part of the flag)
- 1 ½ cups sliced strawberries (for the red stripes)
- Optional: 1 tablespoon apricot jam (warmed, to glaze the berries and add shine)
If you want to swap out the crust, almond flour works well for a gluten-free option, and coconut oil can replace butter for a dairy-free twist. For the berries, frozen is fine if fresh aren’t available, but thaw and drain them well to avoid sogginess. Pro tip: look for firm, bright berries—especially strawberries—to keep the flag looking sharp and fresh.
Equipment Needed
- 9×13-inch (23×33 cm) baking pan – a non-stick one or lined with parchment for easy removal
- Mixing bowls (one large for crust, one medium for filling)
- Electric mixer or stand mixer – to get the cream cheese silky smooth (trust me, it’s worth it)
- Measuring cups and spoons – precise measurements mean perfect results
- Spatula and wooden spoon – for scraping and mixing
- Knife and cutting board – for slicing strawberries neatly
- Small saucepan (optional) – to warm the apricot jam for glazing
If you don’t have an electric mixer, a sturdy whisk and a bit of elbow grease will do, but it takes longer. I’ve used disposable aluminum pans in a pinch for potlucks, and while they work, a glass or metal pan gives a better bake and easier slicing. Keeping your cream cheese at room temp before mixing is a maintenance step that saves you from lumpy filling disasters.
Preparation Method
- Preheat the oven to 325°F (163°C). Line your 9×13-inch pan with parchment paper, leaving some overhang for easy lifting later. This step saves so much cleanup hassle.
- Make the crust: In a medium bowl, combine 1 ½ cups graham cracker crumbs, ⅓ cup melted butter, and 2 tablespoons sugar. Mix until the crumbs are evenly coated and resemble wet sand.
- Press the crust mixture firmly into the bottom of the prepared pan. Use the back of a measuring cup to pack it down evenly—this helps avoid crumbly bars later. Bake for 10 minutes, then remove from oven and let cool slightly while you prepare the filling.
- Prepare the cheesecake filling: Beat 16 oz softened cream cheese with ⅔ cup sugar until smooth and creamy—no lumps! This usually takes about 3-4 minutes with an electric mixer on medium speed.
- Add 2 eggs, one at a time, mixing well after each addition. Then stir in 1 teaspoon vanilla extract and 1 teaspoon lemon zest for that fresh zing.
- Sprinkle 2 tablespoons flour over the mixture and gently fold it in—this helps the filling hold together without becoming cakey.
- Pour the filling evenly over the warm crust, smoothing the top with a spatula.
- Arrange the berries on top in a flag pattern: Line up the blueberries in the top left corner to form the blue square, then create horizontal stripes with the sliced strawberries across the rest of the bar. Don’t worry if it’s not perfect; rustic charm counts here!
- Optional glaze: Warm 1 tablespoon apricot jam in a small saucepan until runny, then brush gently over the berries for a shiny finish.
- Bake the bars for 35-40 minutes until the edges are set but the center still jiggles slightly. This ensures a creamy texture once cooled.
- Cool completely at room temperature, then refrigerate for at least 3 hours or overnight—this chilling step is crucial for clean slices and perfect firmness.
- Use the parchment overhang to lift the bars from the pan and cut into squares. A warm, wet knife makes slicing neat and easy.
Pro tip: If your filling cracks, don’t panic! It still tastes amazing. A dollop of whipped cream or a dusting of powdered sugar can help hide imperfections when serving.
Cooking Tips & Techniques
Getting cheesecake bars just right can be a bit tricky, but here are the tips I learned the hard way:
- Room temperature ingredients: Make sure the cream cheese and eggs aren’t cold. Cold ingredients can cause lumps or curdling in the filling.
- Don’t overmix: Blend the filling just until smooth. Overmixing incorporates too much air and causes cracks during baking.
- Baking temperature: Keeping the oven at 325°F (163°C) prevents the filling from puffing up and cracking.
- Cooling is key: Let the bars cool gradually at room temperature before chilling. Sudden temperature changes can cause cracks.
- Arranging the berries: Pat dry berries before placing them to avoid soggy spots. I once skipped this and ended up with a watery mess!
- Multitasking: While the crust bakes, prep your filling and slice berries. Saves time and keeps things flowing.
Remember, cheesecake perfection is part science, part patience, and part heart. These tips can help you avoid common pitfalls—like a cracked top or crumbly crust—and get you that smooth, luscious texture you want.
Variations & Adaptations
Feel free to make this recipe your own with these tweaks I’ve tried and loved:
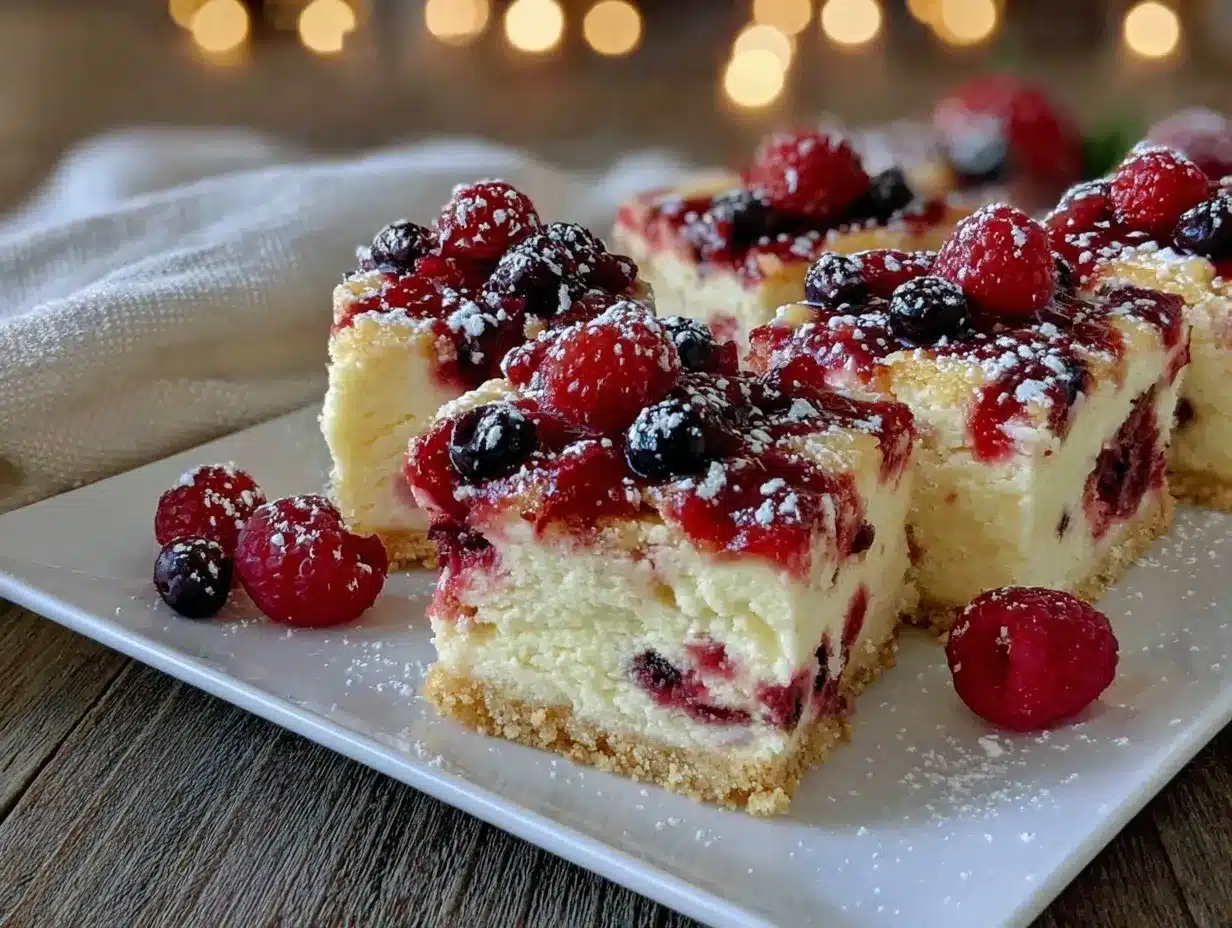
- Seasonal Berry Mix: Swap the strawberries and blueberries for raspberries, blackberries, or even diced peaches in summer. It’s a fresh take that still looks stunning.
- Gluten-Free Crust: Use almond flour or gluten-free graham cracker crumbs combined with melted coconut oil instead of butter for an allergy-friendly option.
- Chocolate Twist: Add ½ cup mini chocolate chips into the cheesecake filling or sprinkle some cocoa powder into the crust. I once threw in dark chocolate chunks last minute—it was a hit!
- Vegan Adaptation: Substitute cream cheese with dairy-free cream cheese, use flax eggs instead of regular eggs, and coconut oil for butter. The texture is slightly different but still delicious.
- Miniature Bars: Make bite-size versions using a mini muffin tin for parties or kids’ lunches.
These variations let you customize based on dietary needs, seasonality, or just your mood. Honestly, experimenting with berries and crust types keeps this recipe exciting every time I make it.
Serving & Storage Suggestions
These cheesecake bars are best served chilled, right from the fridge, allowing the flavors to meld and the texture to be perfectly firm but creamy. I like to plate them with a sprig of mint or a light dusting of powdered sugar for a little extra flair.
Pair them with a cup of freshly brewed coffee or a glass of sparkling lemonade for a delightful balance of flavors. They also go surprisingly well with a scoop of vanilla ice cream if you want to get a little indulgent.
To store, cover tightly with plastic wrap or place in an airtight container. They keep well in the refrigerator for up to 4 days—though I doubt they’ll last that long! For longer storage, freeze the bars individually wrapped in parchment and foil for up to 2 months. When ready to enjoy, thaw overnight in the fridge and let sit at room temperature for 15 minutes before serving.
Flavors actually develop a bit after a day in the fridge, making the berries juicier and the cheesecake even creamier. So if you can wait, it’s worth it!
Nutritional Information & Benefits
Each serving of these flag berry cheesecake bars (assuming 12 squares) contains approximately:
| Nutrient | Amount |
|---|---|
| Calories | 320 kcal |
| Fat | 20 g |
| Saturated Fat | 12 g |
| Carbohydrates | 30 g |
| Sugar | 22 g |
| Protein | 5 g |
| Fiber | 2 g |
Thanks to the fresh berries, these bars provide antioxidants and vitamin C, which support your immune system and add a natural sweetness without processed sugars. The cream cheese offers calcium and protein, but keep in mind this dessert is definitely a treat rather than a health food. For those with gluten intolerance, swapping the crust to a gluten-free option keeps it accessible.
From a personal wellness view, I like to enjoy a small piece with a side of fresh fruit, balancing indulgence with freshness. It’s all about savoring the moment and making celebrations special without guilt.
Conclusion
These perfect flag berry cheesecake bars are a simple way to bring a little festive joy to your table. They’re easy to make, visually stunning, and delicious enough to win over even the toughest dessert critics. Whether you’re new to baking or a seasoned pro, this recipe invites you to customize and make it your own.
I keep coming back to it because it feels like a little celebration every time I slice into those creamy layers topped with juicy berries. Honestly, it’s one of those desserts that makes you pause and smile, and isn’t that what food should be about?
If you try this recipe, I’d love to hear how you made it yours—drop a comment below or share your berry arrangements! Here’s to sweet moments and tasty memories.
FAQs
Can I use frozen berries for the flag berry cheesecake bars?
Yes, you can use frozen berries, but be sure to thaw and drain them well to avoid excess moisture that can make the crust soggy.
How do I prevent cracks in the cheesecake filling?
Make sure your cream cheese and eggs are at room temperature, don’t overmix the batter, bake at a moderate temperature (325°F/163°C), and cool the bars gradually before refrigerating.
Can I make these bars ahead of time?
Absolutely! They actually taste better after chilling overnight, which helps the flavors meld and makes slicing cleaner.
What can I substitute for graham cracker crumbs?
Almond flour or crushed digestive biscuits work well, and coconut flakes can add a unique texture for a twist.
How should I store leftover cheesecake bars?
Store them in an airtight container in the fridge for up to 4 days, or freeze individually wrapped for up to 2 months. Thaw overnight in the fridge before serving.
Pin This Recipe!
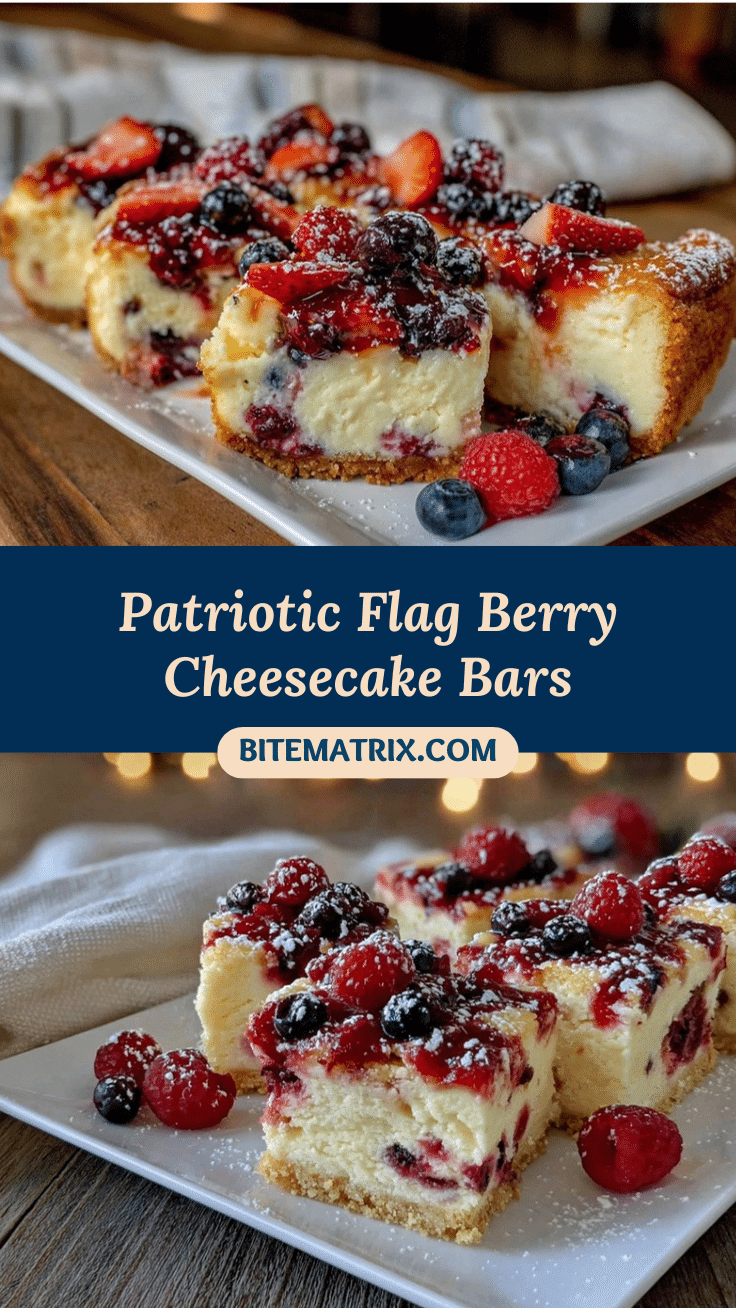
Perfect Flag Berry Cheesecake Bars

These cheesecake bars feature a creamy filling topped with fresh berries arranged like a flag, all on a buttery graham cracker crust. Perfect for celebrations and easy to make in under an hour.
- Prep Time: 15 minutes
- Cook Time: 50 minutes
- Total Time: 3 hours 65 minutes
- Yield: 12 servings 1x
- Category: Dessert
- Cuisine: American
Ingredients
- 1 ½ cups graham cracker crumbs (about 10 full sheets, finely crushed)
- ⅓ cup unsalted butter, melted
- 2 tablespoons granulated sugar
- 16 oz cream cheese, softened
- ⅔ cup granulated sugar
- 2 large eggs, room temperature
- 1 teaspoon pure vanilla extract
- 1 teaspoon lemon zest
- 2 tablespoons all-purpose flour
- 1 ½ cups fresh blueberries
- 1 ½ cups sliced strawberries
- Optional: 1 tablespoon apricot jam, warmed
Instructions
- Preheat the oven to 325°F (163°C). Line a 9×13-inch baking pan with parchment paper, leaving some overhang for easy lifting.
- In a medium bowl, combine graham cracker crumbs, melted butter, and sugar. Mix until crumbs are evenly coated.
- Press the crust mixture firmly into the bottom of the prepared pan. Bake for 10 minutes, then remove and let cool slightly.
- Beat softened cream cheese with sugar until smooth and creamy, about 3-4 minutes with an electric mixer.
- Add eggs one at a time, mixing well after each addition. Stir in vanilla extract and lemon zest.
- Sprinkle flour over the mixture and gently fold it in.
- Pour the filling evenly over the warm crust and smooth the top.
- Arrange blueberries in the top left corner to form the blue square of the flag, then create horizontal stripes with sliced strawberries across the rest of the bar.
- Optional: Warm apricot jam and brush gently over the berries for a shiny finish.
- Bake for 35-40 minutes until edges are set but center jiggles slightly.
- Cool completely at room temperature, then refrigerate for at least 3 hours or overnight.
- Use parchment overhang to lift bars from pan and cut into squares. Use a warm, wet knife for neat slices.
Notes
Use room temperature cream cheese and eggs to avoid lumps. Do not overmix the filling to prevent cracks. Cool bars gradually before refrigerating. Pat dry berries before arranging to avoid sogginess. Frozen berries can be used if thawed and drained well.
Nutrition
- Serving Size: 1 bar (1/12th of rec
- Calories: 320
- Sugar: 22
- Fat: 20
- Saturated Fat: 12
- Carbohydrates: 30
- Fiber: 2
- Protein: 5
Keywords: cheesecake bars, flag berry cheesecake, easy dessert, summer dessert, berry dessert, homemade cheesecake bars, patriotic dessert


