“You really think a cake can capture Aries energy?” my friend joked over text as I described my latest baking experiment. Honestly, I wasn’t sure either. It started on a hectic afternoon—the kind where you’re juggling a million things, and suddenly you remember it’s your best friend’s Aries birthday in a couple of hours. No time for a fancy bakery run, but I wanted something that shouted boldness and warmth, just like her.
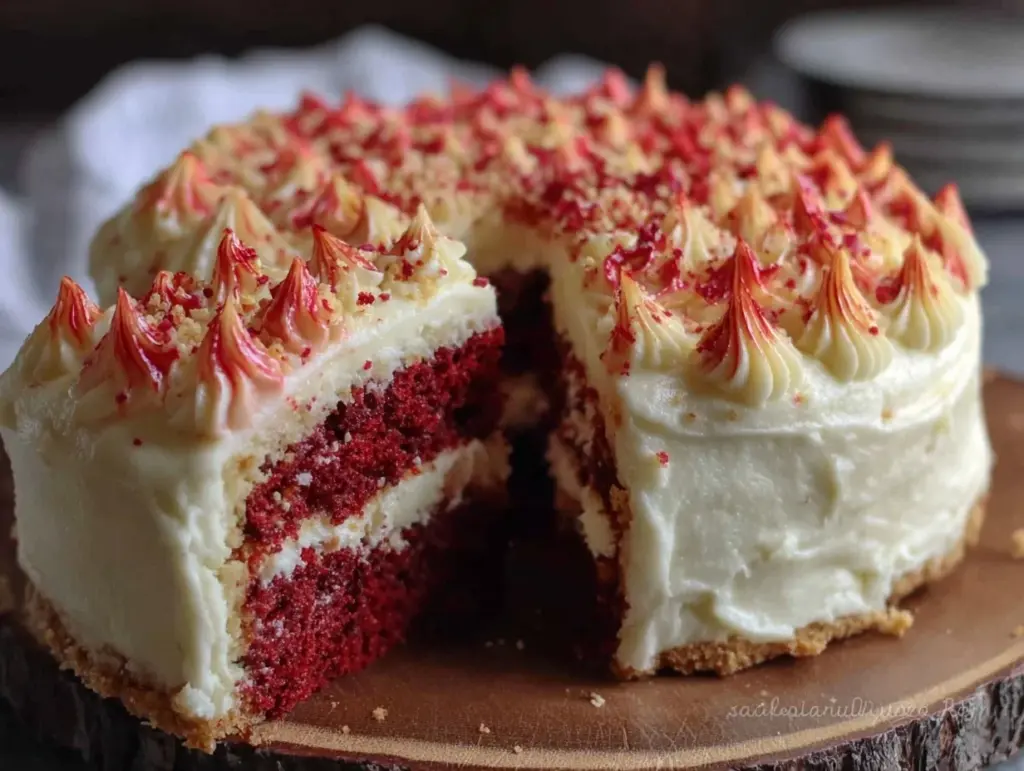
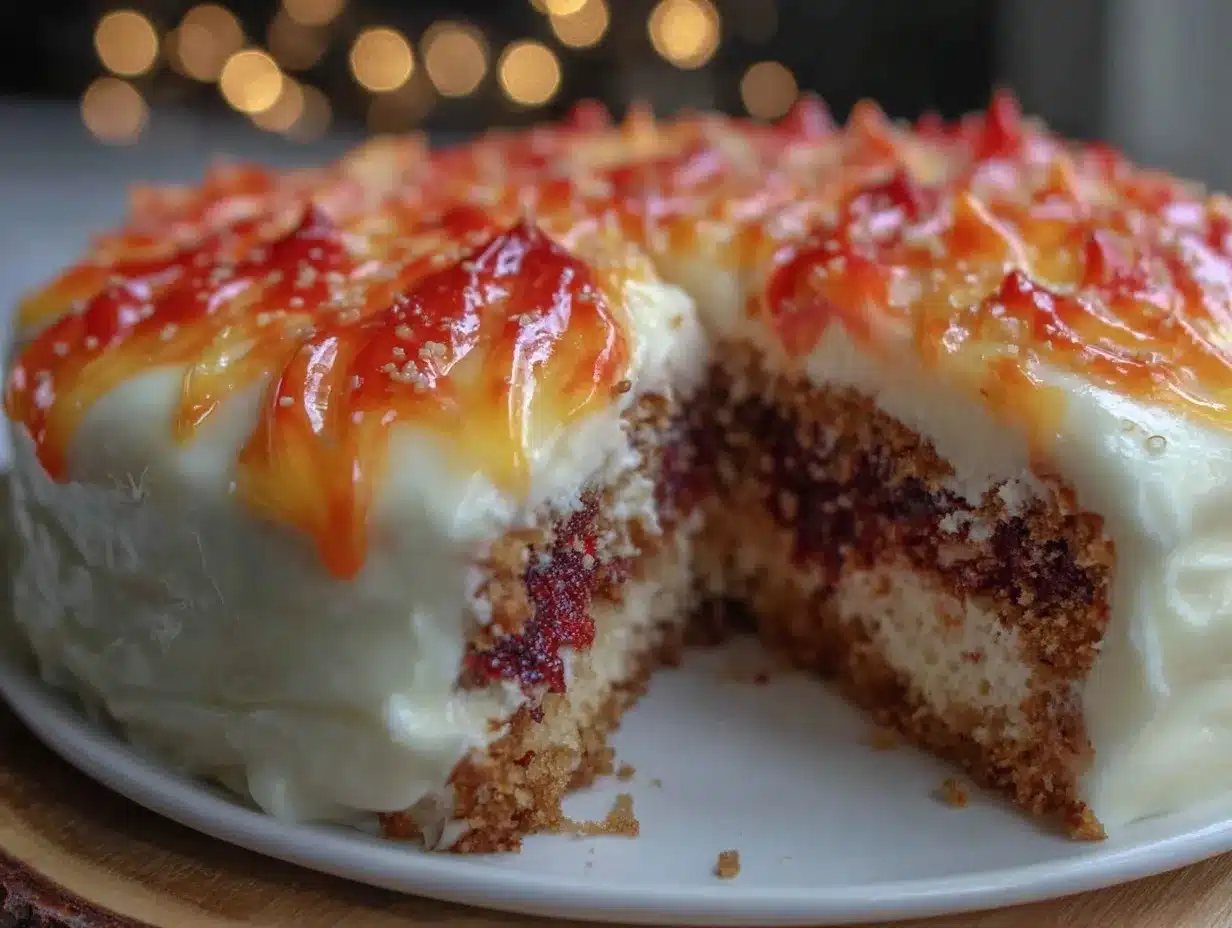
I dug around the pantry, half skeptical, half hopeful, and pulled together ingredients for a cake that turned out to be exactly that: unapologetically fiery and surprisingly easy. The icing was the real kicker—a swirl of flame-inspired colors that looked like it was flickering right on top. It wasn’t just a cake; it was a statement, a moment of celebration captured in frosting.
That night, as we lit the candles and the room glowed with laughter and warmth, I realized this recipe stuck because it matches Aries’ fiery spirit perfectly. Not too complicated, full of personality, and unforgettable. It’s the kind of cake that makes you want to try it again, maybe tweak it, but always come back to that perfect blaze of flavor and color.
So, here’s the story and the recipe behind the Perfect Aries Fire Sign Birthday Cake with Fiery Flame Icing. It’s not just dessert—it’s a spark you can taste.
Why You’ll Love This Recipe
Having tested this cake multiple times (yes, I baked it three times in one week just to get that fiery icing right!), I can say it’s a keeper for Aries birthdays and any occasion that calls for bold flavor and fun presentation. Here’s why this cake stands out:
- Quick & Easy: From mixing to frosting, it takes under 90 minutes, perfect for last-minute celebrations or busy cooks.
- Simple Ingredients: You probably have everything in your kitchen already—no complicated shopping required.
- Perfect for Bold Occasions: Aries birthdays, fiery-themed parties, or any time you want a cake with attitude.
- Crowd-Pleaser: The cake’s moist texture and the sweet-spicy icing combo always get rave reviews from both kids and adults.
- Unbelievably Delicious: The balance between a tender vanilla crumb and the zingy flame icing is unlike any other birthday cake you’ve tried.
- Unique Fiery Flame Icing: The swirl technique and color blend create an eye-catching effect that’s fun to make and impresses every time.
This isn’t just a birthday cake; it’s the kind of treat that invites everyone to pause and savor the moment, like a warm celebration of fire and friendship. It’s comfort food with a twist—fast, flavorful, and full of personality. If you enjoy recipes with a little flair, you might also appreciate the easy no-bake strawberry cheesecake cups for a fresh dessert balance at your party.
What Ingredients You Will Need
This recipe calls for straightforward, pantry-friendly ingredients that come together to create a moist cake and fiery icing. The ingredients are grouped to keep things clear and easy to follow.
For the Cake Batter:
- All-purpose flour – 2 ½ cups (315 g)
- Baking powder – 2 ½ teaspoons
- Baking soda – ½ teaspoon
- Salt – ½ teaspoon
- Granulated sugar – 1 ¾ cups (350 g)
- Unsalted butter – ¾ cup (170 g), softened (I prefer Kerrygold for its creamy texture)
- Large eggs – 3, room temperature
- Vanilla extract – 2 teaspoons (real vanilla for best flavor)
- Whole milk – 1 cup (240 ml), at room temperature
- Buttermilk – ½ cup (120 ml) (adds tenderness; can substitute with regular milk plus 1 tablespoon lemon juice)
For the Fiery Flame Icing:
- Unsalted butter – 1 cup (225 g), softened
- Powdered sugar – 4 cups (480 g), sifted
- Vanilla extract – 1 teaspoon
- Heavy cream or whole milk – 2 to 4 tablespoons (adjust for desired consistency)
- Food coloring: red, orange, and yellow gel colors (gel colors work best for vibrant flames)
- A pinch of cayenne pepper (optional, for a subtle warmth in the icing)
Feel free to swap the butter for a dairy-free spread if needed, or use almond milk in the batter for a dairy-free twist. When it comes to the flame colors, I like using AmeriColor gels—they blend smoothly and hold their vibrancy well. If you want a bit more heat in your icing, that pinch of cayenne really brings a surprising kick, but it’s totally optional.
Equipment Needed
- Two 8-inch (20 cm) round cake pans (non-stick or lined with parchment paper)
- Electric mixer or stand mixer (hand mixers work fine too, but the electric makes the icing silky)
- Mixing bowls (medium and large)
- Measuring cups and spoons (precision matters here)
- Spatula (rubber or silicone for folding batter and scraping bowls)
- Offset spatula or butter knife (for smooth icing application)
- Food-safe paintbrush or small spatula (for painting the flame colors on the icing)
- Cooling racks (to cool the cake layers evenly)
If you don’t have round pans, square pans can work but you’ll need to adjust baking time slightly. When I first made this cake, I didn’t have an offset spatula and used a butter knife—works okay but the spatula really helps with that smooth flame effect. Also, investing in a good set of gel food colors makes the decorating much easier and more fun.
Preparation Method
- Preheat the oven: Set to 350°F (175°C). Grease and line two 8-inch cake pans with parchment paper. This prevents sticking and helps the cakes come out cleanly. (5 minutes)
- Mix dry ingredients: In a medium bowl, whisk together 2 ½ cups all-purpose flour, 2 ½ teaspoons baking powder, ½ teaspoon baking soda, and ½ teaspoon salt. This ensures even distribution of leavening agents for a consistent rise. (3 minutes)
- Cream butter and sugar: In a large bowl, beat ¾ cup softened butter and 1 ¾ cups granulated sugar using an electric mixer on medium speed until light and fluffy, about 3-4 minutes. This step is crucial for a tender crumb. (4 minutes)
- Add eggs and vanilla: Beat in 3 large eggs, one at a time, then add 2 teaspoons vanilla extract. Mix until fully incorporated, scraping down the sides as needed. (3 minutes)
- Alternate adding dry ingredients and milk: With mixer on low, add one-third of the dry ingredients, then half of the milk (1 cup whole milk), then another third of dry, then the ½ cup buttermilk, and finally the rest of the dry ingredients. Mix just until combined. Do not overmix or the cake will be dense. (5 minutes)
- Pour batter and bake: Divide batter evenly between prepared pans. Smooth tops gently with spatula. Bake 30-35 minutes or until a toothpick inserted comes out clean. (35 minutes)
- Cool cakes: Let cakes cool in pans for 10 minutes, then invert onto cooling racks to cool completely. This prevents sogginess. (1 hour)
- Prepare icing: Beat 1 cup softened butter until creamy. Gradually add 4 cups powdered sugar, mixing on low. Add 1 teaspoon vanilla and 2-4 tablespoons heavy cream to reach spreadable consistency. (10 minutes)
- Create fiery flame icing: Divide icing into three small bowls. Tint one red, one orange, and one yellow using gel colors. You can add a pinch of cayenne pepper to the red icing if you want that subtle heat. (5 minutes)
- Assemble and decorate: Place one cake layer on your serving plate. Spread a thin layer of plain icing on top. Add the second layer. Using an offset spatula, apply a base layer of plain icing around the cake. Then, use the red, orange, and yellow icings to paint flame shapes around the sides and top with a small brush or spatula. Blend the colors slightly for a natural flame look. Chill for 15 minutes before serving to set the icing. (20 minutes)
If the icing feels too thick while decorating, add a little more cream, one teaspoon at a time. For a smoother cake crumb, don’t skip the step of bringing eggs and milk to room temperature. It makes a difference in how everything blends. Sometimes, I gently toast the nuts on top of this cake for extra crunch, but that’s totally optional.
Cooking Tips & Techniques
When making this cake, I learned a few things the hard way (because, honestly, who hasn’t battled with cracked cake tops or runny icing?). Here’s what will save you some headaches:
- Don’t overmix the batter: Once you add the dry ingredients, mix just enough to combine. Overmixing develops gluten, making the cake tough instead of tender.
- Room temperature ingredients matter: Butter, eggs, and milk at room temp blend better, giving a smoother batter and more even rise.
- Use gel food coloring: Liquid colors can thin your icing. Gel colors give vibrant hues without messing with texture.
- Chill the cake after decorating: This helps set the icing and makes slicing cleaner.
- For flame icing: Use a small food-safe brush or the edge of a spatula to blend red, orange, and yellow smoothly. It’s okay if it’s not perfect—flames flicker, right?
- Timing multitasking: While the cake bakes, prep your icing colors. Makes the whole process quicker and less stressful.
One time, I added too much cayenne to the icing. Lesson learned: start small with spice and taste as you go! If you’re curious about other crowd-pleasing recipes that balance easy prep and big flavor, you might enjoy the savory beer can chicken with herb butter glaze—a hearty main to pair with this fiery dessert.
Variations & Adaptations
This cake is a canvas for your creativity. Here are some variations you can try:
- Gluten-Free Version: Substitute the all-purpose flour with a 1:1 gluten-free baking blend. Add 1 teaspoon xanthan gum if your blend doesn’t include it for structure.
- Vegan Adaptation: Use flax eggs (1 tablespoon flaxseed meal + 3 tablespoons water per egg), dairy-free butter, and almond or oat milk. Adjust baking time slightly as the texture changes.
- Spiced Flame Icing: Add a pinch of cinnamon or smoked paprika instead of cayenne for a different kind of warmth in the frosting.
- Fruit-Infused Layers: Add fresh or frozen chopped strawberries or raspberries to the batter for a tangy twist that pairs well with the fiery theme.
- Chocolate Flame Cake: Swap ½ cup of flour for cocoa powder for a rich chocolate base that contrasts beautifully with the bright flame colors.
I once tried swapping the flame colors for a shimmering gold and red combo inspired by the perfect gold leaf champagne cake recipe from this site, and it was stunning for a more elegant Aries birthday vibe.
Serving & Storage Suggestions
Serve this cake at room temperature to fully enjoy the moist crumb and creamy icing. The fiery flame icing looks fantastic with a simple garnish of edible gold flakes or thin slices of fresh strawberries for a pop of freshness.
This cake pairs well with a crisp sparkling beverage or a warm cup of chai tea to balance the sweet and spicy notes. For a party, it makes a bold centerpiece, but it also shines as a treat for a cozy family gathering.
Store leftovers covered tightly in the refrigerator for up to 4 days. Before serving again, let the cake come back to room temperature for about 30 minutes to soften the icing and refresh the flavors.
For longer storage, you can freeze the cake layers (wrapped in plastic wrap and foil) for up to 2 months. Thaw in the refrigerator overnight, then bring to room temp before icing and serving.
Interestingly, the flavors in the icing actually mellow and deepen if you make the cake a day ahead. Patience pays off!
Nutritional Information & Benefits
Estimated per slice (based on 12 servings): 350 calories, 18g fat, 45g carbohydrates, 3g protein.
This cake provides energy-boosting carbohydrates and a good dose of calcium from the butter and milk. The optional cayenne in the icing offers a small metabolism kick and antioxidants.
It’s not a low-calorie dessert, but it’s made with real ingredients, no artificial preservatives, and can be adapted for gluten-free or vegan diets. If you’re mindful of sugar, consider reducing the powdered sugar slightly in the icing or pairing the cake with lighter sides like the fresh creamy cucumber dill salad for balance.
In my experience, this cake fits nicely into celebrations where indulgence and joy are the goals, nourishing both body and spirit.
Conclusion
The Perfect Aries Fire Sign Birthday Cake with Fiery Flame Icing is more than just a dessert—it’s a tribute to fiery passion, bold flavors, and celebration. Whether you’re baking for an Aries friend or just want a cake that makes a statement, this recipe delivers on every level.
Don’t be afraid to tweak the flame colors or add your own spin to the icing. That’s the joy of baking—making it yours. Personally, I love how this cake turns simple pantry ingredients into something unforgettable, bright, and full of character.
If you try this recipe, I’d love to hear how your flames turned out or any cool twists you added. Sharing those moments makes the baking even sweeter. Happy baking and may your celebrations burn bright!
FAQs About the Perfect Aries Fire Sign Birthday Cake
Can I make this cake ahead of time?
Absolutely. You can bake the layers a day or two ahead, wrap them tightly, and refrigerate or freeze. Assemble and decorate on the day of serving for best results.
What if I don’t have gel food coloring?
Gel colors are recommended for vibrant hues without thinning the icing, but if you only have liquid food coloring, use sparingly and add a bit more powdered sugar to maintain icing thickness.
Can I use a different shape pan?
Yes! Square or rectangular pans work fine. Adjust baking time by checking doneness with a toothpick starting a few minutes earlier than the recipe suggests.
Is the cayenne pepper necessary in the icing?
Not at all. It’s optional and adds a subtle warmth that complements the fiery theme, but you can omit it if you prefer a classic sweet icing.
How do I get smooth, crack-free cake layers?
Make sure your ingredients are at room temperature, don’t overmix the batter, and bake at the correct temperature. Avoid opening the oven door too early to prevent sudden temperature drops.
Pin This Recipe!
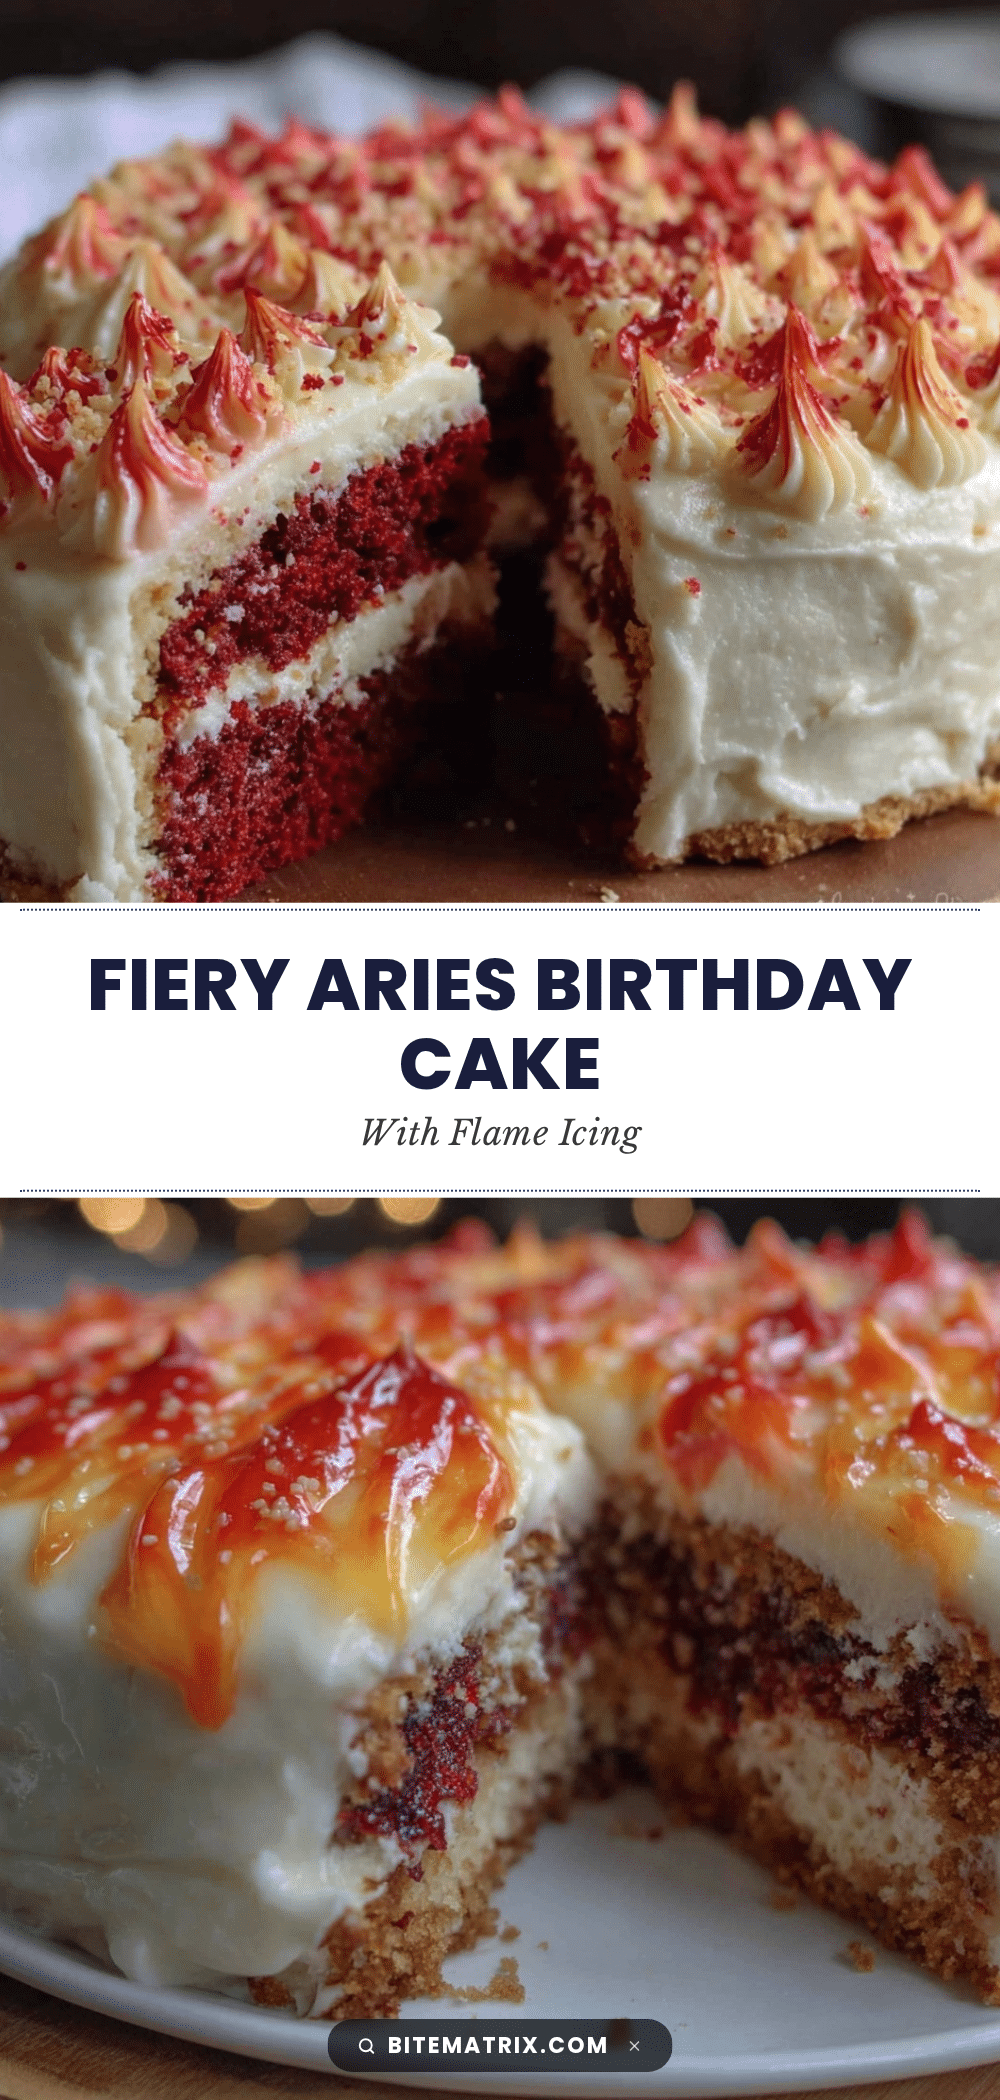
Perfect Aries Fire Sign Birthday Cake with Fiery Flame Icing

A bold and moist vanilla cake with a unique fiery flame icing that captures Aries’ fiery spirit. Quick and easy to make, perfect for birthdays and fiery-themed celebrations.
- Prep Time: 25 minutes
- Cook Time: 35 minutes
- Total Time: 1 hour 20 minutes
- Yield: 12 servings 1x
- Category: Dessert
- Cuisine: American
Ingredients
- 2 ½ cups (315 g) all-purpose flour
- 2 ½ teaspoons baking powder
- ½ teaspoon baking soda
- ½ teaspoon salt
- 1 ¾ cups (350 g) granulated sugar
- ¾ cup (170 g) unsalted butter, softened
- 3 large eggs, room temperature
- 2 teaspoons vanilla extract
- 1 cup (240 ml) whole milk, room temperature
- ½ cup (120 ml) buttermilk (or substitute with regular milk plus 1 tablespoon lemon juice)
- 1 cup (225 g) unsalted butter, softened (for icing)
- 4 cups (480 g) powdered sugar, sifted
- 1 teaspoon vanilla extract (for icing)
- 2 to 4 tablespoons heavy cream or whole milk (for icing)
- Red, orange, and yellow gel food coloring
- A pinch of cayenne pepper (optional, for icing)
Instructions
- Preheat the oven to 350°F (175°C). Grease and line two 8-inch round cake pans with parchment paper.
- In a medium bowl, whisk together the flour, baking powder, baking soda, and salt.
- In a large bowl, beat the softened butter and granulated sugar with an electric mixer on medium speed until light and fluffy, about 3-4 minutes.
- Beat in the eggs one at a time, then add the vanilla extract and mix until incorporated.
- With the mixer on low, alternately add the dry ingredients and the milk: one-third dry ingredients, half the whole milk, another third dry ingredients, the buttermilk, and then the remaining dry ingredients. Mix just until combined.
- Divide the batter evenly between the prepared pans and smooth the tops gently with a spatula.
- Bake for 30-35 minutes or until a toothpick inserted in the center comes out clean.
- Let the cakes cool in the pans for 10 minutes, then invert onto cooling racks to cool completely.
- To prepare the icing, beat the softened butter until creamy. Gradually add powdered sugar, mixing on low speed.
- Add vanilla extract and 2 to 4 tablespoons of heavy cream or milk to reach a spreadable consistency.
- Divide the icing into three small bowls. Tint one red, one orange, and one yellow using gel food coloring. Add a pinch of cayenne pepper to the red icing if desired.
- Place one cake layer on a serving plate and spread a thin layer of plain icing on top. Add the second layer.
- Apply a base layer of plain icing around the cake using an offset spatula.
- Use the red, orange, and yellow icings to paint flame shapes around the sides and top with a small brush or spatula, blending colors slightly for a natural flame look.
- Chill the cake for 15 minutes before serving to set the icing.
Notes
Do not overmix the batter to avoid a tough cake. Use room temperature ingredients for better blending and rise. Gel food coloring is recommended for vibrant colors without thinning the icing. Chill the cake after decorating to set the icing. The pinch of cayenne pepper in the icing is optional but adds a subtle warmth.
Nutrition
- Serving Size: 1 slice (1/12 of cak
- Calories: 350
- Fat: 18
- Carbohydrates: 45
- Protein: 3
Keywords: Aries birthday cake, fiery cake, flame icing, vanilla cake, bold flavor cake, easy birthday cake, colorful icing