“You know that feeling when you’re craving something sweet but don’t want to fire up the oven in the summer heat? That was me last Thursday afternoon, standing in my kitchen with a handful of strawberries and a stubborn sweet tooth. I wasn’t planning to make anything fancy, honestly—just a quick fix. But then I remembered a little trick my friend Mia shared over coffee a few weeks back, scribbled hastily on a napkin while we chatted about easy desserts. Those Easy No-Bake Strawberry Cheesecake Cups came to mind, and I thought, why not give it a try?
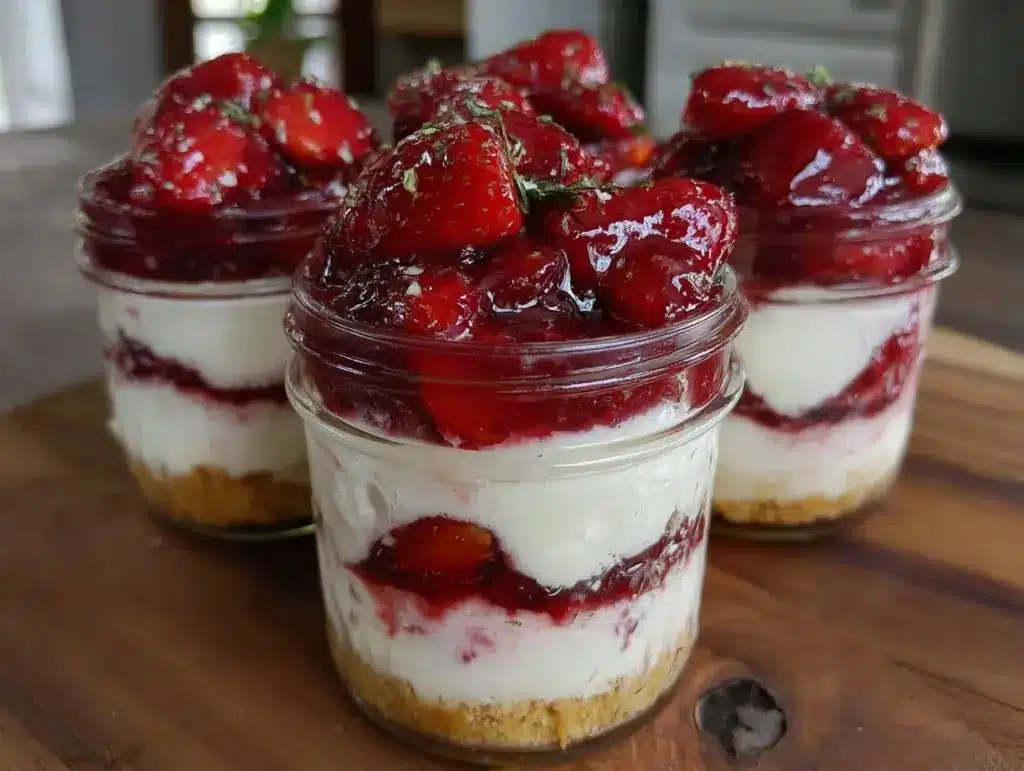
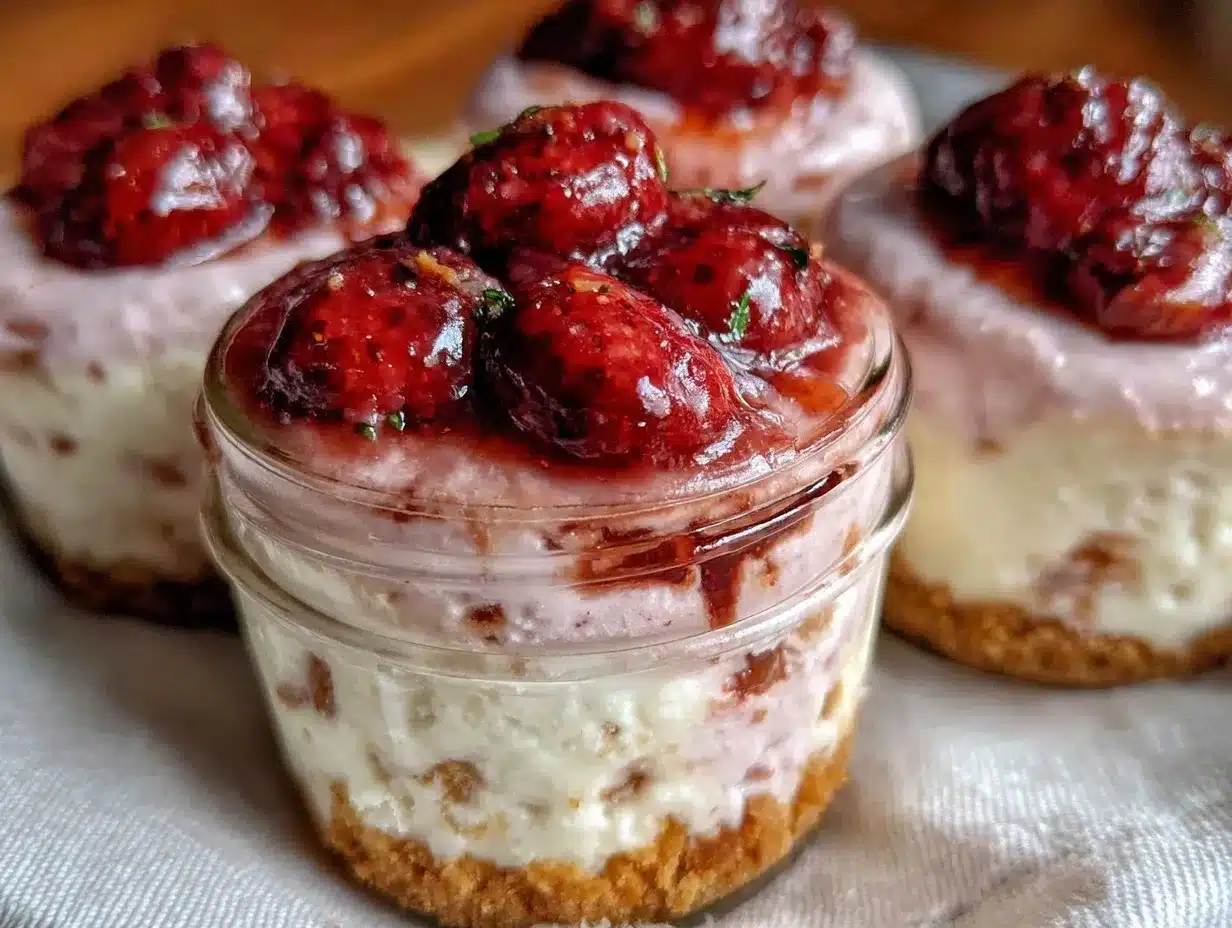
Let me tell you, it turned out to be one of those happy accidents. I made a bit of a mess—cheesecake filling splattered on the counter, and I forgot to chill the cream cheese ahead (rookie move!). But the result? Pure summer magic in a cup. The creamy cheesecake with fresh strawberries layered on a buttery crust made me close my eyes with every bite.
Maybe you’ve been there too—searching for that simple, fuss-free dessert that feels indulgent without the stress. This recipe has stuck with me because it’s just that: quick, no oven required, and the kind of treat that says summer without shouting it. It’s perfect whether you’re hosting a backyard barbecue or just sneaking a sweet moment for yourself after a long day. Honestly, it’s so easy and delicious, I find myself making it again and again.
Why You’ll Love This Recipe
After a few test runs and some small tweaks, these Easy No-Bake Strawberry Cheesecake Cups have become my go-to summer dessert. The joy is in the simplicity and the way the flavors come together effortlessly. Here’s why you’ll fall for them too:
- Quick & Easy: Ready in under 30 minutes, no baking needed—perfect for those sweltering summer afternoons or last-minute dessert plans.
- Simple Ingredients: You probably have everything in your pantry and fridge. No fancy or hard-to-find items, which means less stress and more fun.
- Perfect for Summer Gatherings: Light, refreshing, and visually stunning cups that are sure to impress at potlucks, picnics, or casual dinners.
- Crowd-Pleaser: Kids, adults, picky eaters—everyone seems to love this combo of creamy cheesecake and fresh strawberries.
- Unbelievably Delicious: The balance between the tangy cream cheese filling and the sweet strawberry topping is just spot-on. The buttery crust adds that satisfying crunch.
What really sets this recipe apart is the way the cheesecake filling is whipped to a light, airy texture without complicated steps. No gelatin, no baking, just smooth, creamy goodness that holds up beautifully in individual cups. Plus, layering it with fresh, juicy strawberries makes it feel like a treat without being too heavy.
Honestly, I love that it’s fuss-free but looks like you spent hours preparing. It’s the kind of dessert you can whip up while chatting with friends or even while catching up on your favorite show. Give it a shot—you might just have a new summer favorite on your hands!
What Ingredients You Will Need
This recipe shines because it uses straightforward, wholesome ingredients that come together to create bold flavor and a delightful texture. Most are pantry staples, with fresh strawberries bringing that seasonal brightness.
- For the crust:
- 1 ½ cups graham cracker crumbs (about 10 full sheets, crushed finely)
- 5 tablespoons unsalted butter, melted (adds richness and helps crust bind)
- 2 tablespoons granulated sugar (balances the buttery crust)
- For the cheesecake filling:
- 8 ounces cream cheese, softened (I like Philadelphia brand for smoothness)
- ½ cup powdered sugar (for sweetness without graininess)
- 1 teaspoon pure vanilla extract (quality vanilla makes a difference)
- 1 cup heavy cream, cold (for whipping to fluffy perfection)
- For the topping:
- 1 ½ cups fresh strawberries, hulled and sliced (choose ripe, fragrant berries for best flavor)
- Optional: 1 tablespoon strawberry jam or preserves (for a glossy finish)
Ingredient notes: If you want a gluten-free crust, almond flour works well instead of graham crumbs. For a lighter version, swap heavy cream with coconut cream (chilled) to keep it dairy-free. And if fresh strawberries aren’t in season, thawed frozen berries can be used, but drain excess liquid first.
Equipment Needed
- Mixing bowls (preferably one large and one medium-sized)
- Electric hand mixer or stand mixer (essential for whipping the cream and cream cheese smoothly)
- Measuring cups and spoons (accuracy helps with sweetness and texture)
- Spoon or spatula (for folding and layering)
- 12-ounce clear plastic dessert cups or small glass jars (for serving individual portions)
- Fine mesh sieve (optional, if you want extra smooth crust crumbs)
If you don’t have a mixer, a sturdy whisk and some elbow grease can do the trick, just be prepared for a bit more arm work! I once made these with a simple fork and hand whisk—took longer, but it worked in a pinch. Budget-wise, you can find affordable hand mixers at most grocery or kitchen stores, which make whipping cream a breeze and save a lot of time.
Preparation Method
- Prepare the crust: In a medium bowl, combine 1 ½ cups graham cracker crumbs, 5 tablespoons melted unsalted butter, and 2 tablespoons granulated sugar. Mix until crumbs are evenly coated and hold together when pressed. (About 3 minutes)
Tip: If your crumbs feel coarse, pulse them in a food processor or crush them further in a sealed bag with a rolling pin for a finer texture. - Assemble the crust layer: Spoon about 2 tablespoons of the crust mixture into each serving cup. Press firmly with the back of a spoon or your fingers to create an even base layer. Set aside while making the filling. (5 minutes)
Note: Pressing well helps the crust hold its shape and prevents crumbling when eating. - Make the cheesecake filling: In a large mixing bowl, beat 8 ounces softened cream cheese with ½ cup powdered sugar and 1 teaspoon vanilla extract until smooth and creamy. (3-4 minutes with electric mixer)
Pro tip: Make sure the cream cheese is fully softened—if it’s cold, it can lump up. - Whip the heavy cream: In a separate bowl, whip 1 cup cold heavy cream until stiff peaks form. This usually takes about 5-7 minutes with an electric mixer on medium-high speed.
Warning: Don’t overwhip or it will turn grainy and start turning into butter! - Combine filling and whipped cream: Gently fold the whipped cream into the cream cheese mixture using a spatula. Use slow, sweeping motions to keep the mixture light and airy. (2 minutes)
Tip: Folding instead of mixing aggressively keeps the texture fluffy. - Layer the cheesecake cups: Spoon a generous dollop of the cheesecake filling over the crust in each cup, smoothing the top with the back of a spoon. (5 minutes)
Note: Leave a little space on top for the strawberry topping. - Add the strawberry topping: Arrange sliced strawberries on top of the cheesecake layer. For a shiny finish, you can gently warm 1 tablespoon strawberry jam and brush it lightly over the fruit. (3 minutes)
Note: If you prefer, toss the berries with a teaspoon of sugar to macerate and soften before topping. - Chill before serving: Refrigerate the cups for at least 2 hours to set and let flavors meld. (Patience is key here!)
Tip: Cover with plastic wrap or lids to prevent absorbing fridge odors.
Cooking Tips & Techniques
Making these no-bake strawberry cheesecake cups is pretty straightforward, but a few tricks help get them just right. First, patience with the cream cheese is your friend. I’ve learned the hard way that if it’s too cold, no matter how long you beat it, lumps will stubbornly remain. Let it sit out for at least 30 minutes before mixing.
Whipping the cream is another step where timing matters. Cold cream whips better, so keep it in the fridge until you’re ready to use it. Also, don’t walk away once it starts to thicken—overwhipping can turn your fluffy cream into butter. I once got distracted by a phone call and had to start over—lesson learned!
When folding the whipped cream into the cream cheese mixture, be gentle. I mean, you want to keep that airy texture, so slow, careful folding beats vigorous mixing every time. A rubber spatula is perfect for this.
Using individual cups not only looks pretty but helps portion control and speeds up chilling time. If you’re short on time, pop the cups in the freezer for 30 minutes instead of the fridge, but watch closely so they don’t freeze solid.
Finally, fresh strawberries are the star here, so choose ripe, fragrant berries. If they’re a bit tart, a quick toss with a teaspoon of sugar softens and sweetens them beautifully.
Variations & Adaptations
This recipe is a great canvas for creativity and adaptations, so feel free to make it your own:
- Berry Mix: Swap strawberries for a mix of raspberries, blueberries, or blackberries for a colorful twist. In winter, thawed frozen berries work fine, just drain excess juice to avoid sogginess.
- Crust Alternatives: Try crushed digestive biscuits, vanilla wafers, or even gluten-free almond flour crust for different textures and flavors. For a nutty touch, add finely chopped toasted pecans or walnuts to the crust mix.
- Flavor Boost: Add a teaspoon of lemon zest or a splash of lemon juice to the cheesecake filling for a fresh, tangy edge. Alternatively, fold in a tablespoon of cocoa powder to make a chocolate strawberry cheesecake cup.
- Dairy-Free Version: Use coconut cream instead of heavy cream and a dairy-free cream cheese substitute. The texture will be slightly different but still delicious.
- Personal Favorite: I once added a layer of crushed pineapple between crust and filling for a tropical vibe—unexpected but surprisingly delightful!
Serving & Storage Suggestions
Serve these strawberry cheesecake cups chilled, straight from the fridge, so the filling stays firm and the flavors shine. They look lovely garnished with a fresh mint leaf or a light dusting of powdered sugar for a simple but elegant touch.
Pair these cups with a cup of iced tea, lemon water, or even a light sparkling wine to complement the creamy and fruity flavors. They also make a refreshing finish after a spicy meal or a casual brunch treat.
For storing, cover the cups tightly with lids or plastic wrap and keep refrigerated. They stay fresh for up to 3 days, but honestly, they rarely last that long in my house! You can freeze them for up to a month—just thaw in the fridge overnight before serving.
Reheating isn’t necessary here, but if the cream feels too firm after refrigeration, let the cups sit at room temperature for 10 minutes before eating to soften the filling slightly. Over time, the flavors meld beautifully, making the next-day version just as delightful.
Nutritional Information & Benefits
Each Easy No-Bake Strawberry Cheesecake Cup contains approximately 250 calories, with about 15 grams of fat, 20 grams of carbohydrates, and 3 grams of protein. This estimate varies slightly based on ingredient brands and portion sizes.
Key ingredients like cream cheese and heavy cream provide calcium and fat-soluble vitamins, while fresh strawberries bring vitamin C, fiber, and antioxidants. The recipe is gluten-free when using gluten-free crust substitutes, making it accessible to many dietary needs.
Of course, this dessert is best enjoyed in moderation, but it offers a satisfying sweet fix with real fruit and homemade ingredients rather than processed sweets. I appreciate that it’s a way to treat myself without feeling overwhelmed by overly sugary or artificial components.
Conclusion
If you’re after a dessert that’s fuss-free but still feels special, these Easy No-Bake Strawberry Cheesecake Cups are definitely worth trying. They come together quickly, use simple ingredients, and deliver that classic creamy-and-fruity combo we all love—no oven required!
Feel free to tweak the toppings or crust to suit your taste; that’s part of the fun. Personally, I keep coming back to this recipe because it’s reliable, comforting, and just plain delicious. Plus, it makes summer dessert feel a bit brighter and easier.
If you give it a shot, I’d love to hear how it goes! Drop a comment, share your variations, or just tell me your favorite way to enjoy strawberries. Here’s to sweet moments made simple—happy dessert making!
FAQs
Can I use frozen strawberries instead of fresh?
Yes! Just thaw them completely and drain any excess liquid before using to avoid soggy cups.
How long can I store these cheesecake cups in the fridge?
They’ll stay fresh for up to 3 days when covered well. Beyond that, the crust may start softening.
Can I make these ahead of time for a party?
Absolutely! Prepare them a day in advance and keep refrigerated for easy serving later.
What if I don’t have graham crackers for the crust?
You can substitute with crushed vanilla wafers, digestive biscuits, or gluten-free cookies depending on your preference.
Is there a way to make this recipe lighter?
Try using reduced-fat cream cheese and whipping cream, or substitute heavy cream with coconut cream for a dairy-free, lighter option.
Pin This Recipe!
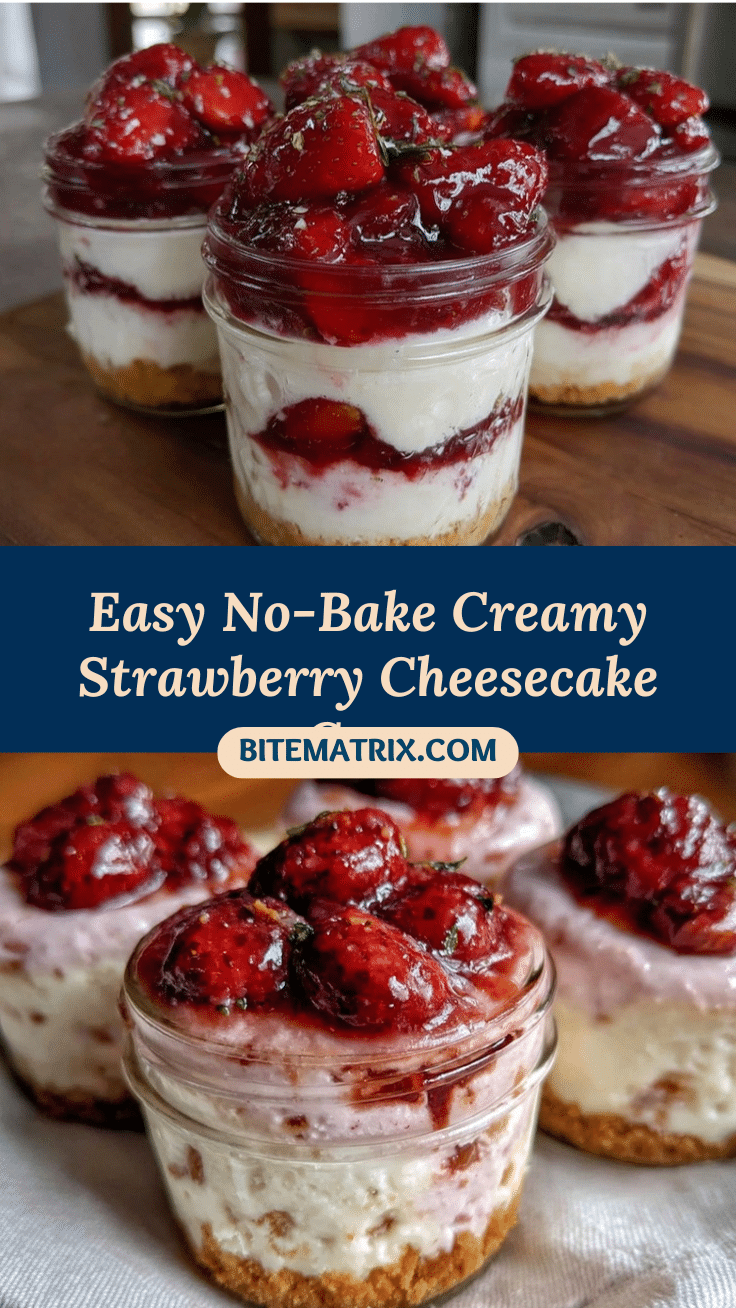
Easy No-Bake Strawberry Cheesecake Cups

A quick and easy no-bake dessert featuring creamy cheesecake filling layered with fresh strawberries on a buttery crust, perfect for summer gatherings.
- Prep Time: 15 minutes
- Cook Time: 0 minutes
- Total Time: 2 hours 15 minutes
- Yield: 6 servings 1x
- Category: Dessert
- Cuisine: American
Ingredients
- 1 ½ cups graham cracker crumbs (about 10 full sheets, crushed finely)
- 5 tablespoons unsalted butter, melted
- 2 tablespoons granulated sugar
- 8 ounces cream cheese, softened
- ½ cup powdered sugar
- 1 teaspoon pure vanilla extract
- 1 cup heavy cream, cold
- 1 ½ cups fresh strawberries, hulled and sliced
- Optional: 1 tablespoon strawberry jam or preserves
Instructions
- Prepare the crust: In a medium bowl, combine graham cracker crumbs, melted butter, and granulated sugar. Mix until crumbs are evenly coated and hold together when pressed.
- Assemble the crust layer: Spoon about 2 tablespoons of the crust mixture into each serving cup. Press firmly to create an even base layer. Set aside.
- Make the cheesecake filling: Beat softened cream cheese with powdered sugar and vanilla extract until smooth and creamy.
- Whip the heavy cream until stiff peaks form.
- Gently fold the whipped cream into the cream cheese mixture using slow, sweeping motions to keep the mixture light and airy.
- Layer the cheesecake cups: Spoon a generous dollop of the cheesecake filling over the crust in each cup, smoothing the top.
- Add the strawberry topping: Arrange sliced strawberries on top of the cheesecake layer. Optionally, warm strawberry jam and brush it lightly over the fruit.
- Chill before serving: Refrigerate the cups for at least 2 hours to set and let flavors meld.
Notes
Let cream cheese soften at room temperature for at least 30 minutes before mixing to avoid lumps. Keep heavy cream cold and watch closely when whipping to avoid overwhipping. Use gentle folding to keep filling airy. Chill cups for at least 2 hours or freeze for 30 minutes for faster setting. Fresh ripe strawberries are best; toss with sugar if tart. Can substitute crust with gluten-free almond flour for gluten-free option and coconut cream for dairy-free version.
Nutrition
- Serving Size: 1 cup (individual de
- Calories: 250
- Sugar: 15
- Sodium: 150
- Fat: 15
- Saturated Fat: 9
- Carbohydrates: 20
- Fiber: 2
- Protein: 3
Keywords: no-bake, strawberry cheesecake, summer dessert, easy dessert, quick dessert, cheesecake cups, no oven dessert