
“Hey, have you tried that chili garlic crisp oil yet?” my friend texted me one rainy afternoon, just as I was rummaging through the fridge for something to jazz up my plain noodles. Honestly, I was skeptical—how much difference could a spicy oil make? But that night, I decided to give it a whirl, slathering that glossy, crackling chili garlic crisp oil over a steaming bowl of noodles and a fried egg. The crunch, the heat, the garlicky aroma—it was like a little party in my mouth, totally unexpected but absolutely addictive. Since then, I haven’t been able to stop making it multiple times a week, drizzling it over everything from pizza slices to scrambled eggs.
What started as a casual recommendation turned into an obsession. The beauty of this flavorful chili garlic crisp oil is how it transforms simple dishes into something special without much effort. It’s the kind of kitchen staple you didn’t know you needed until you have it, and then you wonder how you ever lived without it. That crispy, spicy layer of goodness that clings to every bite—it’s like the secret sauce for elevating your everyday meals.
There’s something satisfying about hearing that sizzle of garlic in hot oil, watching the chili flakes dance as they toast to perfection. It’s a quiet moment in a busy day, the kind of comforting ritual that makes cooking feel less like a chore and more like a creative outlet. This recipe stuck with me because it’s simple, quick, and honest, and it brings that perfect kick of flavor that keeps you coming back for more.
Why You’ll Love This Recipe
After testing this chili garlic crisp oil recipe countless times (and tweaking it just a bit here and there), I can confidently say it’s a game-changer for your kitchen. Here’s why it’s worth making:
- Quick & Easy: Ready in under 20 minutes, perfect when you want to add a punch to weeknight noodles or a last-minute pizza topping.
- Simple Ingredients: You likely have everything in your pantry already—no need for specialty shopping trips.
- Perfect for Multiple Dishes: Whether it’s drizzled over philly cheesesteak sandwiches or mixed into eggs, it brings a bold, irresistible flavor.
- Crowd-Pleaser: I’ve served this at casual dinners and it disappears fast—friends beg for the recipe every time.
- Unbelievably Delicious: The texture contrast of crispy garlic bits and chili flakes in fragrant oil is next-level comfort food.
What makes this recipe stand out? It’s all about the balance—garlic toasted just right so it’s crunchy but not burnt, chili flakes that bring heat without bitterness, and a hint of saltiness that ties it all together. Unlike other versions that can be oily or overpowering, this chili garlic crisp oil is perfectly measured to enhance, not mask, your dish. Plus, it keeps well, so you can make a batch and keep it handy for weeks.
Honestly, it’s the kind of thing that makes you close your eyes after the first bite and smile. Not just heat for heat’s sake, but a deep, layered flavor that’s comforting and exciting at once. It’s become my go-to flavor booster, especially when I want to turn something simple like leftover pizza into a memorable meal.
What Ingredients You Will Need
This recipe uses straightforward, pantry-friendly ingredients that come together to create big flavor and satisfying crunch. Nothing fancy, just honest, bold components that you can rely on.
- Neutral Oil (e.g., grapeseed or vegetable oil, 1 cup / 240 ml): Provides the perfect base without overpowering the garlic or chili.
- Garlic Cloves, thinly sliced (about 10 cloves): The star of the show—crispy, aromatic, and packed with flavor.
- Red Chili Flakes (2–3 tablespoons): Adds heat and that signature chili crunch. Use more or less depending on your heat tolerance.
- Sichuan Peppercorns (optional, 1 teaspoon): For a subtle numbing spice and extra depth (highly recommended for adventurous eaters).
- Salt (1 teaspoon): Enhances all the flavors and helps preserve the oil.
- Sugar (1/2 teaspoon): Balances the heat and garlic bitterness.
- Soy Sauce (1 tablespoon): Adds umami and a slight savory note (optional but delicious).
- Sesame Seeds (1 tablespoon): Toasted for added nuttiness and texture.
For best results, I recommend using fresh garlic and chili flakes from a trusted brand like McCormick or Frontier Co-op for consistent heat and flavor. If you can’t find Sichuan peppercorns, don’t worry—just skip them or swap with a small pinch of black pepper for mild warmth. This recipe is flexible enough to accommodate what you have on hand.
In summer, I sometimes swap out dried chili flakes for fresh chopped chilis for a greener, sharper heat. Or for a gluten-free version, substitute soy sauce with tamari. If you want a milder oil, reduce the chili flakes and add a bit more sesame seeds for a gentle crunch.
Equipment Needed
- Small saucepan or skillet: For gently toasting the garlic and infusing the oil. I find a heavy-bottomed pan works best to avoid burning.
- Heatproof jar or glass container: To store the chili garlic crisp oil once cooled.
- Slotted spoon or spider strainer: Helps remove garlic slices without disturbing the oil too much.
- Kitchen thermometer (optional): Useful to keep the oil at the right temperature (around 250°F / 120°C), but you can also eyeball it by watching the garlic carefully.
- Measuring spoons and cups: For accuracy, especially with spices and salt.
If you don’t have a thermometer, no worries—just watch the garlic closely as it fries and pull it off once golden brown but not dark. I’ve used budget-friendly stainless steel pans for this with great results, and a glass jar is best for seeing the beautiful layers in the finished product. Cleaning the pan immediately after use keeps it in good shape, especially since garlic oil can leave a lingering aroma.
Preparation Method

- Prepare your ingredients: Thinly slice the garlic cloves into even pieces. Measure out chili flakes, salt, sugar, sesame seeds, and soy sauce if using. This prep keeps the process smooth and quick.
- Heat the oil: Pour 1 cup (240 ml) of neutral oil into a small saucepan over medium-low heat. Let it warm gently—aim for about 250°F (120°C) if you have a thermometer or until you see small bubbles form around a garlic slice test piece.
- Add garlic slices: Carefully add the sliced garlic to the warm oil. Stir occasionally with a wooden spoon or spatula to prevent sticking. The key is patience—keep the heat moderate to avoid burning the garlic too fast.
- Toast garlic until golden: Watch for a light golden color and crispy texture, about 8-10 minutes. The kitchen will fill with that irresistible garlic aroma—don’t walk away! If garlic browns too quickly, lower the heat immediately.
- Add chili flakes and optional Sichuan peppercorns: Stir in 2–3 tablespoons of red chili flakes and 1 teaspoon of Sichuan peppercorns if using. Let them toast gently in the oil for 1-2 minutes, releasing their flavor without burning.
- Turn off the heat and season: Remove from heat, then stir in 1 teaspoon salt, ½ teaspoon sugar, 1 tablespoon soy sauce (optional), and 1 tablespoon toasted sesame seeds. Mix well to combine all elements.
- Cool and store: Let the oil mixture cool completely in the pan, then transfer it with a slotted spoon into a clean, heatproof jar. Pour any remaining oil over the top to cover the solids. Store sealed in the refrigerator for up to 3 weeks.
Common pitfalls? Burning the garlic is the biggest one—stay patient and keep the heat moderate. Also, be sure the oil isn’t too hot when adding seasonings to avoid bitterness. The finished oil should shimmer with red chili flecks and crispy garlic bits, inviting you to drizzle it generously.
Pro tip: Make a double batch and keep some on hand for quick flavor boosts. It pairs beautifully with fall-off-the-bone BBQ ribs or simply spooned over warm rice or noodles.
Cooking Tips & Techniques
One trick I learned the hard way is slicing the garlic thin and even—thicker pieces won’t crisp as well, and thinner ones can burn too fast. Using a mandoline slicer helps if you have one, but a sharp knife works fine with a bit of patience.
Keep the oil temperature steady; too hot and the garlic blacks, too low and it turns rubbery. Aim for a gentle sizzle and watch the color change closely. I often move the pan off heat briefly if it looks like the garlic is browning too fast.
To get the chili flakes toasty without burning, add them after the garlic is mostly done. This layering of flavors makes a big difference in complexity. If you like extra crunch, add a handful of toasted sesame seeds or a pinch of crushed peanuts at the end for texture.
When storing, always use a clean, dry spoon to avoid contamination. I keep my chili garlic crisp oil in the fridge to prolong freshness; the oil firms up slightly but melts quickly when drizzled over hot dishes.
Multitasking tip: While your oil is cooling, prep your noodles or pizza dough so you can enjoy the full flavor experience right away. This oil pairs wonderfully with quick recipes like easy Italian sub sandwich skewers, adding that punch of heat and crunch.
Variations & Adaptations
- Vegan Version: Skip the soy sauce or swap with coconut aminos for a gluten-free, vegan-friendly option.
- Milder Flavor: Reduce chili flakes by half and add more toasted sesame seeds or a teaspoon of honey for a sweet-spicy balance.
- Smoky Twist: Add a pinch of smoked paprika or chipotle powder to the oil for a smoky undertone that works great on pizza or grilled dishes.
- Herb Infusion: Toss in a couple of star anise or a cinnamon stick while heating the oil for subtle aromatic notes, then remove before storing.
I once experimented by blending this chili garlic crisp oil into a simple vinaigrette for a salad inspired by my fresh creamy cucumber dill salad recipe, and it was a surprising hit—adds a spicy kick without overwhelming the freshness of the veggies.
You can also try frying shallots instead of garlic for a sweeter, less pungent version, great if you’re serving kids or prefer a gentler crunch.
Serving & Storage Suggestions
This chili garlic crisp oil shines when served warm or at room temperature. Drizzle it liberally over steaming bowls of noodles, fried or scrambled eggs, or even slices of leftover pizza to breathe new life into them. It’s amazing on roasted veggies or as a dipping oil for crusty bread.
For storage, keep the oil in a sealed jar in the refrigerator for up to 3 weeks. The oil will solidify slightly but will liquefy quickly when brought to room temperature or drizzled over hot food. Stir gently before each use to redistribute the crispy bits and chili flakes.
The flavors actually deepen after a day or two, so if you can resist the urge, make it a day ahead for maximum punch. Just don’t blame me if it disappears fast once you taste it!
Nutritional Information & Benefits
This flavorful chili garlic crisp oil is surprisingly light despite its rich taste. One tablespoon contains approximately 120 calories, mostly from healthy fats in the oil. Garlic is well-known for its antioxidant properties and potential heart health benefits, while chili peppers may boost metabolism and add vitamin C.
The oil is naturally gluten-free and can be made vegan easily. Just be mindful if you add soy sauce, which contains gluten unless using a gluten-free brand. It’s a small indulgence that adds a burst of flavor without excessive salt or sugar.
From a wellness perspective, this chili garlic crisp oil encourages using fresh ingredients and homemade seasonings instead of processed condiments loaded with preservatives. It’s a simple way to add complex flavors without extra calories or artificial additives.
Conclusion
In the end, this flavorful chili garlic crisp oil recipe is a kitchen essential that brings a little extra joy to everyday meals. Whether you’re spooning it over noodles, mixing it into eggs, or splashing it on pizza, it’s a versatile condiment that makes your food feel special without fuss.
Feel free to tweak the heat level, swap ingredients, or experiment with additions to make it truly your own. I love how it turns simple dishes into something memorable—comfort food with a spicy, crunchy twist. If you’ve enjoyed recipes like the crispy honey garlic grilled chicken thighs, this chili garlic crisp oil will be right up your alley.
Give it a try and see how a little oil and garlic can change the way you cook and eat. Don’t forget to share your variations or favorite uses—I’m always curious how others enjoy this spicy, crispy goodness!
FAQs About Flavorful Chili Garlic Crisp Oil
Can I make this chili garlic crisp oil ahead of time?
Absolutely! It actually tastes better after resting for a day or two in the fridge, allowing the flavors to meld.
How long does this chili garlic crisp oil last?
Stored in an airtight container in the refrigerator, it should keep fresh for up to 3 weeks.
Can I use other types of oil?
Yes, neutral oils like avocado or sunflower work well. Avoid strong-flavored oils like extra virgin olive oil as they can overpower the garlic and chili.
Is this recipe very spicy?
The heat level is adjustable—reduce or increase the chili flakes according to your preference.
What dishes pair best with this chili garlic crisp oil?
It’s fantastic on noodles, eggs, pizza, roasted vegetables, and even as a dipping sauce for bread or dumplings.
Pin This Recipe!
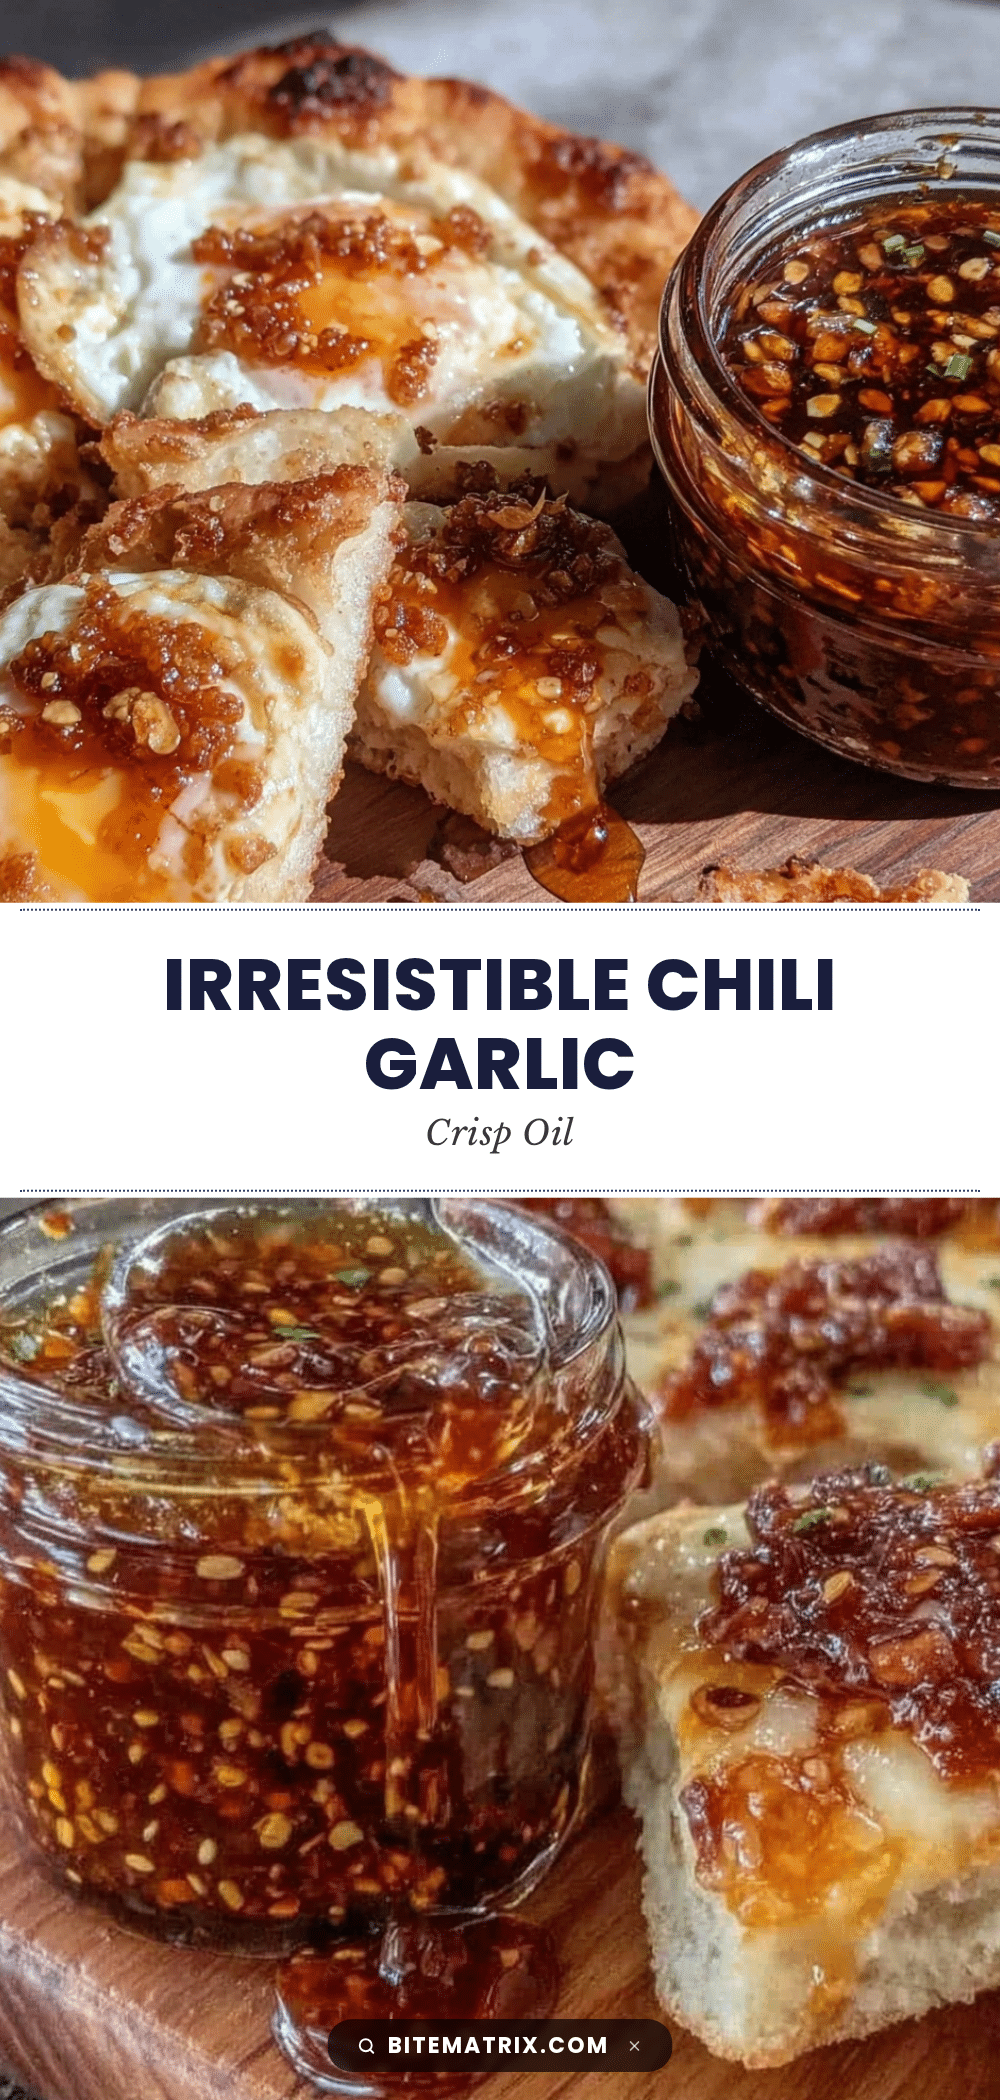
Flavorful Chili Garlic Crisp Oil Recipe Easy Homemade for Noodles and Pizza

A quick and easy homemade chili garlic crisp oil that adds a spicy, crunchy, and garlicky flavor boost to noodles, pizza, eggs, and more. This versatile condiment transforms simple dishes into memorable meals with its perfect balance of heat and aroma.
- Prep Time: 10 minutes
- Cook Time: 10 minutes
- Total Time: 20 minutes
- Yield: About 1 cup (8 servings) 1x
- Category: Condiment
- Cuisine: Asian-inspired
Ingredients
- 1 cup (240 ml) neutral oil (e.g., grapeseed or vegetable oil)
- 10 garlic cloves, thinly sliced
- 2–3 tablespoons red chili flakes
- 1 teaspoon Sichuan peppercorns (optional)
- 1 teaspoon salt
- 1/2 teaspoon sugar
- 1 tablespoon soy sauce (optional)
- 1 tablespoon toasted sesame seeds
Instructions
- Thinly slice the garlic cloves into even pieces. Measure out chili flakes, salt, sugar, sesame seeds, and soy sauce if using.
- Pour 1 cup (240 ml) of neutral oil into a small saucepan over medium-low heat. Warm gently to about 250°F (120°C) or until small bubbles form around a garlic test piece.
- Carefully add the sliced garlic to the warm oil. Stir occasionally to prevent sticking and keep heat moderate to avoid burning.
- Toast garlic until light golden and crispy, about 8-10 minutes, watching closely to prevent burning.
- Stir in 2–3 tablespoons red chili flakes and 1 teaspoon Sichuan peppercorns if using. Toast gently for 1-2 minutes without burning.
- Remove from heat and stir in 1 teaspoon salt, 1/2 teaspoon sugar, 1 tablespoon soy sauce (optional), and 1 tablespoon toasted sesame seeds. Mix well.
- Let the oil cool completely in the pan, then transfer with a slotted spoon into a clean, heatproof jar. Pour remaining oil over solids to cover.
- Store sealed in the refrigerator for up to 3 weeks. Stir gently before each use.
Notes
Use fresh garlic and trusted chili flakes for best flavor. Maintain moderate heat to avoid burning garlic. The oil firms in the fridge but melts quickly when drizzled over hot food. Make a double batch for convenience. Variations include using coconut aminos for vegan/gluten-free, adding smoked paprika for smoky flavor, or infusing with star anise or cinnamon stick.
Nutrition
- Serving Size: 1 tablespoon
- Calories: 120
- Sugar: 0.3
- Sodium: 230
- Fat: 14
- Saturated Fat: 2
- Carbohydrates: 1
- Fiber: 0.3
- Protein: 0.3
Keywords: chili garlic oil, chili crisp, homemade chili oil, spicy condiment, garlic oil, chili flakes, Sichuan peppercorns, easy chili oil, noodle topping, pizza topping