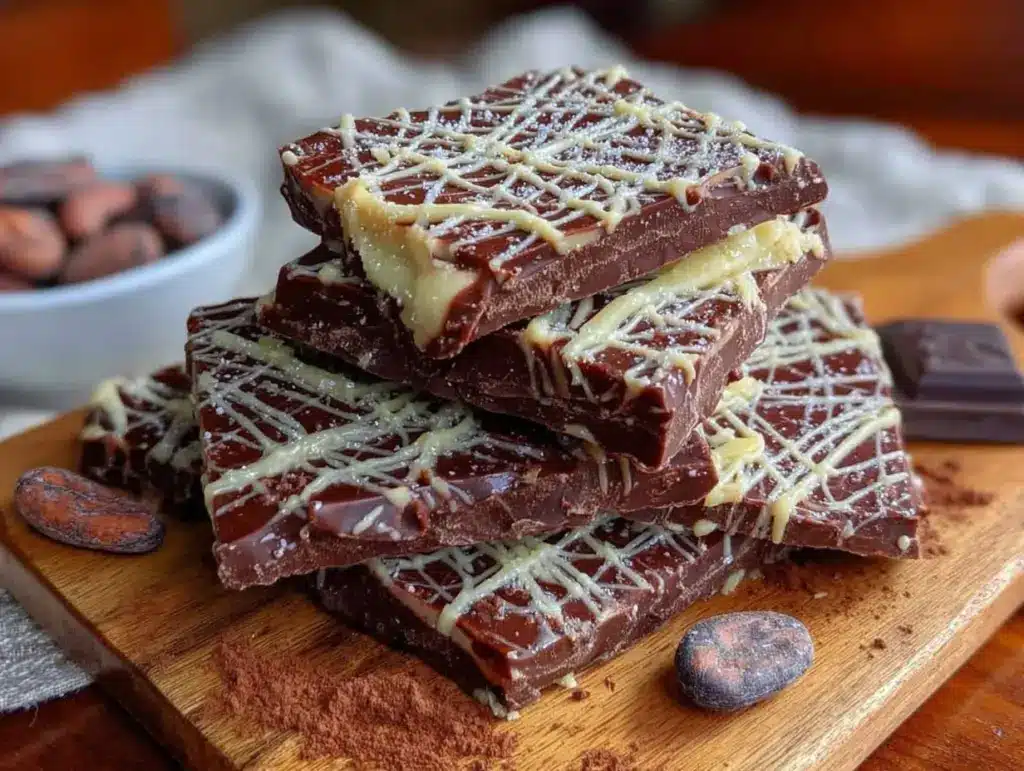
“Watch out, here comes the spider!” my niece exclaimed, eyes wide as I carefully drizzled white chocolate over the dark chocolate bark, crafting delicate spiderweb patterns. Honestly, I wasn’t sure if the whole spiderweb chocolate bark idea would work out when I first tried it. I was aiming for a quick Halloween treat that looked impressive but required minimal fuss. The kitchen was a mess, and the clock was ticking down to a party. But that simple batch of chocolate bark turned into a bit of magic—everyone kept asking how I made those perfect spiderwebs, and I found myself making it again and again that week (yes, more than once!).
It’s funny how something so straightforward can become a highlight. This perfect spiderweb chocolate bark isn’t just about the spooky design; it’s that satisfying snap of chocolate, the creamy contrast of white swirls, and the easy way it pulls together for a last-minute treat. I’ve made plenty of sweet snacks over the years, but there’s just something about this recipe that feels both festive and approachable. If you’re juggling fall festivities, want a cool dessert for a party, or just want a fun project that actually turns out looking great, this recipe has quietly become my go-to.
So, if you’re wondering if your spiderweb chocolate bark will look as good as it tastes, trust me—it will. It’s the kind of recipe that makes you pause and smile, even on a day that’s been all over the place. And you know, it’s worth having in your back pocket for those spontaneous celebrations or when you want to impress without stress.
Why You’ll Love This Recipe
After several rounds of testing this spiderweb chocolate bark, I can say it’s truly a keeper for anyone who loves easy, crowd-pleasing treats. Here’s why it’s become a staple in my recipe box:
- Quick & Easy: Ready in about 20 minutes plus chilling time, perfect for when you need a spooky treat fast.
- Simple Ingredients: No exotic items needed—just good-quality chocolate, white chocolate, and a few extras you likely have on hand.
- Perfect for Halloween Parties: Whether it’s for kids’ school events, office potlucks, or casual gatherings, it’s festive and fun without the fuss.
- Crowd-Pleaser: Kids and adults alike love the mix of creamy white chocolate and rich dark chocolate textures.
- Unbelievably Delicious: The balance of bittersweet and sweet chocolate with a hint of crunch from optional toppings makes it irresistibly tasty.
What sets this apart from other chocolate bark recipes? It’s the spiderweb technique itself. Instead of just melting and spreading chocolate, the way the white chocolate is pulled through the darker base creates a striking pattern that looks professionally done (even if you’re a “not really a baker” type). Plus, I recommend using Ghirardelli or Valrhona chocolates for the best smooth melting and glossy finish—you’ll thank me later.
Honestly, this isn’t just a recipe; it’s a quick mood lifter. I’ve had friends text me in disbelief that it’s so easy yet so eye-catching. The recipe’s charm is in how it transforms simple ingredients into a conversation starter. If you want a treat that’s both playful and palate-pleasing, this spiderweb chocolate bark delivers every time.
What Ingredients You Will Need
This recipe uses simple, wholesome ingredients that come together effortlessly to create bold flavor and satisfying texture without any complicated steps. You’ll find most of these in your pantry or local grocery store, and substitutions are easy if needed.
- Dark Chocolate (8 oz / 225 g): Use good-quality bittersweet or semi-sweet chocolate bars or chips. I like Ghirardelli 60% cacao for smooth melting and rich flavor.
- White Chocolate (4 oz / 115 g): Chips or bars, chopped. Look for couverture or baking chocolate for the best creamy melt.
- Butter (1 tbsp / 14 g): Unsalted, adds silkiness to the melted chocolate.
- Optional Toppings:
- Mini chocolate chips or chunks (adds texture)
- Halloween sprinkles or edible glitter (for festive flair)
- Chopped nuts like pecans or almonds (for crunch)
- Flavor Boosters (Optional):
- Pinch of sea salt (balances sweetness)
- 1/2 tsp vanilla extract (deepens flavor)
If you want a dairy-free or vegan option, swap the butter for coconut oil and choose dairy-free chocolate varieties. For a gluten-free treat, this recipe is naturally safe as long as your toppings are gluten-free. In summer, I’ve even experimented by adding freeze-dried raspberries for a tart twist, which pairs beautifully with the chocolate flavors.
Equipment Needed
To make your spiderweb chocolate bark, here’s what you’ll want to have on hand:
- Baking sheet or tray: A rimmed cookie sheet works perfectly to spread the chocolate thinly.
- Parchment paper or silicone baking mat: Essential to prevent sticking and make cleanup a breeze.
- Microwave-safe bowls or double boiler: For gently melting the dark and white chocolate separately. I usually prefer a double boiler to avoid overheating, but a microwave with short bursts works too.
- Spoon or piping bag: To drizzle the white chocolate in thin lines for the spiderweb design. A zip-top bag with a tiny corner snipped works just as well if you don’t have a piping tool.
- Toothpick or skewer: The secret weapon for drawing the spiderweb lines by dragging through the white chocolate.
If you don’t have a piping bag, no worries! I’ve made this dozens of times with just a spoon and a steady hand. And if your chocolate isn’t melting smoothly, a quick wipe of your bowl and tools with warm water helps keep things silky. For budget-friendly setups, parchment paper and a simple baking tray are all you need.
Preparation Method

- Prepare your workspace: Line your baking sheet with parchment paper or a silicone mat. This step saves you from chocolate sticking disasters later. Set aside your melted chocolates and tools within reach. (5 minutes)
- Melt the dark chocolate: Chop or use chips (8 oz / 225 g). Melt gently over a double boiler or microwave in 30-second bursts, stirring between each. Add 1 tbsp unsalted butter and optional 1/2 tsp vanilla for smoothness. The chocolate should be glossy and fluid but not too hot to touch. (7-10 minutes)
- Spread the dark chocolate: Pour the melted dark chocolate onto the lined baking sheet. Use an offset spatula or the back of a spoon to spread it evenly into a thin layer about 1/4 inch (6 mm) thick. This surface will be your canvas. (3 minutes)
- Melt the white chocolate: In a separate bowl, melt 4 oz (115 g) of white chocolate the same way as dark chocolate. Be extra careful not to overheat—it can seize quickly. Once melted, transfer to a piping bag or a zip-top bag with a tiny snip at the corner. (5-7 minutes)
- Create the spiderweb pattern: Quickly drizzle the white chocolate in concentric circles or spiral shapes over the dark chocolate layer. Don’t worry about being perfect—the charm is in the handmade look. (3 minutes)
- Draw the spiderweb lines: Using a toothpick or skewer, drag lines from the center of the swirl outward to the edges of the bark, crossing the white chocolate lines. Then drag lines from the edges inward. This “pulling” motion creates the classic spiderweb effect. Work quickly before the chocolate sets. (5 minutes)
- Add toppings (optional): Sprinkle mini chocolate chips, nuts, or festive sprinkles over the bark while the chocolate is still soft. This adds texture and visual interest. (2 minutes)
- Chill to set: Place the baking sheet in the refrigerator for at least 30 minutes or until the chocolate is firm and snaps easily. (30 minutes)
- Break into pieces: Once set, remove from fridge and break the bark into irregular shards for serving. (2 minutes)
Pro tip: If your white chocolate starts to harden before you finish the spiderweb, pop it back into warm water for a few seconds to soften. Also, keep your hands steady during the dragging step for the cleanest lines—practice makes perfect!
Cooking Tips & Techniques
Making spiderweb chocolate bark sounds fancy, but the secret is all in the technique and timing. Here’s what I’ve learned from my many attempts:
- Keep your chocolate temperate: Overheated chocolate can seize or become grainy. Low and slow wins the race here.
- Use contrasting chocolate colors: The sharp contrast between dark and white chocolate makes the spiderweb pop. Avoid mixing milky or lighter chocolates with dark ones if you want that bold look.
- Work quickly but calmly: Chocolate sets fast when cool, so have your tools and toppings ready before spreading and swirling.
- Don’t overthink the spiderweb: The charm is in imperfect lines. If one part looks wonky, it adds to that handcrafted vibe.
- Multitasking tip: While the bark chills, prep other Halloween treats like my easy no-bake strawberry cheesecake cups for a sweet summer touch at your party.
- Storage is key: Keep bark in an airtight container in a cool place or fridge to maintain snap and freshness.
One mishap I’ve learned from: trying to drizzle white chocolate straight from the microwave without letting it cool slightly. It dripped too fast and made the lines blotchy. Cooling it just enough gives better control for those delicate spiderweb lines.
Variations & Adaptations
This recipe is flexible and lends itself well to different flavors, diets, and occasions. Here are some ideas I’ve tried or recommend:
- Seasonal flavors: Add a pinch of pumpkin pie spice or cinnamon to the dark chocolate for fall warmth.
- Dietary swaps: Use vegan dark and white chocolates with coconut oil for a dairy-free version.
- Flavor twists: Swap white chocolate for peanut butter drizzle or use colored candy melts for a playful twist.
- Texture upgrades: Mix in crushed pretzels or toffee bits into the dark chocolate layer before it sets.
- Cooking method adaptation: If you prefer, melt the chocolate in a heatproof bowl over a saucepan of simmering water instead of microwaving for more control.
I personally love adding a sprinkle of flaky sea salt on top just before chilling—it cuts the sweetness and brings out the chocolate’s depth. For a fun party variation, try layering thin sheets of peppermint bark beneath your spiderweb bark for a mint-chocolate combo that guests rave about.
Serving & Storage Suggestions
This spiderweb chocolate bark is best served at room temperature so the chocolate’s texture and flavor fully shine. I like to lay the shards on a decorative platter or Halloween-themed tray for easy snacking during parties or cozy movie nights.
Pair it with a warm cup of spiced cider or a creamy hot chocolate to keep that cozy vibe going. For a savory complement, consider serving alongside fresh cucumber dill salad as a light side to balance the richness.
To store, keep the bark in an airtight container at room temperature if your kitchen stays cool (below 70°F/21°C). Otherwise, refrigerate to prevent melting. When refrigerated, bring it back to room temperature before serving for the best texture. It freezes well too—just thaw overnight in the fridge.
Flavors mellow and deepen a bit if you let the bark rest a day before serving, so making it ahead can actually improve the experience.
Nutritional Information & Benefits
Per serving (about 1 oz / 28 g piece), this spiderweb chocolate bark provides approximately:
| Calories | Fat | Carbs | Protein |
|---|---|---|---|
| 150 kcal | 10 g | 15 g | 2 g |
Dark chocolate is rich in antioxidants and can support heart health when enjoyed in moderation. The bittersweet chocolate used here has less sugar than milk chocolate, making this an indulgence that’s a bit more balanced. Using high-quality chocolate also ensures better flavor and less processed ingredients.
Note: This recipe contains dairy and soy lecithin (common in chocolate), so it’s not suitable for those with allergies to these ingredients unless substitutions are made. It’s naturally gluten-free, which is great for those avoiding gluten.
For those mindful of sugar intake, try reducing white chocolate or swapping for a sugar-free variety. I appreciate how this recipe fits well into a treat day without feeling overly heavy.
Conclusion
The perfect spiderweb chocolate bark is proof that simple ingredients and a little creativity can come together to make a memorable treat. I love how it turns an ordinary chocolate bark into a festive centerpiece that’s as fun to make as it is to eat. Plus, the fact that it requires minimal effort and equipment means it’s totally doable for busy days or last-minute plans.
Feel free to customize the toppings and chocolate types to suit your preferences—after all, the best recipes are the ones you make your own. I hope this sweet spiderweb treat brings a bit of joy and spooky charm to your celebrations, just like it has for me and my family.
If you try this recipe, I’d love to hear how it goes or what twists you add! Sharing kitchen wins makes the experience even sweeter.
FAQs
Can I use milk chocolate instead of dark chocolate for this recipe?
Yes, milk chocolate can be used, but the spiderweb contrast won’t be as bold. The dark chocolate provides a richer flavor and better color contrast with the white chocolate swirl.
How do I prevent the white chocolate from hardening too fast when making the spiderweb?
Work quickly and keep the melted white chocolate warm by placing the bowl over a pan of warm water. If it starts to harden, you can gently reheat it in short bursts.
Can I make this spiderweb chocolate bark ahead of time?
Definitely! It stores well in an airtight container for up to two weeks at room temperature or longer in the fridge or freezer.
What’s the best way to break the chocolate bark without it crumbling too much?
Once fully set, gently lift the parchment paper and tap the bark lightly with your hands or a knife to create uneven pieces. Avoid using a sharp knife to cut, as it can shatter the bark.
Are there any fun ways to serve this at a Halloween party?
Serve shards in clear treat bags tied with orange and black ribbons, or arrange on themed platters alongside other snacks like Italian sub sandwich skewers or no-bake cheesecake cups for a balanced spread.
Pin This Recipe!
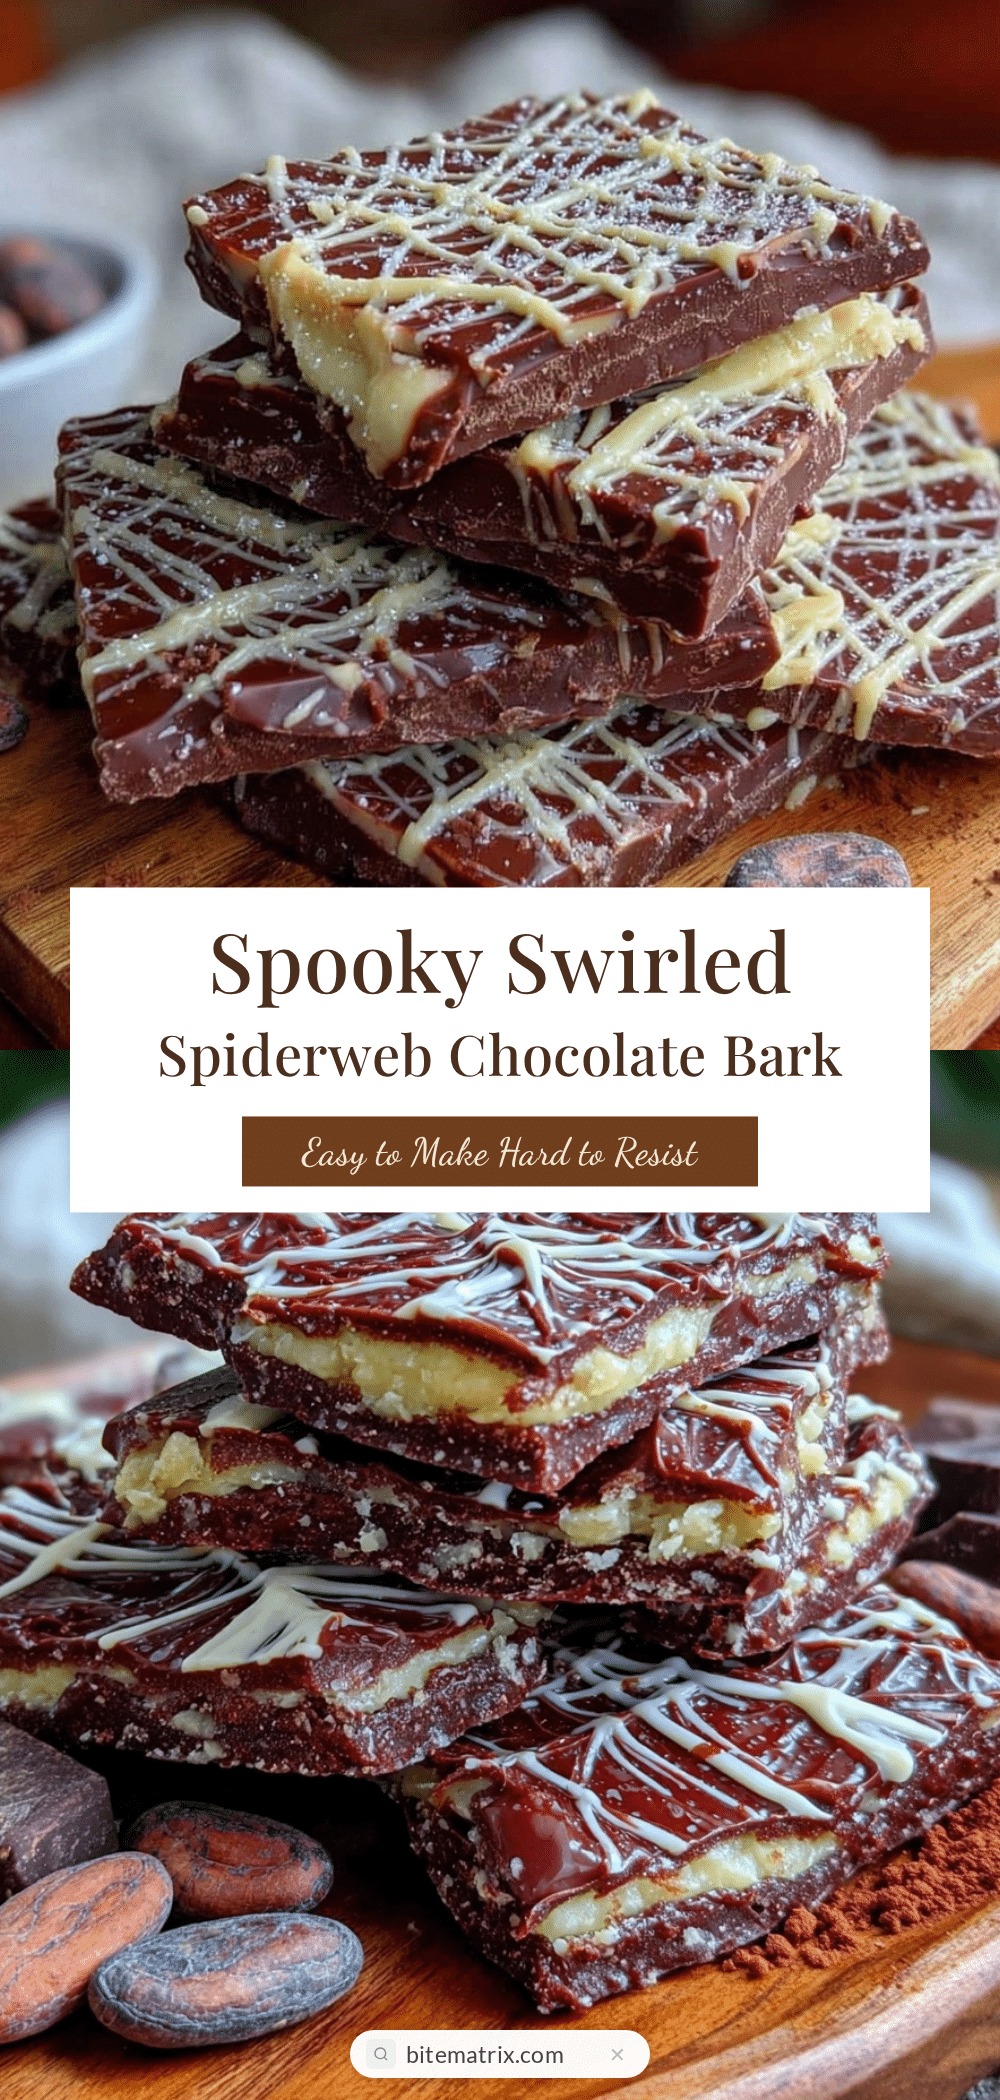
Perfect Spiderweb Chocolate Bark Recipe for Easy Spooky Treats

A quick and easy Halloween treat featuring rich dark chocolate bark decorated with creamy white chocolate spiderweb patterns. Perfect for parties and last-minute celebrations.
- Prep Time: 15 minutes
- Cook Time: 10 minutes
- Total Time: 55 minutes
- Yield: 12 servings 1x
- Category: Dessert
- Cuisine: American
Ingredients
- 8 oz (225 g) dark chocolate (bittersweet or semi-sweet, e.g., Ghirardelli 60% cacao)
- 4 oz (115 g) white chocolate (chips or bars, couverture or baking chocolate preferred)
- 1 tbsp (14 g) unsalted butter
- Optional toppings: mini chocolate chips or chunks, Halloween sprinkles or edible glitter, chopped nuts like pecans or almonds
- Optional flavor boosters: pinch of sea salt, 1/2 tsp vanilla extract
Instructions
- Prepare your workspace by lining a baking sheet with parchment paper or a silicone mat. Set aside melted chocolates and tools within reach. (5 minutes)
- Melt the dark chocolate by chopping or using chips. Melt gently over a double boiler or microwave in 30-second bursts, stirring between each. Add 1 tbsp unsalted butter and optional 1/2 tsp vanilla extract for smoothness. The chocolate should be glossy and fluid but not too hot to touch. (7-10 minutes)
- Pour the melted dark chocolate onto the lined baking sheet. Spread evenly into a thin layer about 1/4 inch (6 mm) thick using an offset spatula or the back of a spoon. (3 minutes)
- Melt the white chocolate in a separate bowl the same way as the dark chocolate. Be careful not to overheat. Transfer melted white chocolate to a piping bag or zip-top bag with a tiny snip at the corner. (5-7 minutes)
- Quickly drizzle the white chocolate in concentric circles or spiral shapes over the dark chocolate layer. (3 minutes)
- Using a toothpick or skewer, drag lines from the center of the swirl outward to the edges, then from the edges inward, crossing the white chocolate lines to create the spiderweb effect. Work quickly before the chocolate sets. (5 minutes)
- Sprinkle optional toppings like mini chocolate chips, nuts, or festive sprinkles over the bark while the chocolate is still soft. (2 minutes)
- Place the baking sheet in the refrigerator for at least 30 minutes or until the chocolate is firm and snaps easily. (30 minutes)
- Remove from fridge and break the bark into irregular shards for serving. (2 minutes)
Notes
Keep chocolate at a moderate temperature to avoid seizing. Work quickly when creating the spiderweb pattern. If white chocolate hardens too fast, gently reheat it in warm water. Store bark in an airtight container at room temperature or refrigerated. Bring to room temperature before serving for best texture. Can be customized with various toppings and flavor twists.
Nutrition
- Serving Size: 1 oz (28 g) piece
- Calories: 150
- Fat: 10
- Carbohydrates: 15
- Protein: 2
Keywords: chocolate bark, spiderweb chocolate, Halloween treats, easy dessert, party snacks, white chocolate, dark chocolate, festive dessert


