“You’re going to think this cake looks like a mess,” my friend teased during a casual weekend get-together. I admit, when I first heard about the Decadent Earthquake Cake with Cream Cheese Swirl, I was picturing something chaotic—crumbly, uneven, maybe a bit too much going on. But honestly, this recipe proved me wrong in the best way. The first time I made it, I was juggling a busy weeknight schedule and just wanted something simple yet impressive.
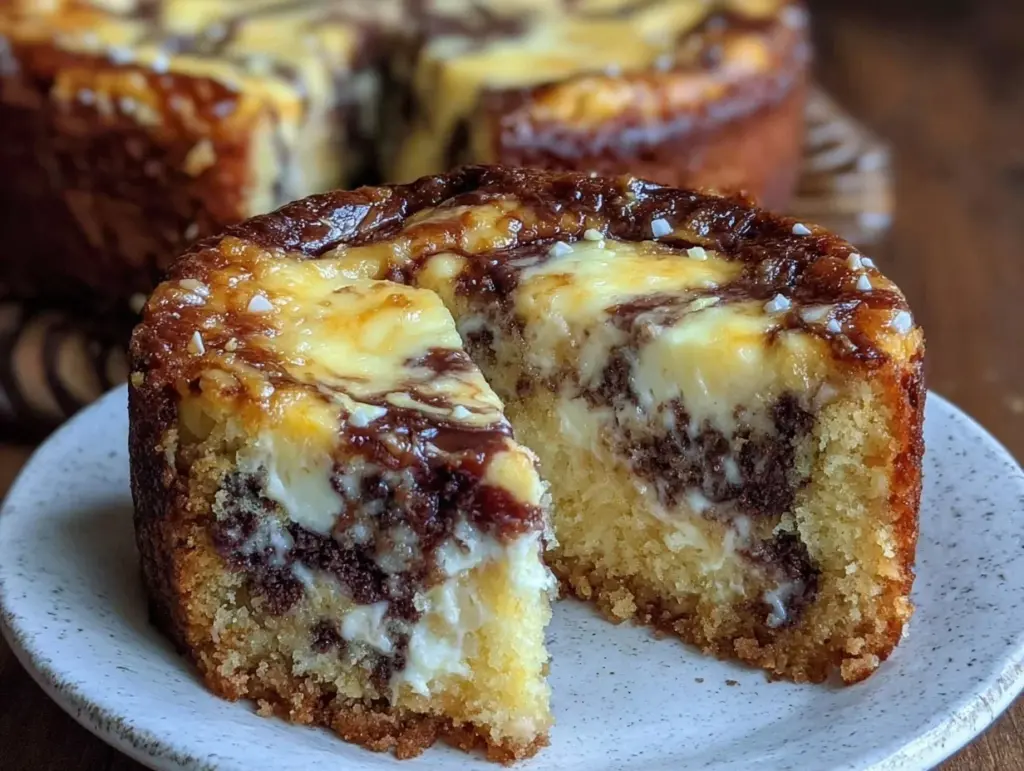
What happened next was pure magic: the cake rose into a beautiful, rustic masterpiece, the creamy cheese swirls weaving through the rich chocolate layers like an accidental but perfect design. It wasn’t just the look; the texture was wonderfully moist, and the flavors were rich without being overwhelming. That unexpected win turned this dessert into a repeat favorite at my house—so much so that I found myself baking it multiple times in one week, just to share with neighbors or keep for those quiet, late-night bites.
There’s something about the way the cream cheese cuts through the decadence of the chocolate that makes this cake stand out. It’s a little wild, a little indulgent, and honestly, a comforting reminder that sometimes the best recipes come from a bit of chaos in the kitchen. It’s the kind of dessert where you don’t worry about perfect slices—each piece is uniquely delicious, and that’s exactly why this recipe stuck with me.
Why You’ll Love This Recipe
This Decadent Earthquake Cake with Cream Cheese Swirl isn’t your everyday chocolate cake. After testing and tweaking it a few times, I can confidently say there’s a lot packed into this one:
- Quick & Easy: You can have this cake ready in under an hour, making it ideal for busy evenings or spontaneous dessert cravings.
- Simple Ingredients: No need for fancy or hard-to-find items—most of these are pantry staples you probably already have hanging around.
- Perfect for Any Occasion: Whether it’s a casual family dinner, a potluck, or a cozy weekend treat, this cake fits right in.
- Crowd-Pleaser: This recipe consistently wins over both kids and adults, thanks to its luscious texture and creamy swirl.
- Unbelievably Delicious: The cream cheese swirl adds a subtle tang that balances the rich chocolate, giving every bite a perfect harmony of flavors.
What really makes this recipe different is the way the cream cheese isn’t just added on top or mixed in haphazardly. The swirling technique creates a marbled effect that’s as beautiful as it is tasty. Plus, the cake’s moist crumb feels almost like a cross between a fudge brownie and a cheesecake, which honestly is a dream combo. I’ve even swapped in almond flour once to make a gluten-free version, and it turned out surprisingly well—still rich and satisfying.
This isn’t just a cake; it’s a little slice of comfort that feels indulgent without being overwhelming. If you’ve ever enjoyed the creamy satisfaction of a cheesecake but craved the chocolate richness of a fudge cake, this recipe hits that sweet spot perfectly. I bet it’ll become your go-to dessert when you want something that feels a bit special but isn’t a hassle to make.
What Ingredients You Will Need
This recipe uses simple, wholesome ingredients to deliver bold flavor and a satisfying texture without any fuss. Most are pantry staples, but the cream cheese swirl really brings it all together.
- For the Chocolate Cake Batter:
- All-purpose flour (2 cups / 240g) — I prefer King Arthur for consistent results
- Granulated sugar (1 ½ cups / 300g)
- Unsweetened cocoa powder (¾ cup / 75g) — Dutch-processed if possible for a smoother flavor
- Baking powder (1 ½ tsp)
- Baking soda (1 ½ tsp)
- Salt (½ tsp)
- Large eggs (2), room temperature
- Buttermilk (1 cup / 240ml) — adds moisture and tang; sour milk works as a substitute
- Vegetable oil (½ cup / 120ml) — neutral flavor works best
- Vanilla extract (2 tsp)
- Boiling water (1 cup / 240ml) — helps bloom the cocoa for richness
- For the Cream Cheese Swirl:
- Cream cheese (8 oz / 225g), softened — Philadelphia brand works great
- Granulated sugar (½ cup / 100g)
- Large egg (1), room temperature
- Vanilla extract (1 tsp)
- All-purpose flour (2 tbsp / 16g) — helps stabilize the swirl
Seasonal tip: If you want to add a little twist, try sprinkling chopped walnuts or chocolate chips on top before baking. I’ve also swapped regular sugar for coconut sugar once, which gave a subtle caramel note that was surprisingly good.
Equipment Needed
- 9×13-inch baking pan — a standard size that the cake bakes evenly in. You can use glass or metal; I prefer metal for a slightly crisper edge.
- Mixing bowls — at least two, one for batter and one for cream cheese swirl.
- Electric mixer or stand mixer — makes creaming the cream cheese and mixing batter much easier. A hand whisk works, but expect a bit more arm work!
- Measuring cups and spoons — for accurate ingredient amounts.
- Rubber spatula — perfect for folding and scraping the bowl clean.
- Cooling rack — allows the cake to cool evenly, preventing sogginess.
If you’re on a budget, a sturdy glass baking dish and a good whisk will get you through. I’ve found that cleaning the mixer immediately after cream cheese work makes the whole process less sticky and stressful. Also, keep your cream cheese at room temperature — it blends in so much smoother that way.
Preparation Method

- Preheat your oven to 350°F (175°C) and grease your 9×13-inch baking pan well. You can line it with parchment paper for easier removal, but the cake is pretty forgiving.
- Mix the dry cake ingredients: In a large bowl, whisk together 2 cups (240g) flour, 1 ½ cups (300g) sugar, ¾ cup (75g) cocoa powder, 1 ½ tsp baking powder, 1 ½ tsp baking soda, and ½ tsp salt. Make sure the cocoa is well sifted to avoid clumps. This step takes about 3 minutes.
- Add wet ingredients to the dry mix: Crack in 2 large eggs, pour in 1 cup (240ml) buttermilk, ½ cup (120ml) vegetable oil, and 2 tsp vanilla extract. Beat everything with your mixer or whisk until smooth and creamy, roughly 2-3 minutes. The batter will be thick but pourable.
- Carefully stir in 1 cup (240ml) boiling water: This thins the batter and blooms the cocoa, creating a moist, rich crumb. The batter will be quite liquid—don’t worry, this is exactly how it should be. Stir gently to combine, about 30 seconds.
- Prepare the cream cheese swirl: In a separate bowl, beat 8 oz (225g) softened cream cheese with ½ cup (100g) sugar until smooth. Add 1 egg and 1 tsp vanilla extract, beating until combined. Finally, mix in 2 tbsp (16g) flour to help keep it firm during baking. This should take about 3-4 minutes.
- Pour the chocolate batter into the prepared pan: Spread evenly with a spatula. Then dollop the cream cheese mixture evenly on top in spoonfuls.
- Create the swirl: Use a knife or skewer to gently swirl the cream cheese into the chocolate batter. Don’t overmix—just a few figure-eight motions to create a marbled effect. The pattern will look rustic and inviting.
- Bake the cake: Place the pan on the middle rack and bake for 40-45 minutes. Check doneness by inserting a toothpick near the center; it should come out with a few moist crumbs but no raw batter. The edges will start pulling away slightly from the pan.
- Cool the cake: Let it cool on a wire rack for at least 30 minutes before slicing. This allows the cream cheese swirl to set and the flavors to meld beautifully.
Pro tip: If you notice the edges browning too fast, loosely tent the cake with aluminum foil halfway through baking. This keeps it moist without burning.
Cooking Tips & Techniques
One thing I learned the hard way is that room temperature eggs and cream cheese really make a difference. Cold ingredients can cause the batter to curdle or the cream cheese swirl to clump. So, take the time to let them warm up a bit before mixing.
When swirling, less is more. Over-twirling can cause the cream cheese to blend completely into the chocolate, losing that beautiful marbled look. A few gentle strokes with a knife are all you need.
Another tip: bloom your cocoa powder with hot water right in the batter as the recipe suggests. This unlocks deeper chocolate notes and keeps the cake moist. I’ve had recipes where skipping this step led to a drier, less flavorful cake, and honestly, it’s a game changer.
Don’t rush cooling. Cutting the cake too soon can cause the cream cheese layer to spill or the texture to feel gummy. Waiting at least 30 minutes makes slicing cleaner and the cake more enjoyable.
Last but not least, if you want a slightly crispier edge, bake in a metal pan rather than glass. I’ve tested both, and metal gives a nice contrast to the soft, creamy center.
Variations & Adaptations
This Earthquake Cake recipe is pretty versatile, and I’ve tried a few tweaks myself:
- Gluten-Free: Swap the all-purpose flour for a gluten-free blend or almond flour. The texture shifts a bit but remains moist and rich. Just be sure to check your baking powder is gluten-free.
- Flavor Twist: Add a teaspoon of espresso powder to the cocoa mix for a mocha undertone that complements the cream cheese beautifully.
- Fruit Add-In: Toss in fresh or frozen raspberries or cherries before swirling the cream cheese for a burst of tartness and color contrast.
- Dairy-Free: Use dairy-free cream cheese and substitute buttermilk with a mixture of plant-based milk and lemon juice. The cake will still be decadent, though the tang from cream cheese is a bit milder.
- Nutty Crunch: Sprinkle chopped pecans or walnuts on top before baking for an added texture layer.
One of my favorite personal twists was using fresh strawberries layered in no-bake cheesecake cups, which gave me the inspiration to add a fruit swirl to this cake. It’s a subtle change but makes the dessert feel more seasonal and fresh.
Serving & Storage Suggestions
This cake is fantastic served slightly warm or at room temperature. The cream cheese swirl softens a bit when warm, making each bite creamy and luscious. I like to pair it with a dollop of whipped cream or a scoop of vanilla ice cream to balance the richness.
For a simple presentation, dust the top lightly with powdered sugar or add a few fresh berries for color contrast. It’s perfect for dessert after a hearty meal or a sweet treat with afternoon coffee.
Store any leftovers in an airtight container in the refrigerator for up to 4 days. The flavors actually deepen after a day, so it’s not a bad idea to make it ahead. To reheat, microwave individual slices for 15-20 seconds or warm in a 300°F (150°C) oven for 5-7 minutes.
If you want to freeze the cake, wrap it tightly in plastic wrap and foil. Thaw overnight in the fridge and refresh in the oven before serving.
Nutritional Information & Benefits
Per slice (based on 12 servings), this Decadent Earthquake Cake contains approximately:
| Calories | 350 |
|---|---|
| Fat | 18g |
| Carbohydrates | 42g |
| Protein | 6g |
| Sugar | 28g |
The cream cheese adds a good dose of protein and calcium, while the cocoa powder contributes antioxidants and rich flavor without excess sugar. Using buttermilk or sour milk helps tenderize the crumb and adds a subtle tang, making this cake feel a bit more wholesome than a typical chocolate dessert.
This recipe can fit into balanced eating when enjoyed in moderation, and the simplicity of ingredients means fewer additives and preservatives compared to store-bought cakes. For those watching allergens, dairy and gluten substitutions are easy to implement.
Conclusion
All said and done, the Decadent Earthquake Cake with Cream Cheese Swirl is one of those recipes that surprises you with its charm and flavor. It’s rich, a little indulgent, but never overwhelming. The cream cheese swirl adds a creamy tang that balances the chocolate perfectly, making each bite memorable.
Feel free to make it your own—swap ingredients, add nuts or fruit, or play with dairy-free alternatives. I love how this recipe invites creativity while being straightforward enough for a quick dessert fix. Honestly, it’s become my reliable “wow” dessert when I want to impress with minimal fuss.
Would love to hear how your version turns out or any fun twists you try. Don’t be shy—leave a comment or share your photos. Baking is better when it’s shared!
Frequently Asked Questions
What makes this cake “earthquake” cake?
It’s called an earthquake cake because the cream cheese swirl creates cracks and fissures on the surface, resembling an earthquake’s aftermath. It’s a fun, rustic look that perfectly complements the cake’s rich texture.
Can I use regular milk instead of buttermilk?
You can substitute buttermilk with regular milk mixed with 1 tablespoon of lemon juice or vinegar, left to sit for 5 minutes. This mimics the acidity of buttermilk essential for tender crumb.
How should I store leftovers?
Keep leftovers in an airtight container in the refrigerator for up to 4 days. The cake tastes even better the next day as the flavors meld.
Is this cake gluten-free?
The original recipe uses all-purpose flour, but you can swap in a gluten-free flour blend or almond flour for a gluten-free option.
Can I make this cake ahead of time?
Absolutely! Bake it a day ahead and store refrigerated. Bring to room temperature before serving or warm slightly for best texture.
For a savory contrast to this dessert, I often pair it with dishes like the savory beer can chicken with herb butter glaze—it makes for a fantastic meal followed by a sweet finish. Or if you’re planning a party, the Italian sub sandwich skewers are a crowd-pleaser that balances well with this decadent cake for dessert.
Pin This Recipe!
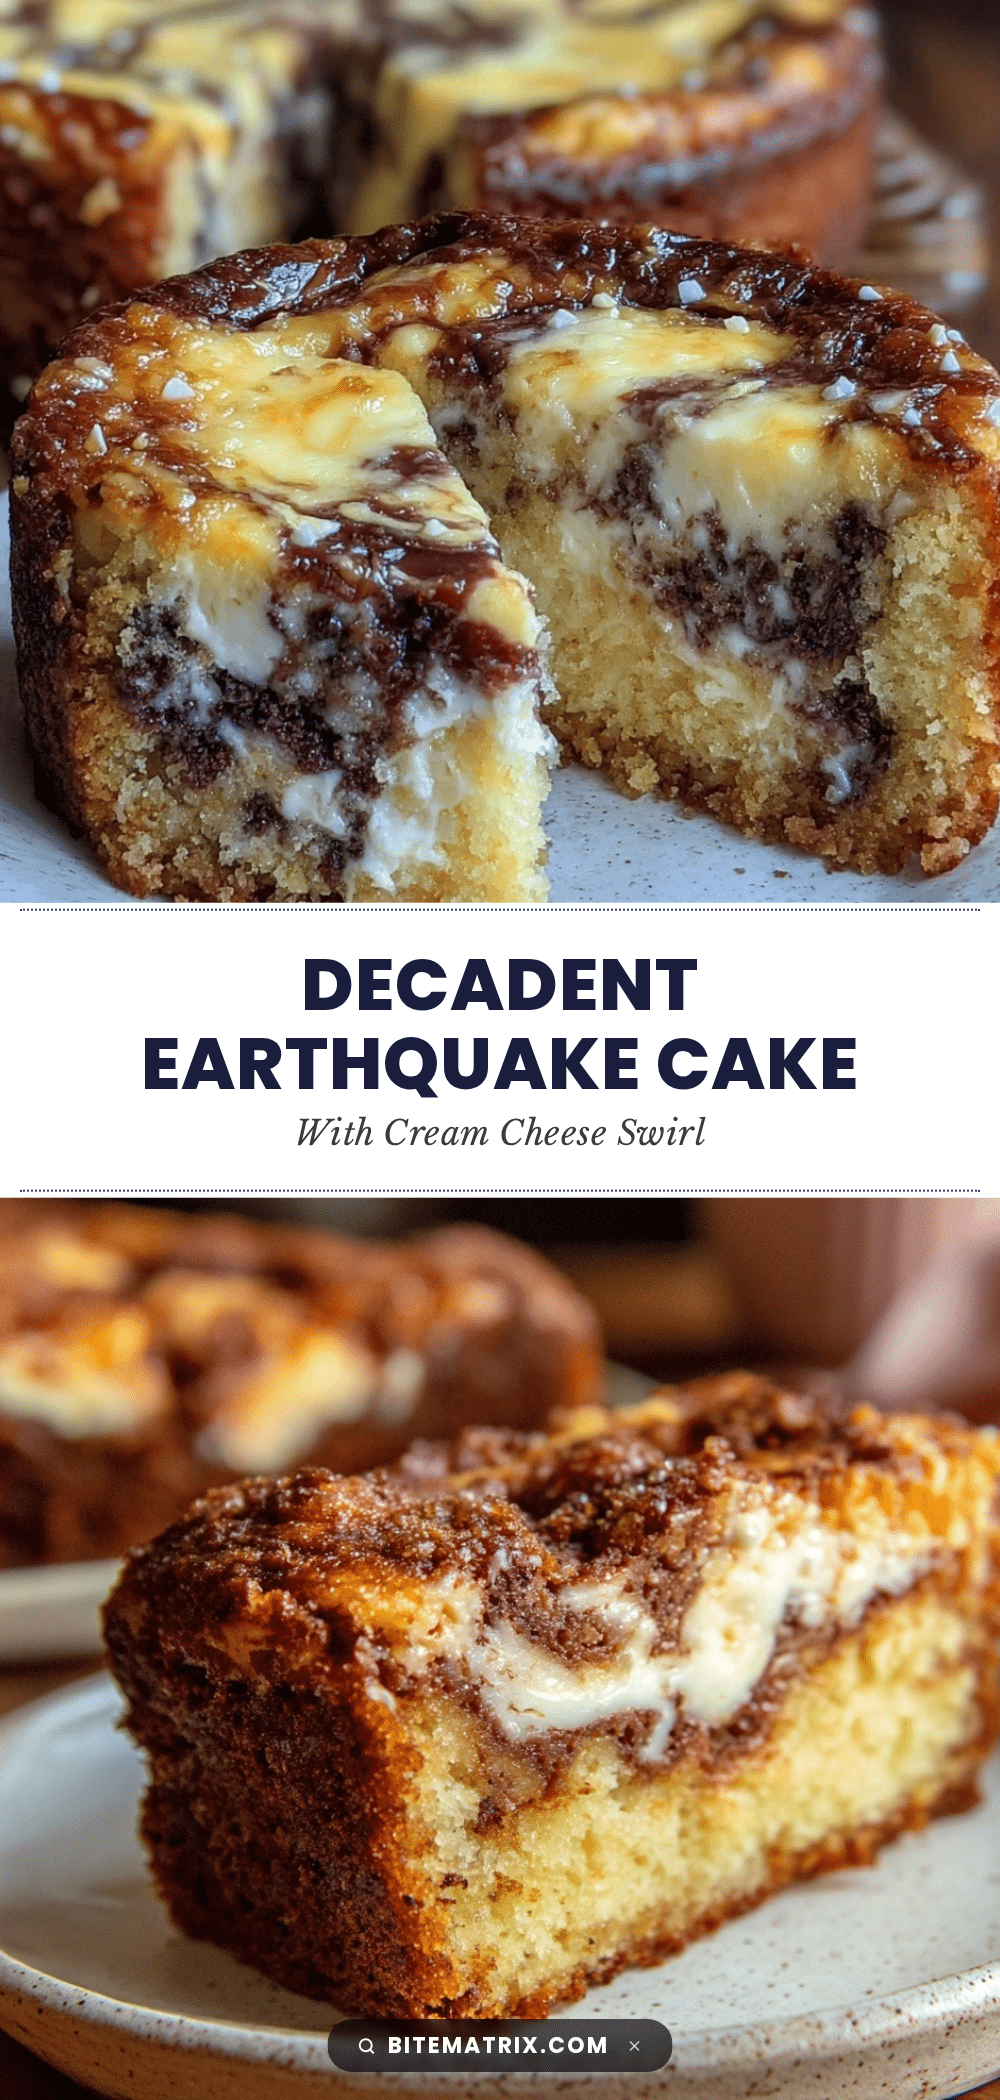
Decadent Earthquake Cake Recipe with Cream Cheese Swirl

A rich and moist chocolate cake with a creamy cream cheese swirl that creates a beautiful marbled effect. This easy and quick recipe is perfect for any occasion and a crowd-pleaser for both kids and adults.
- Prep Time: 15 minutes
- Cook Time: 45 minutes
- Total Time: 1 hour
- Yield: 12 servings 1x
- Category: Dessert
- Cuisine: American
Ingredients
- 2 cups (240g) all-purpose flour
- 1 ½ cups (300g) granulated sugar
- ¾ cup (75g) unsweetened cocoa powder (Dutch-processed if possible)
- 1 ½ tsp baking powder
- 1 ½ tsp baking soda
- ½ tsp salt
- 2 large eggs, room temperature
- 1 cup (240ml) buttermilk (or sour milk as substitute)
- ½ cup (120ml) vegetable oil
- 2 tsp vanilla extract
- 1 cup (240ml) boiling water
- 8 oz (225g) cream cheese, softened
- ½ cup (100g) granulated sugar
- 1 large egg, room temperature
- 1 tsp vanilla extract
- 2 tbsp (16g) all-purpose flour
Instructions
- Preheat your oven to 350°F (175°C) and grease a 9×13-inch baking pan. Optionally line with parchment paper.
- In a large bowl, whisk together flour, sugar, cocoa powder, baking powder, baking soda, and salt. Sift cocoa to avoid clumps.
- Add eggs, buttermilk, vegetable oil, and vanilla extract to the dry ingredients. Beat until smooth and creamy, about 2-3 minutes.
- Carefully stir in boiling water to thin the batter and bloom the cocoa. Stir gently for about 30 seconds.
- In a separate bowl, beat cream cheese with sugar until smooth. Add egg and vanilla extract, then mix in flour. Beat for 3-4 minutes.
- Pour chocolate batter into the prepared pan and spread evenly. Dollop cream cheese mixture on top in spoonfuls.
- Use a knife or skewer to gently swirl the cream cheese into the chocolate batter creating a marbled effect.
- Bake for 40-45 minutes until a toothpick inserted near the center comes out with a few moist crumbs.
- Cool the cake on a wire rack for at least 30 minutes before slicing to allow the cream cheese swirl to set.
Notes
Use room temperature eggs and cream cheese for best results. Avoid over-twirling the cream cheese swirl to maintain the marbled look. Bloom cocoa powder with boiling water to enhance chocolate flavor and moisture. Tent with foil if edges brown too fast. Let cake cool at least 30 minutes before slicing.
Nutrition
- Serving Size: 1 slice (1/12 of cak
- Calories: 350
- Sugar: 28
- Fat: 18
- Carbohydrates: 42
- Protein: 6
Keywords: earthquake cake, cream cheese swirl, chocolate cake, easy dessert, moist cake, marbled cake, quick cake recipe


