
Staring into the open fridge at 11:47 PM on a Tuesday, holding a half-empty package of Hawaiian rolls and a block of cheddar that was definitely past its prime but not quite past its point of no return. The kids had already eaten the leftover pasta, my husband was on his third bowl of cereal, and I had absolutely zero energy to cook anything that required a knife and a cutting board in any serious capacity. That’s when the idea hit me—not like a lightning bolt, more like a gentle, exhausted nudge from my sleep-deprived brain. I grabbed the ham, the cheese, some butter, and a baking dish, and I just started layering. No recipe. No plan. Just pure, desperate hope.
Honestly, I was just trying to make something that wouldn’t require a fork and that everyone could grab on their way out the door the next morning. I wasn’t trying to be creative. I wasn’t trying to start a new family tradition. I was just trying to survive a Wednesday. But when I pulled that pan out of the oven the next morning—golden brown, buttery, the cheese all melty and stringy—something clicked. My son, who usually picks apart his sandwiches, ate two whole sliders without a single complaint. My husband, who claims he “doesn’t do lunch,” packed three for work. And I stood there at the counter, eating one straight from the pan, thinking, this is the kind of recipe that saves your week.
These aren’t fancy sliders. There’s no balsamic glaze, no arugula, no artisanal bread. These are honest, buttery, ham-and-cheese sliders that taste like the best version of a school lunch you wish you’d had. They come together in about ten minutes of actual work, and they travel like a dream. That’s the whole point. Sometimes the best recipes aren’t the ones you plan—they’re the ones you throw together when you’re too tired to care, and they turn out perfect anyway.
Why You’ll Love This Recipe
Let me tell you why these little sliders have officially become my most-requested recipe for everything from school lunches to game-day parties. They’re not complicated, but they hit every single note you want in a comfort food.
- Ready in Under 20 Minutes: From fridge to table in about 20 minutes. That’s faster than delivery and way more satisfying.
- Pantry-Friendly Ingredients: You probably have everything you need right now. Ham, cheese, rolls, butter, and a few seasonings. That’s it.
- Perfect for Meal Prep: These sliders hold up beautifully in the fridge. Make a batch on Sunday, and you’ve got lunches sorted for days.
- Crowd-Pleaser Guaranteed: I’ve served these at birthday parties, potlucks, and casual dinners. They disappear every single time. Kids and adults go crazy for them.
- Incredibly Versatile: You can swap the ham for turkey, roast beef, or even leftover shredded chicken. The method stays the same, and the results are always delicious.
What makes these different from other slider recipes? It’s the butter sauce. I don’t just brush melted butter on top—I whisk it with a little Dijon mustard, a pinch of onion powder, and a splash of Worcestershire sauce. That tiny bit of tang and umami makes all the difference. It’s not just a butter wash; it’s a flavor booster that seeps into the rolls and makes everything taste like you spent way more effort than you actually did.
This recipe isn’t just good—it is the kind that makes you close your eyes after the first bite. It’s comfort food reimagined: faster, simpler, but with the same soul-soothing satisfaction. Perfect for impressing guests without stress, or turning a simple lunch into something memorable.
What Ingredients You Will Need
This recipe uses simple, everyday ingredients to deliver big flavor without the fuss. Most of these are pantry staples, which is exactly why this recipe works so well for busy weeknights and last-minute gatherings.
- Hawaiian sweet rolls (12-count package): These are non-negotiable for the best texture. The slight sweetness balances the salty ham and cheese perfectly. I prefer King’s Hawaiian, but any brand works.
- Deli ham (12 ounces, thinly sliced): Go for quality here. I like black forest ham or honey ham for a touch of sweetness. Ask for it shaved or thinly sliced at the deli counter—it layers better.
- Swiss cheese (8 ounces, thinly sliced): Swiss melts beautifully and has that mild, nutty flavor that pairs perfectly with ham. You can use provolone or mozzarella if you prefer a milder taste.
- Unsalted butter (1/2 cup, melted): Butter is the backbone of the topping sauce. Use unsalted so you can control the salt level. If you only have salted, reduce the added salt in the seasoning.
- Dijon mustard (1 tablespoon): This adds a subtle tang that cuts through the richness. Don’t skip it—it’s the secret ingredient that makes the sauce sing.
- Worcestershire sauce (1 teaspoon): Adds a deep, savory umami note. It’s a small amount, but it makes a big difference.
- Onion powder (1/2 teaspoon): For a gentle savory flavor. Garlic powder works too, but I find onion powder blends more seamlessly.
- Poppy seeds (1 tablespoon): Optional, but highly recommended. They add a lovely crunch and a classic deli-style look. You can use sesame seeds or everything bagel seasoning instead.
- Salt and black pepper (to taste): Go easy on the salt since the ham and cheese are already salty. A good crack of black pepper is always welcome.
Ingredient Selection Tips: For the best texture, look for rolls that are soft but sturdy enough to hold the filling without getting soggy. If you’re using a block of cheese, slice it as thinly as possible—it melts faster and more evenly. For a slightly different flavor profile, try using smoked ham or peppered turkey. And if you’re making these for a party, consider adding a layer of caramelized onions or roasted red peppers for extra flair.
Equipment Needed
You don’t need fancy gadgets for this recipe. Here’s what you’ll need:
- 9×13-inch baking dish: Standard size works perfectly. Glass or ceramic is ideal for even heating.
- Sharp chef’s knife or serrated knife: For slicing the rolls in half cleanly. A serrated knife works best to avoid squishing the soft bread.
- Small mixing bowl: For whisking together the butter sauce.
- Whisk or fork: To combine the butter, mustard, and seasonings.
- Pastry brush: For brushing the butter sauce evenly over the rolls. A spoon works in a pinch, but a brush gives better coverage.
- Aluminum foil: To cover the sliders during the first part of baking so they steam and get soft.
- Cutting board: For assembling and slicing.
Budget-Friendly Options: Don’t have a pastry brush? Use the back of a spoon to drizzle the butter sauce over the rolls. No 9×13 dish? A rimmed baking sheet works—just make sure the sliders fit snugly so they hold their shape. I’ve made these in a disposable aluminum pan for a picnic, and they turned out just as good.
Personal Tip: I learned the hard way that slicing the entire slab of rolls in one go with a bread knife is way easier than separating them and slicing individually. Keep the rolls connected, slice horizontally through the middle, and lift the top half off in one piece. It saves so much time and keeps everything neat.
Preparation Method

- Preheat your oven to 350°F (175°C). While it’s heating, lightly grease your 9×13-inch baking dish with butter or nonstick spray.
- Prepare the rolls. Keep the entire slab of 12 Hawaiian rolls connected. Using a serrated knife, carefully slice through the entire slab horizontally, separating the top half from the bottom half. Place the bottom half of the rolls in the prepared baking dish.
- Layer the ham. Fold the deli ham slices in half and arrange them evenly over the bottom layer of rolls. Don’t be shy—cover every bit of bread. You want ham in every bite. (About 6 ounces of ham for this layer.)
- Add the cheese. Layer the Swiss cheese slices over the ham, overlapping slightly. Make sure the cheese covers the ham completely so every slider gets that melty goodness.
- Top with remaining ham. Add the rest of the ham slices over the cheese. This double layer of ham is what makes these sliders so satisfying and hearty.
- Place the top half of the rolls. Carefully set the top half of the roll slab over the fillings, aligning the edges as best you can. Press down gently to compact everything slightly.
- Make the butter sauce. In a small bowl, whisk together the melted unsalted butter, Dijon mustard, Worcestershire sauce, onion powder, and a pinch of salt and pepper. Whisk until smooth and well combined.
- Brush the sauce. Using a pastry brush, generously brush the entire top surface of the rolls with the butter sauce. Make sure to get the edges and the sides—this is what makes the tops golden and crispy. Reserve about 2 tablespoons of sauce for later.
- Sprinkle with poppy seeds. Evenly sprinkle the poppy seeds over the buttered tops. They’ll stick to the sauce and create that beautiful, classic finish.
- Cover and bake. Cover the baking dish tightly with aluminum foil. Bake for 15 minutes. The foil traps steam, which helps the rolls soften and the cheese melt evenly.
- Uncover and finish baking. Remove the foil and brush the tops with the reserved butter sauce. Bake uncovered for another 5-7 minutes, until the tops are golden brown and the edges are slightly crispy. The cheese should be fully melted and bubbly around the edges.
- Rest before slicing. Let the sliders rest in the dish for 5 minutes. This allows the cheese to set slightly so the sliders hold their shape when you cut them. Use a sharp knife to cut along the individual roll lines.
- Serve warm. Transfer to a platter and serve immediately. Watch them disappear.
Sensory Cues: When you brush the butter sauce, you’ll see it soak into the tops of the rolls—that’s a good sign. After baking, the tops should be a deep golden brown, and you’ll hear a slight sizzle when you pull the foil off. The cheese should be visibly melted and stretching when you lift a slider.
Troubleshooting: If your tops are browning too quickly but the cheese isn’t fully melted, cover loosely with foil for the last few minutes of baking. If the bottoms are soggy, try baking on a lower rack next time or using a wire rack inside the baking dish to allow air circulation.
Cooking Tips & Techniques
Here are some hard-earned lessons from my many batches of sliders—some successful, some, well, less so.
- Don’t over-bake. I once left the sliders in for an extra 10 minutes while I answered a phone call. The tops were practically burnt, and the cheese had turned into a hard, rubbery sheet. Stick to the timing. 15 minutes covered, 5-7 uncovered. That’s your sweet spot.
- Let them rest. I know you want to dig in immediately. I do too. But if you cut into them right away, the cheese will ooze out everywhere, and the sliders will fall apart. Five minutes of patience makes a world of difference.
- Use room-temperature butter. Cold butter doesn’t mix well with the mustard and Worcestershire sauce. Melt it gently in the microwave in 10-second bursts, stirring between each, until just liquid.
- Double the sauce if you like extra flavor. Some people like their sliders extra saucy. If that’s you, make 1.5 times the butter sauce recipe. Brush half before baking, and reserve the rest for brushing after baking.
- Line the dish with parchment paper. This makes cleanup a breeze and prevents any sticking. Just leave a little overhang so you can lift the whole slab out if you want to.
- Toast the rolls first (optional). If you like a crunchier texture, pop the top half of the rolls under the broiler for 1-2 minutes before assembling. Just watch them closely—they burn fast.
Multitasking Strategy: While the sliders are baking covered, use that time to clean up your workspace, prep a side dish, or set the table. The 15-minute covered bake is hands-off, so take advantage of it.
Variations & Adaptations
These sliders are incredibly forgiving. Here are some of my favorite variations:
- Turkey and Provolone: Swap the ham for roasted turkey breast and the Swiss for provolone. Add a thin layer of cranberry sauce for a Thanksgiving-inspired twist. It’s amazing.
- Italian-Style: Use salami, pepperoni, and provolone. Brush the tops with garlic butter and sprinkle with Italian seasoning. Serve with marinara for dipping. These remind me of the Italian sub sandwich skewers I make for parties, but in slider form.
- Spicy Southwest: Use pepper jack cheese instead of Swiss, add a layer of sliced jalapeños, and brush the tops with a mix of butter and hot sauce. These are perfect for game day.
- Breakfast Sliders: Swap the ham for crispy bacon or breakfast sausage, use cheddar cheese, and add a fried egg to each slider. Bake as directed, then top with the egg.
- Vegetarian Option: Replace the ham with roasted portobello mushrooms or thinly sliced zucchini. Add a layer of spinach and use mozzarella. The butter sauce works beautifully with vegetables.
Dietary Adaptations: For a gluten-free version, use gluten-free Hawaiian rolls or any soft gluten-free slider buns. For a lower-carb option, use large lettuce leaves as the bun and skip the butter sauce. For a dairy-free version, use dairy-free cheese and vegan butter—just note that the texture will be slightly different.
Personal Favorite: I once made a batch with leftover fall-off-the-bone BBQ ribs that I shredded and layered with cheddar and pickles. It was messy, ridiculous, and absolutely incredible. Don’t be afraid to experiment with leftovers.
Serving & Storage Suggestions
These sliders are best served warm, straight from the oven. The butter sauce is still glossy, the cheese is perfectly stretchy, and the tops have that irresistible golden crunch.
Serving Ideas: Arrange the sliders on a large platter and serve with extra Dijon mustard or honey mustard for dipping. They pair beautifully with a fresh creamy cucumber dill salad for a light, refreshing contrast. For a heartier meal, serve alongside loaded baked potato salad or a simple green salad with vinaigrette.
Storage Instructions: Store leftover sliders in an airtight container in the refrigerator for up to 3 days. The flavors actually meld together overnight and get even better. To reheat, place them on a baking sheet and warm in a 350°F oven for 5-7 minutes, or until the cheese is melty again. You can also microwave them for 30-45 seconds, but the tops won’t be as crispy.
Freezer Tips: These sliders freeze beautifully. Assemble the sliders completely but don’t bake them. Wrap the entire dish tightly in plastic wrap, then in aluminum foil. Freeze for up to 3 months. When ready to bake, thaw overnight in the refrigerator, then bake as directed, adding 5-10 minutes to the covered baking time.
Flavor Development: If you’re making these for a party, I actually recommend assembling them the night before and refrigerating overnight. The butter sauce soaks into the rolls, and the flavors deepen. Just add 5 minutes to the covered baking time since you’re starting from cold.
Nutritional Information & Benefits
Here’s an approximate nutritional breakdown per slider (based on 12 sliders):
- Calories: 280-320
- Protein: 14-16g
- Fat: 16-18g
- Carbohydrates: 20-22g
- Fiber: 1g
- Sugar: 6-8g
- Sodium: 600-700mg
Health Benefits: Ham is a good source of protein and essential B vitamins, including B12 and niacin. Swiss cheese provides calcium and phosphorus for bone health. While these sliders are definitely a treat, they offer a balanced mix of protein, carbs, and fat to keep you satisfied.
Dietary Considerations: This recipe contains gluten, dairy, and eggs (in the rolls). For a lower-sodium option, look for low-sodium ham and use unsalted butter. For a lighter version, use reduced-fat cheese and whole wheat rolls.
Personal Perspective: I don’t pretend these are health food. They’re comfort food, plain and simple. But I’ve found that when I make them with quality ingredients and pair them with a big salad or roasted vegetables, they fit perfectly into a balanced week. Everything in moderation, right?
Conclusion
These Easy Ham and Cheese Bento Box Sliders are the definition of a reliable recipe. They’re simple enough for a busy weeknight, impressive enough for a party, and portable enough for lunches on the go. The buttery, tangy sauce transforms basic ingredients into something that feels special without any fuss.
I love this recipe because it reminds me that you don’t need complicated techniques or exotic ingredients to make something truly satisfying. Sometimes the best meals come from a half-empty fridge and a little bit of creativity. Whether you’re packing lunchboxes, feeding a crowd, or just craving something warm and cheesy, these sliders deliver every single time.
I’d love to hear how yours turn out! Did you try any variations? Did you add your own twist? Drop a comment below and let me know—I’m always looking for new ideas to try. And if you loved these, don’t forget to share this recipe with a friend who needs a little comfort food in their life. Happy cooking!
Frequently Asked Questions
Can I make these sliders ahead of time?
Absolutely! Assemble the sliders completely, cover, and refrigerate for up to 24 hours before baking. Add 5-10 minutes to the covered baking time since you’re starting from cold. They’re perfect for meal prep.
Can I use a different type of cheese?
Yes! Swiss is classic, but provolone, mozzarella, cheddar, or pepper jack all work beautifully. Just make sure it’s a good melting cheese. Hard cheeses like Parmesan won’t melt as well.
How do I prevent the bottoms from getting soggy?
Make sure you’re not over-brushing the bottom layer of rolls. Also, baking on a lower oven rack helps. If you’re still having issues, try placing a wire rack inside the baking dish to allow air circulation underneath.
Can I freeze these sliders?
Yes! Assemble but don’t bake. Wrap tightly in plastic wrap and foil, then freeze for up to 3 months. Thaw overnight in the fridge, then bake as directed. They’re a lifesaver for busy weeks.
What can I serve with these sliders?
They pair well with a fresh green salad, coleslaw, roasted vegetables, or a bowl of soup. For a party, serve alongside classic burger sliders with secret sauce for a slider bar that guests will love.
Pin This Recipe!
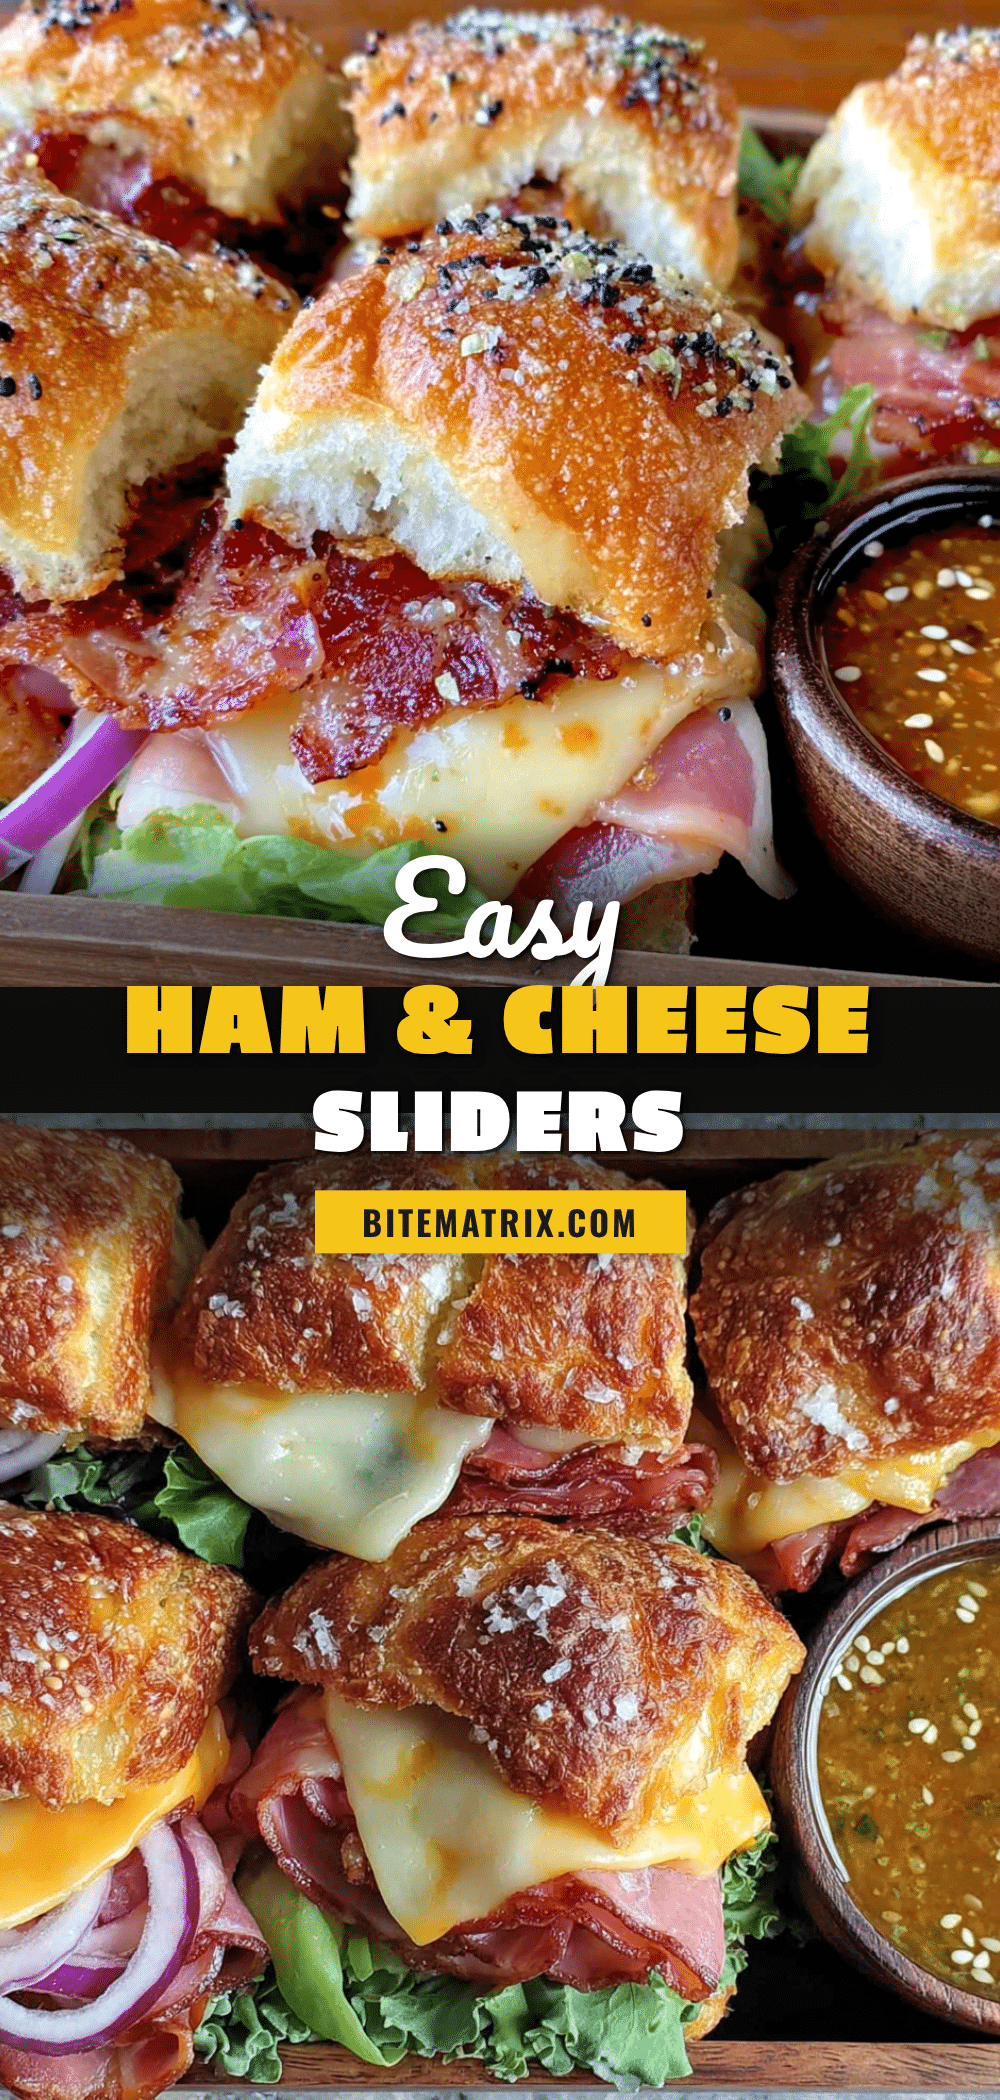
Best Easy Ham and Cheese Bento Box Sliders

These buttery, cheesy ham sliders come together in about 20 minutes using simple pantry ingredients. Perfect for school lunches, game-day parties, or a quick weeknight dinner that everyone will love.
- Prep Time: 10 minutes
- Cook Time: 20 minutes
- Total Time: 30 minutes
- Yield: 12 sliders 1x
- Category: Main Course
- Cuisine: American
Ingredients
- 1 (12-count) package Hawaiian sweet rolls
- 12 ounces deli ham, thinly sliced
- 8 ounces Swiss cheese, thinly sliced
- 1/2 cup unsalted butter, melted
- 1 tablespoon Dijon mustard
- 1 teaspoon Worcestershire sauce
- 1/2 teaspoon onion powder
- 1 tablespoon poppy seeds (optional)
- Salt and black pepper to taste
Instructions
- Preheat your oven to 350°F (175°C). Lightly grease a 9×13-inch baking dish with butter or nonstick spray.
- Keep the entire slab of 12 Hawaiian rolls connected. Using a serrated knife, carefully slice through the entire slab horizontally, separating the top half from the bottom half. Place the bottom half of the rolls in the prepared baking dish.
- Fold the deli ham slices in half and arrange them evenly over the bottom layer of rolls. Cover every bit of bread (about 6 ounces of ham for this layer).
- Layer the Swiss cheese slices over the ham, overlapping slightly. Make sure the cheese covers the ham completely.
- Add the rest of the ham slices over the cheese for a double layer.
- Carefully set the top half of the roll slab over the fillings, aligning the edges. Press down gently to compact slightly.
- In a small bowl, whisk together the melted unsalted butter, Dijon mustard, Worcestershire sauce, onion powder, and a pinch of salt and pepper until smooth.
- Using a pastry brush, generously brush the entire top surface of the rolls with the butter sauce, including the edges and sides. Reserve about 2 tablespoons of sauce for later.
- Evenly sprinkle the poppy seeds over the buttered tops.
- Cover the baking dish tightly with aluminum foil. Bake for 15 minutes.
- Remove the foil and brush the tops with the reserved butter sauce. Bake uncovered for another 5-7 minutes, until the tops are golden brown and the edges are slightly crispy.
- Let the sliders rest in the dish for 5 minutes. Use a sharp knife to cut along the individual roll lines.
- Serve warm.
Notes
For best results, use room-temperature butter for the sauce. Let sliders rest 5 minutes before cutting to prevent cheese from oozing out. To prevent soggy bottoms, avoid over-brushing the bottom layer of rolls and bake on a lower oven rack if needed. Sliders can be assembled the night before and refrigerated; add 5-10 minutes to covered baking time.
Nutrition
- Serving Size: 1 slider
- Calories: 300
- Sugar: 7
- Sodium: 650
- Fat: 17
- Saturated Fat: 9
- Carbohydrates: 21
- Fiber: 1
- Protein: 15
Keywords: ham and cheese sliders, Hawaiian roll sliders, easy sliders, bento box sliders, party sliders, lunchbox sliders, quick dinner