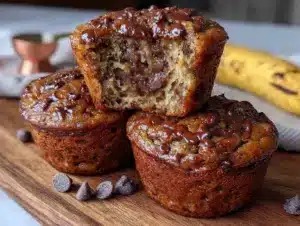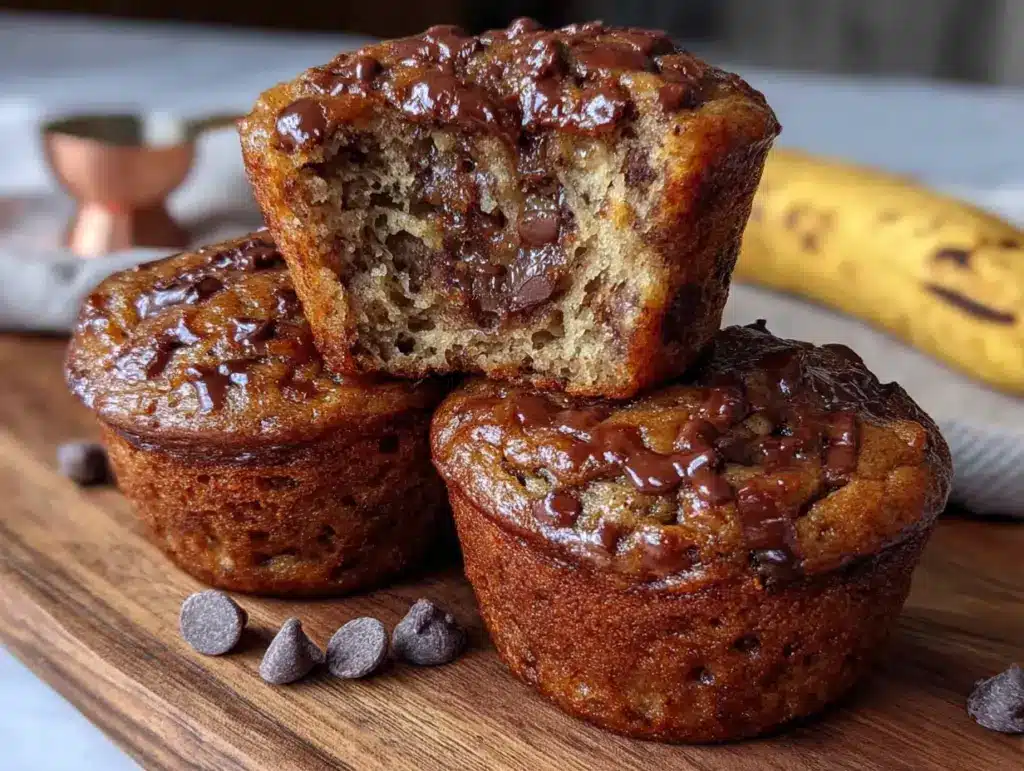
Third batch in three days and I finally stopped overmixing. That was the thing, you know—I kept stirring until the batter looked like a smooth, glossy dream, and then the muffins came out with these sad little tunnels running through them. Dense. Heavy. Not the light, fluffy pockets of chocolate-studded banana goodness I was chasing. My kid took one bite, set it down, and said, “Mom, these are okay.” Okay. The worst word a lunchbox recipe can get.
I wanted a muffin that could survive the chaotic morning shuffle—the dropped backpack, the missing shoe, the frantic search for a permission slip—and still taste like a warm hug at 10:30 a.m. Something that didn’t crumble into a sad pile of crumbs in a Ziploc bag. Something with enough structural integrity to make it through a school day but tender enough that you’d actually want to eat it. These easy chocolate chip banana muffins for lunchboxes are that recipe. They’re the ones I finally got right on a random Tuesday when I stopped trying so hard and just let the bananas do their thing.
Honestly, the secret was backing off. Less mixing, more trusting. And now I make them without thinking—the batter comes together in one bowl, the chocolate chips get folded in gently, and the whole kitchen smells like the kind of morning you wish you could bottle. These muffins are the ones that get eaten before they even make it into the lunchbox.
Why You’ll Love This Recipe
I’ve tested this recipe about a dozen times across different ovens, different banana ripeness levels, and different moods. Here’s what I know for sure:
- Quick & Easy: From start to oven in under 15 minutes. No electric mixer needed, no weird equipment. Just a bowl, a fork, and some patience while they bake.
- Simple Ingredients: You probably have everything in your kitchen right now. Butter, sugar, eggs, flour, bananas, chocolate chips. That’s it. No fancy extracts, no specialty flours, nothing that requires a trip to a specialty store.
- Perfect for Lunchboxes: These muffins hold their shape beautifully. They don’t get soggy, they don’t fall apart, and they actually taste better the next day. The chocolate chips stay soft and melty-adjacent even after a few hours in a lunchbox.
- Crowd-Pleaser: My kid who said “okay” now asks for these in her lunch every single day. Her friends at the lunch table have started trading snacks to get one. That’s the kind of feedback you can’t argue with.
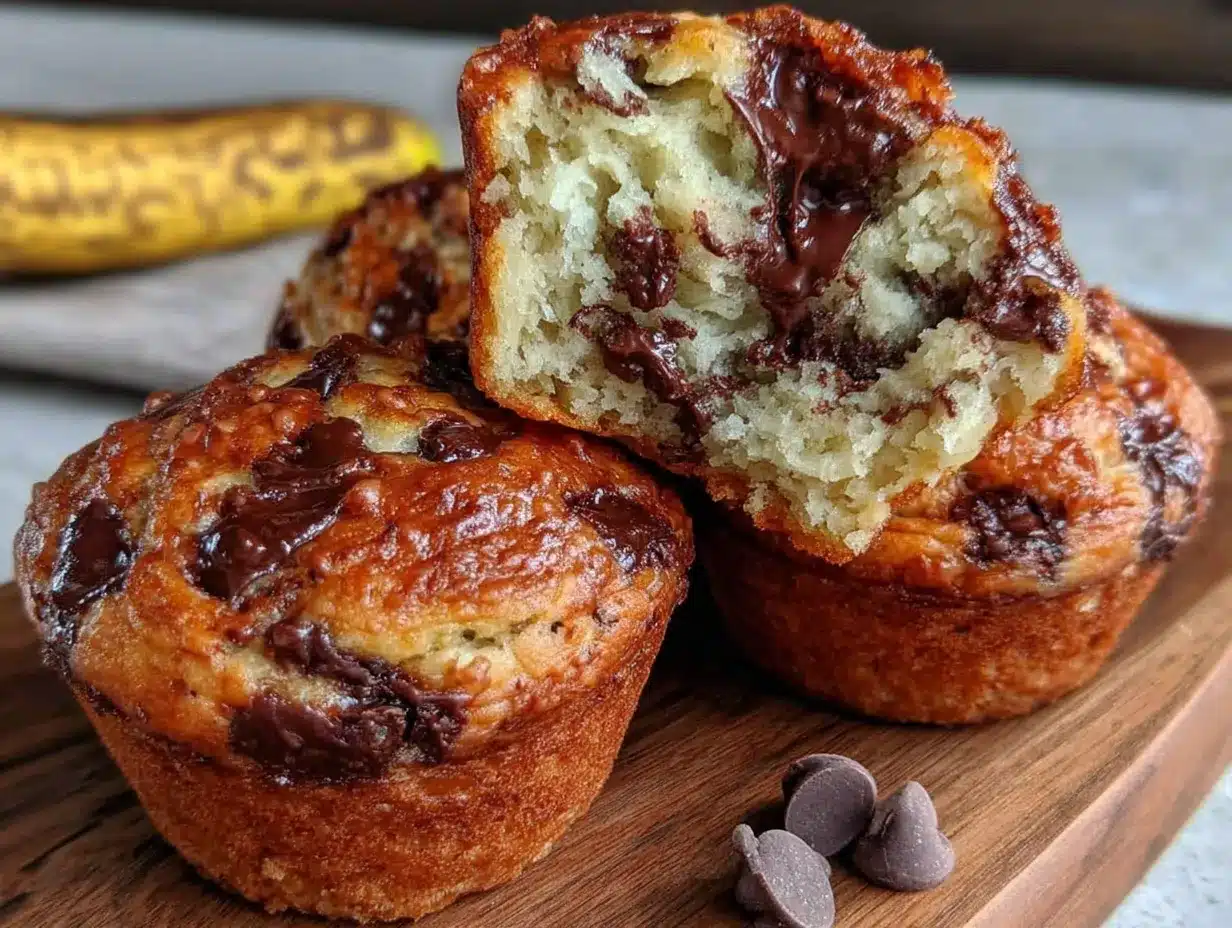
- Unbelievably Delicious: The texture is what gets you—tender and moist on the inside with a slightly domed, golden top. The chocolate chips add little pockets of sweetness that make every bite different from the last.
What makes this recipe different from every other banana muffin out there is the ratio. I played with the flour-to-banana balance until the muffins stayed moist without being gummy. The butter is melted, not creamed, which gives them a denser, more satisfying crumb that holds up to lunchbox abuse. And I use mini chocolate chips instead of regular ones—they distribute more evenly so every bite gets a little something.
This is the kind of recipe that makes you feel like a good parent without spending hours in the kitchen. It’s comfort food that actually works for real life.
What Ingredients You Will Need
This recipe uses simple, honest ingredients that work together to create something genuinely good. No surprises, no substitutions that require a chemistry degree—just real food that tastes like home.
- Ripe Bananas (3 medium, about 1 cup mashed): The browner the better. Seriously. Those spotty bananas sitting on your counter that everyone keeps ignoring? Those are exactly what you want. They mash easier and they’re sweeter, which means you can use less sugar. I’ve found that bananas with mostly brown peels give the most flavor. Green-ish bananas will work in a pinch, but your muffins won’t be as sweet or as moist.
- Unsalted Butter (1/3 cup, melted): Melted butter gives these muffins a tender, almost pound-cake-like texture. I use unsalted so I can control the salt level myself. If you only have salted butter on hand, just skip the added salt in the recipe.
- Granulated Sugar (1/2 cup): Just enough to complement the natural sweetness of the bananas without overpowering them. You could reduce this to 1/3 cup if your bananas are extremely ripe and spotty.
- Large Egg (1, room temperature): The egg binds everything together and adds structure. Room temperature is important here—it emulsifies into the melted butter much more smoothly. If you forgot to take it out of the fridge, place it in a bowl of warm water for 5 minutes.
- Vanilla Extract (1 teaspoon): Pure vanilla extract makes a difference here. The artificial stuff has a chemical aftertaste that doesn’t play well with banana. I like Nielsen-Massey, but any pure extract will work.
- All-Purpose Flour (1 1/2 cups): Spoon and level your flour—don’t scoop directly from the bag. Scooping compacts the flour and you’ll end up with dry, dense muffins. Fluff the flour with a fork, spoon it into your measuring cup, and level it off with a knife.
- Baking Soda (1 teaspoon): This is your leavening agent. It reacts with the acidity in the bananas and brown sugar (if you’re using it) to create lift. Make sure your baking soda is fresh—test it by dropping a bit into vinegar; if it fizzes vigorously, you’re good.
- Salt (1/4 teaspoon): Salt doesn’t make things salty—it makes things taste like themselves. It balances the sweetness and enhances the banana flavor. Don’t skip it.
- Mini Chocolate Chips (3/4 cup): Mini chips distribute more evenly than regular-sized ones. They also melt faster during baking, creating little pockets of chocolate throughout the muffin. I use Ghirardelli or Enjoy Life (for dairy-free options). You can swap in dark chocolate chips if you want a less sweet muffin.
Optional Add-ins: A handful of chopped walnuts or pecans adds nice crunch. A tablespoon of flaxseed meal blends in without changing the flavor. A sprinkle of turbinado sugar on top before baking gives a beautiful crunchy crust.
Equipment Needed
You don’t need a fully stocked bakery to make these muffins. Here’s what you’ll actually use:
- Muffin Tin (standard 12-cup): I’ve used both non-stick and dark metal pans. Dark metal pans actually give you a better golden-brown crust because they absorb heat more efficiently. If you’re using a non-stick pan, you might need an extra minute or two of baking time.
- Mixing Bowls (2 medium): One for the wet ingredients, one for the dry. I prefer glass or stainless steel—they don’t retain odors like plastic can.
- Fork or Potato Masher: For mashing the bananas. A fork works perfectly fine, but a potato masher gets the job done in half the time.
- Whisk: For combining the dry ingredients. A fork works in a pinch, but a whisk incorporates the baking soda and salt more evenly.
- Rubber Spatula: For folding in the chocolate chips and scraping the bowl clean. A flexible spatula is worth its weight in gold here.
- Measuring Cups and Spoons: Dry measuring cups for flour and sugar, liquid measuring cup for melted butter. Yes, there’s a difference—liquid measuring cups have a spout and are designed to measure volume accurately for liquids.
- Paper Liners or Cooking Spray: I prefer paper liners for easy cleanup and portion control. If you’re going liner-free, spray the pan generously with non-stick spray.
- Cooling Rack: Essential for even cooling. If you leave muffins in the hot pan, they’ll continue cooking and can get dry around the edges.
Budget-friendly tip: You can skip the paper liners entirely and just grease the pan well. A standard 12-cup muffin tin costs about $10 and will last you years if you hand-wash it.
Preparation Method
Let me walk you through this step by step. I’ve made these so many times I could do it with my eyes closed, but I’ll write it out like you’re standing next to me in the kitchen.
Step 1: Preheat and Prep
Preheat your oven to 350°F (175°C). Line a 12-cup muffin tin with paper liners or spray generously with non-stick cooking spray. I like to do this first so the oven is fully hot when the batter is ready.
Step 2: Mash the Bananas
Peel the bananas and place them in a medium mixing bowl. Mash them with a fork or potato masher until they’re mostly smooth with a few small lumps remaining. You want about 1 cup of mashed banana. Over-mashing can make the batter too liquidy, so stop when it looks like a chunky puree. A few lumps are totally fine—they’ll bake into tender spots in the muffins.
Step 3: Mix the Wet Ingredients
Add the melted butter, granulated sugar, egg, and vanilla extract to the mashed bananas. Whisk until everything is combined and smooth. The mixture should look pale and slightly thickened. If it looks separated or greasy, you might have added the butter while it was too hot—let it cool for a minute next time. It’ll still bake up fine, don’t worry.
Step 4: Combine the Dry Ingredients
In a separate bowl, whisk together the all-purpose flour, baking soda, and salt. Whisking aerates the flour and distributes the leavening agents evenly. This step takes about 30 seconds but makes a real difference in how evenly your muffins rise.
Step 5: Fold the Dry into the Wet
Add the dry ingredients to the wet ingredients. Here’s the crucial part: use a rubber spatula and fold gently. Stir just until you don’t see any more streaks of flour. Overmixing develops gluten, which makes muffins tough and creates those tunnels I mentioned earlier. The batter should look slightly lumpy and a little thick. That’s exactly what you want. About 12-15 gentle folds should do it.
Step 6: Fold in the Chocolate Chips
Add the mini chocolate chips to the batter and fold them in with 4-5 gentle strokes. Reserve about 2 tablespoons of chips to sprinkle on top of the muffins before baking—this makes them look bakery-style and pretty.
Step 7: Fill the Muffin Cups
Divide the batter evenly among the 12 muffin cups. I use a cookie scoop or a 1/4-cup measure to keep them uniform. Each cup should be about 3/4 full. If you overfill them, the muffins will dome too much and might spill over the edges. Sprinkle the reserved chocolate chips on top of each muffin.
Step 8: Bake
Place the muffin tin in the preheated oven and bake for 18-22 minutes. At 18 minutes, start checking for doneness. Insert a toothpick into the center of a muffin—if it comes out clean or with just a few moist crumbs attached, they’re done. If the toothpick has wet batter on it, give them another 2 minutes and check again. The tops should be golden brown and spring back when lightly pressed.
Step 9: Cool
Let the muffins cool in the pan for 5 minutes. This allows them to set and makes them easier to remove without falling apart. After 5 minutes, transfer them to a wire cooling rack to cool completely. If you leave them in the pan too long, the bottoms can get soggy from trapped steam.
Step 10: Enjoy
These muffins are wonderful warm, but they’re even better at room temperature—which is perfect for lunchboxes. Let them cool completely before packing them away.
Cooking Tips & Techniques
I’ve made every mistake in the book with banana muffins, so you don’t have to. Here’s what I’ve learned the hard way:
Don’t Overmix. I cannot stress this enough. The first few times I made these, I whisked the batter until it was perfectly smooth and silky. Every single batch came out dense and tough. The gluten in the flour develops as you mix, and the more you mix, the more gluten you develop. For tender muffins, you want to mix just until the flour disappears. A few lumps are your friend.
Use Overripe Bananas. Green or yellow bananas don’t have enough sugar or moisture. Your muffins will be dry and bland. Wait until the peels are covered in brown spots—or even completely brown. If your bananas are past the point of eating but not quite at the “mushy” stage, they’re perfect. I actually keep a bag of overripe bananas in my freezer for this exact purpose. Just thaw them in the microwave for 30 seconds, and they’ll release a ton of liquid that you can pour off or mix in.
Room Temperature Ingredients Matter. Cold egg and cold butter won’t emulsify properly with the sugar. The batter will look grainy and separated. Take your egg out of the fridge 30 minutes before you start, or place it in a bowl of warm water for 5 minutes. The melted butter should be warm but not hot—if it’s too hot, it’ll cook the egg.
Check Your Oven Temperature. Ovens run hot or cold, and it changes everything. I learned this when my muffins kept browning too fast on the outside while staying raw in the middle. An oven thermometer costs about $7 and saves you from wasted batches. If your muffins are browning too quickly, tent them with foil for the last 5 minutes of baking.
Let Them Cool Properly. I know it’s tempting to eat one straight out of the oven, but the texture really does improve as they cool. The crumb sets, the flavors meld, and the chocolate chips firm up just enough to be perfectly chewy. For lunchboxes, cool them completely before packing—warm muffins will create condensation in the container and turn everything soggy.
Use a Cookie Scoop for Even Sizing. This is a game-changer for consistent baking. A #20 cookie scoop (about 3 tablespoons) gives you perfectly uniform muffins that all bake at the same rate. No more guessing which one is done.
Variations & Adaptations
Once you’ve mastered the basic recipe, here are some ways to make it your own:
Gluten-Free Version: Swap the all-purpose flour with a 1:1 gluten-free baking blend. I’ve used Bob’s Red Mill and King Arthur with great results. Add 1/4 teaspoon of xanthan gum if your blend doesn’t already include it. The texture will be slightly more tender, but they hold together beautifully.
Dairy-Free Version: Use melted coconut oil or avocado oil instead of butter. Use dairy-free chocolate chips (Enjoy Life makes excellent ones). The coconut oil version has a subtle coconut flavor that pairs surprisingly well with banana. The muffins will be slightly less tender but still delicious.
Lower Sugar Option: Reduce the granulated sugar to 1/3 cup. If your bananas are very ripe and spotty, you won’t miss the extra sweetness. You can also swap 2 tablespoons of the sugar for a tablespoon of maple syrup or honey, though this will change the texture slightly.
Add-In Variations: Fold in 1/2 cup of chopped walnuts or pecans for crunch. Add 1/4 cup of unsweetened shredded coconut for a tropical twist. Swirl in 2 tablespoons of peanut butter before baking for a peanut butter-banana combo that’s absolutely killer.
Mini Muffin Version: Bake in a mini muffin tin for 10-12 minutes. These are perfect for little hands and lunchboxes. You’ll get about 24-30 mini muffins from this recipe. Reduce the chocolate chips to 1/2 cup since the smaller muffins don’t need as much.
Chocolate-Banana Swirl: Melt 1/4 cup of chocolate chips and swirl it into the batter before filling the cups. This creates beautiful marbled muffins that look fancy but take zero extra effort.
My Personal Favorite Variation: I add 1/2 teaspoon of cinnamon and a pinch of nutmeg to the dry ingredients. It gives the muffins a cozy, almost snickerdoodle-like warmth that makes them feel special. My kid calls them “fall muffins” and requests them year-round.
Serving & Storage Suggestions
These muffins are incredibly versatile when it comes to serving. Here’s how I handle them:
Serving Temperature: Room temperature is ideal for lunchboxes, but they’re also wonderful warm with a pat of butter melting into the top. If you’re serving them for breakfast or brunch, warm them in the microwave for 10-15 seconds—it makes the chocolate chips gooey again.
Presentation: For lunchboxes, I wrap each muffin in a small piece of parchment paper or place them in a reusable silicone muffin cup. They look cute and stay fresh. For serving at home, arrange them on a plate with fresh fruit and a dusting of powdered sugar.
Complementary Dishes: These muffins pair beautifully with a glass of cold milk, a hot cup of coffee, or a fruit smoothie. For a more substantial breakfast, serve them alongside scrambled eggs or Greek yogurt. They also work great as part of a brunch spread with fresh strawberry basil lemonade or a simple fruit salad.
Storage: Store leftover muffins in an airtight container at room temperature for up to 3 days. I use a glass container with a tight-fitting lid. If you stack them, place a piece of parchment paper between layers to prevent sticking. Do not refrigerate them—the cold air dries them out and makes the texture gummy.
Freezing: These muffins freeze beautifully. Let them cool completely, then place them in a single layer on a baking sheet and freeze for 1 hour. Transfer the frozen muffins to a freezer-safe bag or container. They’ll keep for up to 3 months. To thaw, leave them at room temperature for about 30 minutes, or microwave one for 20 seconds. The texture after freezing is nearly identical to fresh.
Flavor Development: Here’s a secret: these muffins actually taste better on day two. The banana flavor deepens and the chocolate chips soften slightly. If you can resist eating them all on day one, you’re in for a treat on day two.
Nutritional Information & Benefits
Here’s the approximate nutritional breakdown for one muffin (based on 12 muffins using the standard recipe):
| Nutrient | Amount per Muffin |
|---|---|
| Calories | 215 |
| Total Fat | 9g |
| Saturated Fat | 5g |
| Cholesterol | 35mg |
| Sodium | 195mg |
| Total Carbohydrates | 32g |
| Dietary Fiber | 2g |
| Sugars | 16g |
| Protein | 3g |
Health Benefits: Bananas are rich in potassium, vitamin B6, and vitamin C. They also contain resistant starch, which is good for gut health. The oats (if you add them) provide soluble fiber that helps with heart health. Chocolate chips in moderation offer antioxidants, especially if you use dark chocolate.
Dietary Considerations: This recipe can easily be made gluten-free and dairy-free (see variations above). It’s naturally nut-free if you skip the optional walnuts. For a lower-sugar option, reduce the sugar to 1/3 cup and use very ripe bananas.
Potential Allergens: This recipe contains wheat (gluten), dairy (butter), and eggs. For a nut-free version, skip the optional walnuts and ensure your chocolate chips are processed in a nut-free facility if needed.
My Personal Wellness Perspective: I believe in balance. These muffins have sugar and butter, but they also have real fruit and whole ingredients. They’re a treat, not a health food, and that’s okay. Packing one in your kid’s lunchbox is a small act of love, not a nutritional failure. The joy of eating something homemade and delicious has its own kind of value.
FAQs
Can I use frozen bananas?
Absolutely! In fact, frozen bananas are perfect for muffins. Thaw them in the microwave for 30-60 seconds, then drain off any excess liquid before mashing. The freezing process breaks down the cell walls and makes the bananas even sweeter and more flavorful.
Why did my muffins turn out dry?
Dry muffins are usually caused by overmixing, overbaking, or too much flour. Make sure you’re spooning and leveling your flour, not scooping directly from the bag. Check your muffins at 18 minutes—ovens vary wildly. And remember, a few lumps in the batter are fine; overmixing develops gluten and dries out the crumb.
Can I make these muffins vegan?
Yes! Use a flax egg (1 tablespoon ground flaxseed mixed with 3 tablespoons water, let sit for 5 minutes) instead of the regular egg. Use melted coconut oil or vegan butter instead of dairy butter. Use dairy-free chocolate chips. The texture will be slightly denser but still delicious.
How do I make these muffins healthier?
Reduce the sugar to 1/3 cup. Swap half the all-purpose flour for whole wheat pastry flour. Add 2 tablespoons of ground flaxseed or chia seeds. Use dark chocolate chips with at least 70% cocoa. You can also add 1/2 cup of grated zucchini (squeeze out the excess moisture first) for extra veggies without changing the flavor.
Can I make a double batch?
Definitely. This recipe doubles beautifully. Just make sure you have two muffin tins or bake in batches. The batter can sit at room temperature for about 30 minutes while the first batch bakes—just don’t let it sit longer than that, or the baking soda will lose its effectiveness.
Conclusion
These easy chocolate chip banana muffins for lunchboxes have become a staple in our house for a reason. They’re simple enough to make on a school morning, forgiving enough for beginner bakers, and delicious enough that they disappear faster than I can pack them. The texture is tender and moist, the chocolate chips add just the right amount of sweetness, and the banana flavor is warm and comforting without being overwhelming.
What I love most about this recipe is how adaptable it is. You can make it your own—swap in different add-ins, adjust the sweetness, or make it gluten-free. It’s a recipe that works with you, not against you. And honestly, that’s the kind of recipe worth keeping around.
If you try these muffins, I’d love to hear how they turned out. Drop a comment below and let me know if your family loved them as much as mine does. Did you add cinnamon? Swap in dark chocolate chips? Make them for a school bake sale? Share your version—I genuinely love seeing how people make recipes their own.
Happy baking, friends. Your lunchboxes are about to get a whole lot more interesting.
Pin This Recipe!
Easy Chocolate Chip Banana Muffins: Best Lunchbox Snack

These easy chocolate chip banana muffins are tender, moist, and perfect for lunchboxes. They hold their shape beautifully, taste even better the next day, and come together in one bowl with simple ingredients.
- Prep Time: 15 minutes
- Cook Time: 20 minutes
- Total Time: 35 minutes
- Yield: 12 muffins 1x
- Category: Dessert
- Cuisine: American
Ingredients
- 3 medium ripe bananas (about 1 cup mashed)
- 1/3 cup unsalted butter, melted
- 1/2 cup granulated sugar
- 1 large egg, room temperature
- 1 teaspoon vanilla extract
- 1 1/2 cups all-purpose flour
- 1 teaspoon baking soda
- 1/4 teaspoon salt
- 3/4 cup mini chocolate chips
Instructions
- Preheat oven to 350°F (175°C). Line a 12-cup muffin tin with paper liners or spray with non-stick cooking spray.
- Peel bananas and mash in a medium bowl with a fork or potato masher until mostly smooth with a few small lumps (about 1 cup).
- Add melted butter, granulated sugar, egg, and vanilla extract to the mashed bananas. Whisk until combined and smooth.
- In a separate bowl, whisk together flour, baking soda, and salt.
- Add dry ingredients to wet ingredients. Fold gently with a rubber spatula just until no streaks of flour remain (12-15 folds). Batter should be slightly lumpy.
- Fold in mini chocolate chips with 4-5 gentle strokes. Reserve about 2 tablespoons of chips to sprinkle on top.
- Divide batter evenly among 12 muffin cups, filling each about 3/4 full. Sprinkle reserved chocolate chips on top.
- Bake for 18-22 minutes, until a toothpick inserted in the center comes out clean or with a few moist crumbs. Tops should be golden brown and spring back when pressed.
- Let muffins cool in the pan for 5 minutes, then transfer to a wire cooling rack to cool completely.
- Enjoy warm or at room temperature. For lunchboxes, cool completely before packing.
Notes
Don’t overmix the batter—a few lumps are fine. Use overripe bananas (brown spots) for best sweetness and moisture. Room temperature ingredients help emulsify properly. Muffins taste even better on day two. For freezing, cool completely, freeze in a single layer, then store in a freezer-safe bag for up to 3 months.
Nutrition
- Serving Size: 1 muffin
- Calories: 215
- Sugar: 16
- Sodium: 195
- Fat: 9
- Saturated Fat: 5
- Carbohydrates: 32
- Fiber: 2
- Protein: 3
Keywords: chocolate chip banana muffins, lunchbox muffins, easy banana muffins, kid-friendly muffins, banana chocolate chip muffins