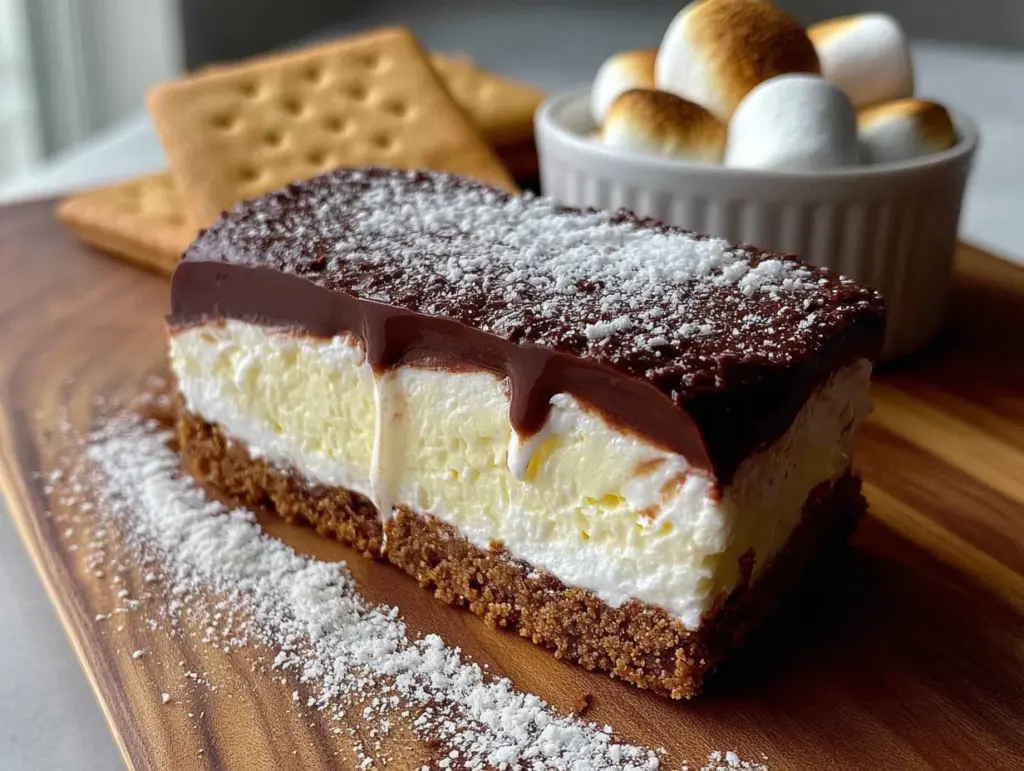
“Wait—so you’re telling me I can have a s’more without lighting a fire?” My sister was staring at me from across the kitchen counter, a spoonful of chocolate pudding halfway to her mouth. It was August, the kind of humid evening where even the thought of a campfire felt like a punishment. She had just watched me crush graham crackers into a zip-top bag with a rolling pin—something that, honestly, looked more aggressive than it needed to be—and she was genuinely suspicious. I didn’t blame her. We grew up on the real deal: sticky fingers, burnt marshmallows, and the faint smell of smoke clinging to our hair for days. The idea of a s’more that didn’t require kindling felt like cheating. But let me tell you—after one bite of these Easy No-Bake S’mores Icebox Bars, she changed her tune. The crunch of the buttery graham crust, the silky chocolate layer, and that cloud-like marshmallow topping all stacked together without ever turning on the oven. It was the kind of dessert that makes you stop mid-chew and just nod. You know the nod. The one that says, Okay, this is happening again soon. And honestly? It’s become my go-to for those nights when you want something that feels special but you’re too tired to earn it. No fire required.
Why You’ll Love This Recipe
I’ve tested this recipe about six times—yes, six—to get the texture just right. The first batch was too soft. The second was too hard. The third? Let’s just say I learned the hard way that not all chocolate chips melt the same. But now, I’ve nailed it. These bars are the perfect balance of crunchy, creamy, and fluffy, and they come together in about ten minutes of actual work. Here’s why they’ll become your new favorite:
- No-Bake & Ready in 10 Minutes: No oven, no stovetop, no sweat. Just mix, layer, and chill. Perfect for hot days when you can’t stand the thought of turning on the stove.
- Simple Ingredients: You probably have graham crackers, butter, chocolate chips, and marshmallows in your pantry right now. No fancy trips to the store required.
- Perfect for Summer Gatherings: Whether it’s a backyard barbecue, a pool party, or a lazy picnic, these bars travel well and disappear fast. They’re also a hit at graduation parties—I’ve brought them alongside my easy make-ahead walking taco bar before, and the combo was legendary.
- Crowd-Pleaser: Kids love them. Adults love them. Even my picky uncle who “doesn’t do sweets” asked for the recipe.
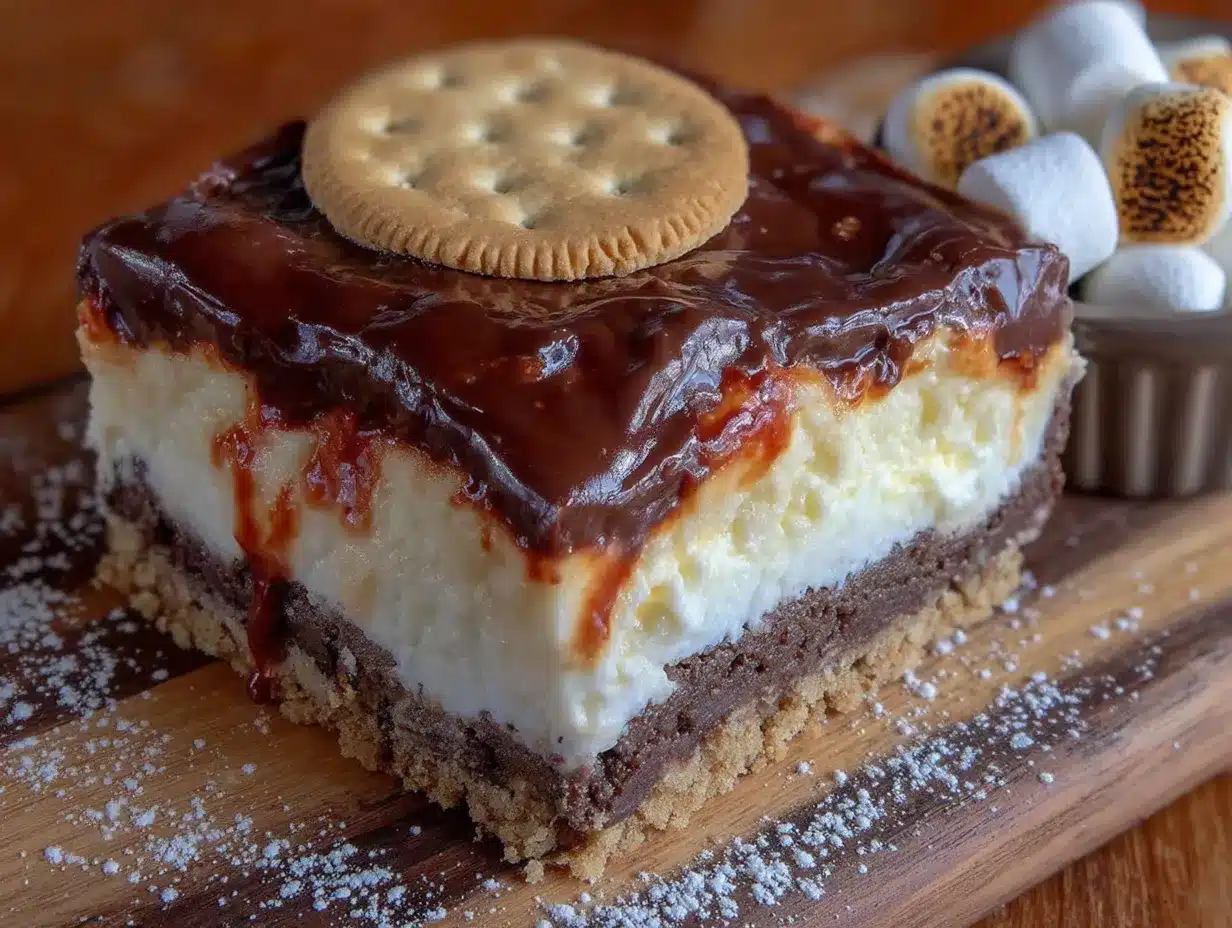
- Unbelievably Delicious: The magic is in the layers. The graham cracker crust stays firm but crumbly, the chocolate filling is rich without being heavy, and the marshmallow topping is light and airy. It’s comfort food without the work.
What makes this recipe different from the dozens of other s’mores desserts out there? It’s the texture. Most no-bake bars turn into a mushy mess or a rock-hard brick. I’ve figured out the exact ratio of butter to crumbs, the right way to melt the chocolate so it sets up smooth, and the trick to keeping the marshmallow layer fluffy. This isn’t just another version—it’s the best version. And after the first bite, you’ll close your eyes and nod, too.
What Ingredients You Will Need
This recipe uses simple, pantry-friendly ingredients to deliver that classic s’mores flavor without any fuss. Most of these are probably already in your kitchen, which makes this the perfect last-minute dessert. Let’s break it down:
- Graham Cracker Crumbs (2 cups / about 200g): You can buy pre-crushed crumbs or crush your own. I prefer crushing my own because the texture is more rustic—some bigger bits add nice crunch. If you’re gluten-free, use gluten-free graham crackers. Just make sure they’re finely crushed for the base.
- Unsalted Butter (½ cup / 1 stick / 113g), melted: This binds the crust. I use unsalted so I can control the salt level. If you only have salted butter, skip the pinch of salt I mention later. Melt it gently—microwave in 20-second bursts or on the stovetop.
- Granulated Sugar (2 tablespoons / 25g): Just a little sweetness for the crust. You could skip it if you’re using sweetened graham crackers, but I like the extra hint of caramel.
- Pinch of Salt: Balances the sweetness. Don’t skip it—it makes the chocolate pop.
- Semi-Sweet Chocolate Chips (1½ cups / 260g): I recommend Ghirardelli or Guittard for the best melt and flavor. They’re smooth and not too sweet. If you’re dairy-free, use dairy-free chocolate chips—they work just as well.
- Sweetened Condensed Milk (1 can / 14 oz / 397g): This is the secret to the creamy, fudgy chocolate layer. It thickens the chocolate without needing to cook it. Don’t confuse it with evaporated milk—they’re not the same.
- Vanilla Extract (1 teaspoon): Pure vanilla adds warmth. Imitation works in a pinch, but pure is better.
- Marshmallow Fluff (1 jar / 7 oz / 198g): This gives you that light, airy topping without the hassle of melting marshmallows. You can use mini marshmallows if you prefer, but fluff spreads more evenly.
- Optional Toppings: A handful of mini marshmallows for the top, a drizzle of melted chocolate, or a sprinkle of crushed graham crackers for garnish.
One thing I’ve learned: don’t skimp on the chocolate. Cheap chocolate chips sometimes have stabilizers that prevent them from melting smoothly. Stick with a brand you trust. And if you’re feeling fancy, you can use a chopped chocolate bar instead—it melts even better.
Equipment Needed
You don’t need a fancy kitchen for these bars. Here’s what you’ll need:
- 8×8-inch Baking Dish: This is the perfect size for thick bars. If you only have a 9×9, the bars will be slightly thinner but still delicious. Line it with parchment paper for easy removal—trust me, it’s worth the extra step.
- Mixing Bowls: One for the crust, one for the chocolate filling. Medium-sized bowls work fine.
- Rolling Pin or Food Processor: If you’re crushing your own graham crackers, a rolling pin and a zip-top bag work great. A food processor makes it even faster. I’ve used both—the rolling pin is more satisfying, honestly.
- Spatula: For pressing the crust and spreading the layers. A silicone spatula is ideal for scraping every last bit of chocolate.
- Microwave-Safe Bowl or Double Boiler: For melting the chocolate. I prefer the microwave—it’s faster—but a double boiler gives you more control if you’re nervous about burning.
- Measuring Cups and Spoons: Standard set. Nothing fancy.
If you don’t have an 8×8 dish, you can use a loaf pan for thicker bars or a 9×13 for thinner ones—just adjust the chilling time slightly. And if you’re out of parchment paper, greasing the dish with butter works, but the bars might be harder to lift out cleanly.
Preparation Method
Here’s the step-by-step. I’ve included time estimates and sensory cues so you know exactly what to look for. This is where the magic happens.
- Make the Crust (5 minutes): In a medium bowl, combine 2 cups of graham cracker crumbs, 2 tablespoons of granulated sugar, and a pinch of salt. Pour in ½ cup of melted butter and stir until the mixture looks like wet sand. It should clump together when you squeeze it. If it’s too dry, add another tablespoon of melted butter. Press the mixture firmly into the bottom of your parchment-lined 8×8 dish. Use the bottom of a glass or a measuring cup to really pack it down—this keeps the crust from crumbling when you cut the bars. Pop it in the fridge while you make the filling.
- Melt the Chocolate (3 minutes): In a microwave-safe bowl, combine 1½ cups of semi-sweet chocolate chips and the entire can of sweetened condensed milk. Microwave in 30-second bursts, stirring between each, until the chocolate is completely melted and the mixture is smooth and glossy. It should look like thick fudge sauce. Stir in 1 teaspoon of vanilla extract. Be careful not to overheat—if the chocolate seizes (turns grainy), you’ve gone too far. If that happens, stir in a teaspoon of coconut oil or vegetable oil to bring it back.
- Layer the Chocolate (2 minutes): Pour the chocolate mixture over the chilled crust. Use a spatula to spread it evenly to the edges. Tap the dish gently on the counter to release any air bubbles. The layer should be about ½-inch thick. Return the dish to the fridge for 10 minutes to let the chocolate set slightly—this prevents the marshmallow from sinking in later.
- Add the Marshmallow Layer (2 minutes): Take the jar of marshmallow fluff and give it a good stir. If it’s too stiff to spread, microwave it for 10 seconds to loosen it up. Spoon the fluff over the chocolate layer and spread it gently. Don’t press too hard—you want to keep that chocolate layer intact. If you’re using mini marshmallows instead, arrange them in a single layer, pressing them down lightly.
- Chill (At least 4 hours, preferably overnight): Cover the dish with plastic wrap or foil and refrigerate for at least 4 hours. Overnight is better—the bars firm up perfectly and are easier to cut. The crust will be firm but not hard, the chocolate will be creamy and fudgy, and the marshmallow will be soft and pillowy.
- Cut and Serve (5 minutes): Lift the bars out of the dish using the parchment paper. Place them on a cutting board. Use a sharp knife, wiping it clean between cuts, to slice into 16 squares. For cleaner cuts, dip the knife in hot water and dry it before each slice. Garnish with a drizzle of melted chocolate, a sprinkle of crushed graham crackers, or a few mini marshmallows on top.
One thing I always do: after cutting, I pop the bars back in the fridge for 15 minutes before serving. They hold their shape better, especially if it’s warm out. And if you’re making these for a party, they’re even better the next day—the flavors meld together beautifully.
Cooking Tips & Techniques
I’ve made a few mistakes with this recipe so you don’t have to. Here’s what I’ve learned:
- Don’t Over-Melt the Chocolate: I once walked away from the microwave for an extra 20 seconds, and the chocolate seized into a grainy mess. Melt in short bursts and stir each time. If it looks almost melted, stop—the residual heat will finish the job.
- Press the Crust Firmly: A loose crust falls apart when you cut the bars. Use a flat-bottomed glass or a measuring cup to really pack it down. I’ve even used the bottom of a clean soup can—whatever works.
- Chill Between Layers: If you add the marshmallow fluff right after pouring the chocolate, it will sink in and create a muddy layer. Let the chocolate set for 10 minutes in the fridge first. It’s a small step that makes a big difference.
- Use a Sharp Knife for Clean Cuts: A dull knife will drag through the marshmallow and mess up the layers. I run my knife under hot water, dry it, then slice. Wipe the blade clean between each cut.
- Room Temperature Matters: If your kitchen is hot and humid, the bars might soften faster. Keep them chilled until just before serving. On a scorching day, I’ve even served them straight from the fridge—they’re still delicious.
I also learned the hard way that parchment paper isn’t optional. The first time I made these, I greased the dish with butter and couldn’t get the bars out without breaking them. Parchment paper with overhanging edges is a lifesaver.
Variations & Adaptations
This recipe is super flexible. Here are some twists I’ve tried and loved:
- Peanut Butter S’mores Bars: Before adding the chocolate layer, spread ¼ cup of creamy peanut butter over the crust. The salty-sweet combo is incredible. I’ve also used almond butter for a different nutty flavor.
- Vegan Version: Use vegan graham crackers, dairy-free chocolate chips, and a vegan marshmallow fluff (like Dandies). Swap the butter with melted coconut oil. The texture is slightly different—coconut oil sets a bit harder—but it’s still amazing.
- Mint Chocolate S’mores: Add ½ teaspoon of peppermint extract to the chocolate mixture. Top with crushed peppermint candies for a festive twist. This is my go-to for holiday parties.
- Gluten-Free Option: Use gluten-free graham crackers. Most brands work well—just make sure they’re finely crushed. The rest of the ingredients are naturally gluten-free.
- Extra Crunchy Version: Stir ½ cup of chopped toasted almonds or pecans into the crust mixture. The nuts add a lovely crunch that contrasts with the soft marshmallow.
My personal favorite variation? I add a layer of sliced strawberries between the chocolate and marshmallow. It’s like a strawberry s’mores dream. If you’re into fruity desserts, you’d probably love my easy no-bake strawberry cheesecake cups—they have that same creamy, no-fuss vibe.
Serving & Storage Suggestions
These bars are best served cold, straight from the fridge. The crust is firm, the chocolate is fudgy, and the marshmallow is soft—it’s the perfect bite. Here’s how to serve and store them:
- Serving Temperature: Cold is ideal. If you let them sit at room temperature for more than 15 minutes, the marshmallow gets sticky and the bars lose their structure. On a hot day, serve them straight from the fridge.
- Presentation: Arrange the bars on a platter and garnish with a light dusting of cocoa powder or a drizzle of melted white chocolate. A few fresh mint leaves add a pop of color.
- Complementary Dishes: These bars pair beautifully with a cold glass of milk or a hot cup of coffee. For a summer spread, I’ve served them alongside my fresh strawberry basil lemonade—the tartness cuts through the sweetness perfectly.
- Storage: Store the bars in an airtight container in the refrigerator for up to 5 days. Layer them with parchment paper between each row to prevent sticking. They’re actually better on day two—the flavors meld together.
- Freezing: You can freeze these bars for up to 3 months. Wrap each bar individually in plastic wrap, then place them in a freezer-safe bag. Thaw in the fridge overnight before serving. Don’t thaw at room temperature—the marshmallow gets weepy.
- Reheating: Honestly, I don’t recommend reheating these. They’re meant to be cold. But if you want a warm s’mores experience, you can microwave a single bar for 10 seconds—the marshmallow gets gooey and the chocolate softens. Just don’t overdo it.
One thing I’ve noticed: the flavors develop over time. On day one, the layers are distinct. By day three, everything melds into one cohesive, delicious bar. So don’t be afraid to make them ahead.
Nutritional Information & Benefits
Let’s be real—these are a treat. But here’s a rough estimate per bar (based on 16 servings):
- Calories: Approximately 280
- Fat: 14g (8g saturated)
- Carbohydrates: 38g (28g sugar)
- Protein: 3g
- Fiber: 1g
- Sodium: 120mg
While these aren’t health food, there are a few silver linings. The semi-sweet chocolate contains antioxidants called flavonoids, which are good for heart health in moderation. Graham crackers offer a small amount of whole grains, and the butter provides a bit of vitamin A. If you’re watching your sugar intake, you can use sugar-free chocolate chips and a sugar-free marshmallow fluff—though the texture will be slightly different.
For those with dietary restrictions, this recipe is naturally nut-free (if you use nut-free graham crackers) and can be made dairy-free and vegan with simple swaps. It’s also a great option for those who avoid eggs—there are none in this recipe. Just be mindful of portion sizes if you’re counting calories. One bar is plenty satisfying, but I won’t judge if you go back for a second.
Conclusion
These Easy No-Bake S’mores Icebox Bars are everything I want in a dessert: quick, simple, and ridiculously satisfying. They bring back all the nostalgia of a campfire s’more without the smoke, the bugs, or the effort. Whether you’re making them for a summer barbecue, a last-minute potluck, or just because it’s Tuesday and you deserve something sweet, they never disappoint. I love that I can throw them together in ten minutes and forget about them until the next day. And honestly? That first bite—the crunch, the creaminess, the fluff—it’s pure joy.
I’d love to hear how yours turn out. Did you try a variation? Add a twist? Serve them at a party and watch them disappear? Drop a comment below and let me know. And if you’re looking for another no-bake dessert that’s just as easy, check out my easy no-bake strawberry pretzel dessert cups—they’re perfect for summer, too. Happy no-baking!
Frequently Asked Questions
Can I use regular marshmallows instead of marshmallow fluff?
Yes, you can. If you use mini marshmallows, just arrange them in a single layer over the chocolate. They won’t spread as evenly as fluff, but they’ll still taste great. For a more traditional s’mores look, you can even toast the marshmallows under the broiler for 30 seconds—just watch them closely so they don’t burn.
How long do these bars need to chill?
At least 4 hours, but overnight is best. The longer they chill, the firmer the layers become, making them easier to cut. If you’re in a rush, you can freeze them for 1 hour, but the texture won’t be as perfect.
Can I make these bars in a 9×13 dish?
Absolutely. If you use a larger dish, the bars will be thinner. You might want to double the recipe for a thicker result. Just adjust the chilling time—thinner layers set faster, so check after 3 hours.
Why did my chocolate layer turn out grainy?
This usually happens if the chocolate gets too hot or if moisture gets into the bowl. Make sure your bowl is completely dry before melting. If it seizes, stir in a teaspoon of coconut oil or vegetable oil to smooth it out. Next time, melt in shorter bursts.
Can I add a layer of peanut butter?
Yes! Spread ¼ cup of creamy peanut butter over the crust before adding the chocolate. It adds a salty, nutty flavor that pairs beautifully with the sweet chocolate and marshmallow. Just make sure the peanut butter is at room temperature so it spreads easily.
Pin This Recipe!
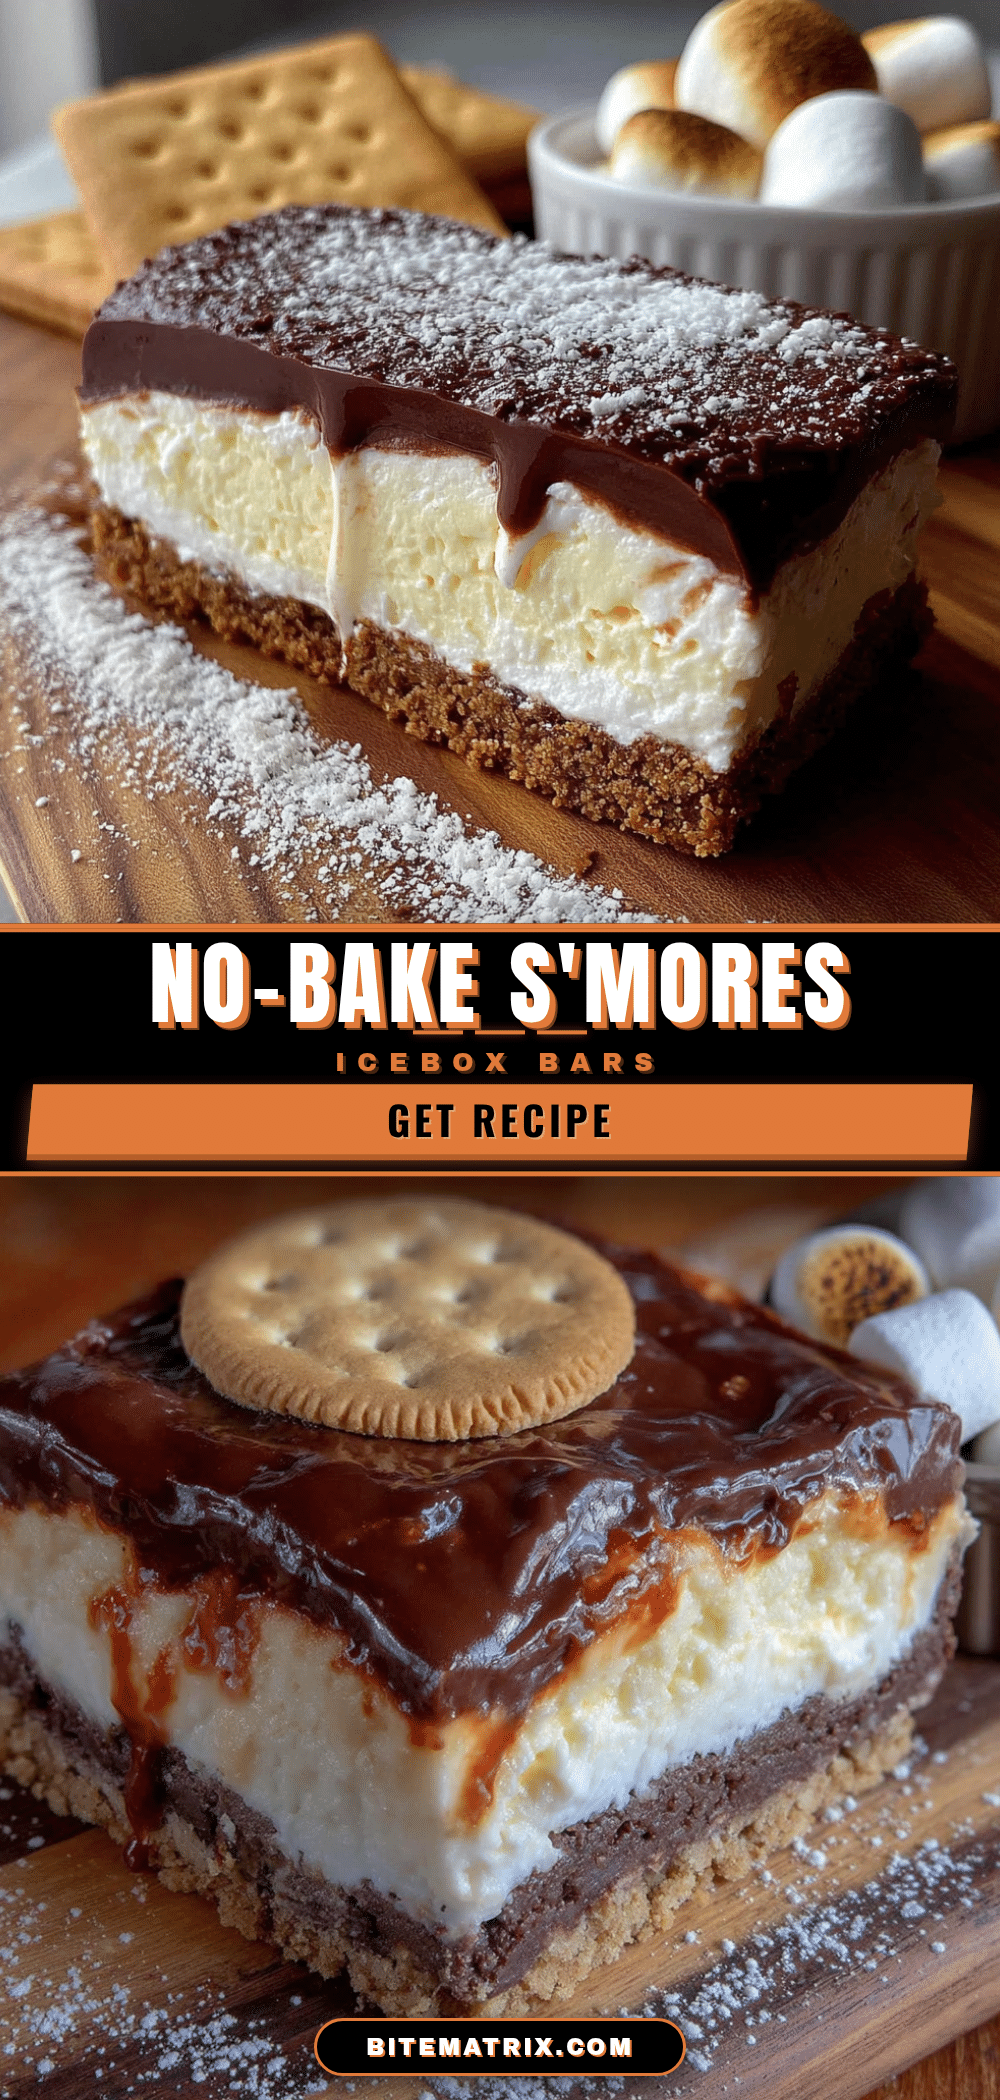
Easy No-Bake Smores Icebox Bars: Best 10-Minute Dessert

These Easy No-Bake S’mores Icebox Bars are the perfect summer dessert—no oven required! With a crunchy graham cracker crust, a creamy fudgy chocolate layer, and a fluffy marshmallow topping, they come together in just 10 minutes of prep and are a guaranteed crowd-pleaser.
- Prep Time: 10 minutes
- Cook Time: 0 minutes
- Total Time: 4 hours 10 minutes (includes chilling)
- Yield: 16 bars 1x
- Category: Dessert
- Cuisine: American
Ingredients
- 2 cups (200g) graham cracker crumbs
- ½ cup (1 stick / 113g) unsalted butter, melted
- 2 tablespoons (25g) granulated sugar
- Pinch of salt
- 1½ cups (260g) semi-sweet chocolate chips
- 1 can (14 oz / 397g) sweetened condensed milk
- 1 teaspoon vanilla extract
- 1 jar (7 oz / 198g) marshmallow fluff
- Optional: mini marshmallows, melted chocolate, crushed graham crackers for garnish
Instructions
- Make the Crust (5 minutes): In a medium bowl, combine 2 cups graham cracker crumbs, 2 tablespoons granulated sugar, and a pinch of salt. Pour in ½ cup melted butter and stir until the mixture looks like wet sand and clumps together when squeezed. Press firmly into the bottom of a parchment-lined 8×8-inch dish using a flat-bottomed glass or measuring cup. Refrigerate while making the filling.
- Melt the Chocolate (3 minutes): In a microwave-safe bowl, combine 1½ cups semi-sweet chocolate chips and the entire can of sweetened condensed milk. Microwave in 30-second bursts, stirring between each, until the chocolate is completely melted and the mixture is smooth and glossy. Stir in 1 teaspoon vanilla extract. Be careful not to overheat.
- Layer the Chocolate (2 minutes): Pour the chocolate mixture over the chilled crust and spread evenly to the edges. Tap the dish gently on the counter to release air bubbles. Refrigerate for 10 minutes to let the chocolate set slightly.
- Add the Marshmallow Layer (2 minutes): Stir the marshmallow fluff until smooth (microwave for 10 seconds if too stiff). Spoon over the chocolate layer and spread gently without pressing too hard. If using mini marshmallows, arrange in a single layer.
- Chill (At least 4 hours, preferably overnight): Cover the dish with plastic wrap or foil and refrigerate for at least 4 hours, or overnight for best results. The bars will firm up and be easier to cut.
- Cut and Serve (5 minutes): Lift the bars out using the parchment paper. Place on a cutting board and slice into 16 squares using a sharp knife (wipe clean between cuts for neat edges). Garnish as desired. For cleaner cuts, dip the knife in hot water and dry before each slice.
Notes
For best results, chill the bars overnight. Use high-quality chocolate chips (like Ghirardelli or Guittard) for a smooth melt. If the chocolate seizes, stir in a teaspoon of coconut oil or vegetable oil. Press the crust firmly to prevent crumbling. Let the chocolate layer set for 10 minutes in the fridge before adding marshmallow to avoid sinking. Store in an airtight container in the refrigerator for up to 5 days. Freeze individually wrapped bars for up to 3 months.
Nutrition
- Serving Size: 1 bar
- Calories: 280
- Sugar: 28
- Sodium: 120
- Fat: 14
- Saturated Fat: 8
- Carbohydrates: 38
- Fiber: 1
- Protein: 3
Keywords: no-bake s'mores, icebox bars, easy dessert, summer dessert, no-bake dessert, s'mores bars, graham cracker crust, chocolate marshmallow bars