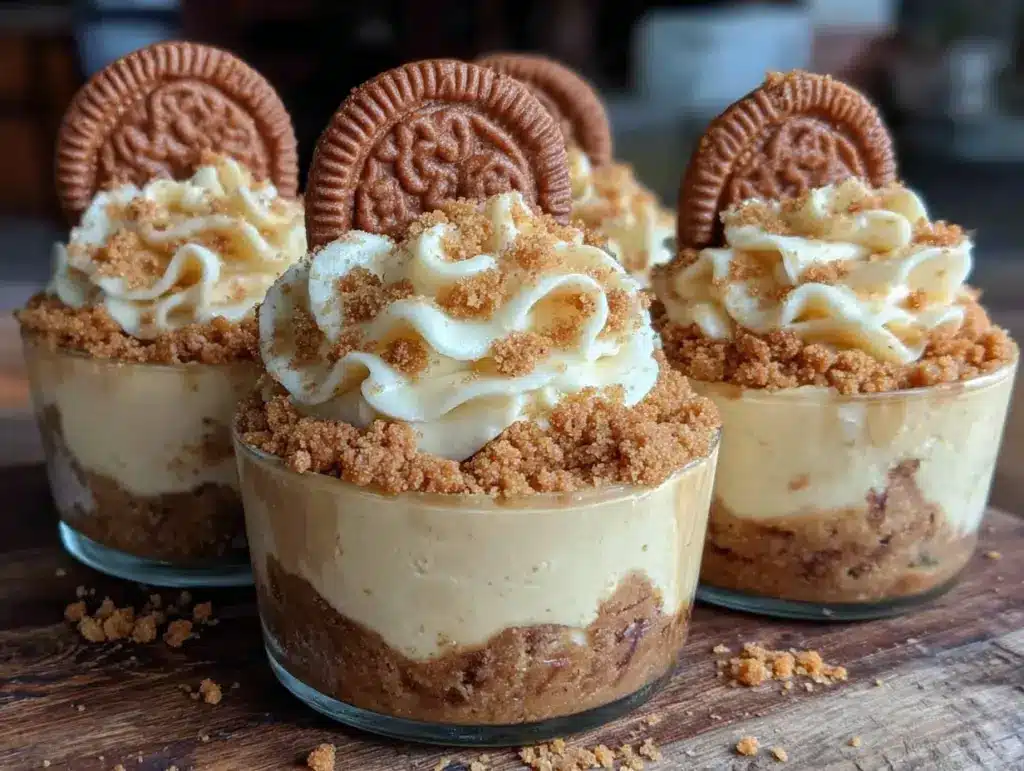
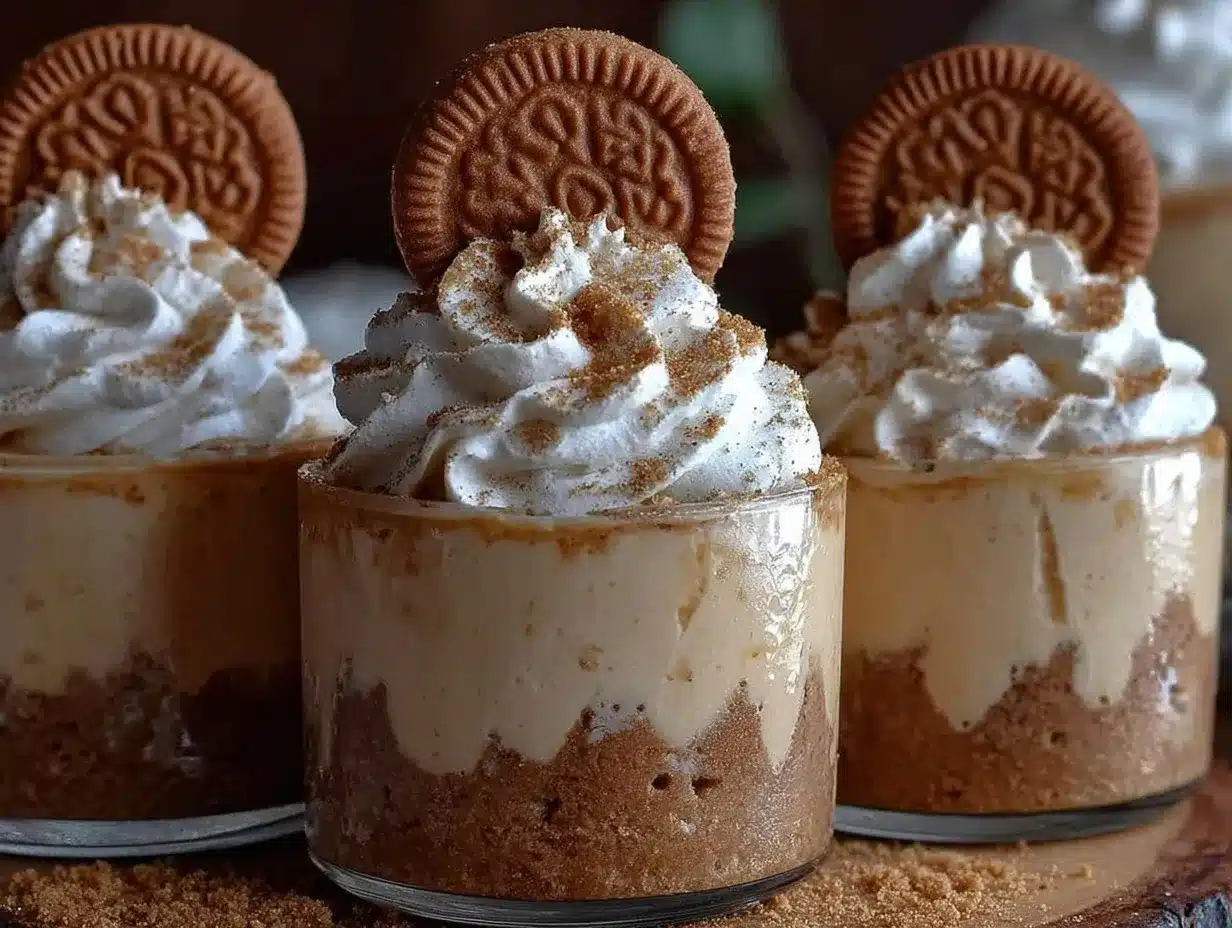
Picture this: you pull a tray of Creamy Cookie Butter Cheesecake Cups from the fridge and the sweet, toasty aroma of cookie butter hits you like a cozy hug. The first time I made these, I couldn’t believe how velvety the cheesecake filling was—like a cloud that melts with every bite. There’s something magical about the way cookie butter’s spiced notes swirl into creamy cheesecake, creating a dessert that’s comforting yet just a little bit indulgent.
I stumbled onto this recipe years ago after a rainy weekend spent experimenting in my tiny kitchen. I was knee-high to a grasshopper when my grandma taught me her classic cheesecake trick, and let’s just say, adding cookie butter was my little rebellion. The result? The kind of moment where you pause, take a deep breath, and just smile because you know you’re onto something truly special. My family couldn’t stop sneaking them off the cooling rack (and I can’t really blame them). These Creamy Cookie Butter Cheesecake Cups are now a staple for family gatherings, cookie exchanges, and, honestly, those nights when you just need a sweet treat for yourself.
Let’s face it, these cups are dangerously easy—almost too easy. They’re pure, nostalgic comfort in a cute, individual package. Perfect for potlucks, sweet treats for your kids, or to brighten up your Pinterest dessert board! I’ve tested this recipe more times than I care to admit (in the name of research, of course), and every time, it feels like a warm hug. Trust me, you’re going to want to bookmark this one.
Why You’ll Love This Recipe
From the first creamy spoonful to the very last crumb, these Creamy Cookie Butter Cheesecake Cups are a dessert lover’s dream. After dozens of recipe tests—some with less-than-perfect results—I can confidently say these cups are a game-changer for anyone who loves cheesecake, cookie butter, or just easy sweets.
- Quick & Easy: Comes together in under 30 minutes (plus chilling), perfect for busy weeknights or last-minute cravings.
- Simple Ingredients: No fancy grocery trips needed; you likely already have everything in your kitchen.
- Perfect for Any Occasion: Great for brunch, potlucks, cozy dinners, or holiday mornings with family.
- Crowd-Pleaser: Always gets rave reviews from kids and adults alike—my picky cousin even asked for seconds!
- Unbelievably Delicious: The texture is ultra-creamy, the flavor is rich with a hint of spice from the cookie butter, and the cookie crust adds the perfect crunch.
What makes these Creamy Cookie Butter Cheesecake Cups stand out from the rest? For starters, blending cookie butter into the filling gives a smooth, almost mousse-like texture. The base is a simple cookie crumb crust that stays crisp even after chilling. I’ve tweaked the sweetness, so it’s just right—not cloying, but deeply satisfying. These aren’t just another cheesecake cup—they’re my best version yet.
This recipe isn’t just good—it’s the kind that makes you close your eyes after the first bite. It’s comfort food, made a little healthier and a whole lot faster, but with the same soul-soothing satisfaction. Whether you want to impress guests without stress or turn a simple meal into something memorable, these cheesecake cups are your answer.
What Ingredients You Will Need
This recipe uses simple, wholesome ingredients to deliver bold flavor and satisfying texture without the fuss. Most are pantry staples, and you can easily swap a few to suit your needs.
- For the crust:
- 1 cup (120g) crushed speculoos cookies or graham crackers (for classic crunchy base)
- 3 tablespoons (42g) unsalted butter, melted (adds richness)
- 1 tablespoon (13g) brown sugar (optional, for extra caramel undertone)
- For the cheesecake filling:
- 8 ounces (226g) cream cheese, softened (full-fat for best texture)
- 1/2 cup (120g) cookie butter (I love Lotus Biscoff, but Trader Joe’s works great too!)
- 1/3 cup (80ml) sour cream or Greek yogurt (adds tang and creaminess)
- 1/3 cup (65g) granulated sugar (balances the tang and spice)
- 1 large egg, room temperature (for structure and silkiness)
- 1 teaspoon (5ml) vanilla extract (rounds out the flavors)
- Pinch of salt (heightens all the flavors—don’t skip!)
- For the topping (optional but highly recommended):
- 2 tablespoons (30g) cookie butter, melted (for a pretty drizzle)
- Crushed speculoos cookie crumbs (for texture and visual appeal)
- Fresh berries or whipped cream (if you want a little color—optional)
If you need a gluten-free option, swap in gluten-free graham crackers. For dairy-free, use plant-based cream cheese and coconut yogurt—worked surprisingly well in my last test! In summer, I love adding a few fresh berries for a pop of color and tartness. Honestly, these ingredients are forgiving—just make sure your cream cheese is softened and your cookie crumbs are finely crushed for the best texture.
Equipment Needed
- Muffin tin or silicone cupcake mold: Standard size, 12-cup works best. I’ve used both metal and silicone—silicone makes for easier removal.
- Paper cupcake liners: Keeps cleanup easy and helps with presentation. If you’re out, just grease the tin well.
- Mixing bowls (2): One for crust, one for filling. Glass or stainless steel is fine.
- Hand mixer or stand mixer: For whipping the cheesecake filling. You can use a sturdy whisk if you don’t have a mixer—just expect a little arm workout!
- Rubber spatula: For scraping down the bowl and smoothing the tops.
- Measuring cups and spoons: For accuracy (because let’s be honest, eyeballing rarely works with baking).
- Small saucepan (for melting butter and cookie butter): Or microwave-safe bowl—both work fine.
If you’re just starting out, don’t let the equipment list scare you. I once made these with a fork and a soup spoon—worked out okay, but a hand mixer really makes things easier. For budget-friendly options, check out local thrift shops for mixing bowls and spatulas. And here’s a tip: keep your silicone molds clean by rinsing immediately after use—nothing sticks faster than melted cookie butter!
Preparation Method
- Prepare the crust:
- In a medium bowl, combine 1 cup (120g) crushed speculoos cookies, 3 tablespoons (42g) melted butter, and 1 tablespoon (13g) brown sugar.
- Mix until the crumbs are evenly moistened—it should look like damp sand and smell rich and caramel-y.
- Spoon about 1 tablespoon (8g) of the mixture into each lined muffin cup and press down firmly. Use the back of a spoon or your fingers.
- Tip: If the crust seems too dry, add an extra teaspoon of melted butter. If it’s too wet, add a few more crumbs.
- Chill the crusts in the freezer for 10 minutes while you prepare the filling. This helps the crust set and stay crisp.
- Make the cheesecake filling:
- In a large bowl, beat 8 ounces (226g) softened cream cheese with a hand mixer on medium speed until smooth, about 1 minute.
- Add 1/2 cup (120g) cookie butter, 1/3 cup (80ml) sour cream or Greek yogurt, and 1/3 cup (65g) granulated sugar.
- Beat until creamy and well-blended, about 2 minutes. Scrape the bowl as needed.
- Mix in 1 large egg, 1 teaspoon (5ml) vanilla extract, and a pinch of salt. Beat until fully incorporated, but don’t overmix—just until smooth.
- Tip: If the filling looks lumpy, let it sit at room temperature for 5 minutes and mix again. It should be silky and thick.
- Fill the cups:
- Spoon the cheesecake filling evenly over the chilled crusts, about 2 tablespoons (20g) per cup. Smooth the tops gently with a spatula.
- Tap the muffin tin lightly on the counter to release air bubbles.
- Warning: Don’t overfill the cups—leave a little space for expansion.
- Bake:
- Preheat your oven to 325°F (163°C).
- Bake for 17–19 minutes, until the centers are just set but still slightly jiggly in the middle. The edges may puff slightly.
- Sensory cue: They’ll smell sweet and nutty, with a hint of caramel from the cookie butter.
- If the tops crack, don’t worry—cookie butter drizzle covers everything!
- Cool and chill:
- Let the cheesecake cups cool in the pan for 15 minutes. Transfer to a wire rack and cool completely.
- Refrigerate at least 2 hours (overnight is even better for flavor).
- Tip: Warm cheesecake is tempting, but patience pays off—the texture firms up and flavors blend as they chill.
- Top and serve:
- After chilling, drizzle each cup with melted cookie butter and sprinkle with crushed cookies.
- Add berries or whipped cream if you like.
- Tip: Use a spoon to gently remove the cups if using a silicone mold—they pop out easier when cold.
Honestly, the hardest part is waiting for them to chill. My kids always hover around the fridge, hoping I’ll cave and let them sneak one early. If you’re short on time, even a quick hour in the freezer works in a pinch!
Cooking Tips & Techniques
Let me share some pro tips and a few hard-earned lessons from my own kitchen adventures:
- Softening Cream Cheese: Always start with room temperature cream cheese. If it’s too cold, you’ll get lumps that just won’t blend out (trust me, I’ve tried).
- Don’t Overmix: Once you add the egg, beat just until combined. Overmixing leads to cracks (been there, fixed that with more cookie butter drizzle).
- Chill for Texture: The longer you chill, the creamier and more set the cups are. Overnight is best if you can wait.
- Baking Time: Every oven is a little different! Start checking at 17 minutes—if the centers are barely set, they’re done. Overbaking makes them dry.
- Multi-tasking: While the crusts chill, make the filling. It’s a little trick that saves you time and keeps things moving.
- Consistency: Use a cookie scoop for even portioning. It makes the cups look uniform and bake evenly.
- Flavor Boost: Try adding a pinch of cinnamon to the crust for extra warmth. I did once, and it took the whole batch up a notch.
I’ve had my share of cheesecake mishaps—runny fillings, overly dense cups, burnt crusts. Most mistakes come from rushing (guilty!) or skipping the chilling step. Now, I always plan a little ahead so the cups have time to set. And if you’re worried about cracks, just remember: toppings make everything pretty.
Variations & Adaptations
One of the best things about Creamy Cookie Butter Cheesecake Cups is how easy they are to customize. Here are a few of my favorite twists:
- Gluten-Free: Swap the speculoos or graham crackers for gluten-free cookies. I’ve tried Schär and they work great!
- Dairy-Free: Use plant-based cream cheese (Violife or Kite Hill), coconut yogurt, and dairy-free butter. The flavor is a bit lighter but still creamy.
- Chocolate Swirl: Swirl 2 tablespoons (30g) melted dark chocolate into the cheesecake filling before baking for a fudgy twist.
- Seasonal Fruit: Top with fresh strawberries, blueberries, or peaches in summer for a tart contrast to the sweet cups.
- Nutty Crunch: Add chopped toasted pecans or walnuts to the crust for extra texture (my husband’s favorite variation!).
- Mini Jars: Assemble the cups in small mason jars for picnic-perfect, travel-friendly desserts.
Personally, I love adding a splash of espresso to the filling—just a half teaspoon (2ml). It deepens the flavor and makes the cookie butter pop. If you have nut allergies, skip the nuts and use plain cookie crumbs. For vegan, stick with egg replacer and plant-based ingredients. Honestly, the recipe is so forgiving—experiment and make it your own!
Serving & Storage Suggestions
Serve these Creamy Cookie Butter Cheesecake Cups cold, straight from the fridge, for the creamiest texture. If you’re feeling fancy, arrange them on a pretty platter and sprinkle with extra cookie crumbs and berries.
- Serving Temperature: Chilled is best, but let them sit at room temperature for 10 minutes for a softer bite.
- Presentation: Top with a swirl of whipped cream, a drizzle of cookie butter, and a dusting of cinnamon for that Pinterest-perfect look.
- Complementary Dishes: Pair with fresh fruit salad or a hot cup of coffee for a balanced dessert spread.
- Storage: Keep in an airtight container in the fridge for up to 5 days. They actually taste even better after a day or two, as the flavors meld.
- Freezing: Freeze for up to 2 months. Thaw in the fridge overnight before serving.
- Reheating: Not recommended—these are best enjoyed cold. If you must, microwave for 10 seconds (but the texture may change).
Honestly, I often stash a few in the back of the fridge for secret late-night treats! The flavors deepen over time, making each bite even more irresistible.
Nutritional Information & Benefits
Here’s a quick look at what you’re getting with each Creamy Cookie Butter Cheesecake Cup:
- Estimated calories: 220 per cup
- Fat: 14g
- Carbohydrates: 20g
- Protein: 3g
Cookie butter adds a dose of healthy fats and warming spices. Cream cheese brings calcium and a bit of protein. If you use Greek yogurt, you’ll bump up the protein even more. For gluten-free or dairy-free diets, just swap in your preferred ingredients—these cups are easy to adapt. Be mindful of nut and wheat allergens if serving to a crowd.
I love that these cheesecake cups offer pure comfort with a little nutrition boost from dairy and protein. They’re a treat, but not over-the-top heavy.
Conclusion
There’s a reason Creamy Cookie Butter Cheesecake Cups are a hit in my house—they’re easy, versatile, and downright irresistible. Whether you’re a cheesecake newbie or a cookie butter fanatic, these little cups offer big flavor in a personal dessert package.
Don’t be afraid to tweak the recipe for your own tastes—swap the crust, use dairy-free ingredients, add chocolate, or pile on the fruit. That’s what makes baking fun! I love this recipe because it turns everyday ingredients into something that feels special, without a ton of effort or stress.
If you try these, leave a comment below and tell me how you customized them! Did you sneak a cup before they chilled? (No judgment—I totally do). Share your photos, pin this recipe, and spread the cheesecake love. Happy baking and sweet snacking!
Frequently Asked Questions
Can I make Creamy Cookie Butter Cheesecake Cups ahead of time?
Absolutely! These cups are perfect for making a day or even two in advance. The flavors actually get better as they sit in the fridge.
Can I freeze these cheesecake cups?
Yes, you can freeze them for up to 2 months. Just thaw in the refrigerator overnight before serving for the best texture.
What if I don’t have cookie butter?
You can substitute peanut butter or almond butter for a different flavor, but the classic cookie butter gives these cups their unique taste.
How do I prevent cracks in my cheesecake cups?
Don’t overmix after adding the egg and avoid overbaking. Cracks are mostly cosmetic—just cover with extra cookie butter drizzle!
Can I use mini muffin tins for smaller bites?
Yes! Just reduce the baking time to about 10–12 minutes and check for doneness. Mini cups are great for parties or kids’ treats.
Pin This Recipe!
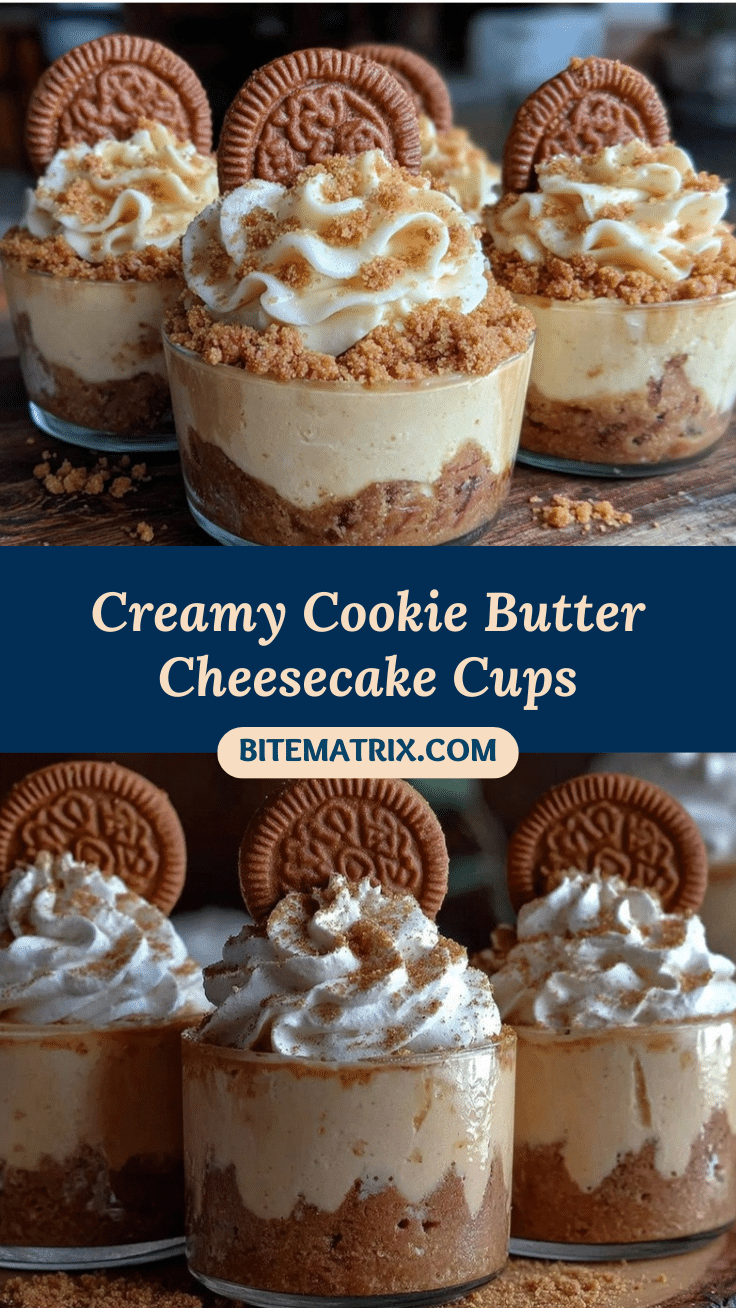
Creamy Cookie Butter Cheesecake Cups

Creamy Cookie Butter Cheesecake Cups are individual-sized desserts featuring a crunchy cookie crust and a velvety cheesecake filling swirled with spiced cookie butter. They’re easy to make, crowd-pleasing, and perfect for any occasion.
- Prep Time: 15 minutes
- Cook Time: 19 minutes
- Total Time: 2 hours 34 minutes
- Yield: 12 cups 1x
- Category: Dessert
- Cuisine: American
Ingredients
- 1 cup crushed speculoos cookies or graham crackers
- 3 tablespoons unsalted butter, melted
- 1 tablespoon brown sugar (optional)
- 8 ounces cream cheese, softened
- 1/2 cup cookie butter
- 1/3 cup sour cream or Greek yogurt
- 1/3 cup granulated sugar
- 1 large egg, room temperature
- 1 teaspoon vanilla extract
- Pinch of salt
- 2 tablespoons cookie butter, melted (for topping, optional)
- Crushed speculoos cookie crumbs (for topping, optional)
- Fresh berries or whipped cream (optional, for garnish)
Instructions
- In a medium bowl, combine crushed speculoos cookies, melted butter, and brown sugar. Mix until evenly moistened.
- Spoon about 1 tablespoon of the mixture into each lined muffin cup and press down firmly. Chill crusts in the freezer for 10 minutes.
- In a large bowl, beat softened cream cheese until smooth. Add cookie butter, sour cream or Greek yogurt, and granulated sugar. Beat until creamy.
- Mix in egg, vanilla extract, and a pinch of salt. Beat just until smooth.
- Spoon cheesecake filling evenly over chilled crusts, about 2 tablespoons per cup. Smooth tops gently.
- Preheat oven to 325°F (163°C). Bake for 17–19 minutes, until centers are just set but slightly jiggly.
- Cool in pan for 15 minutes, then transfer to a wire rack to cool completely. Refrigerate at least 2 hours (overnight preferred).
- Drizzle each cup with melted cookie butter and sprinkle with crushed cookies. Add berries or whipped cream if desired.
Notes
For best texture, chill overnight. Use room temperature cream cheese to avoid lumps. Don’t overmix after adding the egg to prevent cracks. Gluten-free and dairy-free adaptations are easy—swap cookies and dairy products as needed. Mini muffin tins can be used for bite-sized treats; reduce baking time accordingly.
Nutrition
- Serving Size: 1 cheesecake cup
- Calories: 220
- Sugar: 13
- Sodium: 120
- Fat: 14
- Saturated Fat: 7
- Carbohydrates: 20
- Fiber: 1
- Protein: 3
Keywords: cookie butter cheesecake, cheesecake cups, easy dessert, speculoos, individual cheesecake, creamy cheesecake, potluck dessert, personal dessert, cookie butter recipe


