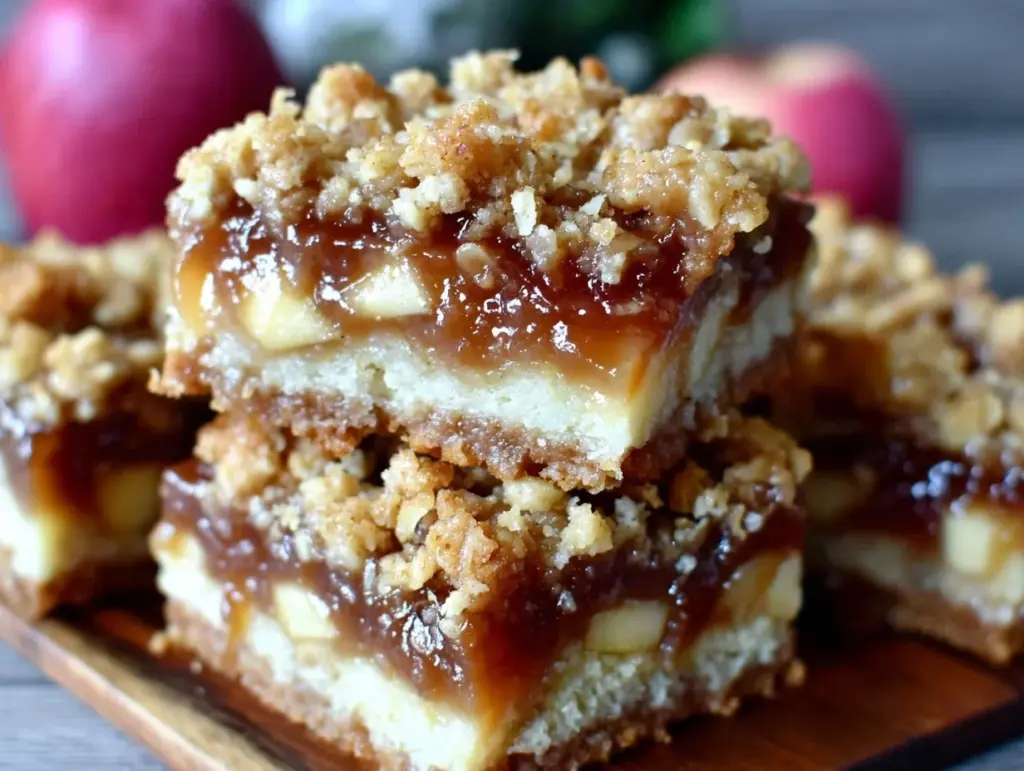
Let’s talk about the magical aroma that fills your kitchen when baking Crispy Apple Crisp Bars. Imagine the cozy scent of cinnamon, brown sugar, and sweet apples mingling together, curling up from the oven and making everyone pause in their tracks. The first time I baked these, I literally stopped mid-whisk just to savor that moment—the kind of moment where you pause, take a deep breath, and just smile because you know you’re onto something truly special.
I stumbled across this recipe years ago, back when I was knee-high to a grasshopper and desperate for a snack to impress my grandma. She’d always say that the best fall desserts should be both warm and crispy, and these bars are exactly that. (Honestly, I wish I’d known about these years ago for all those bake sales and chilly afternoons.) The tender apple filling reminds me of picking apples at the local orchard, and the crunchy oat topping is pure, nostalgic comfort.
Let’s face it, my family couldn’t stop sneaking these apple bars off the cooling rack. Even my usually reserved uncle couldn’t resist grabbing seconds. There’s something about the sweet-tart apples and buttery crisp topping that just works for every crowd, whether it’s a weekend get-together or a school lunchbox treat. I’ve made these dozens of times—purely in the name of research, of course—and they’ve become a staple for family gatherings, gifting, and anytime I want to brighten up my Pinterest dessert board. Every bite feels like a warm hug, and you’re going to want to bookmark this one.
Why You’ll Love These Crispy Apple Crisp Bars
Over the years, I’ve tested, tweaked, and taste-tested these apple crisp bars to perfection. Trust me, they deliver every time. Here’s why you’ll be reaching for this recipe again and again:
- Quick & Easy: Comes together in under 45 minutes. Perfect for busy weeknights or spontaneous dessert cravings.
- Simple Ingredients: No fancy grocery trips needed—just apples, oats, butter, and pantry staples. You probably have everything on hand.
- Perfect for Fall Gatherings: These bars are a hit at potlucks, cozy dinners, and holiday mornings. Seriously, they disappear fast!
- Crowd-Pleaser: Kids, adults, and even picky eaters love the crispy topping and gooey apple filling.
- Unbelievably Delicious: The mix of tart apples and buttery oats is the kind of comfort food that makes you close your eyes after the first bite.
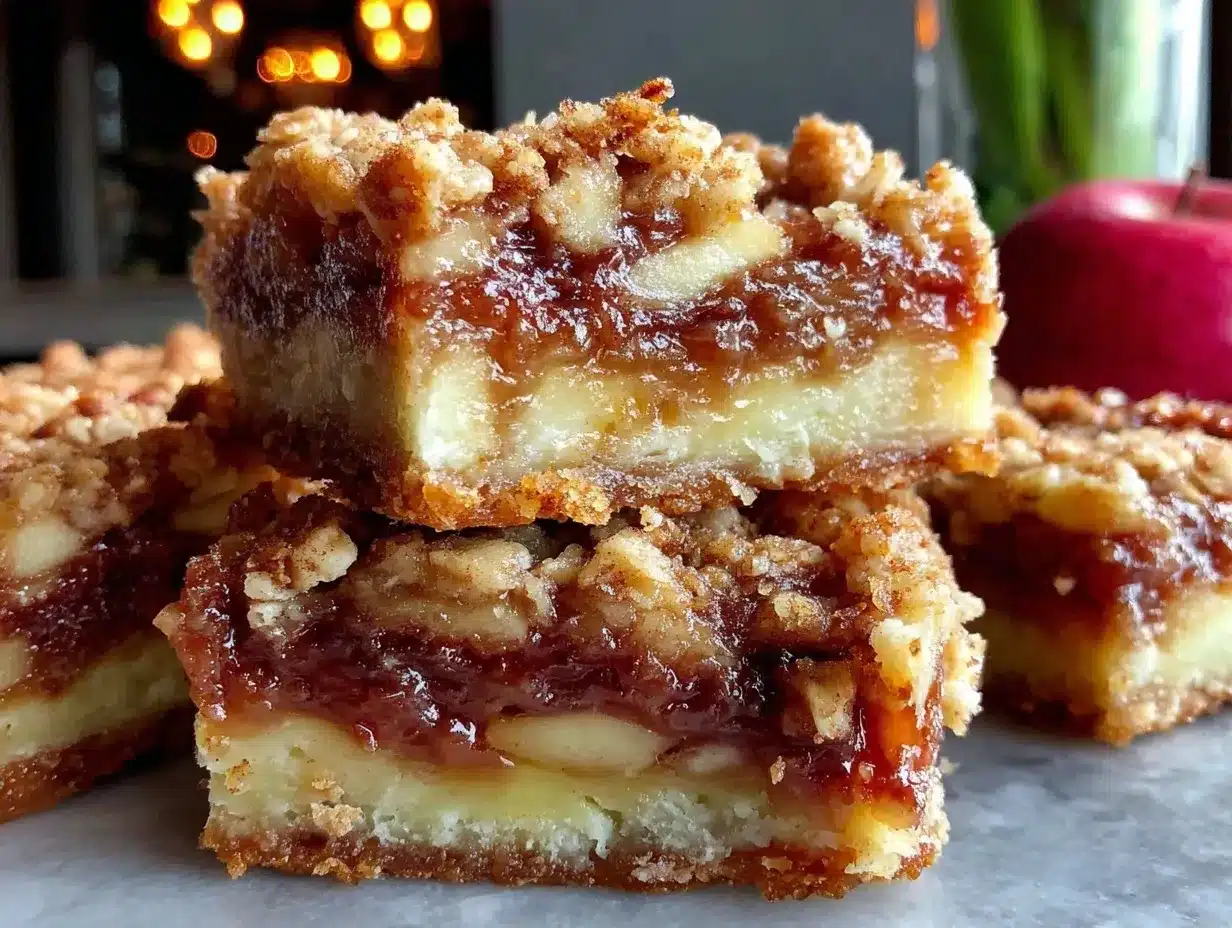
What makes this recipe different? I blend a touch of lemon juice with the apples for brightness, and my secret weapon is adding a pinch of salt to the oat topping—it makes the flavors pop. Some recipes turn out mushy or bland, but this one is all about texture. Every bite is crispy at the top and tender in the middle (the holy grail for apple crisp bars, you know?). You get all the flavor of classic apple crisp, but in a portable, easy-to-share bar.
For me, these bars aren’t just another fall dessert—they’re a way to turn a simple moment into something memorable. They’re comforting, fuss-free, and guaranteed to impress your friends with minimal effort. Whether you’re baking for a crowd or sneaking a midnight snack, you’ll love how these bars deliver soul-soothing satisfaction every time.
What Ingredients You Will Need
This recipe uses simple, wholesome ingredients to deliver bold flavor and a satisfying crunch—no fancy stuff required. Most items are pantry staples, and you can easily swap things to suit your taste or dietary needs. Here’s what you’ll need for the best crispy apple crisp bars:
- For the Apple Filling:
- 4 cups apples, peeled, cored, and diced (about 4 medium apples—Granny Smith for tartness, or Honeycrisp for sweetness)
- 2 tablespoons lemon juice (keeps apples bright and adds tang)
- 1/4 cup granulated sugar (balances the apple tartness)
- 1 teaspoon ground cinnamon (for that classic fall aroma)
- 1/4 teaspoon ground nutmeg (optional, adds warmth)
- 2 tablespoons all-purpose flour (helps thicken the filling)
- For the Crisp Topping & Crust:
- 1 1/2 cups old-fashioned rolled oats (for extra crunch—avoid quick oats if you want crispy texture)
- 1 cup all-purpose flour (can swap for almond flour for gluten-free)
- 3/4 cup packed brown sugar (adds deep caramel notes)
- 1/2 teaspoon salt (don’t skip it—brings out the flavors!)
- 1/2 teaspoon baking powder (helps crisp up the crust)
- 1 teaspoon ground cinnamon (yes, more cinnamon—it’s fall, after all)
- 3/4 cup unsalted butter, melted (use dairy-free margarine for a vegan twist)
- 1 teaspoon vanilla extract (optional, but adds depth)
Ingredient Tips: I always go for organic apples when possible, but any fresh, firm apple works. If you’re feeling adventurous, mix apple varieties for a more complex flavor. For oats, I prefer Bob’s Red Mill (they hold up well and stay crisp). If you need to make these gluten-free, almond flour works great—just watch for a slight change in texture. Want to cut the sugar? Swap half the brown sugar for coconut sugar, or use your favorite sugar substitute.
In summer, you can swap in diced peaches or pears for the apples. If you’re low on butter, try using half butter and half coconut oil (it gives a subtle tropical note!).
Equipment Needed
You don’t need a fancy kitchen to whip up these crispy apple crisp bars. Here’s what I use every time:
- 9×13-inch baking pan (lined with parchment paper for easy removal)
- Mixing bowls (one large, one medium)
- Measuring cups and spoons (for accuracy—trust me, it makes a difference)
- Peeler and corer (a sharp paring knife works if you’re old school)
- Rubber spatula or wooden spoon (for mixing and spreading)
- Wire rack (for cooling—makes the bars crisp up perfectly)
If you don’t have a 9×13-inch pan, use two 8×8-inch pans instead. For mixing, I’ve found sturdy glass bowls work best (they don’t retain odors and are easy to clean). My grandma always used her old wooden spoon, and I swear it adds a little magic. If you’re on a budget, the basics work just fine—no need for top-shelf brands. Just keep your peeler sharp and your measuring cups dry, and you’re good to go!
Preparation Method
- Preheat and Prep: Preheat your oven to 350°F (175°C). Line your 9×13-inch baking pan with parchment paper, leaving a little overhang for easy lifting. (Trust me, this makes clean-up way easier!)
- Prepare the Apple Filling: In a medium bowl, toss the diced apples with lemon juice. Add the granulated sugar, cinnamon, nutmeg, and flour. Mix until everything is well-coated. The apples should look glossy and slightly sticky—if they’re dry, add another splash of lemon juice.
- Make the Crisp Topping & Crust: In a large bowl, combine the rolled oats, flour, brown sugar, salt, baking powder, and cinnamon. Stir until evenly mixed. Pour in the melted butter and vanilla extract. Mix with a spatula until the mixture is crumbly but moist. (It should clump together when squeezed between your fingers.)
- Press the Crust: Take about 2/3 of the oat mixture and press it firmly into the bottom of your prepared pan. Use your fingers or the back of a measuring cup to flatten it evenly. You want a sturdy base—make sure there are no gaps.
- Add the Apple Layer: Spread the apple filling over the crust in an even layer. Use a spatula to nudge apples into the corners. It’s okay if it looks a bit chunky—the apples will settle as they bake.
- Crumble the Topping: Sprinkle the remaining oat mixture evenly over the apples. Don’t press it down; just let it sit in loose clumps for extra crunch.
- Bake: Bake for 35-40 minutes, until the top is golden brown and crispy. If your oven runs hot, check at 30 minutes. The bars should smell fragrant and the edges will bubble gently.
- Cool and Slice: Remove from the oven and let the bars cool in the pan for at least 30 minutes. (This is the hardest part—everyone wants to dig in early!) Lift the bars out using the parchment paper and transfer to a wire rack. Slice into squares once completely cool.
Troubleshooting: If your bars are too soft, let them cool longer—they firm up as they rest. If the top isn’t crispy enough, pop them under the broiler for 1-2 minutes (watch closely!). Apples too runny? Next time, add an extra tablespoon of flour.
Personal Tip: I like to prep the apples a day ahead and refrigerate them with the sugar and spices—it gives them a deeper flavor. If you’re really short on time, pre-chop the oat topping and keep it in the freezer until you’re ready to bake.
Cooking Tips & Techniques
Getting apple crisp bars just right is all about the details. Here’s what I’ve learned (sometimes the hard way!):
- Use Firm Apples: Softer apples can get mushy. Granny Smiths hold their shape and add tartness—perfect for these bars.
- Don’t Overmix the Oat Topping: If you mix too much, it gets dense. Lightly toss until just combined for a crumbly texture.
- Press the Crust Firmly: Use your hands or a flat-bottom cup. If the crust is too loose, the bars will fall apart after slicing.
- Watch the Baking Time: Ovens can be sneaky. Check at 35 minutes and don’t be afraid to cover with foil if the top browns too quickly.
- Cool Completely: Bars need to set. If you slice while warm, they’ll be messy (but still delicious). Patience pays off!
One time, I tried these with quick oats—big mistake. The topping turned soggy and lost its crunch. Lesson learned: stick with old-fashioned rolled oats. If you’re multitasking, prep the filling while the oven preheats and melt the butter in the microwave (saves a pan!). For consistent results, always measure your flour with a spoon and level off—too much flour makes bars dry as sawdust.
Honestly, every batch teaches me something new. Even if they’re not picture-perfect, they always taste amazing. That’s the fun of homemade treats!
Variations & Adaptations
Want to shake things up? Here are a few tried-and-true ways to customize your crispy apple crisp bars:
- Gluten-Free: Swap the all-purpose flour for almond flour or a gluten-free flour blend. The bars will be just as crispy (I’ve made this version for my gluten-sensitive friends, and it’s a hit!).
- Vegan Option: Use dairy-free margarine or coconut oil instead of butter. Choose coconut sugar or maple syrup in place of brown sugar. The bars stay rich and flavorful, promise!
- Berry Twist: In summer, substitute half the apples for fresh blueberries or blackberries. The flavors pop, and the bars look gorgeous!
- Nutty Crunch: Add 1/2 cup chopped pecans or walnuts to the oat topping for extra texture.
- Spice It Up: Try adding cardamom, ginger, or cloves for a warm, spicy twist.
I once swapped in pears and a dash of ginger for a winter party—everyone wanted the recipe! If you have nut allergies, skip the nuts and add sunflower seeds. For those who love a gooey center, add a handful of dried cranberries or raisins to the apple layer.
Can I make apple crisp bars without butter?
Absolutely! Use coconut oil or a vegan butter substitute. The topping will still crisp up, just with a subtle change in flavor.
Serving & Storage Suggestions
These apple crisp bars are best served slightly warm or at room temperature. Stack them on a pretty plate or rustic wooden board for that Pinterest-perfect look. I love pairing them with a scoop of vanilla ice cream or a dollop of whipped cream (the cold-meets-warm combo is unbeatable).
For drinks, try hot apple cider, spiced chai, or a caramel latte. If you’re hosting brunch, serve alongside scrambled eggs or a fruit salad for balance.
To store, keep bars in an airtight container in the refrigerator for up to 4 days. They freeze well, too—just layer between sheets of parchment paper and store in a zip-top bag for up to 2 months. Reheat in the microwave for 10-15 seconds, or pop in a 350°F oven for 5 minutes to revive the crispiness.
The flavors deepen as they sit, so don’t be surprised if they taste even better on day two. (If you have any left, that is!)
Nutritional Information & Benefits
Each bar (assuming 16 bars per batch) is estimated to have about 180 calories, 7g fat, 29g carbs, 2g protein, and 4g fiber.
Healthful Highlights: Apples provide vitamin C and fiber, oats add whole-grain goodness, and cinnamon has anti-inflammatory properties. If you use almond flour or coconut oil, you’ll get a dose of healthy fats.
These bars can be made gluten-free or vegan with simple swaps. They do contain potential allergens (wheat, butter, nuts if added), so always check with guests. For me, they’re a guilt-free way to satisfy sweet cravings and sneak in a little fruit. Homemade means you control the sugar and fat—no weird preservatives or artificial flavors.
Conclusion
There’s nothing quite like the smell and taste of homemade crispy apple crisp bars fresh from the oven. They’re easy, crowd-pleasing, and endlessly adaptable to your family’s tastes. Whether you’re a seasoned baker or just starting out, this recipe is a must-try—comforting, nostalgic, and perfect for sharing.
Feel free to tweak the spices, swap the fruit, or add your own twist. That’s what makes homemade treats so much fun! Personally, I love these bars because they remind me of family, fall afternoons, and the simple joy of baking something special. If you give them a try, let me know how it goes—leave a comment below, share your photos, or tag me with your creative variations.
Happy baking, friend! May your kitchen smell amazing and your bars turn out perfectly crispy (even if they don’t—just eat them warm and call it a win!).
Frequently Asked Questions
What kind of apples are best for crispy apple crisp bars?
I like Granny Smith for tartness, but Honeycrisp or Fuji work great for sweetness. Mixing two varieties gives the best flavor.
Can I make these bars gluten-free?
Yes! Use almond flour or a gluten-free blend instead of all-purpose flour. The bars stay crispy and delicious.
How do I keep the topping extra crispy?
Don’t use quick oats—stick with old-fashioned rolled oats. Let the bars cool on a wire rack, and avoid covering them while warm.
Can I freeze apple crisp bars?
Definitely. Layer bars with parchment paper in a zip-top bag and freeze up to 2 months. Thaw at room temp or reheat briefly in the oven.
Do I have to peel the apples?
Peeling is recommended for the best texture, but you can leave skins on for more fiber (and a rustic look!). It’s totally up to you.
Pin This Recipe!
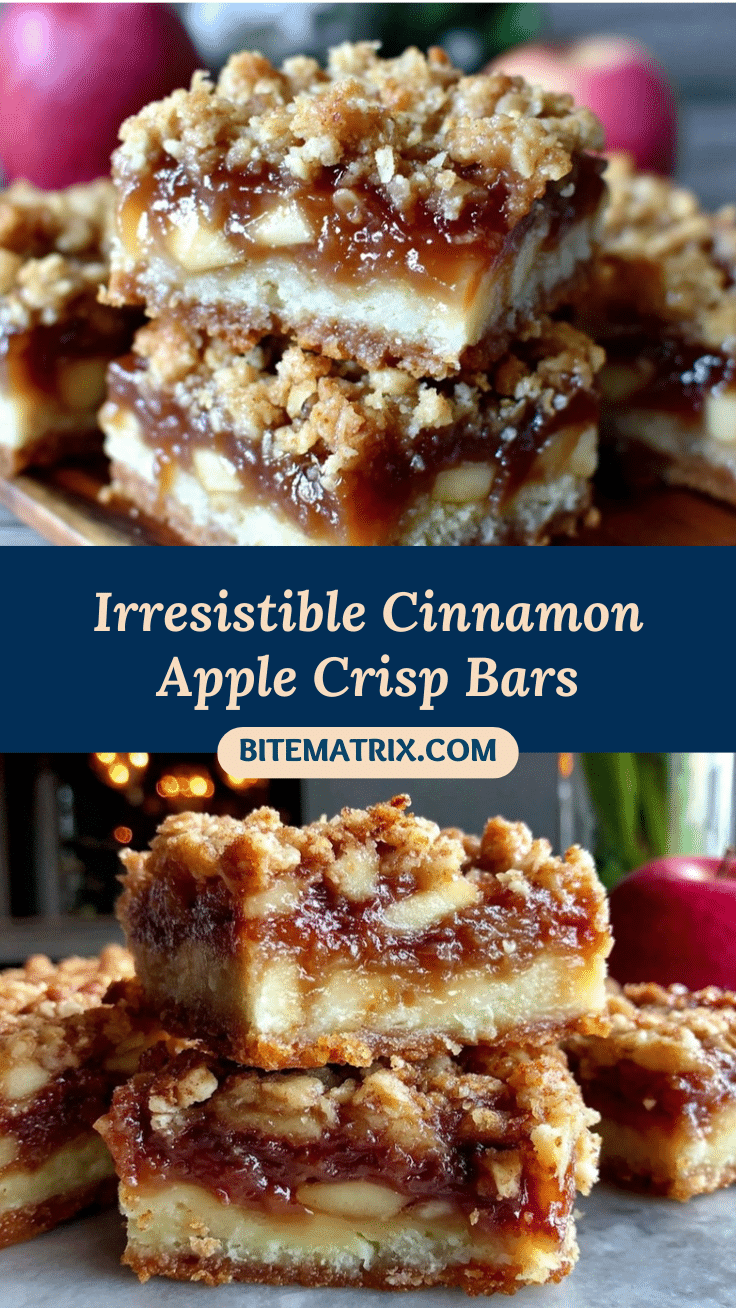
Crispy Apple Crisp Bars

These easy homemade apple crisp bars feature a tender apple filling and a crunchy oat topping, making them the perfect cozy fall dessert. They come together quickly and are a crowd-pleaser for gatherings, lunchboxes, or a comforting treat at home.
- Prep Time: 15 minutes
- Cook Time: 35-40 minutes
- Total Time: 50-55 minutes
- Yield: 16 bars 1x
- Category: Dessert
- Cuisine: American
Ingredients
- 4 cups apples, peeled, cored, and diced (about 4 medium apples—Granny Smith or Honeycrisp)
- 2 tablespoons lemon juice
- 1/4 cup granulated sugar
- 1 teaspoon ground cinnamon
- 1/4 teaspoon ground nutmeg (optional)
- 2 tablespoons all-purpose flour
- 1 1/2 cups old-fashioned rolled oats
- 1 cup all-purpose flour (can substitute almond flour for gluten-free)
- 3/4 cup packed brown sugar
- 1/2 teaspoon salt
- 1/2 teaspoon baking powder
- 1 teaspoon ground cinnamon
- 3/4 cup unsalted butter, melted (or dairy-free margarine/coconut oil for vegan)
- 1 teaspoon vanilla extract (optional)
Instructions
- Preheat oven to 350°F (175°C). Line a 9×13-inch baking pan with parchment paper, leaving an overhang for easy removal.
- In a medium bowl, toss diced apples with lemon juice. Add granulated sugar, cinnamon, nutmeg, and flour. Mix until apples are well-coated.
- In a large bowl, combine rolled oats, flour, brown sugar, salt, baking powder, and cinnamon. Stir until evenly mixed.
- Pour in melted butter and vanilla extract. Mix until the mixture is crumbly but moist.
- Press about 2/3 of the oat mixture firmly into the bottom of the prepared pan to form the crust.
- Spread the apple filling evenly over the crust.
- Sprinkle the remaining oat mixture over the apples in loose clumps for extra crunch.
- Bake for 35-40 minutes, until the top is golden brown and crispy. Check at 30 minutes if your oven runs hot.
- Remove from oven and let cool in the pan for at least 30 minutes. Lift bars out using parchment paper and transfer to a wire rack.
- Slice into squares once completely cool.
Notes
For gluten-free bars, substitute almond flour for all-purpose flour. For vegan, use dairy-free margarine or coconut oil and coconut sugar. Mix apple varieties for deeper flavor. Let bars cool completely before slicing for best texture. Store in an airtight container in the fridge up to 4 days or freeze up to 2 months. Serve with vanilla ice cream or whipped cream for extra indulgence.
Nutrition
- Serving Size: 1 bar
- Calories: 180
- Sugar: 16
- Sodium: 90
- Fat: 7
- Saturated Fat: 4
- Carbohydrates: 29
- Fiber: 4
- Protein: 2
Keywords: apple crisp bars, fall dessert, apple bars, oat topping, easy apple dessert, homemade apple bars, apple crisp, autumn baking, crowd-pleaser, comfort food


