
Introduction
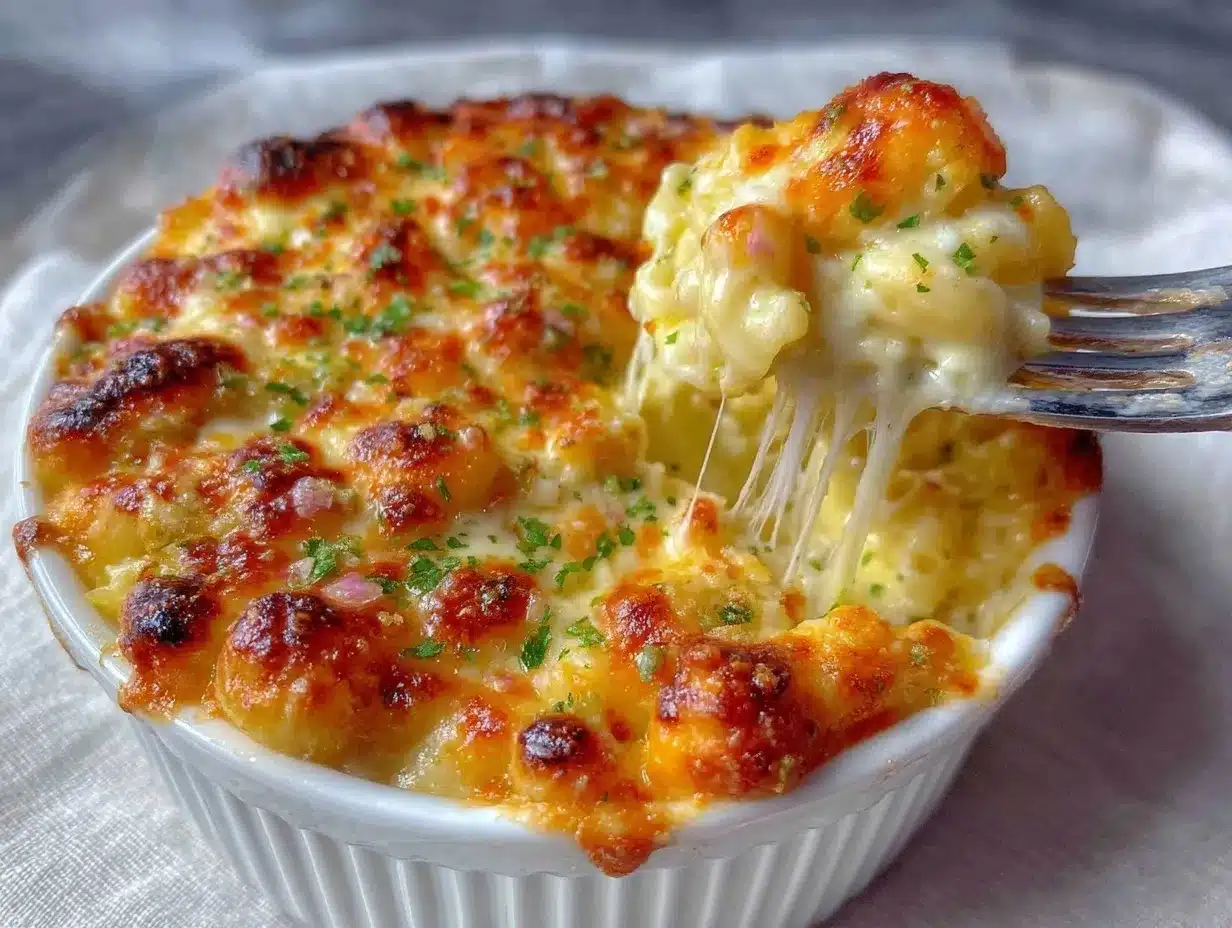
Let me set the scene: Imagine the irresistible aroma of bubbling cheese and butter drifting through your kitchen, mingling with the cozy scent of toasted breadcrumbs. That’s exactly what happens every single time I pull my creamy baked mac and cheese with golden crust from the oven. The first forkful—steaming, silky noodles wrapped in layers of gooey cheddar and a crispy, buttery topping—made me pause, close my eyes, and just soak in the moment. Honestly, it’s the kind of comfort food that feels like a warm hug from your favorite person.
My earliest memory of baked mac and cheese goes all the way back to childhood, when I was knee-high to a grasshopper and my grandma would whip up big pans for family Sunday suppers. I remember her secret blend of cheeses, and how she’d let me sprinkle the crunchy topping (I may have snuck a few bites raw, don’t judge!). Years later, after too many boxed mixes and lackluster restaurant versions, I decided to chase that nostalgic magic with my own recipe. Let’s face it, nothing beats homemade mac and cheese when you’re craving pure, nostalgic comfort.
When I first tested this recipe, my kids couldn’t stop sneaking noodles off the baking dish, and my husband declared it “dangerously easy” to eat half the pan in one sitting. It’s become a staple for potlucks, family gatherings, and gifting (because nothing says “I care” like a casserole of cheesy goodness). I’ve tweaked and tested it—sometimes in the name of research, sometimes just because I wanted more reasons to eat mac and cheese. If you’re searching for the ultimate creamy baked mac and cheese with golden crust, you’re going to want to bookmark this one. Trust me, it’s perfect for weeknights, cozy weekends, or brightening up your Pinterest recipe board.
Why You’ll Love This Creamy Baked Mac and Cheese
Let me tell you, after years of experimenting (and way too many taste tests), I can say this creamy baked mac and cheese recipe stands out in all the right ways. Whether you’re a busy parent, a college student, or just someone who loves a good cheese pull, there’s a lot to adore here.
- Quick & Easy: You can have this homemade comfort food ready in under an hour (about 45 minutes total)—perfect for last-minute cravings or weeknight dinners.
- Simple Ingredients: No fancy shopping trips required. The recipe uses pantry staples and everyday cheeses, so you’re likely stocked already.
- Perfect for Any Occasion: Whether it’s a holiday spread, cozy movie night, or potluck dinner, this dish fits right in. I’ve brought it to bake sales and brunches, and it’s always the first to disappear.
- Crowd-Pleaser: Both kids and adults go wild for the creamy sauce and crispy topping—my extended family insists I bring two pans for gatherings now!
- Unbelievably Delicious: The combination of sharp cheddar, creamy mozzarella, and a hint of parmesan delivers next-level flavor and a melt-in-your-mouth texture.
What really sets this mac and cheese apart is the method: making a homemade cheese sauce (no shortcuts!) and finishing with a golden, crunchy crust. Sometimes, I blend the cheese sauce a little extra for silky smoothness—learned that trick from a chef friend. You can swap the pasta shape, mix up the cheeses, or even sneak in veggies for an easy twist. It’s not just good—it’s the kind of recipe that makes you pause after the first bite and just smile.
This creamy baked mac and cheese with golden crust is comfort food reimagined: rich, satisfying, and so much better than any boxed version. No stress, no fuss—just pure, soul-soothing satisfaction. If you want to impress guests or treat yourself after a long day, this is the dish to make.
What Ingredients You Will Need
This creamy baked mac and cheese recipe uses straightforward, wholesome ingredients to deliver bold flavor and that signature velvety texture (plus a golden, crunchy crust!). Most of these are pantry staples, and you can easily substitute or adjust based on what’s handy.
-
For the Pasta:
- Elbow macaroni (about 12 oz / 340 g; classic choice, but cavatappi or shells work great too)
-
For the Cheese Sauce:
- Unsalted butter (1/4 cup / 60 g; for richness)
- All-purpose flour (1/4 cup / 30 g; thickens the sauce)
- Whole milk (3 cups / 720 ml; for creaminess, but 2% works if you’re watching fat)
- Heavy cream (1/2 cup / 120 ml; optional, but wow does it amp up the creaminess!)
- Sharp cheddar cheese, shredded (2 cups / 200 g; I love Cabot or Tillamook for bold flavor)
- Mozzarella cheese, shredded (1 cup / 100 g; makes it extra gooey)
- Parmesan cheese, finely grated (1/2 cup / 50 g; adds a nutty depth)
- Salt (1 tsp / 5 g; adjust to taste)
- Ground black pepper (1/2 tsp / 2 g; optional, but gives a nice kick)
- Ground mustard powder (1/2 tsp / 2 g; adds subtle tang—don’t skip!)
- Paprika (1/2 tsp / 2 g; for color and a hint of warmth)
-
For the Topping:
- Panko breadcrumbs (1 cup / 60 g; for the crispiest crust)
- Melted butter (2 tbsp / 30 g; helps brown the crumbs beautifully)
- Extra cheddar or parmesan (1/2 cup / 50 g; for that gorgeous golden finish)
Ingredient tips: For best texture, use block cheese and shred it yourself (pre-shredded can be dry). For gluten-free, swap all-purpose flour for a 1:1 gluten-free blend and use gluten-free pasta. Sometimes I add a pinch of cayenne for a little heat—totally optional, but so good.
Substitutions: Almond milk works for dairy-free (though it won’t be quite as creamy). You can use Gruyère or fontina cheese for a fancier twist. For extra protein, toss in cooked chicken or stir in a handful of steamed broccoli.
If you’re making this in summertime, try mixing in fresh cherry tomatoes or roasted peppers before baking. The base recipe is flexible, so don’t be afraid to play around!
Equipment Needed
- Large pot (for boiling pasta)
- Colander (to drain the noodles)
- Medium saucepan (for making cheese sauce)
- Whisk (essential for lump-free sauce—I swear by my OXO whisk)
- Wooden spoon or spatula (for stirring the sauce and pasta)
- 9×13 inch (23×33 cm) baking dish (ceramic or glass—metal works too, but watch for browning)
- Measuring cups and spoons (accuracy matters!)
- Cheese grater (box grater is best for shredding cheese fresh)
- Small bowl (for mixing topping)
If you don’t have a whisk, a fork will do in a pinch (though your arm might get tired). For budget-friendly options, I’ve used thrift store bakeware and it’s worked fine. Maintenance tip: soak your saucepan right after making the cheese sauce for easier cleanup. And hey, if your baking dish is a bit smaller, just fill it most of the way—overflow isn’t the end of the world!
Preparation Method
- Preheat & Prep: Preheat oven to 375°F (190°C). Lightly butter your baking dish. (I sometimes use parchment if I’m feeling lazy about scrubbing later.)
- Boil Pasta: Bring a large pot of salted water to a boil. Add 12 oz (340 g) elbow macaroni. Cook until just al dente—about 7-8 minutes. Drain and set aside. (Don’t overcook; mushy pasta = sad mac and cheese.)
- Make Cheese Sauce: In a medium saucepan over medium heat, melt 1/4 cup (60 g) unsalted butter. Whisk in 1/4 cup (30 g) flour and cook for about 2 minutes—until it smells a little nutty and looks pale golden. Slowly whisk in 3 cups (720 ml) milk and 1/2 cup (120 ml) heavy cream. Keep whisking until smooth, about 3-4 minutes. Simmer gently until thickened (it should coat the back of a spoon).
- Add Cheese & Seasonings: Remove saucepan from heat. Stir in 2 cups (200 g) sharp cheddar, 1 cup (100 g) mozzarella, and 1/2 cup (50 g) parmesan. Mix until completely melted and silky. Add 1 tsp (5 g) salt, 1/2 tsp (2 g) pepper, 1/2 tsp (2 g) mustard powder, and 1/2 tsp (2 g) paprika. Taste and adjust seasoning if needed. Sauce should be thick but pourable.
- Combine Pasta & Sauce: Pour drained pasta into the cheese sauce. Use a wooden spoon to gently fold everything together. The noodles should be completely coated (and honestly, if you sneak a spoonful here, I won’t tell!).
- Transfer to Baking Dish: Scoop the cheesy pasta into your prepared baking dish. Smooth the top with your spoon. (If it seems dry, drizzle a little extra milk—sometimes the pasta soaks up more than expected.)
- Make the Topping: In a small bowl, mix 1 cup (60 g) panko breadcrumbs with 2 tbsp (30 g) melted butter. Stir in 1/2 cup (50 g) extra cheddar or parmesan. Sprinkle evenly over the mac and cheese. This is what makes the crust irresistibly golden and crispy.
- Bake: Bake uncovered for 25-30 minutes, until the top is bubbly and golden brown. If you want an extra-crispy crust, broil for 2-3 minutes at the end (watch closely so it doesn’t burn—been there, done that).
- Cool & Serve: Let the pan rest for 5-10 minutes before serving. The sauce will thicken and set a bit, making it easier to scoop. The aroma at this point is downright magical.
Troubleshooting tips: If your sauce looks lumpy, whisk vigorously or blend for a few seconds. If it’s too thick, add a splash of milk. If the topping browns too quickly, cover loosely with foil. Efficiency tip: Shred cheese while pasta cooks to save time!
Cooking Tips & Techniques
After a lot of trial and error, I’ve learned a few secrets for making creamy baked mac and cheese with golden crust truly foolproof. Here are my best tips:
- Cook pasta just to al dente—overcooking means mushy noodles after baking. I always set a timer (because I get distracted easily!).
- Whisk the roux (butter + flour) until it smells nutty, then add milk slowly. This keeps your sauce smooth, not grainy.
- Use freshly shredded cheese. Pre-shredded cheese contains anti-caking agents and doesn’t melt as well. Trust me, I learned the hard way.
- Don’t rush the thickening process. If the sauce is too thin, let it simmer a few extra minutes. It should coat the back of a spoon.
- For the crust, mix breadcrumbs with melted butter. Dry crumbs just don’t brown right—been there, regretted that.
- Bake uncovered for a golden top, but if the crust starts burning, cover with foil for the last 10 minutes.
- Multitasking tip: Prep your topping while the sauce thickens. That way, everything is ready to assemble quickly.
- For perfectly creamy results, don’t skimp on the cheese or milk. I tried light versions once—good, but not “wow.”
Consistency tip: Always taste your sauce before mixing with pasta. Sometimes a pinch more salt or a dash of paprika makes all the difference. And if you’re making a double batch for a crowd, use two smaller dishes for more crusty edges (my favorite part!).
Variations & Adaptations
One of the best things about creamy baked mac and cheese with golden crust is how easy it is to tweak for your tastes or dietary needs. Here are a few tried-and-true variations I love:
- Gluten-Free: Use gluten-free macaroni and swap the flour for a 1:1 gluten-free blend. The texture stays creamy and satisfying.
- Veggie Boost: Stir in roasted broccoli, diced tomatoes, or sautéed mushrooms before baking. My kids actually request the broccoli version—who knew?
- Spicy Kick: Add a pinch of cayenne or a dash of hot sauce to the cheese sauce for a grown-up twist.
- Dairy-Free: Use dairy-free milk, vegan butter, and plant-based cheese. I’ve tried this for lactose-intolerant friends, and it’s surprisingly good (though the crust isn’t quite as golden).
- Protein Power: Mix in cooked chicken, ham, or crumbled bacon for a heartier meal. My husband likes the bacon version best!
If you want to change things up for the seasons, add roasted red peppers in summer or a sprinkle of smoked paprika in winter. For a stovetop mac and cheese, skip the baking and just serve after mixing the sauce—super creamy, no crust, but still delicious. Feel free to experiment and make it your own!
Serving & Storage Suggestions
This creamy baked mac and cheese with golden crust is best served hot, right from the oven. I like to scoop generous portions into bowls and garnish with a sprinkle of fresh parsley (for color and a little freshness). If you’re feeling fancy, serve alongside grilled chicken or a crisp green salad.
For parties or potlucks, cut into squares and serve straight from the baking dish. Leftovers? Store covered in the refrigerator for up to 4 days. You can freeze in airtight containers for up to 2 months—just thaw overnight before reheating.
To reheat, warm in a 350°F (175°C) oven for 15-20 minutes, covered loosely with foil to keep it moist. Microwave works too, but I prefer oven reheating for a crispier topping. Honestly, the flavors deepen overnight, so leftovers taste even cheesier. If it dries out, add a splash of milk before reheating. This makes weekday lunches feel like a treat!
Nutritional Information & Benefits
Here’s an estimated breakdown per serving (based on 8 servings):
- Calories: ~420
- Protein: 16g
- Fat: 25g
- Carbs: 32g
- Fiber: 2g
Key benefits: The recipe delivers a hefty dose of calcium and protein from all that cheese and milk. If you use whole grain or legume-based pasta, you can add extra fiber. For gluten-free or low-carb needs, swap the noodles and flour for alternatives. Just a heads-up: this dish contains wheat, dairy, and may have egg (in some pasta brands)—so check labels if you’re cooking for allergies.
Honestly, I love this recipe because it’s satisfying and comforting. It’s not “health food,” but it’s nourishing in all the right ways—especially when shared with family!
Conclusion
If you’re searching for a recipe that brings pure comfort, creamy texture, and a golden, crispy crust, this creamy baked mac and cheese is worth every bite. It’s easy to personalize—switch up the cheeses, sneak in veggies, or experiment with protein. I keep coming back to it because it never fails to make my family (and guests) happy.
Whether you make it for a holiday, a cozy night in, or just because you’re craving something cheesy and delicious, you’ll find yourself making it again and again. Why do I love it? Because it’s warm, familiar, and always brings people together. If you try this recipe, let me know in the comments—share your twists, tag me with your photos, or pass it on to a fellow cheese lover. Bookmark this creamy baked mac and cheese with golden crust and make it your new comfort food go-to. Happy cooking!
FAQs About Creamy Baked Mac and Cheese
Can I make creamy baked mac and cheese ahead of time?
Absolutely! Prepare as directed, cover tightly, and refrigerate up to 24 hours before baking. Add a splash of milk before baking to keep it creamy.
What cheeses work best for this recipe?
Sharp cheddar is classic, but blending in mozzarella and parmesan adds creaminess and flavor. Feel free to use Gruyère, fontina, or even Monterey Jack for variation.
How do I keep my mac and cheese from drying out?
Make sure your cheese sauce is thick but still pourable. If reheating, add a splash of milk and cover with foil to keep the moisture in.
Is it possible to make this recipe gluten-free?
Yes! Use gluten-free macaroni and a 1:1 gluten-free flour for the roux. The results are just as creamy and delicious.
Can I freeze baked mac and cheese?
Definitely. Cool completely, portion into freezer-safe containers, and freeze for up to 2 months. Thaw overnight in the fridge before reheating in the oven for best texture.
Pin This Recipe!

Creamy Baked Mac and Cheese

This creamy baked mac and cheese features silky noodles wrapped in a rich, homemade cheese sauce and topped with a golden, crispy breadcrumb crust. It’s the ultimate comfort food, perfect for weeknights, gatherings, or whenever you crave nostalgic, cheesy goodness.
- Prep Time: 15 minutes
- Cook Time: 30 minutes
- Total Time: 45 minutes
- Yield: 8 servings 1x
- Category: Main Course
- Cuisine: American
Ingredients
- 12 oz elbow macaroni (about 3 cups dry)
- 1/4 cup unsalted butter
- 1/4 cup all-purpose flour
- 3 cups whole milk
- 1/2 cup heavy cream (optional)
- 2 cups sharp cheddar cheese, shredded
- 1 cup mozzarella cheese, shredded
- 1/2 cup parmesan cheese, finely grated
- 1 tsp salt
- 1/2 tsp ground black pepper
- 1/2 tsp ground mustard powder
- 1/2 tsp paprika
- 1 cup panko breadcrumbs
- 2 tbsp melted butter
- 1/2 cup extra cheddar or parmesan (for topping)
Instructions
- Preheat oven to 375°F (190°C). Lightly butter a 9×13 inch baking dish.
- Bring a large pot of salted water to a boil. Add elbow macaroni and cook until just al dente, about 7-8 minutes. Drain and set aside.
- In a medium saucepan over medium heat, melt unsalted butter. Whisk in flour and cook for about 2 minutes until pale golden and nutty.
- Slowly whisk in milk and heavy cream. Continue whisking until smooth, about 3-4 minutes. Simmer gently until thickened and coats the back of a spoon.
- Remove saucepan from heat. Stir in cheddar, mozzarella, and parmesan until melted and silky. Add salt, pepper, mustard powder, and paprika. Taste and adjust seasoning.
- Pour drained pasta into the cheese sauce and gently fold together until noodles are coated.
- Transfer cheesy pasta to the prepared baking dish and smooth the top.
- In a small bowl, mix panko breadcrumbs with melted butter and extra cheddar or parmesan. Sprinkle evenly over the mac and cheese.
- Bake uncovered for 25-30 minutes, until the top is bubbly and golden brown. For extra-crispy crust, broil for 2-3 minutes at the end, watching closely.
- Let rest for 5-10 minutes before serving.
Notes
For best results, use freshly shredded cheese. To make gluten-free, use gluten-free pasta and flour. Add a pinch of cayenne for heat or stir in veggies like broccoli or tomatoes for variation. If reheating, add a splash of milk and cover with foil to keep it creamy.
Nutrition
- Serving Size: 1/8 of the recipe (a
- Calories: 420
- Sugar: 5
- Sodium: 650
- Fat: 25
- Saturated Fat: 14
- Carbohydrates: 32
- Fiber: 2
- Protein: 16
Keywords: mac and cheese, baked mac and cheese, creamy mac and cheese, comfort food, casserole, cheese, pasta, family dinner, easy recipe


