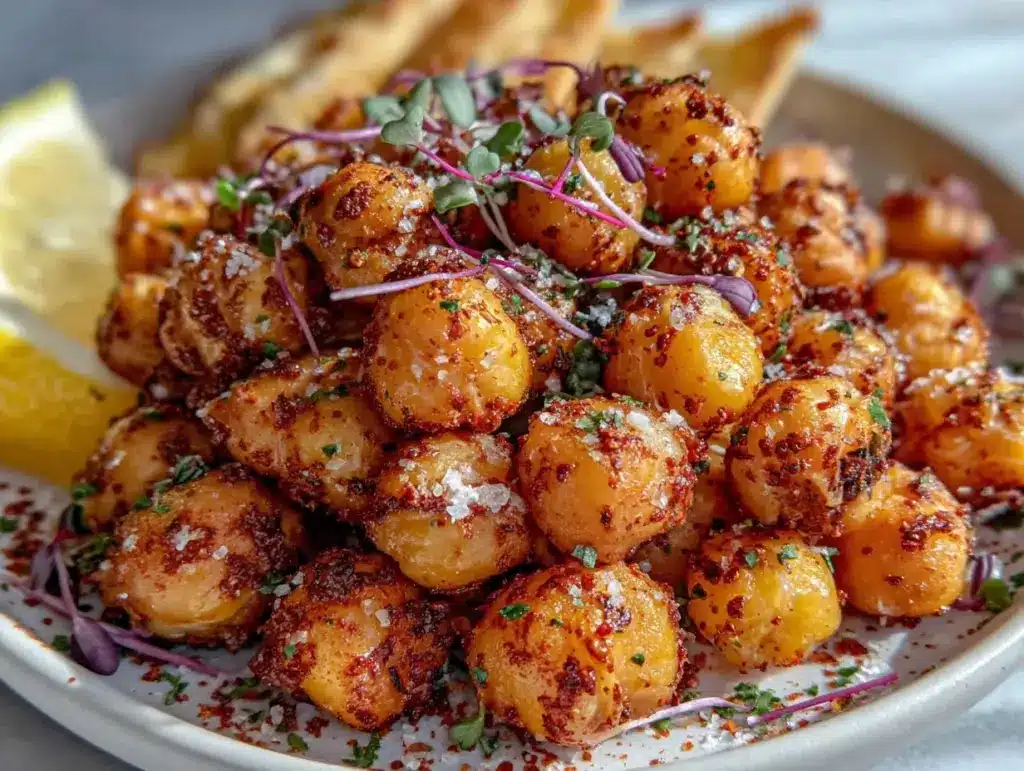
The moment the smoky paprika hits those golden chickpeas in my oven, the aroma fills my kitchen with this irresistible, savory warmth. It’s the kind of scent that makes you stop mid-scroll on your phone and drift toward the oven, hoping you can sneak a taste before anyone notices. You know that crunch—the perfect crispy snap that you hear before you taste it? That’s the magic happening here, and honestly, it’s dangerous how easy these crispy roasted chickpea snack bowls are to whip up.
The first time I made these, it was a rainy Sunday, and I was searching for something snacky yet healthy (that’s always a tough combo, right?). I’d seen roasted chickpeas pop up everywhere and figured, why not? So, I tossed a can with smoky paprika, fresh herbs, and a pinch of garlic powder. When I tasted the first batch, I was instantly hooked—the kind of moment where you pause, take a deep breath, and just smile because you know you’re onto something truly special. It felt like I’d cracked the code to the ultimate snack. If only I’d discovered this crunchy delight years ago when I was knee-high to a grasshopper and desperate for after-school munchies!
These snack bowls have become a staple for family gatherings and Netflix marathons. My kids can’t stop sneaking them off the tray, and my husband (the real snack critic) gives me a nod of approval every single time. Whether you’re planning a picnic, packing lunchboxes, or just need a Pinterest-worthy snack for your board, these crispy roasted chickpea bowls fit the bill. They’re the kind of treat that makes your taste buds dance and your friends ask for the recipe before they leave. Trust me, after testing them more times than I care to admit (in the name of research, of course), I know you’re going to want to bookmark this one. It’s pure, nostalgic comfort in every crunchy bite!
Why You’ll Love This Crispy Roasted Chickpea Snack Bowls Recipe
- Quick & Easy: Ready in under 45 minutes, perfect for those busy afternoons when you need something fast but still crave real flavor.
- Simple Ingredients: Pantry staples—no last-minute grocery runs or fancy spice blends required. You probably have everything right in your kitchen.
- Perfect for Any Occasion: These snack bowls shine at potlucks, game nights, picnics, and even as a lunchbox treat for school or work.
- Crowd-Pleaser: Kids and adults love the crunchy texture and smoky flavor. You know it’s good when half the batch disappears before dinner.
- Unbelievably Delicious: The combo of crispy chickpeas, smoky paprika, and fresh herbs is just next-level comfort food. It’s a flavor explosion in every bite.
What makes this recipe different from all those plain roasted chickpeas out there? I use a special trick: patting the chickpeas extra dry and roasting them at a slightly higher temperature for maximum crispiness (learned that from a chef friend, no joke). The smoky paprika gives them a deep flavor, while the fresh herbs add a burst of brightness you don’t expect in a snack. Plus, a little garlic powder and flaky sea salt? That’s just the ticket to addictive snacking.
Honestly, this recipe isn’t just good—it’s the kind that makes you close your eyes after the first bite and seriously consider hiding the bowl from everyone else. It’s snack food, reimagined for real life: healthier, faster, and just as satisfying as anything you’d grab from the store. If you want a recipe that impresses guests without any stress, or turns a simple afternoon into something memorable, this is the one you’ve been searching for.
What Ingredients You Will Need for Crispy Roasted Chickpea Snack Bowls
This recipe relies on simple, wholesome ingredients to deliver bold flavor and an addictive crunchy texture. Most are pantry staples, and you can easily swap a few if you’re running low or need to tweak for allergies. Here’s what you’ll need:
- For the Chickpeas:
- 2 cans (15 oz / 425g each) chickpeas, drained and rinsed
- 2 tbsp olive oil (extra virgin preferred for flavor)
- 1 tsp flaky sea salt (plus more for finishing)
- For the Smoky Seasoning:
- 2 tsp smoked paprika (gives that deep, smoky flavor—don’t substitute with regular paprika!)
- 1/2 tsp garlic powder (essential for savory depth)
- 1/2 tsp onion powder
- 1/4 tsp ground cumin (adds earthiness)
- 1/4 tsp black pepper, freshly ground if possible
- For the Herb Finish:
- 2 tbsp chopped fresh parsley (or cilantro, if you’re a fan)
- 1 tbsp chopped fresh chives (optional, but my grandma swears by it)
- 1 tsp lemon zest (brings all the flavors together)
- Optional Add-Ons:
- Pinch of cayenne pepper (for heat—my kids prefer it mild, but I sneak some in for myself)
- 1/4 cup grated Parmesan (for a cheesy twist)
- 1 tbsp toasted sesame seeds (extra crunch and flavor)
Ingredient Tips: If you want the crispiest texture, I recommend using organic chickpeas—Eden Foods is my go-to brand. If you’re gluten-free, double-check your spices for hidden wheat starch. For vegan snack bowls, skip the Parmesan and stick with herbs and lemon zest.
Substitution Notes: Out of smoked paprika? Try chipotle powder for a spicy, smoky vibe. No fresh herbs? Dried parsley works in a pinch, though the fresh stuff is best for pop and color. If you need oil-free, you can use aquafaba (the liquid from the chickpea can), but the crunch won’t be quite as intense.
These ingredients come together for that signature flavor and crunch—no fuss, just simple pantry magic. In summer, swap in fresh dill or basil for the herbs if you have them on hand. That’s the beauty of this recipe: it’s flexible and forgiving (thank goodness!).
Equipment Needed
- Large rimmed baking sheet: For even roasting. I prefer the heavy-duty, light-colored aluminum trays—they don’t burn the chickpeas.
- Parchment paper or silicone baking mat: Makes cleanup a breeze and prevents sticking. If you don’t have these, just lightly oil your tray.
- Clean kitchen towel or paper towels: For drying chickpeas thoroughly (critical for crunch!).
- Mixing bowl: To toss chickpeas with oil and spices.
- Spatula or wooden spoon: For stirring and spreading chickpeas evenly.
- Microplane or box grater: If you use fresh lemon zest or Parmesan.
- Sharp knife and cutting board: For chopping herbs.
If you’re missing a baking sheet, you can use a shallow roasting pan, but keep the chickpeas in a single layer. Silicone mats work wonders for nonstick and are budget-friendly if you bake often. I’ve tried both parchment and silicone; honestly, silicone wins for durability and easy cleanup. Just rinse and reuse—no fuss! If you’re using an old baking sheet, scrub it well to avoid any burnt flavor or stuck bits. Maintenance tip: wash silicone mats with warm, soapy water and air-dry flat. They last forever.
Preparation Method
- Preheat the oven: Set your oven to 425°F (220°C). A hot oven is key for crispy chickpeas.
- Drain and rinse chickpeas: Empty the cans into a colander, rinse thoroughly under cold water, and shake off excess moisture.
- Dry the chickpeas: Spread chickpeas onto a clean kitchen towel or paper towels. Pat them gently until completely dry—don’t skip this step! Damp chickpeas won’t crisp up properly.
- Remove loose skins (optional): If you notice any skins coming off, pinch and discard them. It’s a little tedious, but skipping it is fine—some folks swear by this for extra crunch.
- Toss with oil and seasonings: Place dried chickpeas in a mixing bowl. Add olive oil, smoked paprika, garlic powder, onion powder, cumin, black pepper, and sea salt. Toss until evenly coated (I use my hands for this—way more even coverage).
- Spread on baking sheet: Line your baking sheet with parchment or silicone mat. Dump chickpeas on the tray and spread into a single layer—don’t crowd them or they’ll steam instead of roast.
- Roast: Place the tray in the preheated oven. Roast for 30-40 minutes, shaking the pan every 10-15 minutes for even browning. Chickpeas should be deep golden and crunchy to the touch. If they’re still soft, keep roasting in 5-minute intervals.
- Finish with herbs and zest: When chickpeas are crisp, remove from oven and immediately toss with chopped parsley, chives, and lemon zest. Sprinkle extra sea salt to taste.
- Cool and serve: Let chickpeas cool on the tray for 10 minutes—they crisp up more as they cool. Serve in snack bowls, top with Parmesan or sesame seeds if desired.
Preparation Notes: If your chickpeas aren’t crunchy after 40 minutes, your oven might run cool (happened to me once—turns out my thermostat was wonky!). Just roast a bit longer, but watch closely so they don’t burn. The chickpeas should sound hollow when you shake the pan. If you use aquafaba instead of oil, check for sticking at the 20-minute mark, and gently loosen with a spatula.
Troubleshooting: If chickpeas are chewy and not crispy, they probably weren’t dry enough before roasting. Next time, let them air-dry for an extra 10 minutes before seasoning. Too salty? Sprinkle salt after roasting instead of before—it sticks better and prevents overpowering flavor. For maximum crunch, let them cool completely before storing.
Cooking Tips & Techniques
Getting these crispy roasted chickpea snack bowls just right takes a few easy tricks and a little patience (learned the hard way, trust me!). Here’s what works for me:
- Dry, dry, dry: The drier your chickpeas, the crispier they’ll get. Pat them like you mean it, and let them air-dry for 10-15 minutes if you can.
- Single layer is key: If you pile chickpeas on top of each other, you’ll end up with soft, steamed peas—not the crunchy snack you want.
- Shake the pan: Every 10-15 minutes, give the baking sheet a good shake or use a spatula to stir. It helps them crisp up evenly and prevents burning.
- Don’t walk away: Last 10 minutes are crucial—chickpeas go from golden to burnt in a flash. Keep a close eye, especially if your oven runs hot.
- Season after roasting: Some herbs burn if added before baking. Toss fresh parsley, chives, and lemon zest after you pull the tray out.
- Batch cooking: Double the recipe but use two trays, swapping their positions halfway through roasting. Nothing sadder than soggy chickpeas from overcrowding.
One mistake I made early on: I used wet chickpeas and skipped the parchment. Total disaster—half stuck to the pan, and the other half was mush. Another tip? If you want extra crunch, leave chickpeas in the turned-off oven with the door cracked for 10 minutes after roasting. Multitasking? Prep herbs while chickpeas roast, and set out bowls for easy serving. Consistency is all about drying, single layering, and frequent shaking. Get those right, and you’ll be in snack heaven.
Variations & Adaptations
- Spicy Kick: Add 1/2 tsp cayenne powder or chili flakes with the seasoning for a fiery crunch. My husband loves this for game day!
- Herb Lovers: Swap out parsley for fresh dill, basil, or even rosemary. In spring, a mix of mint and cilantro is super refreshing.
- Cheesy Chickpeas: Toss roasted chickpeas with 1/4 cup grated Parmesan or nutritional yeast for a savory, cheesy twist (vegan option!).
- Baking vs. Air Fryer: If you have an air fryer, roast chickpeas at 400°F (200°C) for 15-20 minutes, shaking every 5 minutes for extra crispiness—super efficient and less oil needed.
- Gluten-Free & Allergy-Friendly: All ingredients here are naturally gluten-free, but double-check spice blends for hidden gluten. For nut allergies, skip sesame seeds or use pumpkin seeds.
- Sweet & Savory: Try tossing hot chickpeas with a sprinkle of cinnamon and a touch of maple syrup, then cool for a sweet snack (my kids go nuts for this at movie night).
One of my favorite personal adaptations? I made a Mediterranean bowl with roasted chickpeas, chopped tomatoes, cucumber, feta, and a drizzle of tahini—lunch perfection! Don’t be afraid to experiment; these little guys play well with almost any flavor profile you throw at them.
Serving & Storage Suggestions
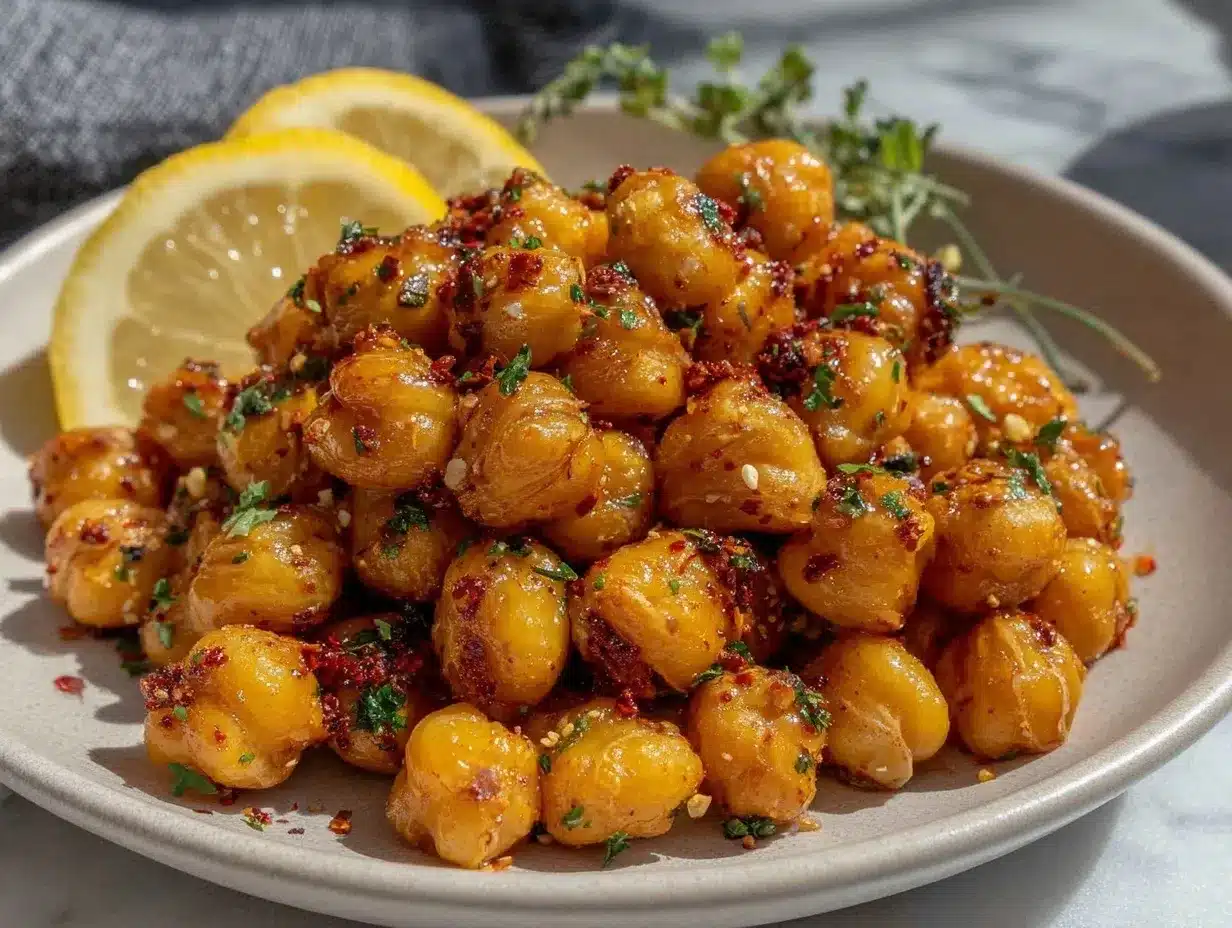
These crispy roasted chickpea snack bowls are best served slightly warm or at room temperature. I like to pile them high in colorful bowls, sprinkle extra herbs and a squeeze of lemon for pop, and set them out with toothpicks for easy snacking. They’re perfect alongside hummus, pita chips, or a fresh veggie platter—great for parties or afternoon cravings.
To store, let chickpeas cool completely, then transfer to an airtight container. They’ll stay crispy for 3-4 days at room temperature. If you need to keep them longer, refrigerate for up to a week, but the crunch might soften (I usually re-crisp them in a 350°F/175°C oven for 5-7 minutes). Avoid storing in the fridge while warm—steam makes them soggy. For freezer storage, pack in a zip-top bag, thaw at room temperature, and refresh in the oven.
Flavors develop as they sit—the smoky paprika mellows and the herbs infuse the chickpeas. I find they’re best on day two, honestly. Serve with cold lemonade, iced tea, or even a light beer for adults. These snack bowls bring people together, whether you set them out for guests or just devour them solo on the couch.
Nutritional Information & Benefits
Each serving (about 1 cup/150g) of crispy roasted chickpea snack bowls delivers approximately:
- Calories: 220
- Protein: 9g
- Fiber: 6g
- Fat: 7g
- Carbs: 30g
Chickpeas are packed with plant-based protein, making them a filling snack for vegetarians and vegans. The fiber keeps you satisfied longer and supports healthy digestion. Olive oil adds healthy fats, while smoked paprika supplies antioxidants and anti-inflammatory properties. This recipe is naturally gluten-free, and with a simple swap (omit Parmesan), it’s vegan too. Allergens? Just watch for sesame seeds and cheese if you have sensitivities.
As someone trying to sneak more fiber and protein into my family’s snacks, these bowls are a winner. They’re the kind of snack you feel good about eating—no guilt, just crunchy satisfaction!
Conclusion
These crispy roasted chickpea snack bowls with smoky paprika and herbs are a recipe you’ll come back to again and again. They’re crunchy, satisfying, and bursting with flavor—perfect for busy families, snack-loving kids, or anyone who wants a healthier munch. Customize the spices, swap the herbs, or go cheesy if that’s your jam; there’s no wrong way to enjoy them. I love this recipe because it’s “dangerously easy” and always gets rave reviews from my picky eaters (and that’s saying something!).
Give them a try, and let me know how you make them your own—share your tweaks, your favorite spice combos, or your best serving ideas in the comments. Tag your photos for Pinterest bragging rights, and don’t forget to tell your friends. These snack bowls are more than just a recipe—they’re a crunchy hug in a bowl. Happy snacking!
FAQs
Can I use dried chickpeas instead of canned?
Absolutely! Just soak and cook dried chickpeas until tender, then follow the drying and roasting steps. Make sure they’re fully cooked and dry before seasoning.
Why aren’t my chickpeas getting crispy?
Usually, it’s because they weren’t dry enough or the oven wasn’t hot enough. Pat them dry thoroughly and roast at 425°F (220°C) for the crunchiest result.
Can I make these in an air fryer?
Yes! Air fry at 400°F (200°C) for 15-20 minutes, shaking the basket every 5 minutes. They crisp up even faster and use less oil.
Are these crispy roasted chickpeas gluten-free?
Yes, all the ingredients are naturally gluten-free. Just double-check your spice labels for any hidden gluten if you’re sensitive.
How do I keep leftover chickpeas crispy?
Let them cool completely before storing in an airtight container. If they soften, just re-crisp in the oven at 350°F (175°C) for 5-7 minutes before serving.
Pin This Recipe!
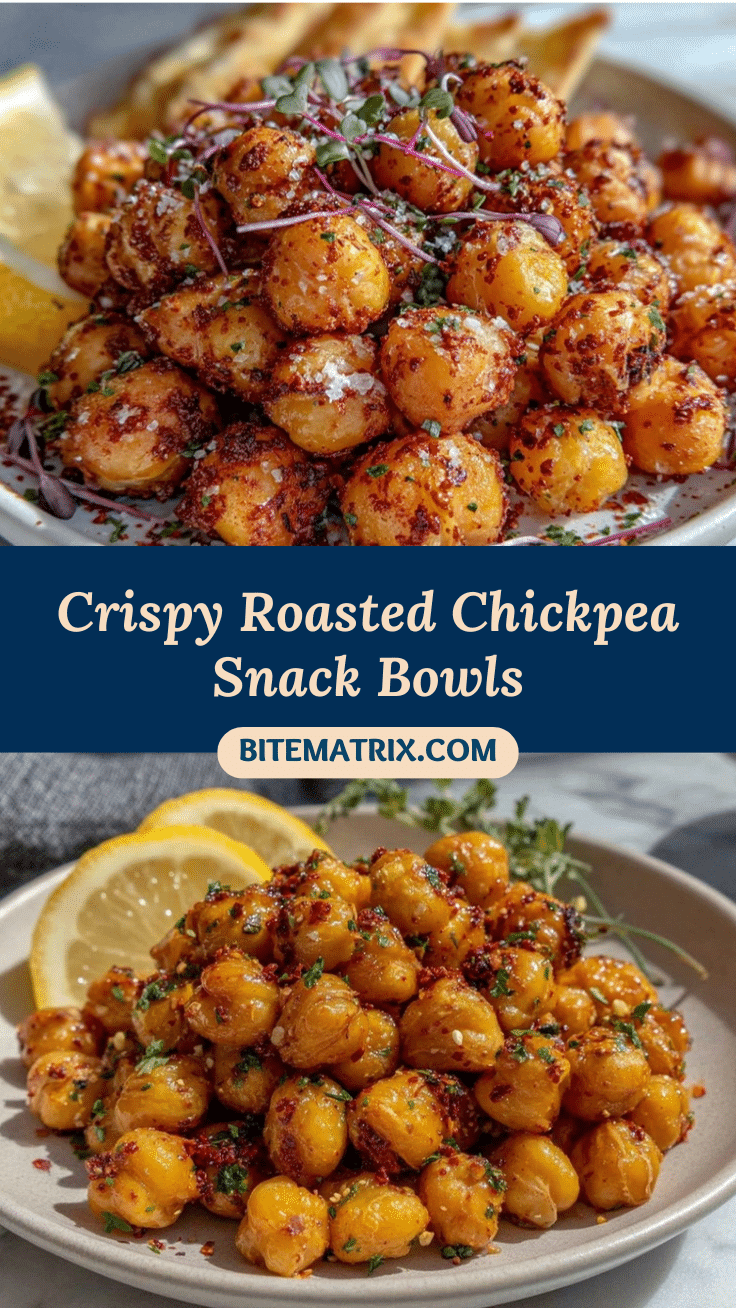
Crispy Roasted Chickpea Snack Bowls Recipe with Smoky Paprika

These crispy roasted chickpea snack bowls are a crunchy, savory treat packed with smoky paprika and fresh herbs. Perfect for healthy snacking, family gatherings, or lunchbox additions, they’re easy to make and naturally gluten-free.
- Prep Time: 15 minutes
- Cook Time: 30-40 minutes
- Total Time: 45-55 minutes
- Yield: 4 servings 1x
- Category: Snack
- Cuisine: Mediterranean
Ingredients
- 2 cans (15 oz each) chickpeas, drained and rinsed
- 2 tablespoons olive oil (extra virgin preferred)
- 1 teaspoon flaky sea salt (plus more for finishing)
- 2 teaspoons smoked paprika
- 1/2 teaspoon garlic powder
- 1/2 teaspoon onion powder
- 1/4 teaspoon ground cumin
- 1/4 teaspoon black pepper, freshly ground
- 2 tablespoons chopped fresh parsley (or cilantro)
- 1 tablespoon chopped fresh chives (optional)
- 1 teaspoon lemon zest
- Pinch of cayenne pepper (optional, for heat)
- 1/4 cup grated Parmesan (optional, for cheesy twist)
- 1 tablespoon toasted sesame seeds (optional, for extra crunch)
Instructions
- Preheat oven to 425°F (220°C).
- Drain and rinse chickpeas thoroughly under cold water.
- Spread chickpeas onto a clean kitchen towel or paper towels and pat dry until completely dry.
- Remove any loose skins from chickpeas if desired.
- Place dried chickpeas in a mixing bowl. Add olive oil, smoked paprika, garlic powder, onion powder, cumin, black pepper, and sea salt. Toss until evenly coated.
- Line a large rimmed baking sheet with parchment paper or a silicone baking mat. Spread chickpeas in a single layer.
- Roast in preheated oven for 30-40 minutes, shaking the pan every 10-15 minutes for even browning. Chickpeas should be deep golden and crunchy.
- Remove from oven and immediately toss with chopped parsley, chives, and lemon zest. Sprinkle extra sea salt to taste.
- Let chickpeas cool on the tray for 10 minutes to crisp up further.
- Serve in snack bowls, topping with Parmesan or sesame seeds if desired.
Notes
For extra crunch, let chickpeas cool completely before storing. If using aquafaba instead of oil, check for sticking during roasting. Double the recipe for a crowd, but use two trays to avoid overcrowding. Chickpeas crisp up more as they cool. For vegan bowls, skip Parmesan. Store in an airtight container for up to 4 days at room temperature.
Nutrition
- Serving Size: About 1 cup (150g) p
- Calories: 220
- Sugar: 2
- Sodium: 400
- Fat: 7
- Saturated Fat: 1
- Carbohydrates: 30
- Fiber: 6
- Protein: 9
Keywords: crispy chickpeas, roasted chickpeas, snack bowls, smoky paprika, healthy snack, gluten-free, vegan, vegetarian, easy snack, party snack


