Let me tell you, the aroma of melted cheese mingling with roasted peppers and savory deli meats, wafting from my oven, is enough to make anyone’s mouth water. The first time I baked these Easy Loaded Sheet Pan Sub Sandwiches, I was instantly hooked—the kind of moment where you pause, take a deep breath, and just smile because you know you’re onto something truly special. It was a chilly Saturday afternoon years ago, and I was knee-high to a grasshopper when my family threw a last-minute gathering. I wanted something simple, satisfying, and perfect for feeding a crowd without the usual chaos of individual sandwiches.
Honestly, these sheet pan subs have been a staple ever since—my family couldn’t stop sneaking them off the cooling rack (and I can’t really blame them). You know what’s great? They’re dangerously easy to make and bring that pure, nostalgic comfort of a classic sub but with a hands-off twist. Whether you’re planning a big game day spread, a casual potluck, or just want to brighten up your Pinterest cookie board with something savory and crowd-pleasing, these loaded sheet pan subs fit the bill perfectly.
After testing this recipe multiple times in the name of research, of course, it’s become my go-to for family gatherings, gifting, and quick weeknight dinners. It feels like a warm hug on a plate, and trust me—you’re going to want to bookmark this one.
Why You’ll Love This Recipe
From my experience and all the trial runs, here’s why these Easy Loaded Sheet Pan Sub Sandwiches stand out:
- Quick & Easy: Comes together in under 30 minutes, perfect for busy weeknights or last-minute cravings.
- Simple Ingredients: No fancy grocery trips needed; you likely already have everything in your kitchen.
- Perfect for Parties: Great for potlucks, game days, and casual get-togethers where feeding a crowd is key.
- Crowd-Pleaser: Always gets rave reviews from kids and adults alike—trust me, it disappears fast.
- Unbelievably Delicious: The combo of melty cheese, savory meats, and crisp veggies hits all the comfort food notes.
What makes this recipe different? It’s all about the layering and roasting on a single sheet pan, which keeps things simple and lets flavors meld beautifully. Plus, I add a dash of Italian seasoning and a drizzle of olive oil that really brings the whole thing together. This isn’t just another sub sandwich recipe—it’s your best version, one that makes you close your eyes after the first bite. It’s comfort food with less fuss, more flavor, and way less cleanup. Perfect for impressing guests without the stress, or turning a simple meal into something memorable.
What Ingredients You Will Need
This recipe uses simple, wholesome ingredients to deliver bold flavor and satisfying texture without the fuss. Most are pantry staples, and you can easily swap or omit based on what you have on hand.
- Sub rolls (4-6, depending on size; preferably fresh or bakery-style for best texture)
- Deli meats: Sliced turkey, ham, salami, or your favorite combo (about 12-16 oz/340-450 g total)
- Cheese: Provolone or mozzarella slices (8-12 slices, depending on the number of subs)
- Bell peppers: 1 large, sliced thinly (adds sweetness and crunch)
- Red onion: 1 medium, thinly sliced (adds a mild tang)
- Cherry tomatoes: 1 cup, halved (for juicy bursts of flavor)
- Olive oil: 2 tablespoons (I like extra virgin for flavor)
- Italian seasoning: 1 teaspoon (adds herby depth)
- Garlic powder: ½ teaspoon (for a subtle kick)
- Salt and pepper: To taste
- Banana peppers or pepperoncini: Optional, sliced (for a tangy, spicy note)
- Mayonnaise or mustard: Optional, for spreading on the rolls before assembling
If you want to add a little green, fresh basil or arugula tossed on top right after baking works wonders. For a gluten-free option, use gluten-free sub rolls or sturdy gluten-free bread.
Equipment Needed
- Baking sheet or sheet pan: A rimmed 18×13-inch (46×33 cm) pan works perfectly to hold all the subs and toppings.
- Parchment paper or silicone baking mat: Helps prevent sticking and makes cleanup a breeze.
- Sharp knife: For slicing veggies and rolls evenly.
- Cutting board: To prep all your ingredients.
- Measuring spoons: To get your seasoning just right.
- Oven mitts: Safety first when handling hot pans.
If you don’t have a large sheet pan, two smaller pans work fine too; just watch your oven space. I personally love using a silicone baking mat on my sheet pan—it keeps things from sticking and makes flipping the subs easy.
Preparation Method

- Preheat your oven to 400°F (200°C). This temperature crisps the rolls nicely without drying out the fillings. Give your oven at least 10 minutes to heat fully.
- Slice the sub rolls lengthwise. Be careful not to cut all the way through; you want them to open like a book but stay intact. If your rolls are super fresh, handle gently to avoid squishing.
- Arrange the rolls on the prepared sheet pan, cut side up. Space them evenly so they roast well.
- Layer the deli meats evenly inside each roll. Use about 3-4 ounces (85-115 g) per sandwich. Don’t overstuff or it’ll be tricky to eat later.
- Add cheese slices on top of the meat. This will melt perfectly in the oven, binding everything together.
- Scatter the sliced bell peppers, red onion, and cherry tomatoes over the cheese. These add sweetness, crunch, and juiciness. If using banana peppers, add them here too.
- Drizzle olive oil evenly over all the subs and veggies. This helps everything roast nicely and adds richness.
- Sprinkle Italian seasoning, garlic powder, salt, and pepper over the top. This final touch brings out all the flavors.
- Place the sheet pan in the oven and bake for 12-15 minutes. The cheese should be melted and bubbly, and the veggies just tender.
- Remove from oven and let cool for 5 minutes. This lets everything set so the subs won’t fall apart when you slice or serve.
- Optionally, spread mayo or mustard inside the rolls before serving. Adds a creamy, tangy kick if you like.
Pro tip: If your sub rolls are a bit soft, give them a quick toast under the broiler for 1-2 minutes before assembling to prevent sogginess. Also, keep an eye on your cheese bubbling—it should be melty but not browned or burnt.
Cooking Tips & Techniques
Getting perfect loaded sheet pan subs is all about balance and timing. Here’s what I’ve learned over the years:
- Use fresh, sturdy rolls: Flimsy bread will get soggy fast. Bakery-style or hoagie rolls hold up best to the juicy toppings.
- Don’t overload your subs: It’s tempting to pile on the fillings, but too much can make them hard to handle and unevenly cook.
- Layer cheese directly over the meat: This prevents the bread from getting soggy and helps everything stick together.
- Cut veggies thinly: Thin slices roast faster and blend better with the sandwich overall.
- Drizzle olive oil generously: It’s the secret to a nicely roasted, flavorful topping.
- Let the subs rest after baking: This small step keeps everything from sliding apart when you serve.
- Multitasking tip: While the subs bake, prep a simple side salad or chips to serve alongside for a complete meal.
One time, I forgot to slice the onions thin enough, and they stayed too crunchy—definitely not the vibe! Also, be careful with seasoning; a little goes a long way when layered with deli meats.
Variations & Adaptations
Want to switch things up? Here are some tasty ideas:
- Vegetarian Version: Swap the deli meats for grilled or roasted veggies like zucchini, mushrooms, and eggplant. Add some sliced avocado after baking for creaminess.
- Spicy Kick: Add sliced jalapeños or a drizzle of hot sauce before baking. Pepper jack cheese pairs beautifully here.
- Low-Carb Option: Use low-carb or keto-friendly bread alternatives, or skip the bread entirely and serve the fillings over a bed of greens.
- Seasonal Twist: In summer, toss in fresh basil or swap bell peppers for sweet summer corn kernels.
- Personal fave: I once added caramelized onions and swapped provolone for sharp cheddar, which gave a sweet-savory twist everyone loved.
Feel free to customize based on taste or dietary needs—these subs are flexible and forgiving!
Serving & Storage Suggestions
Serve these Easy Loaded Sheet Pan Sub Sandwiches warm or at room temperature. They’re perfect fresh out of the oven when the cheese is gooey and the veggies are tender-crisp.
Pair with classic sides like potato chips, a crisp green salad, or even a bowl of soup for a cozy combo. For drinks, I like sparkling water with a squeeze of lemon or an ice-cold soda for that classic deli vibe.
To store, wrap leftovers tightly in foil or plastic wrap and refrigerate for up to 3 days. Reheat in a 350°F (175°C) oven for 10 minutes to bring back the melty goodness without turning the bread soggy. Avoid microwaving if you want to keep the bread texture intact.
These sandwiches also freeze well if wrapped properly—freeze individually wrapped subs for up to 2 months and thaw overnight in the fridge before reheating.
Honestly, the flavors develop nicely after a day, making them great for make-ahead parties or packed lunches.
Nutritional Information & Benefits
Estimated nutrition per serving (1 sandwich): approximately 450-550 calories, depending on fillings and bread choice. Loaded with protein from the deli meats and cheese, these subs also provide a good dose of calcium and vitamins from the fresh veggies.
Choosing whole-grain or multigrain sub rolls can add fiber, while olive oil contributes heart-healthy fats. This recipe can fit into balanced eating plans and is adaptable for gluten-free or low-carb diets with simple swaps.
Keep in mind, deli meats can be high in sodium, so balancing with fresh veggies and serving with lighter sides helps keep the meal wholesome. Personally, I find these sandwiches to be a satisfying, crowd-pleasing meal that doesn’t skimp on flavor or comfort.
Conclusion
If you’re looking for a no-fuss, tasty, and versatile meal to feed a crowd, these Easy Loaded Sheet Pan Sub Sandwiches are where it’s at. They bring together simplicity, flavor, and that classic sub sandwich feel with way less hassle and cleanup.
Customize them to fit your taste buds or dietary needs, and you’ll soon see why they’ve become a family favorite in my house. I love how they bring everyone together—whether it’s a casual get-together or a cozy night in.
Give this recipe a try, and don’t forget to leave a comment sharing your favorite twist or how it turned out for you. Sharing is caring after all, and I can’t wait to hear your stories about this easy crowd-pleaser!
FAQs
Can I make these sheet pan subs ahead of time?
Yes! You can assemble them a few hours before baking and keep them covered in the fridge. Just bake right before serving for the best melty results.
What if I don’t have a large sheet pan?
No worries—use two smaller pans and split the subs between them. Just watch your oven space and baking times.
Can I use other types of cheese?
Absolutely! Cheddar, pepper jack, or Swiss all work well. Just choose a cheese that melts nicely.
How do I keep the bread from getting soggy?
Layer cheese directly on the meat before adding veggies, and drizzle olive oil over the top. Toasting the rolls lightly before assembling also helps.
Are these sandwiches freezer-friendly?
Yes! Wrap individual subs tightly and freeze for up to 2 months. Thaw in the fridge overnight and reheat in the oven before serving.
Pin This Recipe!

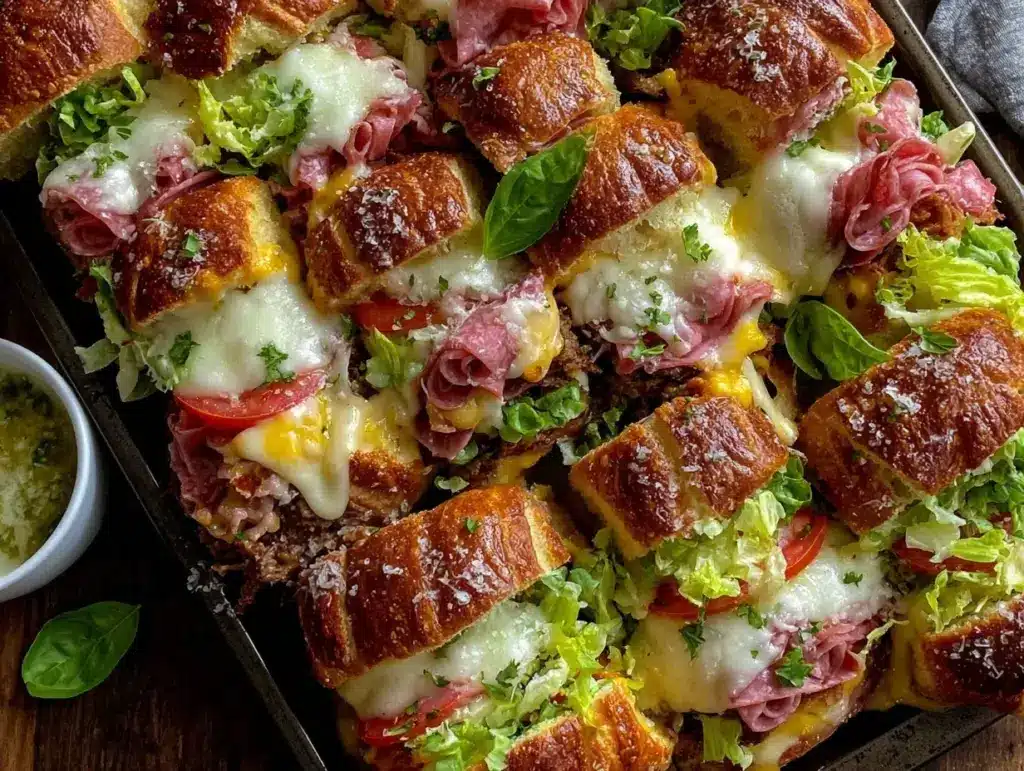
Easy Loaded Sheet Pan Sub Sandwiches

These loaded sheet pan sub sandwiches are quick, easy, and perfect for feeding a crowd with melty cheese, savory deli meats, and roasted veggies all baked on one pan.
- Prep Time: 15 minutes
- Cook Time: 15 minutes
- Total Time: 30 minutes
- Yield: 4-6 servings 1x
- Category: Main Course
- Cuisine: American
Ingredients
- 4–6 sub rolls (preferably fresh or bakery-style)
- 12–16 oz sliced deli meats (turkey, ham, salami, or favorite combo)
- 8–12 slices provolone or mozzarella cheese
- 1 large bell pepper, thinly sliced
- 1 medium red onion, thinly sliced
- 1 cup cherry tomatoes, halved
- 2 tablespoons olive oil (extra virgin preferred)
- 1 teaspoon Italian seasoning
- ½ teaspoon garlic powder
- Salt and pepper to taste
- Optional: banana peppers or pepperoncini, sliced
- Optional: mayonnaise or mustard for spreading
- Optional: fresh basil or arugula for topping after baking
Instructions
- Preheat oven to 400°F (200°C) and allow to heat fully for at least 10 minutes.
- Slice the sub rolls lengthwise, being careful not to cut all the way through.
- Arrange the rolls cut side up on a prepared sheet pan, spacing evenly.
- Layer 3-4 ounces of deli meats evenly inside each roll.
- Add cheese slices on top of the meat.
- Scatter sliced bell peppers, red onion, cherry tomatoes, and optional banana peppers over the cheese.
- Drizzle olive oil evenly over all subs and veggies.
- Sprinkle Italian seasoning, garlic powder, salt, and pepper over the top.
- Bake in the oven for 12-15 minutes until cheese is melted and bubbly and veggies are tender.
- Remove from oven and let cool for 5 minutes to set.
- Optionally, spread mayonnaise or mustard inside the rolls before serving.
Notes
Toast rolls under the broiler for 1-2 minutes before assembling if they are soft to prevent sogginess. Layer cheese directly on meat to keep bread from getting soggy. Use fresh, sturdy rolls for best results. Let subs rest after baking to prevent falling apart. Can assemble ahead and refrigerate before baking. Freeze individually wrapped subs for up to 2 months.
Nutrition
- Serving Size: 1 sandwich
- Calories: 500
- Sugar: 5
- Sodium: 900
- Fat: 25
- Saturated Fat: 10
- Carbohydrates: 40
- Fiber: 3
- Protein: 30
Keywords: sheet pan sandwiches, sub sandwiches, party food, easy dinner, crowd-pleaser, deli meat sandwich, baked subs


