“You know, it all started on a chilly Thursday evening when I found myself fumbling through my pantry, trying to impress a last-minute guest with something fancy yet doable. I wasn’t planning on making macarons—honestly, they always seemed a bit intimidating with their delicate shells and that mysterious ‘feet’ everyone talks about. But then, a friend’s offhand comment about chocolate-dipped macarons being her ultimate weakness stuck with me. I figured, why not give it a shot?
Well, let me tell you, the kitchen quickly turned into a bit of a mess (I dropped an egg shell right into the batter—classic me!), but somehow, these macarons came out with that perfect crisp exterior and a soft, chewy center. The chocolate dip? Absolutely dreamy. It added that elegant touch that makes you pause mid-bite, savoring the bittersweet contrast. Maybe you’ve been there too—the quest for the perfect homemade macaron that looks like it came from a boutique patisserie but without the fuss (or the price tag!).
This recipe stayed with me because it’s approachable yet impressive. It’s the kind of treat you can whip up for a cozy night, a festive gathering, or just because you deserve a little fancy. So, if you’re ready to have your mind (and taste buds) pleasantly surprised, let me walk you through how to make these perfect chocolate-dipped macarons that bring a little elegance to your kitchen.
Why You’ll Love This Recipe
After testing countless batches and tweaking every little detail, I’m confident this perfect chocolate-dipped macarons recipe will quickly become a favorite in your baking repertoire. Here’s why:
- Quick & Easy: Comes together in about 90 minutes from start to finish, including baking—ideal for busy days when you want a gourmet treat without the marathon.
- Simple Ingredients: You probably already have them: almond flour, egg whites, sugar, and chocolate. No rare imports or specialty stores needed.
- Perfect for Elegant Occasions: Whether it’s a bridal shower, holiday party, or a quiet tea afternoon, these macarons impress without stress.
- Crowd-Pleaser: Kids, adults, picky eaters—everyone loves the delicate crunch paired with rich chocolate.
- Unbelievably Delicious: The silky chocolate coating balances the sweet nuttiness of the shells, creating a harmonious bite that’s both light and indulgent.
What sets this apart? Well, the chocolate dip isn’t just a drizzle—it’s a smooth, glossy coating that hardens just right, giving you that satisfying snap when you bite in. Plus, the shells have a perfectly balanced texture, thanks to a little trick I learned about folding the batter just enough (but not too much). Honestly, this recipe feels like a little secret passed on between friends, one that turns you into the go-to for elegant treats.
It’s not just about the taste—it’s about the experience. You’ll find yourself closing your eyes after the first bite, savoring that moment of pure bliss. Trust me, once you nail this, you’ll want to share it, gift it, and maybe even keep a stash just for yourself.
What Ingredients You Will Need
This recipe uses straightforward, wholesome ingredients to create macarons with bold flavor and that signature texture without any fuss. Most are pantry staples, and if you’re missing something, I’ve got substitutions to help out.
- For the Macaron Shells:
- Almond flour, finely ground (110g / 1 cup) – Look for a brand like Bob’s Red Mill for best texture
- Powdered sugar (200g / 1 2/3 cups) – Sifted to avoid lumps
- Egg whites, room temperature (90g / about 3 large) – Aged overnight in the fridge for better volume
- Granulated sugar (50g / 1/4 cup) – For stabilizing the meringue
- Salt, a pinch – To balance sweetness
- Vanilla extract (1 tsp) – Adds subtle warmth
- Optional: A few drops of gel food coloring if you want colored shells
- For the Chocolate Dip:
- High-quality dark chocolate (150g / 5 oz) – I prefer Valrhona or Ghirardelli for smooth melting
- Unsalted butter (15g / 1 tbsp) – Adds sheen and richness
If you want to make these gluten-free, good news—they already are! For a dairy-free chocolate dip, swap the butter with coconut oil. Also, you can substitute almond flour with finely ground pistachios for a nutty twist, but keep the quantity the same.
Equipment Needed
- Stand mixer or hand mixer – essential for whipping the egg whites to stiff peaks
- Sifter or fine mesh sieve – to sift almond flour and powdered sugar for smooth batter
- Parchment paper or silicone baking mats – prevents sticking and helps with even baking
- Mixing bowls – I like glass or stainless steel to avoid any fat contamination that can deflate meringue
- Rubber spatula – flexible, perfect for folding the batter gently
- Piping bag with a round tip (about 1/2 inch / 1.3 cm) – for uniform shells
- Kitchen scale – highly recommended for precise measurements (baking is a science, you know!)
- Double boiler or microwave-safe bowl – for melting chocolate smoothly
If you don’t have a stand mixer, a hand mixer works fine, just be patient when whipping egg whites. For piping, you can also use a sturdy plastic bag with the corner snipped off. And when it comes to parchment vs. silicone mats, I personally prefer silicone because it’s reusable and helps with even heat distribution.
Preparation Method

- Prepare your workspace: Line two baking sheets with parchment paper or silicone mats. Have your ingredients measured and ready.
- Sift dry ingredients: Sift almond flour and powdered sugar together into a large bowl. This step is crucial to avoid lumpy shells and ensure smooth batter texture.
- Whip the egg whites: In a clean, grease-free bowl, beat the egg whites on medium speed until foamy. Gradually add granulated sugar and salt, then increase speed to high. Beat until stiff, glossy peaks form (about 5-7 minutes). This might take longer if your eggs are cold or your bowl isn’t perfectly clean.
- Fold in dry ingredients: Add vanilla extract to the meringue. Then gently fold the almond flour mixture into the egg whites using a rubber spatula. The goal is a thick, flowing batter—think lava slowly pouring off a spoon. Avoid overmixing; the batter should fall in ribbons, but not be too runny.
- Pipe the shells: Transfer batter to piping bag. Pipe uniform 1.5-inch (4 cm) rounds onto your prepared sheets, spacing about 1 inch (2.5 cm) apart. Tap the trays firmly on the counter twice to release air bubbles. If bubbles remain, pop them gently with a toothpick.
- Rest before baking: Let the piped shells rest at room temperature for 30-45 minutes until a skin forms. You should be able to touch lightly without batter sticking to your finger. This is key for that shiny, crack-free top and developing feet.
- Bake: Preheat oven to 300°F (150°C). Bake one tray at a time for 15-17 minutes, rotating halfway through. The shells are done when they lift easily off the parchment and have formed feet.
- Cool: Let shells cool completely on the tray before removing. Handle gently to avoid cracks.
- Melt chocolate dip: Melt chocolate and butter in a double boiler or microwave in 30-second bursts, stirring in between. The mixture should be smooth and glossy.
- Dip and set: Dip the bottoms of half the shells into the chocolate, place on parchment, and allow to set at room temperature or in the fridge for faster firming.
- Assemble macarons: Pair dipped shells with undipped ones, sandwiching with your favorite filling—ganache, buttercream, or jam.
Pro tip: If your oven has hot spots, use an oven thermometer and rotate trays to avoid uneven baking. Also, don’t skip the resting step—it’s the secret behind those perfect feet!
Cooking Tips & Techniques
Macarons can be tricky, but with some insider tips, you’ll master them in no time. First, make sure your egg whites are at room temperature and free from any yolk traces—fat and protein don’t get along in this case.
When folding batter, patience is your friend. Too little folding means your shells will be lumpy; too much and the batter becomes runny, leading to flat, cracked shells. Look for that ‘lava’ stage—slowly flowing but holding some shape.
Don’t rush the resting time. The skin that forms on top is essential for that smooth surface and those signature feet. If you skip it, your macarons may crack or stick.
Chocolate dipping can be intimidating, but warming it gently prevents seizing or burning. Adding a touch of butter helps keep the dip shiny and gives a lovely snap once set. Avoid dipping warm shells, or the chocolate might melt unevenly.
One mistake I made early on was overcrowding the baking tray. Give your macarons breathing room to expand without merging. Also, if your shells stick, they probably need a minute or two more baking or a longer rest before baking.
Multitasking tip: While your shells rest, melt the chocolate dip and prepare fillings. It keeps the process smooth and efficient.
Variations & Adaptations
- Flavored Shells: Add finely ground freeze-dried raspberry powder or cocoa powder (10g) to the dry ingredients for a flavor twist.
- Filling Variations: Swap traditional buttercream with lemon curd, salted caramel, or a light cream cheese frosting for different flavor profiles.
- Dietary Adaptations: Use coconut sugar instead of granulated sugar for a lower glycemic index. For dairy-free, replace butter in the chocolate dip with coconut oil.
- Colorful Macarons: Add gel food coloring to the meringue for festive occasions—just a few drops to avoid altering batter consistency.
- Alternative Chocolate: Use white chocolate for dipping and sprinkle with crushed pistachios or edible glitter for a fancy touch.
Once, I tried swapping half the almond flour for finely ground hazelnuts—it gave a lovely nutty depth but required a slightly longer resting time to avoid cracks. So, don’t hesitate to experiment, but keep notes!
Serving & Storage Suggestions
Serve your perfect chocolate-dipped macarons at room temperature to enjoy their full flavor and texture. Arrange them elegantly on a tiered stand or a simple pretty plate for the wow factor. Pair with a cup of Earl Grey tea or a glass of champagne for a truly classy experience.
Store macarons in an airtight container in the refrigerator for up to 3 days. They actually taste better after a day or two as the flavors meld. Just bring them to room temperature before serving.
For longer storage, freeze them (assembled or shells only) for up to a month. Thaw in the fridge overnight, then let sit at room temperature for 20 minutes to soften slightly.
When reheating, avoid microwaves as they can make macarons soggy. A gentle 5-minute warm-up in a low oven (around 250°F/120°C) does the trick without drying them out.
Nutritional Information & Benefits
This recipe makes about 20 macarons (40 shells), with each chocolate-dipped macaron containing roughly 90-110 calories depending on filling choice. They are naturally gluten-free, which is great for those avoiding wheat.
Almond flour is rich in healthy fats, protein, and vitamin E, supporting heart health and skin vitality. Dark chocolate provides antioxidants and can boost mood thanks to its flavonoids.
While macarons are a sweet treat, this recipe keeps added sugars moderate, and the portion size is small—perfect for mindful indulgence.
For those watching allergens, note that this recipe does contain nuts and eggs. For dairy-free adaptation, choose a suitable chocolate dip alternative as mentioned earlier.
Conclusion
So there you have it—perfect chocolate-dipped macarons that look and taste like they came from a fancy patisserie, but are actually made in your own kitchen. Whether you’re a seasoned baker or someone who’s been wary of macarons, this recipe makes the process approachable and fun.
Feel free to tweak the flavors and colors to match your mood or occasion. I love how these treat moments bring a bit of elegance and joy without stress. Honestly, it’s the kind of recipe that makes you smile while baking and keeps you coming back for more.
If you try it out, drop a comment below—share your flavor twists, funny fails, or that proud moment when your macarons turned out just right. And hey, don’t forget to share this with friends who deserve a little homemade luxury!
Happy baking, and may your kitchen always smell like a chocolaty dream.
FAQs
What causes macarons to crack during baking?
Cracking usually happens if the shells haven’t rested long enough before baking or if the oven temperature is too high. Make sure to let the shells form a dry skin and bake at a steady 300°F (150°C).
Can I make macarons without a stand mixer?
Yes! A hand mixer works fine, but it might take a bit longer to whip the egg whites to stiff peaks. Just be patient and ensure your bowl is clean and grease-free.
How do I know when macarons are done baking?
They should have formed feet and lift off the parchment paper easily. The tops should be firm and dry, not sticky or soft.
Can I use milk chocolate instead of dark chocolate for dipping?
Absolutely! Milk chocolate works well, though it’s sweeter and softer. Just keep an eye when melting to prevent burning.
How long can I store assembled macarons?
Store assembled macarons in an airtight container in the refrigerator for up to 3 days. They taste best after resting a day to let flavors meld. Bring to room temperature before serving for the best texture.
Pin This Recipe!

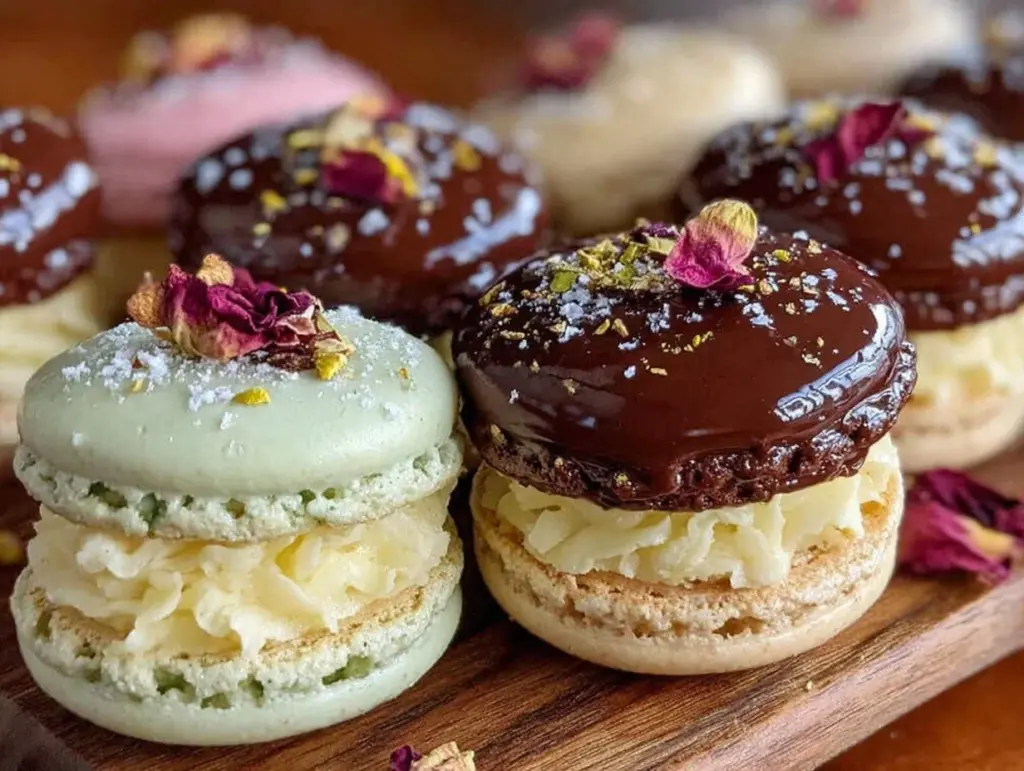
Perfect Chocolate-Dipped Macarons

An approachable yet elegant recipe for homemade macarons with a crisp exterior, chewy center, and a smooth chocolate dip that adds a delightful snap and rich flavor.
- Prep Time: 45 minutes
- Cook Time: 15-17 minutes per tray
- Total Time: 90 minutes
- Yield: 20 macarons (40 shells) 1x
- Category: Dessert
- Cuisine: French
Ingredients
- 110g (1 cup) almond flour, finely ground
- 200g (1 2/3 cups) powdered sugar, sifted
- 90g (about 3 large) egg whites, room temperature, aged overnight
- 50g (1/4 cup) granulated sugar
- Pinch of salt
- 1 tsp vanilla extract
- Optional: a few drops of gel food coloring
- 150g (5 oz) high-quality dark chocolate
- 15g (1 tbsp) unsalted butter
Instructions
- Line two baking sheets with parchment paper or silicone mats. Measure and prepare all ingredients.
- Sift almond flour and powdered sugar together into a large bowl to avoid lumps and ensure smooth batter.
- In a clean, grease-free bowl, beat egg whites on medium speed until foamy. Gradually add granulated sugar and salt, then increase speed to high and beat until stiff, glossy peaks form (about 5-7 minutes).
- Add vanilla extract to the meringue. Gently fold the almond flour mixture into the egg whites using a rubber spatula until the batter is thick and flowing like lava, avoiding overmixing.
- Transfer batter to a piping bag fitted with a 1/2 inch round tip. Pipe uniform 1.5-inch rounds onto prepared sheets, spacing about 1 inch apart. Tap trays firmly twice to release air bubbles; pop remaining bubbles with a toothpick.
- Let piped shells rest at room temperature for 30-45 minutes until a skin forms and they are not sticky to touch.
- Preheat oven to 300°F (150°C). Bake one tray at a time for 15-17 minutes, rotating halfway through. Shells are done when they lift easily and have formed feet.
- Cool shells completely on the tray before removing to avoid cracks.
- Melt chocolate and butter in a double boiler or microwave in 30-second bursts, stirring until smooth and glossy.
- Dip bottoms of half the shells into the chocolate, place on parchment, and allow to set at room temperature or refrigerate for faster firming.
- Assemble macarons by pairing dipped shells with undipped ones, sandwiching with your favorite filling such as ganache, buttercream, or jam.
Notes
Ensure egg whites are at room temperature and free from yolk for best volume. Do not skip resting the piped shells to form a skin for perfect feet. Use an oven thermometer to avoid hot spots and rotate trays during baking. For dairy-free chocolate dip, substitute butter with coconut oil. Avoid overcrowding baking trays to prevent merging shells.
Nutrition
- Serving Size: 1 macaron
- Calories: 90110
- Sugar: 8
- Sodium: 20
- Fat: 6
- Saturated Fat: 2.5
- Carbohydrates: 10
- Fiber: 1
- Protein: 2
Keywords: macarons, chocolate-dipped macarons, homemade macarons, elegant treats, almond flour, French dessert, baking, chocolate dip


