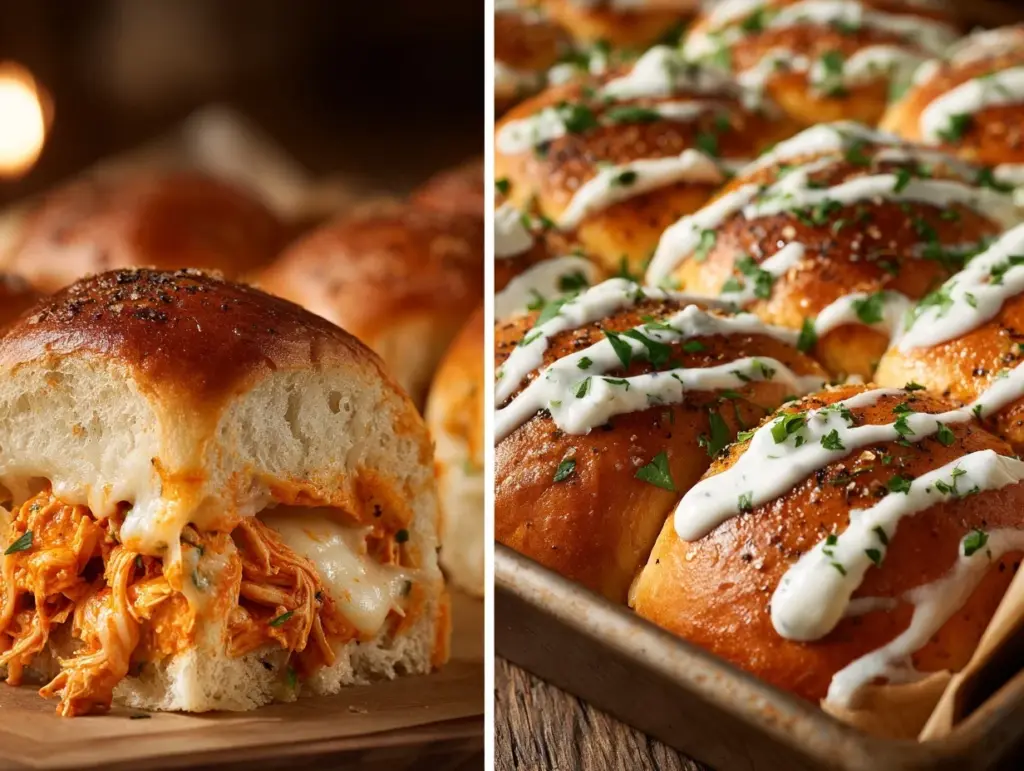
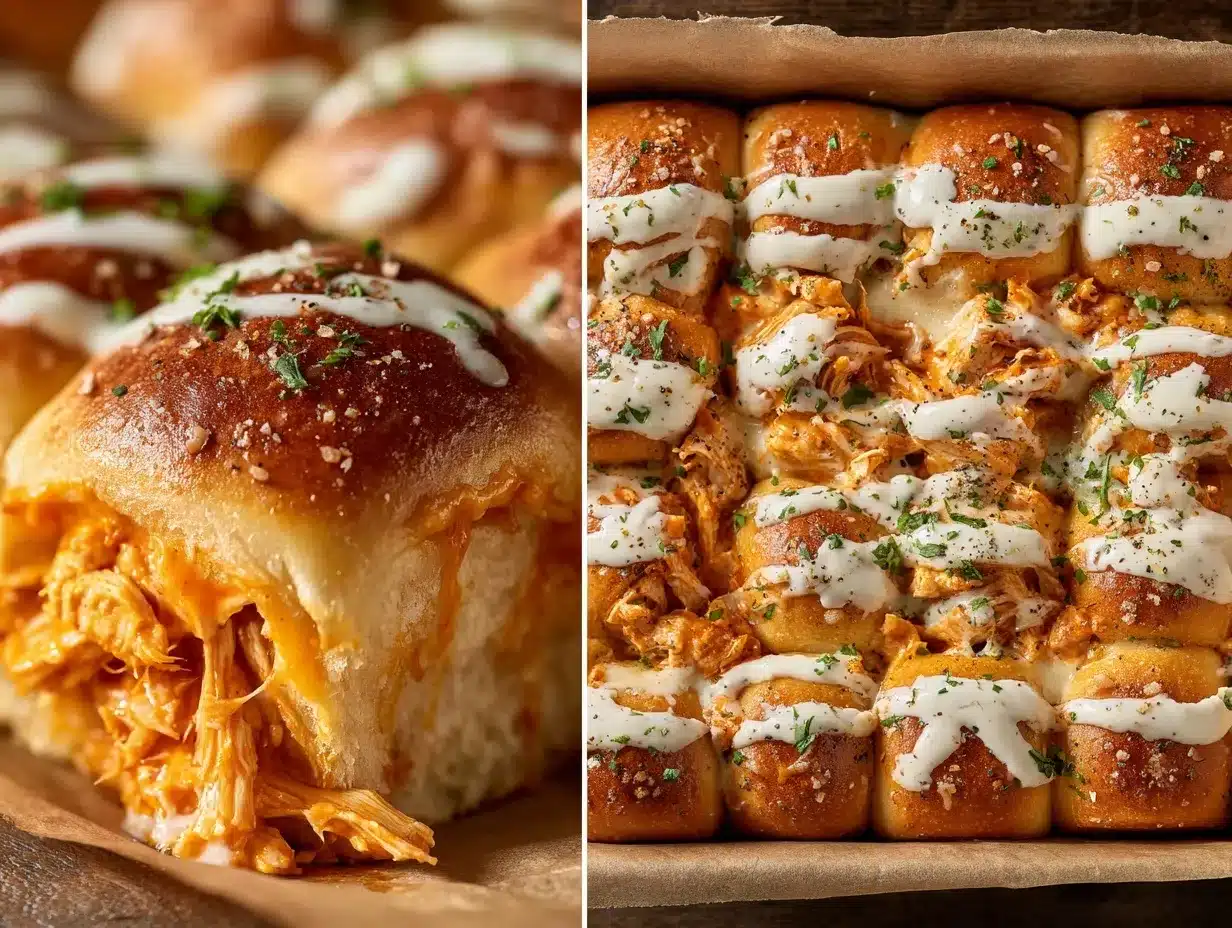
The sizzle of tangy buffalo sauce, the aroma of buttery slider rolls, and that unmistakable creamy ranch drizzle—Buffalo Chicken Pull-Apart Sliders with Ranch Drizzle are the ultimate crowd-pleaser. Honestly, I can’t even count how many times I’ve made these for game days, busy weeknights, or impromptu get-togethers. The first bite is always magic: you get juicy chicken, zesty heat, gooey cheese, and a soft, golden bun all in one. If you’re looking for an easy, shareable snack that disappears before you can say “seconds,” this buffalo chicken pull-apart sliders recipe is about to become your new go-to.
I stumbled on this idea during a playoff football night when I had leftover rotisserie chicken and a half-empty bottle of buffalo sauce. You know those moments when you want something bold but don’t want to fuss with frying or a mountain of dishes? That’s how these sliders were born. Over the years, I’ve tweaked the filling, changed up the cheese, and—most importantly—perfected the ranch drizzle. It’s become a family staple, especially when my kids beg for “those spicy cheesy buns.”
What sets these apart is the pull-apart factor. There’s just something about everyone grabbing a gooey, saucy slider from the pan—it makes game day or movie night feel extra special. You don’t need fancy ingredients or chef skills, just a bit of mixing, layering, and baking. These buffalo chicken pull-apart sliders are perfect for busy families, picky eaters, or anyone who craves comfort food with a kick. Trust me, after testing this recipe at least a dozen times, it never fails to impress. Whether you’re a spice lover or just want an easy dinner, you can count on this recipe for big flavor and lots of smiles.
Why You’ll Love This Buffalo Chicken Pull-Apart Sliders Recipe
- Quick & Easy: You can whip up these sliders in under 30 minutes—no fancy prep required. Perfect for those hectic nights when you want something hearty, fast.
- Simple Ingredients: Most of the ingredients are probably already in your pantry or fridge. No need to run to a specialty store. Honestly, I’ve made these with whatever shredded chicken I had on hand—even leftovers work great!
- Perfect for Game Day & Parties: These buffalo chicken pull-apart sliders are my secret weapon for potlucks, tailgates, and family movie nights. They’re always the first thing to disappear from the table.
- Crowd-Pleaser: The combo of spicy buffalo chicken, melty cheese, and soft rolls is a hit with kids and adults alike. Even picky eaters come back for seconds (and thirds!).
- Unbelievably Delicious: Every bite is packed with creamy, spicy, cheesy goodness, and the ranch drizzle adds a cool, zesty finish. It’s comfort food at its best—messy fingers and happy faces guaranteed.
What makes my buffalo chicken pull-apart sliders recipe different? For starters, I blend the buffalo sauce right into the shredded chicken, ensuring every mouthful is evenly coated. I also layer in extra cheese (because, why not?), and brush the buns with a buttery garlic mixture before baking. The ranch drizzle isn’t just a garnish—it’s the creamy, tangy contrast that balances the spice. This isn’t just another slider recipe; it’s a tested, family-approved favorite that’s ridiculously crave-worthy.
Honestly, these sliders have turned even my anti-spicy-food friends into buffalo chicken fans. They’re comforting but bold, messy in the best way, and a little bit addictive. There’s nothing better than seeing everyone gather around the pan, grabbing a slider, and going back for “just one more.” If you want a recipe that’s as fun to eat as it is to make, you’ve found it.
What Ingredients You Will Need
This buffalo chicken pull-apart sliders recipe is all about bold flavor and easy prep, using ingredients that are simple to find and easy to swap. Here’s what you’ll need:
- Slider Buns or Rolls (12-pack, soft dinner rolls or Hawaiian rolls work best – their sweetness balances the spicy filling)
- Cooked Shredded Chicken (about 3 cups/400g – leftover rotisserie chicken is perfect, or you can quickly poach and shred chicken breasts or thighs)
- Buffalo Sauce (½ cup/120ml – I love Frank’s RedHot for its classic tang, but you can use your favorite brand or even homemade buffalo sauce for more control over the heat)
- Cream Cheese (4oz/115g, softened – this makes the filling extra creamy and helps the flavors meld together)
- Shredded Mozzarella Cheese (1 cup/100g – for stretch and meltiness; you can swap in Monterey Jack or cheddar if you like a sharper flavor)
- Shredded Cheddar Cheese (1 cup/100g – adds richness and tang; use sharp or mild based on your preference)
- Ranch Dressing (for drizzling – use bottled or homemade, and feel free to add a little extra for dipping!)
- Unsalted Butter (¼ cup/55g, melted – for brushing the tops of the buns and keeping them extra soft and flavorful)
- Garlic Powder (½ teaspoon – mixed with the butter for a subtle kick)
- Salt & Black Pepper (to taste)
- Chopped Green Onions or Chives (optional, for garnish and a fresh pop of color)
Ingredient Tips:
- Chicken: If you’re pressed for time, grab a rotisserie chicken from the store—just shred and go. For meal prep, I often poach chicken breasts and keep them ready to use.
- Buffalo Sauce: Adjust the amount based on your spice tolerance. Kids around? Start with less, then add more to taste. You can even mix in a bit of honey if you want to mellow the heat.
- Buns: Hawaiian rolls are my family’s favorite, but regular soft dinner rolls or even mini brioche buns work beautifully.
- Cheese: This recipe is forgiving—swap in whatever melty cheese you love. Pepper Jack adds a little extra zing, while provolone keeps things mild.
- Cream Cheese: This is the secret to that ultra-creamy filling. If you’re dairy-free, use a plant-based cream cheese alternative.
- Ranch: Homemade ranch is a treat, but store-bought is totally fine. If you’re not a ranch fan, blue cheese dressing is a classic alternative.
Substitutions: Use rotisserie turkey for a twist, gluten-free rolls for dietary needs, or dairy-free cheese to make it allergy-friendly. This recipe is flexible, so don’t stress if you need to improvise!
Equipment Needed
- 9×13-inch Baking Dish or Casserole Pan: This size fits a 12-pack of slider buns perfectly. If you don’t have one, use any oven-safe dish that fits the rolls snugly together.
- Mixing Bowls: You’ll want at least one large bowl for tossing the chicken and sauce, and a smaller bowl for mixing the garlic butter.
- Measuring Cups & Spoons: Essential for getting the buffalo sauce and cheese proportions just right.
- Small Saucepan (optional): For melting the butter, but you can use the microwave if that’s easier.
- Serrated Knife: For slicing the slider rolls in half horizontally without squishing them. A bread knife works best—trust me, I’ve tried with a regular knife and it’s a mess.
- Offset Spatula or Spoon: For spreading the chicken filling and cheese evenly over the buns.
- Aluminum Foil: This helps prevent the tops from over-browning while the cheese inside melts perfectly.
- Pastry Brush: For brushing the garlic butter on the buns. No brush? Use the back of a spoon or even your clean fingers in a pinch.
Don’t worry about fancy gear. I’ve made these with mismatched pans and a butter knife in a friend’s kitchen, and they still turned out awesome. The main thing is to pack the buns close together so they bake up soft and gooey.
Pro Tip: To keep your nonstick pans in top shape, avoid using metal utensils when slicing or serving. And if you’re on a tight budget, dollar store pans do the job just fine—especially if you’re bringing sliders to a party and don’t want to worry about getting your dish back.
How to Make Buffalo Chicken Pull-Apart Sliders
-
Preheat & Prep:
Preheat your oven to 350°F (175°C). Lightly grease a 9×13-inch baking dish or line it with parchment paper for easy cleanup.
Tip: Don’t skip greasing—those cheesy edges can get sticky! -
Prepare the Chicken Filling:
In a large bowl, combine 3 cups (400g) cooked shredded chicken, ½ cup (120ml) buffalo sauce, and 4oz (115g) softened cream cheese. Mix until the chicken is evenly coated and the cream cheese is fully blended in.
Sensory cue: The filling should smell spicy and tangy, and look creamy with no dry spots.
Troubleshooting: If the cream cheese is too cold and clumpy, microwave the bowl for 10 seconds and stir again. -
Slice the Slider Buns:
With a serrated knife, carefully slice the entire pack of slider buns in half horizontally (like a big sandwich), keeping the buns connected. Place the bottom half in your prepared baking dish.
Warning: Go slow to avoid tearing the rolls. -
Layer the Ingredients:
Spoon the buffalo chicken mixture evenly over the bottom half of the buns. Sprinkle 1 cup (100g) shredded mozzarella and 1 cup (100g) shredded cheddar over the chicken layer.
Tip: Spread to the edges for cheesy goodness in every bite. -
Add the Top Buns:
Gently place the top half of the slider buns over the filling, lining them up with the bottoms. -
Brush with Garlic Butter:
In a small bowl or saucepan, melt ¼ cup (55g) unsalted butter. Stir in ½ teaspoon garlic powder and a pinch of salt. Brush the tops of the buns generously with the butter mixture.
Tip: Be generous—the butter soaks in and adds flavor and softness. -
Bake Covered:
Cover the dish loosely with aluminum foil (don’t press it down or the cheese will stick). Bake for 15 minutes.
If you like extra soft buns, keep covered the whole time. For golden tops, read the next step. -
Bake Uncovered:
Remove the foil and bake for another 7-10 minutes, or until the tops are golden brown and the cheese is bubbling.
Watch closely—cheese burns fast at the end! -
Drizzle and Garnish:
Remove from the oven and let cool for 5 minutes. Drizzle ranch dressing generously over the top, then sprinkle with chopped green onions or chives if using.
Sensory cue: The sliders should smell buttery, tangy, and a little garlicky—try not to eat them all before serving! -
Serve & Enjoy:
Use a spatula or knife to pull apart individual sliders. Serve warm with extra ranch or buffalo sauce on the side.
Personal tip: If you’re serving a crowd, double the recipe—these go fast!
Cooking Tips & Techniques
- Even Shredding: Use two forks, or a stand mixer with the paddle attachment, to shred the chicken quickly. Consistent pieces soak up the buffalo sauce evenly—no dry bites!
- Room Temperature Ingredients: Let the cream cheese and butter sit out for 20-30 minutes before mixing. Cold cream cheese doesn’t blend well (I’ve learned this the hard way—lumpy filling is no fun).
- Don’t Overload the Filling: Spread the chicken mixture in an even layer—not too thick, or the buns might get soggy. If you have extra filling, save it for wraps or salads!
- Timing is Everything: Cover the sliders for the first bake to keep them soft, then uncover to brown. I once left them uncovered the whole time—crispy tops, but the cheese dried out.
- Test for Doneness: Peek under the top buns to make sure the cheese is fully melted and everything is hot. If not, bake for a few more minutes.
- Multitasking: While the sliders bake, prep your ranch drizzle and any sides. If you want to serve these with celery sticks or carrot sticks, now’s the time to chop.
- Consistency: Always use the same brand of buffalo sauce if you can—the heat and saltiness can vary a lot. I stick with Frank’s for predictability.
Biggest lesson learned? Don’t skip the garlic butter. It’s the difference between “good” and “can I have the recipe?” Also, let the sliders sit for a few minutes before pulling apart—they hold together better and you won’t burn your fingers!
Variations & Adaptations
- Low-Carb or Gluten-Free: Use keto slider buns or your favorite gluten-free rolls. I’ve tried both, and the flavor is still awesome. Just watch the bake time—some gluten-free breads brown faster.
- Milder Version for Kids: Cut the buffalo sauce in half and add a tablespoon of honey or extra ranch to the filling. My youngest isn’t big on spice, and this version gets two thumbs up from her.
- Blue Cheese Twist: Swap ranch for blue cheese dressing and sprinkle crumbled blue cheese between the chicken and cheese layers. For die-hard buffalo fans (like my husband), this is the ultimate slider.
- Vegetarian Option: Substitute shredded jackfruit or cooked, crumbled cauliflower for the chicken. Use the same buffalo sauce and cheese for a plant-based treat.
- Different Proteins: Try pulled pork or shredded turkey for a fun change. I’ve made these with leftover Thanksgiving turkey, and they vanished just as quickly.
- Grilled Sliders: If you’re hosting a summer BBQ, assemble the sliders, wrap in foil, and heat over indirect grill heat for 10-12 minutes. The smoky flavor is next-level!
Honestly, one of my favorite spins is using leftover BBQ chicken and adding a drizzle of spicy ranch—just proves this recipe is endlessly adaptable to whatever you’ve got on hand.
Serving & Storage Suggestions
Serve these buffalo chicken pull-apart sliders hot, right out of the oven. They’re best when the cheese is melty and the buns are warm and buttery. Arrange them on a platter or serve straight from the pan for that family-style, dig-in vibe.
- Pairings: They’re fantastic with crunchy celery and carrot sticks, a crisp green salad, or kettle chips. For drinks, try cold lemonade, iced tea, or even a light beer if you’re feeling festive.
- Storage: If you have leftovers (it’s rare!), let them cool completely. Store in an airtight container in the fridge for up to 3 days.
- Reheating: Warm sliders in a 300°F (150°C) oven, covered with foil, for 10-12 minutes. Or microwave individual sliders for 30-45 seconds. The buns will soften up and the cheese will melt again.
- Freezing: You can freeze baked sliders, tightly wrapped, for up to 1 month. Thaw overnight in the fridge and reheat as above.
- Flavor Development: The flavors get even richer after a day or two in the fridge. Honestly, cold sliders straight from the fridge make a sneaky midnight snack… not that I’m admitting anything!
Nutritional Information & Benefits
Each buffalo chicken pull-apart slider packs about 220 calories, 10g protein, 13g fat, and 15g carbs (values will vary based on bun and cheese choices). The recipe is a good source of protein thanks to the chicken and cheese, and you can tweak the fat content by choosing reduced-fat cheese or skipping the butter drizzle (but, you know, it’s worth it for flavor!).
Health Benefits: Chicken is lean and rich in protein, which helps keep you full. Using whole wheat or gluten-free buns adds fiber. Buffalo sauce has minimal sugar, and ranch can be lightened up by using Greek yogurt-based versions. Watch out for dairy and gluten if you have allergies—just swap in safe alternatives and you’re set.
As a home cook who loves comfort food but also watches nutrition, I find these sliders satisfy both cravings and hunger. If you’re tracking macros, adjust the cheese or use low-calorie ranch to fit your goals.
Conclusion
If you want a snack that’s bold, cheesy, and dangerously addictive, these buffalo chicken pull-apart sliders with ranch drizzle are where it’s at. They’re easy to make, endlessly customizable, and guaranteed to bring people together—whether it’s for game day, a family dinner, or a casual party. Honestly, I make these whenever I want something that feels special but doesn’t keep me in the kitchen all day.
Don’t be afraid to play with the flavors or adapt the recipe to your crew. The beauty of sliders is in the sharing—and the mess! I hope you love this recipe as much as my family and friends do. Drop a comment below if you try it, share your favorite variations, or tag me on Pinterest if you snap a pic. Happy snacking and here’s to many cheesy, spicy, joy-filled bites!
Frequently Asked Questions
How spicy are buffalo chicken pull-apart sliders?
They’re moderately spicy, but you control the heat by choosing your buffalo sauce and amount. Use a mild sauce for kids or spice-shy guests, or add hot sauce for an extra kick!
Can I prepare buffalo chicken sliders ahead of time?
Absolutely! Assemble the sliders, cover, and refrigerate for up to 24 hours. Bake just before serving for best results. Add a few extra minutes to the baking time if baking from cold.
What’s the best way to shred chicken quickly?
Use two forks or a hand mixer on low speed for fast, evenly shredded chicken. Rotisserie chicken is a great time saver here, too.
Can I freeze buffalo chicken pull-apart sliders?
Yes! Wrap baked sliders tightly and freeze for up to 1 month. Thaw in the fridge overnight and reheat in the oven until warmed through.
What other sauces can I use instead of ranch?
Blue cheese dressing is a classic, but you can also try creamy Caesar, garlic aioli, or your favorite yogurt-based dip. The sliders are super flexible!
Pin This Recipe!
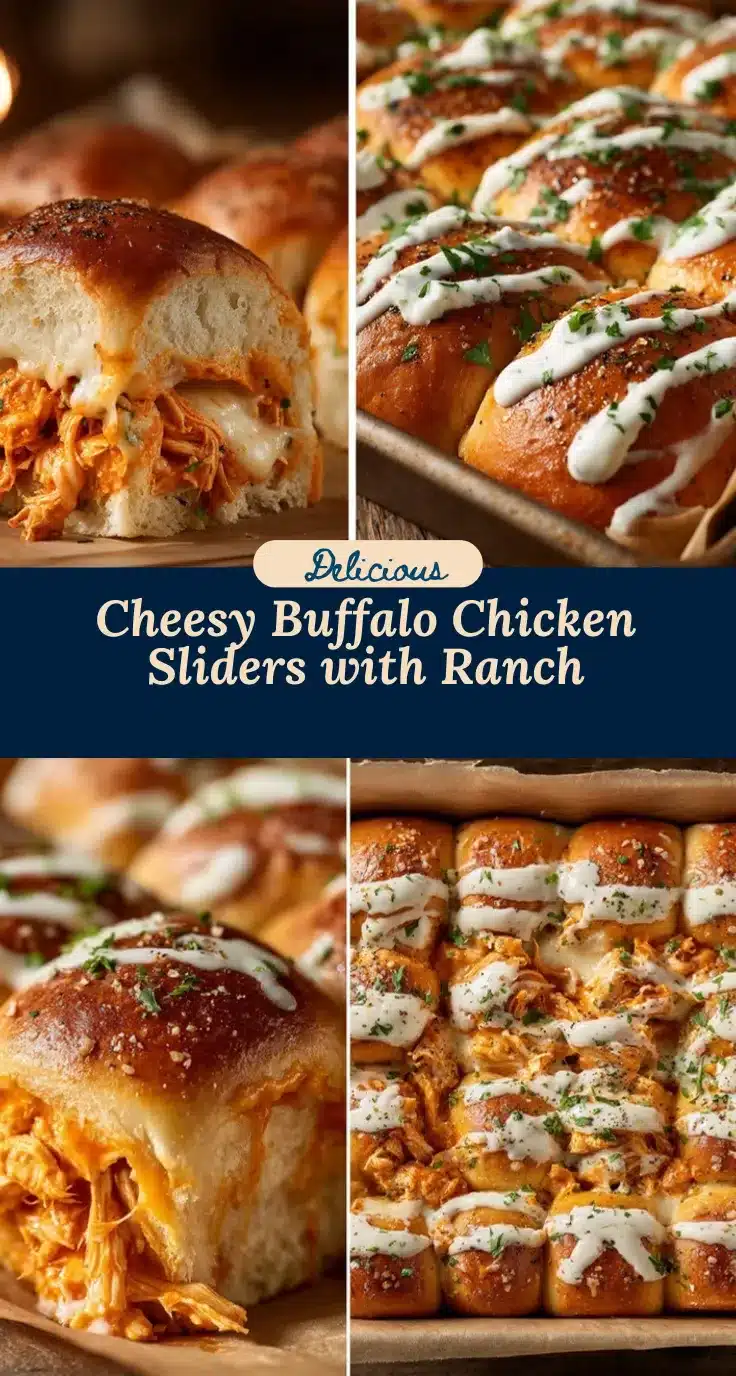
Buffalo Chicken Pull-Apart Sliders with Ranch Drizzle

These Buffalo Chicken Pull-Apart Sliders are the ultimate game day snack, featuring juicy shredded chicken tossed in tangy buffalo sauce, layered with gooey cheese, and finished with a creamy ranch drizzle. Perfect for parties, family dinners, or any time you need a bold, shareable comfort food.
- Prep Time: 10 minutes
- Cook Time: 25 minutes
- Total Time: 35 minutes
- Yield: 12 sliders 1x
- Category: Appetizer
- Cuisine: American
Ingredients
- 12-pack slider buns or rolls (soft dinner rolls or Hawaiian rolls preferred)
- 3 cups cooked shredded chicken (about 400g, rotisserie or poached)
- 1/2 cup buffalo sauce (120ml, such as Frank’s RedHot)
- 4 oz cream cheese, softened (115g)
- 1 cup shredded mozzarella cheese (100g)
- 1 cup shredded cheddar cheese (100g)
- Ranch dressing, for drizzling and serving
- 1/4 cup unsalted butter, melted (55g)
- 1/2 teaspoon garlic powder
- Salt and black pepper, to taste
- Chopped green onions or chives (optional, for garnish)
Instructions
- Preheat your oven to 350°F (175°C). Lightly grease a 9×13-inch baking dish or line with parchment paper.
- In a large bowl, combine shredded chicken, buffalo sauce, and softened cream cheese. Mix until evenly coated and creamy.
- With a serrated knife, slice the entire pack of slider buns in half horizontally, keeping the buns connected. Place the bottom half in the prepared baking dish.
- Spoon the buffalo chicken mixture evenly over the bottom buns. Sprinkle mozzarella and cheddar cheese evenly over the chicken.
- Place the top half of the slider buns over the filling, aligning with the bottoms.
- In a small bowl, melt the butter and stir in garlic powder and a pinch of salt. Brush the tops of the buns generously with the garlic butter.
- Cover the dish loosely with aluminum foil and bake for 15 minutes.
- Remove the foil and bake for an additional 7-10 minutes, until the tops are golden brown and the cheese is bubbling.
- Remove from the oven and let cool for 5 minutes. Drizzle ranch dressing over the top and sprinkle with green onions or chives, if using.
- Pull apart the sliders and serve warm with extra ranch or buffalo sauce on the side.
Notes
For a milder version, reduce the buffalo sauce and add a tablespoon of honey or extra ranch to the filling. Use gluten-free or dairy-free alternatives as needed. Let the sliders rest for a few minutes before serving for easier pulling apart. Leftovers can be stored in the fridge for up to 3 days or frozen for up to 1 month.
Nutrition
- Serving Size: 1 slider
- Calories: 220
- Sugar: 3
- Sodium: 480
- Fat: 13
- Saturated Fat: 7
- Carbohydrates: 15
- Fiber: 1
- Protein: 10
Keywords: buffalo chicken sliders, pull-apart sliders, game day snacks, ranch drizzle, easy appetizer, party food, chicken sliders, cheesy sliders, comfort food