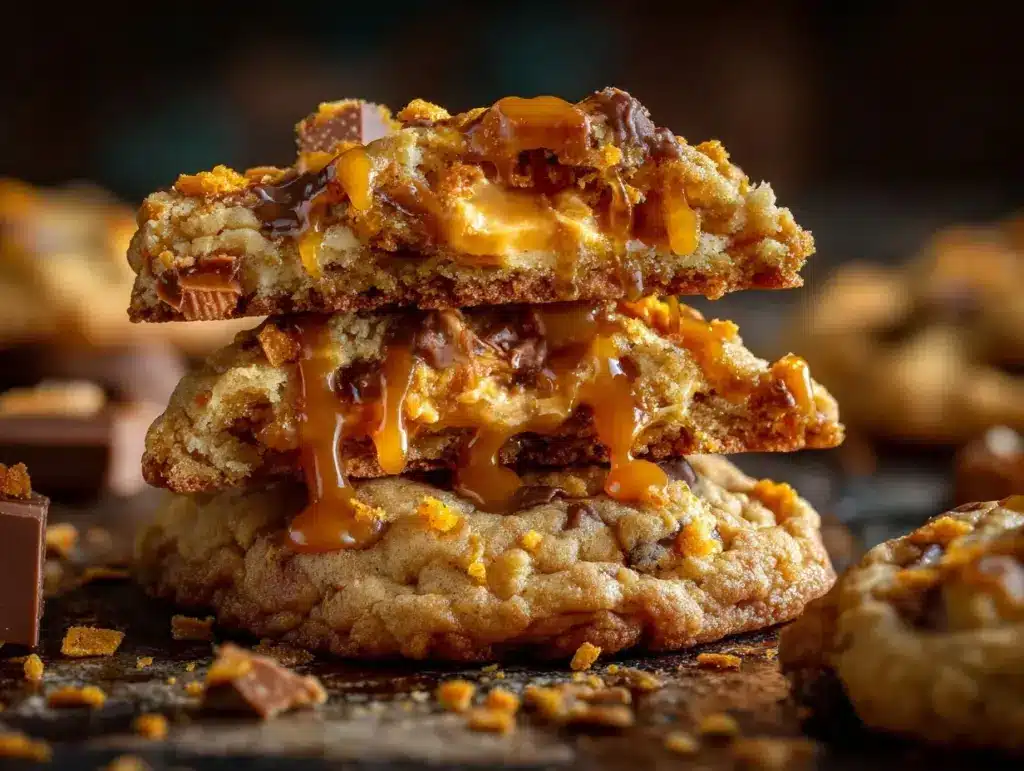
The first time I pulled a tray of Butterfinger Caramel Crunch Cookies from my oven, the kitchen smelled like a candy shop collided with a bakery—warm caramel, melted chocolate, and that unmistakable roasted peanut aroma. You know the kind of cookie that makes you do a little happy dance just seeing the golden edges and gooey centers? That’s these cookies. I stumbled onto this recipe after a Halloween candy haul left me with too many Butterfingers (if such a thing exists), and honestly, I’m glad I did. There’s just something magical about the way creamy caramel bits and crispy Butterfinger chunks mingle in every bite.
Butterfinger Caramel Crunch Cookies are my go-to treat when I need something spectacular but still easy enough for a weeknight bake. They’re big, bakery-style, and loaded with surprises—think gooey caramel ribbons, crunchy candy pieces, and a thick, chewy center that stays soft for days (if they last that long). If you’ve ever found yourself craving a cookie that’s a little bit over-the-top, you’re in for a treat. These are perfect for parties, bake sales, or just a cozy night in with a glass of milk and your favorite show.
I’ve tested this recipe more times than I can count—tweaking the ratio of caramel to Butterfinger, adjusting the bake time for that perfect gooeyness, and even freezing them to see how they hold up (spoiler: they’re amazing frozen). So whether you’re a seasoned baker or just looking for a killer dessert that’ll impress your friends, this Butterfinger Caramel Crunch Cookies recipe has got you covered. Trust me, you won’t want to stop at just one.
Why You’ll Love This Butterfinger Caramel Crunch Cookies Recipe
- Quick & Easy: These cookies come together in under 30 minutes, start to finish. No chilling, no fussy steps—just mix, scoop, and bake.
- Simple Ingredients: Odds are, you already have most of what you need in your pantry (except maybe the Butterfinger bars, but any excuse for a candy run, right?).
- Perfect for Any Occasion: Whether you’re baking for a birthday party, holiday cookie swap, or late-night snack attack, these cookies fit the bill.
- Crowd-Pleaser: Kids, adults, picky eaters—everyone raves about the combination of gooey caramel and crunchy Butterfinger bits.
- Unbelievably Delicious: The texture is out-of-this-world—crisp edges, soft and chewy middle, with little pockets of caramel and peanut butter candy crunch in every bite.
What really sets this Butterfinger Caramel Crunch Cookies recipe apart is the way the flavors and textures play together. Blending the Butterfinger bars in gives you tiny shards of peanut buttery toffee throughout, while hand-chopping a few bars means you get big, satisfying chunks that almost melt inside the cookie. I also use caramel baking bits (not just soft caramels chopped up), so you get that gooey, stretchy caramel center without any weird, sticky mess.
And let’s face it, there’s something about a cookie that’s a little over-the-top that just makes people happy. I’ve had friends tell me these are the best cookies they’ve ever eaten—no joke. Honestly, I think it’s because they’re more than just sweet; they’re nostalgic, comforting, and just a little bit wild. If you love a cookie that’s loaded, gooey, and full of surprises, you’ll be hooked on these. They’re the kind you’ll want to bake for special occasions—or when you just need a pick-me-up on a random Tuesday.
What Ingredients You Will Need
This recipe uses simple, everyday ingredients to create a cookie that’s anything but ordinary. Each element brings its own magic—richness from the butter, chew from the brown sugar, crunch from the Butterfinger, and ooey-gooey pockets of caramel. Most of these are probably already in your kitchen, but I’ll give you some tips on picking the best versions for the ultimate Butterfinger Caramel Crunch Cookies.
- For the Cookie Dough:
- All-purpose flour (sifted for best texture)
- Baking soda (for a bit of lift and soft centers)
- Kosher salt (balances out the sweetness)
- Unsalted butter, softened (I like using Kerrygold for that extra creamy flavor, but store brands work, too)
- Light brown sugar, packed (adds moisture and chewiness)
- Granulated sugar (for just the right amount of crisp edges)
- Large eggs, room temperature (helps the dough bind and rise)
- Pure vanilla extract (I’m partial to Nielsen-Massey, but any pure vanilla is fine)
- For the Mix-Ins:
- Butterfinger bars, chopped (about 2 cups or 8 fun-size bars; use more for extra crunch or a mix of blended and chunky pieces)
- Caramel baking bits (1 cup; Kraft makes these, and they hold up well in the oven)
- Semi-sweet chocolate chips (optional, but I love the extra chocolatey touch)
Ingredient Tips: For the Butterfinger, you can use regular or fun-size bars—just chop some finely and leave a few bigger pieces for those epic bites. If you can’t find caramel baking bits, you can cut soft caramel candies into small cubes, but they can get a little oozy (in a good way). Want to make these gluten-free? Use a 1:1 gluten-free flour blend. For a dairy-free version, swap in vegan butter and check the label on your caramel bits.
Honestly, the only “fancy” item here is the Butterfinger, and even that’s just a trip down the candy aisle. Everything else is pantry-friendly, and you can swap in what you have—milk chocolate chips, dark chocolate chunks, or even a handful of roasted salted peanuts for extra crunch. That’s the beauty of this recipe: it’s flexible, forgiving, and always delicious.
Equipment Needed
- Mixing bowls (one large for the dough, one medium for dry ingredients)
- Electric hand mixer or stand mixer (either works; I use my hand mixer for easy cleanup, but stand mixers make quick work of the butter and sugar)
- Rubber spatula (great for folding in those chunky Butterfinger pieces so they don’t break up too much)
- Measuring cups and spoons (accuracy matters with cookies—especially the flour!)
- Cookie scoop (I use a #24 scoop for big, bakery-style cookies, but two spoons work in a pinch)
- Baking sheets (heavy-duty sheets help prevent over-browning)
- Parchment paper or silicone baking mats (for easy cleanup and perfect bottoms)
- Wire cooling rack (so cookies set up without getting soggy underneath)
If you don’t have a cookie scoop, just use two tablespoons to drop dough onto the sheet. No parchment? Grease your pans lightly, but watch for sticking caramel. My old hand mixer has seen better days, but it still creams butter like a champ—don’t worry if your tools are well-loved. A heavy-duty baking sheet is worth the investment, though; thin pans can burn your cookies on the bottom before the middle’s done. For specialty equipment, just give your silicone mat a quick wash after baking—caramel can get sticky, but it comes right off with hot water.
Preparation Method
- Prep the oven and pans: Preheat your oven to 350°F (175°C). Line two baking sheets with parchment paper or silicone mats. This helps the cookies bake evenly and prevents that dreaded stuck-on caramel mess.
- Mix dry ingredients: In a medium bowl, whisk together 2 1/2 cups (315g) all-purpose flour, 1 teaspoon baking soda, and 1/2 teaspoon kosher salt. Set aside. (If your flour is lumpy, sift it first for the softest cookies.)
- Cream the butter and sugars: In a large mixing bowl, beat 1 cup (2 sticks/226g) unsalted butter, 1 cup (200g) packed light brown sugar, and 1/2 cup (100g) granulated sugar together on medium-high speed for 2-3 minutes, until light and fluffy. Scrape down the sides as needed; you want the mixture to look pale and creamy.
- Add eggs and vanilla: Beat in 2 large eggs, one at a time, mixing after each addition. Add 2 teaspoons vanilla extract and mix until combined. (If your eggs are cold, run them under warm water for a minute to prevent the butter from seizing.)
- Combine wet and dry: Add the dry ingredients to the wet ingredients in two parts, mixing on low speed until just combined. Don’t overmix—stop as soon as you see no more flour streaks. (Overmixing = tough cookies, and nobody wants that.)
- Fold in the good stuff: Gently fold in 2 cups (about 8 fun-size) chopped Butterfinger bars, 1 cup (170g) caramel baking bits, and 1/2 cup (85g) semi-sweet chocolate chips, if using. Save a handful of Butterfinger pieces for topping, if you want pretty cookies with candy bits peeking out.
- Scoop the dough: Using a large cookie scoop (about 3 tablespoons), portion dough onto prepared baking sheets, spacing cookies about 2 inches (5cm) apart. If you want extra gooey centers, make the scoops tall rather than wide. For bakery-style looks, press a few extra Butterfinger and caramel bits on top of each dough mound.
- Bake: Bake for 10-12 minutes, rotating trays halfway through, until edges are golden but centers look slightly underbaked. The cookies will set as they cool. If your oven runs hot, check at 9 minutes. (Don’t wait for the centers to look done or you’ll lose that gooey magic.)
- Cool: Let cookies cool on the baking sheet for 5 minutes—this helps the caramel firm up and keeps them from falling apart. Transfer to a wire rack to cool completely (or eat one warm if you can’t resist!).
- Storing: Once cooled, store cookies in an airtight container at room temperature for up to 4 days, or freeze for longer storage. If stacking, separate layers with wax paper to keep caramel from sticking.
Troubleshooting: If your cookies spread too much, chill the dough for 30 minutes before baking. If caramel oozes out, just nudge it back in with a spoon while the cookies are hot. For extra-thick cookies, try baking at 375°F (190°C) for 8-9 minutes instead. And if your cookies are too crisp, reduce bake time by a minute or two next round. The smell wafting from the oven is your best cue—when it smells like pure candy shop heaven, they’re close to done!
Cooking Tips & Techniques
- Creaming is key: Don’t rush the butter and sugar stage. When you beat until fluffy, you trap air for that thick, chewy texture. If you skimp, your cookies might be dense.
- Watch your oven: Every oven is a little quirky. I once burned a whole batch because my oven’s “350°F” was actually 375°F—grab an oven thermometer if you can.
- Mix-ins last: Add your Butterfinger and caramel bits right at the end. Overmixing breaks up the candy and can turn your dough orange (learned that the hard way). Just a gentle fold is enough.
- Batch baking: Bake one sheet at a time in the center of the oven for even heat. If you double up, rotate halfway and swap trays from top to bottom.
- Cookie size matters: Larger cookies stay gooier in the middle, while smaller ones bake up crispier. Adjust to your preference—but keep an eye on bake time!
- Don’t skip cooling: Letting cookies sit on the hot tray for a few minutes after baking helps set the caramel and keeps everything together. If you move them too soon, they can fall apart (but the gooey mess is still delicious, honestly).
- Rebake trick: If your cookies turn out too soft, pop them back in the oven for a minute or two. I’ve rescued more than one batch this way.
Most of these tips come from years of baking (and a few near-disasters). The best advice? Trust your senses—when your kitchen smells like caramel heaven and the edges look set, pull them out. Sometimes, imperfection is what makes a cookie unforgettable!
Variations & Adaptations
- Gluten-Free: Swap the all-purpose flour for a gluten-free 1:1 baking blend. I’ve tried Bob’s Red Mill with great results—no one could tell the difference!
- Nut-Free: Use Heath toffee bits instead of Butterfinger (they’re peanut-free, but double-check labels), and swap in a nut-free caramel candy. Still delicious, just a little less peanutty.
- Seasonal Twist: Around the holidays, I add a dash of cinnamon and a handful of white chocolate chips for a festive touch. In summer, a sprinkle of flaky sea salt on top is amazing.
- Dairy-Free: Substitute vegan butter and make sure your caramel bits are dairy-free. Enjoy Life chocolate chips are a good option, too.
- Bar Cookie Option: Press the dough into a 9×13-inch (23x33cm) pan and bake for 25-30 minutes for thick, gooey cookie bars. Let cool before slicing (if you can wait!).
One of my favorite personal spins? Adding a handful of roasted salted peanuts for extra crunch. It’s a throwback to classic candy bars, and the salt really makes the caramel pop. Don’t be afraid to riff—these Butterfinger Caramel Crunch Cookies can handle just about any twist you throw at them.
Serving & Storage Suggestions
Serving: These cookies are best enjoyed slightly warm, when the caramel is still soft and the edges have that perfect crunch. If you want to wow a crowd, stack them high on a cake stand or pile them in a basket lined with parchment for a rustic look. For an extra-indulgent treat, serve with a scoop of vanilla ice cream or drizzle with a bit of extra caramel sauce.
Pairings: Butterfinger Caramel Crunch Cookies go great with a tall glass of cold milk, a mug of coffee, or even a creamy hot chocolate. For parties, I love pairing them with fresh berries or a simple fruit salad to balance the richness.
Storage: Store in an airtight container at room temperature for up to 4 days. If you want to keep them longer, freeze baked cookies (layered with wax paper) for up to 2 months. To reheat, pop a cookie in the microwave for 10-12 seconds—just enough to melt the caramel but not turn it to lava!
Flavor Tip: The caramel intensifies after a day or two, so if you can resist, let them sit overnight. The flavors meld, and the cookies get even gooier. (But honestly, they rarely last that long in my house.)
Nutritional Information & Benefits
Each Butterfinger Caramel Crunch Cookie is a decadent treat, so they’re definitely a “sometimes food”—but they do offer a few perks! On average, one large cookie contains about 220-250 calories, 12g fat, 30g carbs, and 2g protein. They’re naturally peanut-rich thanks to the Butterfinger bars, and the caramel bits provide a quick energy boost (handy after a long day).
For those with dietary needs, these cookies can be adapted for gluten-free and dairy-free diets with simple swaps. But please note: Butterfinger bars contain peanuts and dairy, so always check for allergens if baking for a crowd. I love that you can make them with less sugar by reducing the chocolate chips or using sugar alternatives, though you’ll want to watch the texture. To me, these cookies are pure comfort—sometimes a sweet treat is just what you need to brighten your day!
Conclusion
Butterfinger Caramel Crunch Cookies aren’t just cookies—they’re an experience. Gooey, crunchy, sweet, and a little bit salty, they’re the treat you bring out when you want to make memories (or just treat yourself after a long week). I’ve baked these for birthdays, office parties, and lazy Sunday afternoons, and the reaction is always the same: pure joy.
Don’t be afraid to play with the recipe—add a pinch of sea salt, swap in your favorite chocolate, or go big and turn them into ice cream sandwiches. However you make them, these cookies are guaranteed to be a hit. If you try this recipe, I’d love to hear what you think! Drop a comment, share your own twists, or tag me if you post your cookie creations online. Happy baking, and remember: sometimes the messiest cookies are the most delicious!
Frequently Asked Questions
How do I keep caramel bits from melting out of the cookies?
Make sure you use caramel baking bits (like Kraft brand) rather than soft caramels. If some caramel oozes out during baking, just gently push it back in with a spoon while the cookies are still warm—it’ll set as they cool.
Can I make Butterfinger Caramel Crunch Cookies ahead of time?
Absolutely! You can make the dough up to 48 hours ahead and keep it covered in the fridge. Baked cookies freeze well, too—just thaw at room temperature or warm in the microwave for gooey centers.
What’s the best way to chop Butterfinger bars for this recipe?
I like to roughly chop half of them for big chunks and pulse the rest in a food processor for fine bits. This gives you lots of texture and Butterfinger flavor in every bite.
Can I use other candy bars instead of Butterfinger?
Sure! Heath bars, Snickers, or even Reese’s Cups work well. Each will give a different flavor and texture, but the results are always delicious.
Why did my cookies spread too much?
If your dough is too warm, the cookies can spread. Try chilling the dough for 20-30 minutes before baking. Also, double-check your flour measurement—too little flour can cause spreading.
Pin This Recipe!

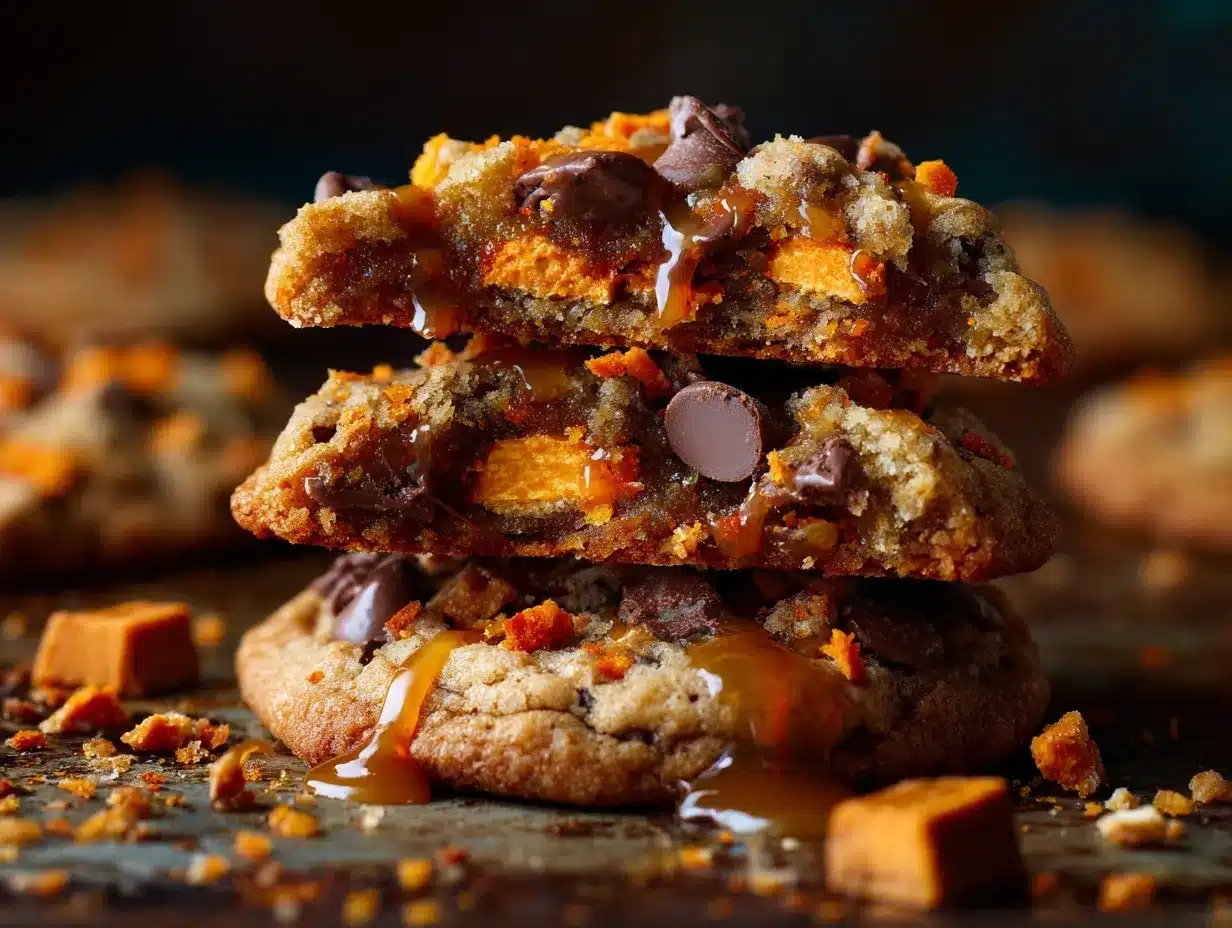
Butterfinger Caramel Crunch Cookies

These bakery-style cookies are loaded with gooey caramel, crunchy Butterfinger candy pieces, and a thick, chewy center. Quick and easy to make, they’re perfect for parties, bake sales, or a cozy night in.
- Prep Time: 15 minutes
- Cook Time: 12 minutes
- Total Time: 27 minutes
- Yield: 20 large cookies 1x
- Category: Dessert
- Cuisine: American
Ingredients
- 2 1/2 cups (315g) all-purpose flour, sifted
- 1 teaspoon baking soda
- 1/2 teaspoon kosher salt
- 1 cup (2 sticks, 226g) unsalted butter, softened
- 1 cup (200g) packed light brown sugar
- 1/2 cup (100g) granulated sugar
- 2 large eggs, room temperature
- 2 teaspoons pure vanilla extract
- 2 cups (about 8 fun-size bars) Butterfinger bars, chopped
- 1 cup (170g) caramel baking bits
- 1/2 cup (85g) semi-sweet chocolate chips (optional)
Instructions
- Preheat oven to 350°F (175°C). Line two baking sheets with parchment paper or silicone mats.
- In a medium bowl, whisk together flour, baking soda, and salt. Set aside.
- In a large mixing bowl, beat butter, brown sugar, and granulated sugar together on medium-high speed for 2-3 minutes until light and fluffy.
- Beat in eggs, one at a time, mixing after each addition. Add vanilla extract and mix until combined.
- Add dry ingredients to wet ingredients in two parts, mixing on low speed until just combined. Do not overmix.
- Gently fold in chopped Butterfinger bars, caramel baking bits, and chocolate chips (if using). Save a handful of Butterfinger pieces for topping, if desired.
- Using a large cookie scoop (about 3 tablespoons), portion dough onto prepared baking sheets, spacing cookies about 2 inches apart. Press extra Butterfinger and caramel bits on top if desired.
- Bake for 10-12 minutes, rotating trays halfway through, until edges are golden but centers look slightly underbaked.
- Let cookies cool on the baking sheet for 5 minutes, then transfer to a wire rack to cool completely.
- Store cooled cookies in an airtight container at room temperature for up to 4 days, or freeze for longer storage.
Notes
For extra gooey centers, make the dough scoops tall rather than wide. If cookies spread too much, chill the dough for 30 minutes before baking. For gluten-free cookies, use a 1:1 gluten-free flour blend. Let cookies cool on the tray for a few minutes to set the caramel. Store with wax paper between layers to prevent sticking.
Nutrition
- Serving Size: 1 large cookie
- Calories: 235
- Sugar: 18
- Sodium: 120
- Fat: 12
- Saturated Fat: 7
- Carbohydrates: 30
- Fiber: 1
- Protein: 2
Keywords: Butterfinger cookies, caramel cookies, candy bar cookies, easy dessert, chewy cookies, bakery-style cookies, peanut butter cookies, party cookies, bake sale cookies, chocolate chip cookies