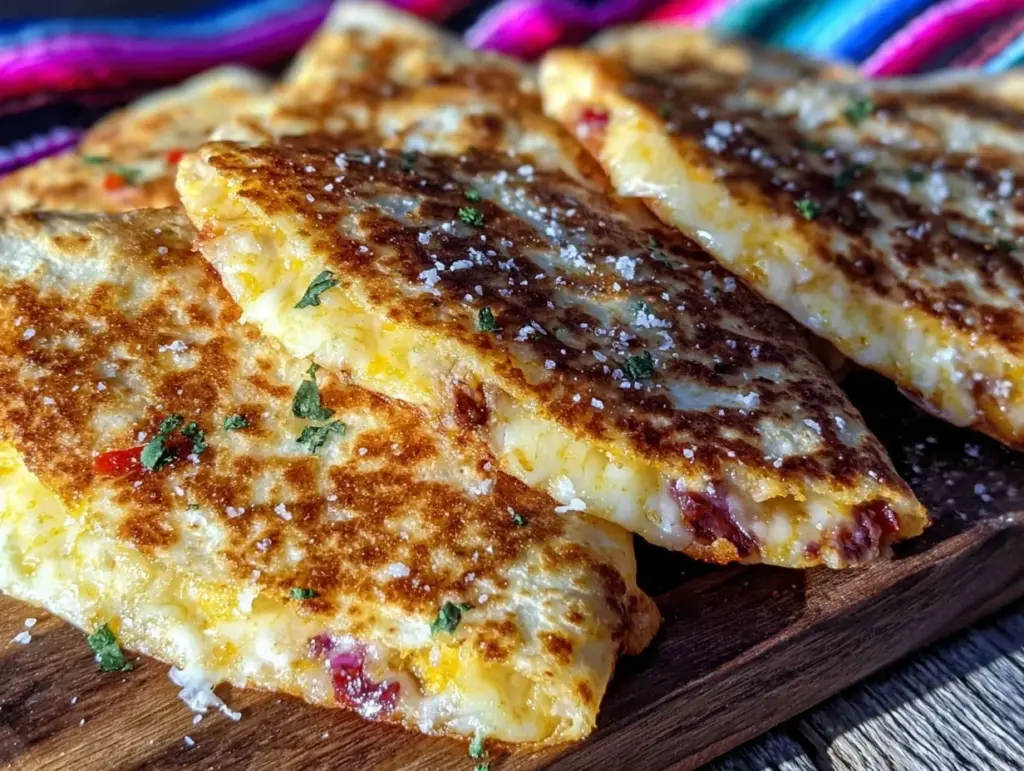
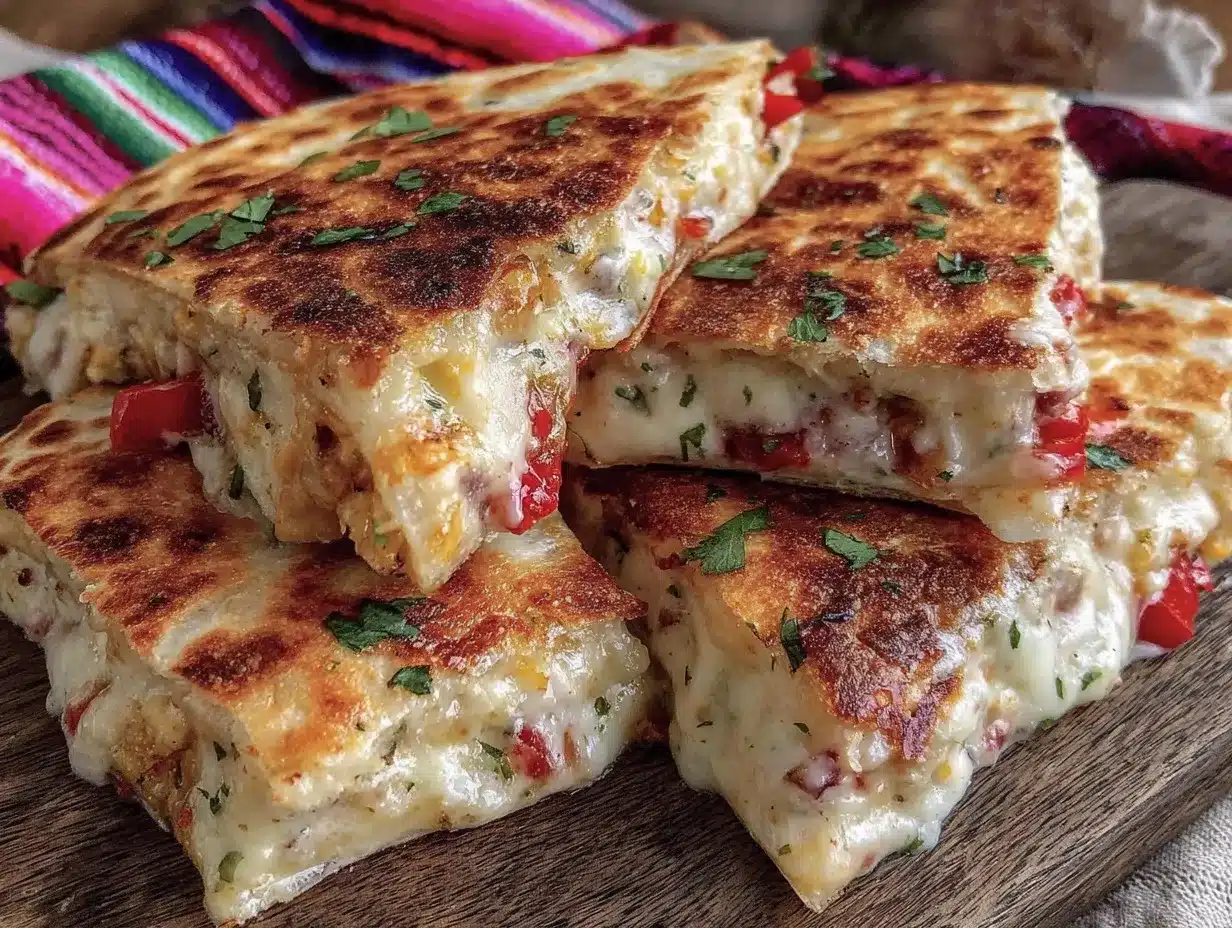
Rummaging through the fridge with one eye on the clock and a chorus of “What’s for lunch?” from the other room—yeah, that was my Tuesday. Half a bag of shredded cheese, a few tortillas wilting in the corner, and barely 20 minutes before the hangry troop stormed the kitchen. That’s when the idea for these Easy Crispy Sheet Pan Quesadilla Lunches clicked. No fuss, no standing over a skillet flipping quesadillas one by one—just a sheet pan doing all the hard work while I tried to keep the chaos at bay.
The smell of melting cheese mingling with toasty tortillas filled the air, and honestly, it was a small win that day. The crispy edges were spot on, and the best part? Everyone got their quesadilla hot, fresh, and perfectly crispy without me losing my mind in the process. It quickly became my go-to for quick lunches, especially when time is tight and patience is thin.
These sheet pan quesadillas stuck around because they make life easier. Plus, the crispy texture that you usually only get from skillet cooking somehow comes out even better when baked en masse on the pan. There’s something quietly satisfying about that golden crunch paired with gooey cheese and whatever fillings you throw in. It’s lunch that feels like a treat but made with zero drama.
So, if you’re juggling kids, work, or just hungry for something fuss-free and delicious, this recipe is for you. It’s the kind of lunch that makes you pause for a second and think, “Yeah, I nailed this.”
Why You’ll Love This Recipe
I’ve tested this Easy Crispy Sheet Pan Quesadilla Lunches recipe more times than I can count—because, well, it’s just that handy. Here’s why it’s become a staple in my kitchen:
- Quick & Easy: It all comes together in under 25 minutes, perfect for rushed weekdays or lazy weekends alike.
- Simple Ingredients: No special trips to the store needed. Almost everyone has tortillas, cheese, and a few fillings hanging around.
- Perfect for Lunch or Snack: Great for packing into school or work lunches, or just a satisfying mid-day bite.
- Crowd-Pleaser: Kids, picky eaters, and adults all give it two thumbs up.
- Unbelievably Delicious: That crispy, cheesy texture combo is just next-level comfort food.
What sets this recipe apart? The secret lies in baking quesadillas on a sheet pan instead of cooking them one by one in a skillet. This method creates a perfect crisp without the hassle of flipping each quesadilla. Plus, it frees up your stove for other dishes, like a quick fresh cucumber dill salad or some zesty sides.
And I’m not just talking cheese and tortillas thrown together—this recipe balances flavors and textures with a sprinkle of seasoning and the option to add your favorite fillings. It’s comfort food reimagined for busy lives, and honestly, it’s the kind of lunch that makes you close your eyes after the first bite.
What Ingredients You Will Need
This recipe uses straightforward, pantry-friendly ingredients that come together to create bold flavors and satisfying textures without any fuss. Here’s the breakdown:
- For the Quesadilla Base:
- Flour tortillas (10-inch size works best for easy folding and crisping)
- Shredded cheese (a blend of sharp cheddar and Monterey Jack gives great melt and flavor; I like Sargento for its consistent shredding)
- For the Filling:
- Cooked chicken, shredded or diced (rotisserie chicken works perfectly if you’re low on time)
- Black beans, rinsed and drained (adds protein and fiber)
- Roasted corn kernels (fresh, frozen, or canned—drained)
- Diced bell peppers (for a pop of color and sweetness)
- Thinly sliced green onions (adds a mild onion bite)
- Seasonings & Extras:
- Ground cumin (just a pinch to warm up the flavor)
- Smoked paprika (for a subtle smoky note)
- Salt and black pepper (to taste)
- Olive oil or melted butter (for brushing the tortillas to get that golden crisp)
- Optional Toppings:
- Sour cream or Greek yogurt (for dipping)
- Fresh cilantro leaves (for brightness)
- Jalapeño slices (if you like a little heat)
If you want to switch things up, you can use corn tortillas for a gluten-free option or swap chicken for cooked ground beef or turkey. I often keep a bag of frozen corn on hand, which works just as well as fresh for this recipe. In summer, fresh roasted corn really shines and adds that little extra sweetness.
Equipment Needed
Not much gear is required to get these Easy Crispy Sheet Pan Quesadilla Lunches going, which is part of the charm.
- Baking sheet (rimmed sheet pan): A 12×17 inch pan fits about 4 quesadillas comfortably. If you don’t have a rimmed sheet pan, a large cookie sheet works fine—just keep an eye out for any drips.
- Parchment paper or silicone baking mat: These prevent sticking and make cleanup a breeze. I prefer parchment for easy toss after.
- Mixing bowl: To toss the filling ingredients together evenly.
- Brush: For applying olive oil or melted butter to the tortillas—helps get that crispy, golden finish.
- Spatula or tongs: To transfer quesadillas from the pan without breaking them.
If you’re short on kitchen tools, no worries—my lazy trick is to use a clean hand to brush oil on the tortillas if you don’t have a pastry brush. And if your sheet pan is a little warped like mine, lining it with parchment keeps everything flat and even.
Preparation Method
- Preheat your oven to 425°F (220°C). This high heat is key to getting the quesadillas crispy quickly without drying out the fillings. While it warms up, line your sheet pan with parchment paper.
- Prepare the filling. In a mixing bowl, combine shredded chicken, black beans, corn, diced bell peppers, green onions, ground cumin, smoked paprika, salt, and pepper. Toss everything until evenly mixed. This step can be done ahead to save time.
- Assemble the quesadillas. Lay out half of your tortillas on the parchment-lined pan. Sprinkle a thin, even layer of shredded cheese over each tortilla—about ⅓ cup (35g) per quesadilla works well. Spread a generous spoonful of the filling mixture on top, then add another ⅓ cup (35g) of cheese to help everything stick. Top with the remaining tortillas, pressing gently to seal.
- Brush the top and edges lightly with olive oil or melted butter. This will help create that irresistible crispy, golden exterior.
- Bake for 12-15 minutes. Halfway through baking, carefully flip each quesadilla using a spatula or tongs to crisp the other side. Be gentle—these are delicate but hold together well if you’re careful. Bake an additional 8-10 minutes until both sides are golden brown and cheese is melted inside.
- Remove from oven and let rest for 2-3 minutes. This helps the cheese firm up just enough for easier slicing.
- Slice into wedges with a sharp knife or pizza cutter. Serve warm with your favorite toppings like sour cream, cilantro, or jalapeños.
If you notice your quesadillas getting soggy, try using a bit less filling next time or make sure to dry canned beans and corn well. Also, flipping carefully makes all the difference—don’t rush this step!
Cooking Tips & Techniques
Getting that perfect crisp without burning? It’s all about balance and timing.
- Don’t overload the filling. Too much filling can make the quesadillas soggy or hard to flip. Keep it moderate so the tortillas crisp up nicely and hold their shape.
- Use a mix of cheeses. A blend like sharp cheddar and Monterey Jack melts beautifully and adds flavor depth. Avoid pre-shredded cheese with anti-caking agents—they don’t melt as well.
- Flip with care. Use a wide spatula and tongs to turn each quesadilla gently. If one tears, no biggie—just patch it up with a little extra cheese and keep going.
- Brush oil evenly. Don’t skip this step! The oil or butter creates the golden crust and prevents sticking. Be sure to coat the edges too.
- Work in batches if needed. If your sheet pan is small, bake quesadillas in batches. They come together fast, so you won’t be waiting long.
- Let them rest. A brief cool-down lets the melted cheese set so your slices hold together better.
I once tried throwing these on the pan without oil brushing—big mistake! The tortillas stuck, and I lost a couple to the pan. Lesson learned: don’t skip the oil.
Variations & Adaptations
These sheet pan quesadillas are a fantastic blank canvas for all kinds of flavors and dietary needs.
- Vegetarian version: Skip the chicken and load up on roasted veggies like zucchini, mushrooms, and spinach. Add extra black beans for protein punch.
- Gluten-free option: Use corn tortillas or gluten-free wraps. Just watch the baking time as corn tortillas crisp a little faster—check them at 10 minutes.
- Spicy twist: Add diced jalapeños or a sprinkle of cayenne pepper to the filling. Serve with chipotle mayo or salsa verde for extra kick.
- Cheese swap: Try pepper jack for a little zing, or mozzarella for a milder, stretchy melt.
- Different protein: Ground beef, turkey, or even cooked shrimp make great filling swaps. When using ground meat, cook and season it beforehand.
One time, I made a batch with leftover BBQ chicken and red onion, then paired it with a creamy slaw (kind of like the tangy crunch in my creamy Hawaiian macaroni salad). It was a total hit—smoky, sweet, crispy goodness all in one bite.
Serving & Storage Suggestions
Serve these quesadillas warm straight from the oven for the crispiest texture and gooey cheese experience. They’re perfect alongside fresh salsa, guacamole, or a dollop of sour cream. For a light side, I often reach for a crisp salad like the fresh watermelon feta mint salad—the sweet and tangy flavors balance the richness perfectly.
Leftovers? They reheat beautifully. Wrap quesadilla slices in foil and pop them in a 350°F (175°C) oven for about 10 minutes to bring back the crispness. Avoid the microwave if you want to keep that crunch (microwaving tends to make them soggy).
For longer storage, freeze uncooked assembled quesadillas in a single layer on a baking sheet, then transfer to freezer bags. Bake from frozen, adding a few extra minutes to the cooking time. This is a life-saver for meal prep or busy days.
Over time, the flavors meld nicely if you prep fillings a day ahead. Just assemble and bake when ready for a fuss-free meal.
Nutritional Information & Benefits
These quesadillas pack a good balance of carbs, protein, and fat. A typical serving (one quesadilla) contains approximately:
| Calories | 350-400 |
|---|---|
| Protein | 20-25g (from chicken and cheese) |
| Carbohydrates | 30-35g (mostly from tortillas and beans) |
| Fat | 15-20g (depending on cheese and oil used) |
Key ingredients like black beans and corn add fiber and essential nutrients. Using lean chicken keeps protein high and calories moderate. You can make it lighter by controlling cheese amounts or swapping sour cream for Greek yogurt.
This recipe is naturally gluten-free when made with corn tortillas and can be easily adapted to low-carb with alternative wraps. Just watch the fillings and cheese portions for your dietary needs.
Conclusion
These Easy Crispy Sheet Pan Quesadilla Lunches are the perfect quick meal when you want something comforting, tasty, and hassle-free. The crispy edges, melty cheese, and customizable fillings make it a lunch that never gets old in my house. It’s one of those recipes that fits into busy schedules without skimping on flavor or satisfaction.
Feel free to tweak the fillings or spice level to suit your tastes—this recipe is forgiving and flexible, which makes it a keeper in my book. Honestly, I love how it takes the pressure off me when everyone’s hungry and ready to eat now.
If you try it, I’d love to hear what fillings you added or how you serve yours. Sharing little variations is half the fun of cooking, right? Wishing you many crispy, cheesy lunches ahead!
FAQs About Easy Crispy Sheet Pan Quesadilla Lunches
Can I use corn tortillas instead of flour tortillas?
Yes! Corn tortillas work well and make the recipe gluten-free. Just note they crisp up faster, so check them around 10 minutes to avoid burning.
How do I prevent quesadillas from getting soggy?
Don’t overload the filling and make sure any canned ingredients like beans or corn are well drained. Brushing the tortillas with oil also helps create a crispy barrier.
Can I prepare these quesadillas ahead of time?
You can mix the filling a day ahead and keep it refrigerated. Assemble and bake right before serving for best texture.
What are good dipping sauces for these quesadillas?
Classic sour cream, guacamole, salsa, or even a little chipotle mayo complement the crispy quesadillas beautifully.
Can I make these vegan?
Absolutely! Use dairy-free cheese and omit chicken or replace it with seasoned tofu or beans. Just watch baking times as some vegan cheeses melt differently.
Pin This Recipe!
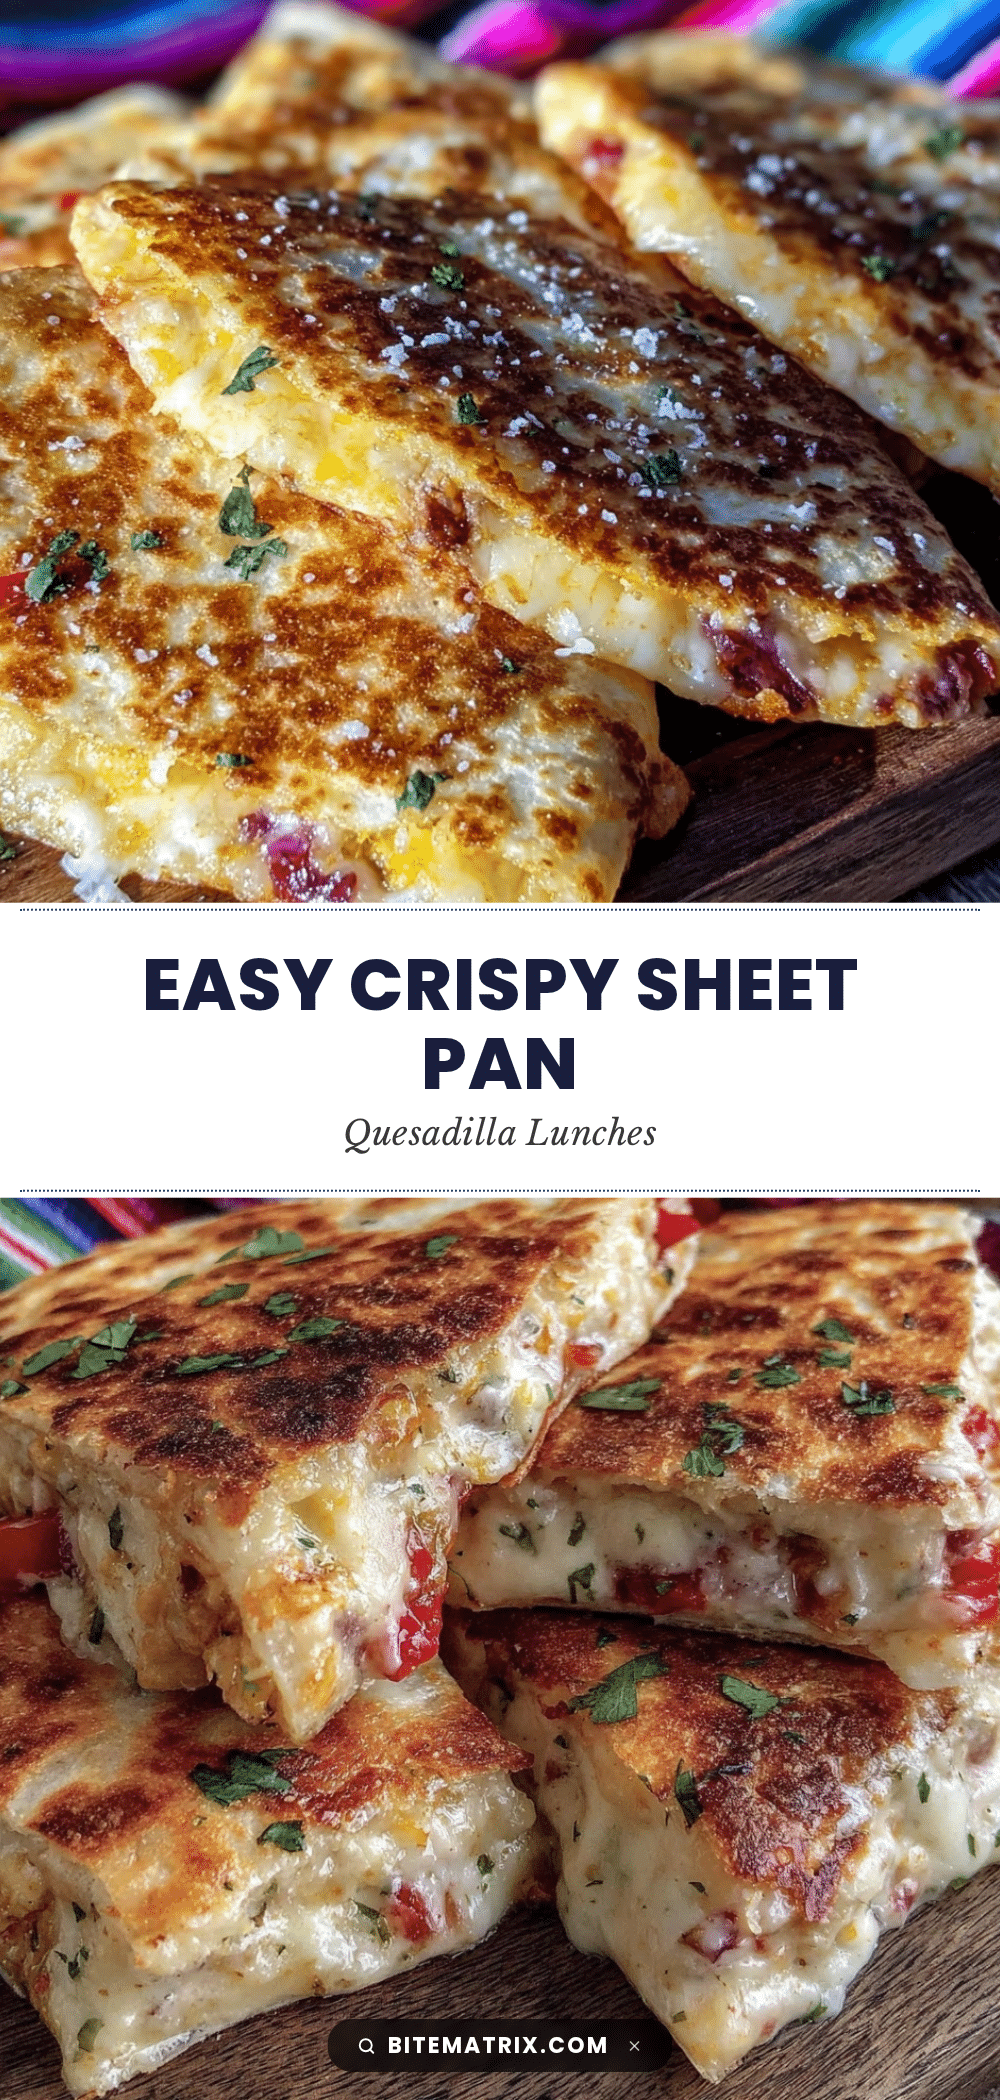
Easy Crispy Sheet Pan Quesadilla Lunches

A quick and easy sheet pan quesadilla recipe that delivers perfectly crispy, cheesy lunches with minimal fuss. Ideal for busy weekdays or lazy weekends, this recipe uses simple ingredients and bakes quesadillas en masse for a crowd-pleasing meal.
- Prep Time: 10 minutes
- Cook Time: 20-25 minutes
- Total Time: 30-35 minutes
- Yield: 4 servings
- Category: Main Course
- Cuisine: Mexican-inspired
Ingredients
- Flour tortillas (10-inch size)
- Shredded cheese (blend of sharp cheddar and Monterey Jack, about ⅓ cup or 35g per quesadilla)
- Cooked chicken, shredded or diced (rotisserie chicken works well)
- Black beans, rinsed and drained
- Roasted corn kernels (fresh, frozen, or canned, drained)
- Diced bell peppers
- Thinly sliced green onions
- Ground cumin (a pinch)
- Smoked paprika (a pinch)
- Salt and black pepper to taste
- Olive oil or melted butter (for brushing tortillas)
- Optional toppings: sour cream or Greek yogurt, fresh cilantro leaves, jalapeño slices
Instructions
- Preheat your oven to 425°F (220°C) and line a rimmed baking sheet with parchment paper.
- In a mixing bowl, combine shredded chicken, black beans, corn, diced bell peppers, green onions, ground cumin, smoked paprika, salt, and pepper. Toss until evenly mixed.
- Lay out half of the tortillas on the prepared sheet pan. Sprinkle about ⅓ cup (35g) of shredded cheese evenly over each tortilla.
- Spread a generous spoonful of the filling mixture on top of the cheese layer, then add another ⅓ cup (35g) of cheese over the filling.
- Top each with the remaining tortillas, pressing gently to seal.
- Brush the top and edges lightly with olive oil or melted butter.
- Bake for 12-15 minutes, then carefully flip each quesadilla using a spatula or tongs.
- Bake for an additional 8-10 minutes until both sides are golden brown and cheese is melted.
- Remove from oven and let rest for 2-3 minutes to allow cheese to firm up.
- Slice into wedges with a sharp knife or pizza cutter and serve warm with optional toppings.
Notes
Do not overload the filling to prevent sogginess and difficulty flipping. Use a mix of sharp cheddar and Monterey Jack cheese for best melt and flavor. Brush tortillas evenly with oil or butter for a golden crisp. Flip quesadillas gently to avoid tearing. For gluten-free, use corn tortillas and reduce baking time to about 10 minutes. Leftovers reheat best in the oven wrapped in foil to maintain crispness. Freeze uncooked assembled quesadillas for meal prep.
Nutrition
- Serving Size: One quesadilla (appr
- Calories: 375
- Sugar: 3
- Sodium: 600
- Fat: 17.5
- Saturated Fat: 7
- Carbohydrates: 32.5
- Fiber: 5
- Protein: 22.5
Keywords: sheet pan quesadilla, quick lunch, easy quesadilla, crispy quesadilla, baked quesadilla, chicken quesadilla, family meal, crowd-pleaser