
“You know that feeling when you’re scrambling to put together something special for a last-minute celebration? That was me last Saturday afternoon. I had promised my niece a batch of sweet treats for her graduation party, but the usual flour stash in my pantry was nowhere to be found. Honestly, I wasn’t sure how to pull off decorated sugar cookies without the gluten. Then, as I was about to give up, my neighbor—who rarely cooks—popped over with a small bag of gluten-free flour blend and a knowing smile. She said, ‘Try this recipe; it’s foolproof and perfect for celebrations.’ I wasn’t expecting much, but I gave it a shot. The dough was easy to handle, the cookies baked up golden and soft, and decorating them became a breeze. That afternoon, with some sprinkles, icing, and a few laughs (plus a cracked bowl and a spilled cup of sugar—classic me), these Easy Gluten-Free Decorated Graduation Sugar Cookies came to life.”
Maybe you’ve been there, rushing to find a dessert that looks festive but also suits dietary needs. This recipe stayed with me because it’s simple, reliable, and adds that cheerful touch to any graduation party table. Plus, it’s gluten-free without sacrificing texture or flavor. Let me tell you, there’s nothing like biting into a beautifully decorated cookie that just melts in your mouth, especially when you know it’s safe for friends or family avoiding gluten.
Why You’ll Love This Recipe
- Quick & Easy: Ready in under 45 minutes, ideal for those last-minute party plans or casual baking sessions.
- Simple Ingredients: No complicated or hard-to-find items here—just pantry staples and basic baking essentials.
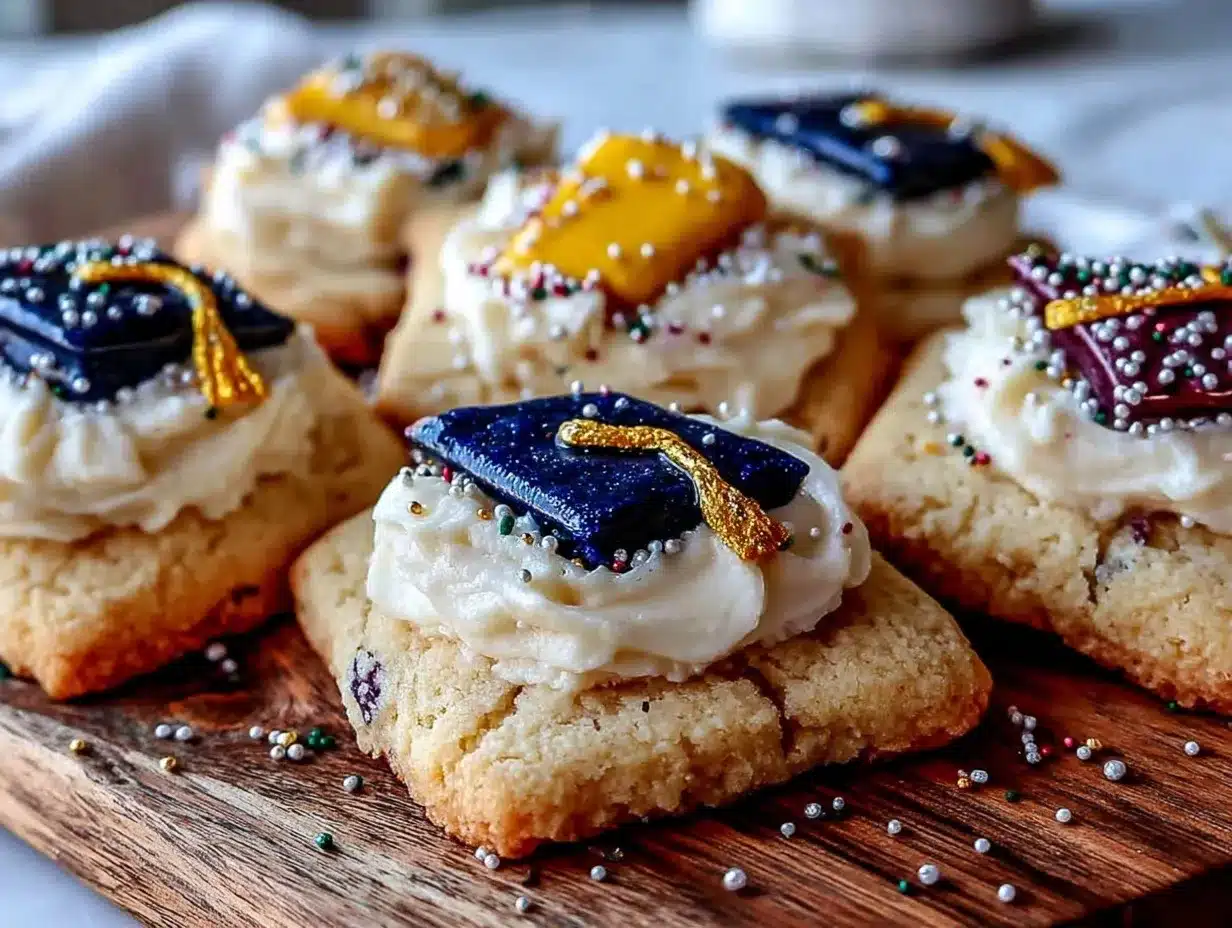
- Perfect for Graduation Parties: Customizable decorations make these cookies a festive highlight for any celebration.
- Crowd-Pleaser: Kids and adults alike can’t resist them, whether gluten-sensitive or not.
- Unbelievably Delicious: Soft, buttery, and lightly sweet with a tender crumb that doesn’t crumble apart.
This recipe isn’t just another gluten-free sugar cookie. The secret lies in the right balance of gluten-free flour blend and a bit of xanthan gum that gives the dough elasticity and chew without the typical dryness. I also love how the dough handles perfectly for rolling and cutting—no sticky mess or crumbling disasters here. Decorating is a joy because the cookies hold their shape well, which means your caps, diplomas, and stars will look sharp and festive. Honestly, it’s the kind of recipe that makes you close your eyes after the first bite and smile, knowing you nailed the treats for the party.
What Ingredients You Will Need
This recipe uses simple, wholesome ingredients to deliver bold flavor and satisfying texture without the fuss. Most of these are pantry staples, with a few gluten-free swaps that make all the difference.
- For the cookie dough:
- 1 ¾ cups gluten-free all-purpose flour blend (I prefer Bob’s Red Mill 1-to-1 Baking Flour for best texture)
- ½ teaspoon xanthan gum (if your flour blend doesn’t already include it)
- ½ teaspoon baking powder
- ¼ teaspoon salt
- ¾ cup unsalted butter, softened (room temperature)
- ¾ cup granulated sugar
- 1 large egg, room temperature
- 1 teaspoon pure vanilla extract
- 1 tablespoon milk (use dairy-free almond or oat milk if preferred)
- For the royal icing decoration:
- 2 cups powdered sugar, sifted
- 3 tablespoons meringue powder
- 5 tablespoons warm water (adjust as needed for consistency)
- Food coloring gels (blue, gold, black, or your graduation colors)
- Optional: Edible glitter or sprinkles for extra sparkle
When selecting your gluten-free flour blend, check the label for a blend meant for cookies or all-purpose baking—it really affects the end texture. I find that blends containing rice flour, potato starch, and tapioca starch work well here. If you want to experiment, almond flour can be substituted for part of the flour to add a subtle nutty flavor, but the dough will be a bit more delicate. For the butter, unsalted is best because it lets you control the salt level, but salted is okay if you adjust the salt in the dough slightly. The royal icing is easy to whip up with meringue powder, which stabilizes it and makes it perfect for piping fine details or flooding shapes with smooth color.
Equipment Needed
- Mixing bowls (medium and large)
- Electric mixer (handheld or stand mixer works great for creaming butter and sugar)
- Measuring cups and spoons (for precise ingredient amounts)
- Rolling pin (a non-stick or lightly floured surface helps a lot!)
- Cookie cutters (graduation-themed shapes like caps, stars, diplomas, or simple circles)
- Baking sheet(s) lined with parchment paper or silicone baking mat
- Wire cooling rack
- Piping bags and small round tips (for detailed icing work)
- Spoons or toothpicks (for spreading and detailing icing)
If you don’t have a rolling pin, a smooth glass bottle can work in a pinch. For piping, disposable plastic bags with a tiny corner snipped off are budget-friendly and effective if you don’t want to invest in piping tips. A silicone baking mat is a favorite of mine because it keeps the cookies from sticking and helps with even baking. Also, washing meringue powder residue off your bowls and utensils right away prevents sticky buildup and makes cleanup easier.
Preparation Method
- Prepare the dough: In a medium bowl, whisk together 1 ¾ cups gluten-free flour blend, ½ teaspoon xanthan gum (if needed), ½ teaspoon baking powder, and ¼ teaspoon salt. Set aside. (This step takes about 5 minutes.)
- Cream the butter and sugar: Using an electric mixer, beat ¾ cup softened unsalted butter and ¾ cup granulated sugar on medium speed until fluffy and pale, about 3-4 minutes. This is key for tender cookies, so don’t rush it.
- Add egg and vanilla: Beat in 1 large room-temperature egg and 1 teaspoon vanilla extract until combined. The mixture will look smooth and creamy.
- Combine wet and dry ingredients: Gradually add the dry ingredients to the wet, mixing on low speed. Pour in 1 tablespoon milk to bring the dough together. The dough should be soft but not sticky—if too sticky, add a little more flour, 1 tablespoon at a time.
- Chill the dough: Shape the dough into a disk, wrap in plastic wrap, and refrigerate for at least 30 minutes. This step firms up the dough, making it easier to roll and cut without cracking. (Tip: If you’re short on time, 20 minutes works too, but don’t skip it.)
- Roll out and cut shapes: On a lightly floured surface, roll the dough to about ¼ inch (6 mm) thickness. Use your graduation-themed cookie cutters to cut shapes and place them 1 inch (2.5 cm) apart on a parchment-lined baking sheet.
- Bake: Preheat oven to 350°F (175°C). Bake the cookies for 8-10 minutes, until the edges are just beginning to turn golden. (Don’t overbake; you want tender cookies, not crispy.) Let cool on the sheet for 5 minutes, then transfer to a wire rack to cool completely.
- Prepare royal icing: In a clean bowl, combine 2 cups powdered sugar, 3 tablespoons meringue powder, and 5 tablespoons warm water. Beat on high speed until stiff peaks form, about 5-7 minutes. Divide icing into smaller bowls and tint with your chosen food coloring gels.
- Decorate: Use piping bags fitted with small round tips to outline and flood the cookies. Let each color dry for 15-20 minutes before adding details or layering colors. Sprinkle edible glitter or sprinkles while icing is still wet for extra sparkle.
- Allow icing to set: Let decorated cookies dry at room temperature for at least 2 hours before stacking or packaging. This helps prevent smudging.
Pro tip: If your dough cracks while rolling, just press it gently back together with your fingers—gluten-free dough can be a bit more delicate, but it’s forgiving. Also, keep an eye on the oven, as gluten-free cookies can go from perfect to overdone quickly. I learned the hard way once when I got distracted by a phone call and ended up with crunchy cookies—not exactly what you want for a graduation party!
Cooking Tips & Techniques
Working with gluten-free dough can be a bit tricky if you’re new to it, but with these tips, you’ll nail it every time:
- Don’t overmix: Once you add the flour blend to the wet ingredients, mix just until combined. Overmixing can make the dough tough.
- Chill well: Refrigerating the dough firms it up, making rolling and cutting easier and preventing spreading during baking.
- Use parchment paper or silicone mats: These help cookies bake evenly and prevent sticking without adding extra flour, which can dry out the dough.
- Watch your oven temperature: Every oven is different—if your cookies spread too much or brown too fast, try lowering the temperature by 10-15°F (5-8°C).
- For royal icing consistency: Thin icing (flood consistency) should flow smoothly but not run off the cookie edges. Thicker icing (for outlines and detail) holds shape well. Adjust by adding water or powdered sugar in tiny amounts.
- Practice piping: If you’re new to decorating, try piping on parchment paper before the cookies to get a feel for pressure and speed.
- Store decorated cookies carefully: Keep them in a single layer or with parchment between layers to avoid smudging designs.
Honestly, I used to dread decorating sugar cookies because my icing would always run or crack. But controlling the icing consistency and letting each layer dry has made a huge difference. Plus, patience really pays off here—rushing the drying stage often leads to smudged or uneven designs.
Variations & Adaptations
- Flavor twists: Add a teaspoon of almond or lemon extract instead of vanilla for a fresh flavor change.
- Vegan version: Swap butter for vegan margarine and use a flax egg (1 tablespoon ground flaxseed + 3 tablespoons water) instead of a chicken egg. Use plant-based milk for the dough and adjust royal icing by using aquafaba (chickpea water) in place of meringue powder.
- Seasonal colors: Change the icing colors to match other celebrations or themes—for example, autumn tones for a fall graduation or school colors for a team spirit touch.
- Gluten-free flour swaps: Use a homemade blend of rice flour, potato starch, and tapioca starch if you prefer DIY flour blends. Just keep xanthan gum in the mix to bind.
- Cookie shapes: Instead of traditional graduation caps and diplomas, try stars, numbers, or personalized initials for a unique twist.
One time, I swapped in coconut flour for part of the flour blend—just ¼ cup—and added a little extra milk to keep the dough moist. The cookies had a subtle coconut flavor that was a hit with my tropical-loving family. Don’t be afraid to experiment a little; this recipe is pretty forgiving.
Serving & Storage Suggestions
Serve these Easy Gluten-Free Decorated Graduation Sugar Cookies at room temperature for the best texture and flavor. They look fantastic arranged on a festive platter or stacked in a clear jar with ribbons matching the graduate’s school colors. Pair the cookies with a cold glass of milk, a cup of coffee, or even sparkling lemonade for a refreshing combo.
To store, place the cookies in an airtight container layered with parchment paper. They keep well at room temperature for up to 3 days. If you need more time, freeze the cookies (undecorated or decorated with fully dried icing) in a single layer in a freezer-safe container for up to 3 months. Thaw at room temperature before serving.
Reheating isn’t necessary, but if you like a softer bite, pop a cookie in the microwave for 10 seconds. Just be careful not to melt the icing! Also, the flavors often deepen slightly after a day or two, so making them a day ahead can actually improve taste and ease party-day stress.
Nutritional Information & Benefits
Each cookie (based on a 3-inch diameter) contains approximately:
| Calories | 120 |
|---|---|
| Fat | 6g |
| Carbohydrates | 17g |
| Sugar | 9g |
| Protein | 1g |
Using gluten-free flour blends makes this recipe accessible to those with gluten intolerance or celiac disease. The butter provides satisfying richness and some fat-soluble vitamins, while the egg adds a bit of protein. Remember, these cookies are treats—moderation is key! For dairy-free versions, swapping butter and milk with plant-based alternatives keeps them suitable for various dietary needs. As someone who’s mindful about what my family eats, I appreciate that this recipe is flexible and inclusive without sacrificing that classic sugar cookie comfort.
Conclusion
So, there you have it—Easy Gluten-Free Decorated Graduation Sugar Cookies that look impressive but come together without fuss. Whether you’re celebrating a milestone or just want a sweet project that everyone can enjoy, this recipe has your back. I love how it combines simplicity, flavor, and festive charm, plus it’s perfect for anyone avoiding gluten.
Feel free to make these your own: switch up colors, shapes, or flavors to fit your party vibe. I’d love to hear how your cookies turned out or any creative decorating ideas you tried. Don’t hesitate to leave a comment or share your photos—let’s celebrate success one cookie at a time!
Happy baking and congrats to all the grads out there!
FAQs
Can I make these cookies ahead of time?
Yes! The dough can be made and refrigerated for up to 3 days before baking. Decorated cookies should be stored in an airtight container and are best eaten within 3 days, or frozen for longer storage.
What if I don’t have xanthan gum?
If your gluten-free flour blend already contains xanthan gum, you can omit it. Otherwise, it helps bind the dough and improve texture, so I recommend including it if possible. You can substitute with guar gum in equal amounts.
How do I prevent royal icing from cracking?
Keep your icing covered with a damp cloth when not in use to prevent drying out. Use meringue powder for stability, and avoid adding too much water. Let each layer dry completely before adding more details.
Can I use regular flour instead of gluten-free?
Absolutely! This recipe works with regular all-purpose flour if gluten isn’t a concern. You may not need xanthan gum in that case, and the texture might be slightly different but just as delicious.
What’s the best way to store leftover decorated cookies?
Store them in an airtight container at room temperature with parchment paper between layers. Avoid stacking cookies before the icing is fully dry to prevent smudging.
Pin This Recipe!

Easy Gluten-Free Decorated Graduation Sugar Cookies

These gluten-free sugar cookies are soft, buttery, and perfect for graduation parties. They are easy to make, decorate, and safe for those avoiding gluten without sacrificing flavor or texture.
- Prep Time: 15 minutes
- Cook Time: 10 minutes
- Total Time: 45 minutes
- Yield: 24 cookies 1x
- Category: Dessert
- Cuisine: American
Ingredients
- 1 ¾ cups gluten-free all-purpose flour blend (e.g., Bob’s Red Mill 1-to-1 Baking Flour)
- ½ teaspoon xanthan gum (if your flour blend doesn’t already include it)
- ½ teaspoon baking powder
- ¼ teaspoon salt
- ¾ cup unsalted butter, softened (room temperature)
- ¾ cup granulated sugar
- 1 large egg, room temperature
- 1 teaspoon pure vanilla extract
- 1 tablespoon milk (dairy or dairy-free almond/oat milk)
- 2 cups powdered sugar, sifted (for royal icing)
- 3 tablespoons meringue powder (for royal icing)
- 5 tablespoons warm water (for royal icing, adjust as needed)
- Food coloring gels (blue, gold, black, or graduation colors)
- Optional: Edible glitter or sprinkles
Instructions
- In a medium bowl, whisk together gluten-free flour blend, xanthan gum (if needed), baking powder, and salt. Set aside.
- Using an electric mixer, beat softened unsalted butter and granulated sugar on medium speed until fluffy and pale, about 3-4 minutes.
- Beat in the egg and vanilla extract until smooth and creamy.
- Gradually add dry ingredients to the wet mixture on low speed. Pour in milk and mix until dough comes together. If too sticky, add more flour 1 tablespoon at a time.
- Shape dough into a disk, wrap in plastic wrap, and refrigerate for at least 30 minutes.
- Roll dough on a lightly floured surface to about ¼ inch thickness. Cut shapes with graduation-themed cookie cutters and place 1 inch apart on parchment-lined baking sheets.
- Preheat oven to 350°F (175°C). Bake cookies for 8-10 minutes until edges begin to turn golden. Cool on baking sheet for 5 minutes, then transfer to wire rack to cool completely.
- Prepare royal icing by combining powdered sugar, meringue powder, and warm water. Beat on high speed until stiff peaks form, about 5-7 minutes. Divide and tint with food coloring gels.
- Use piping bags with small round tips to outline and flood cookies. Let each color dry 15-20 minutes before adding details or layering colors. Add edible glitter or sprinkles while icing is wet.
- Allow decorated cookies to dry at room temperature for at least 2 hours before stacking or packaging.
Notes
If dough cracks while rolling, gently press it back together. Avoid overbaking to keep cookies tender. Use parchment paper or silicone mats to prevent sticking. Adjust royal icing consistency by adding water or powdered sugar as needed. Store decorated cookies in a single layer with parchment between layers to avoid smudging. Dough can be refrigerated up to 3 days before baking. For vegan version, substitute butter with vegan margarine, egg with flax egg, milk with plant-based milk, and use aquafaba instead of meringue powder in icing.
Nutrition
- Serving Size: 1 cookie (3-inch dia
- Calories: 120
- Sugar: 9
- Fat: 6
- Carbohydrates: 17
- Protein: 1
Keywords: gluten-free, sugar cookies, decorated cookies, graduation party, easy cookie recipe, royal icing, celebration treats


