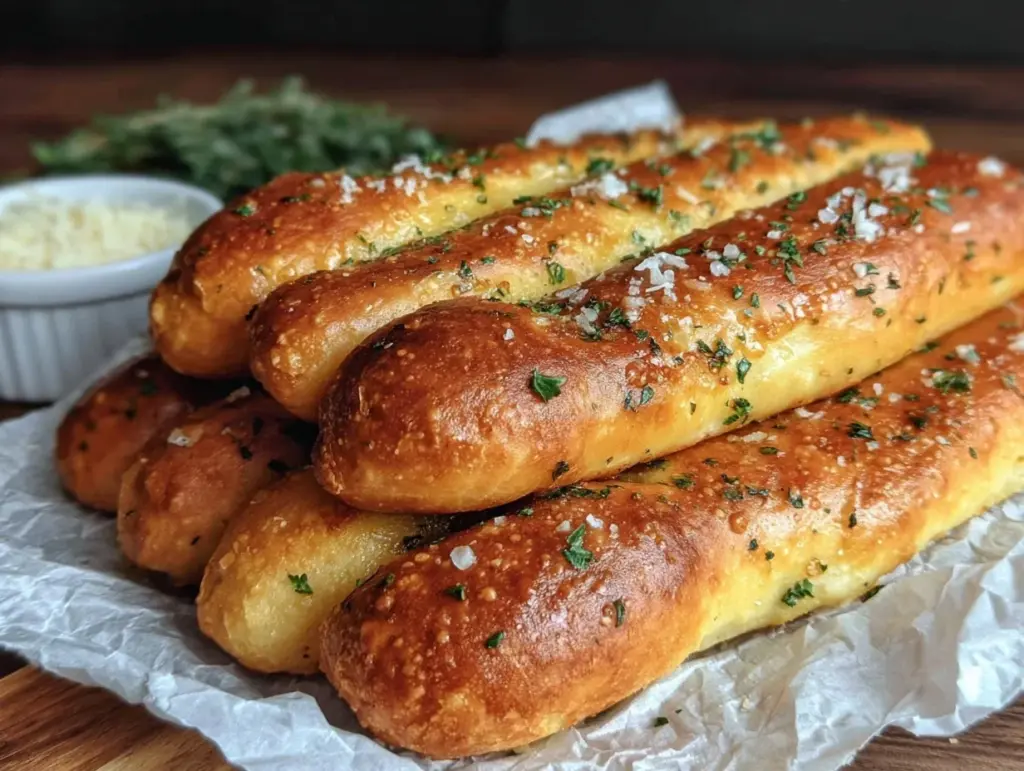
Let me tell you, the gentle aroma of freshly baked breadsticks—garlicky, buttery, soft as a pillow—wafting through my kitchen is pure happiness. There’s something magical about that scent, a little reminiscent of walking into Olive Garden and knowing you’re about to get a basket of their famous breadsticks. The first time I set out to make these homemade Olive Garden breadsticks, I was honestly just hoping for something close to the real deal. I still remember pausing after my first bite—eyes closed, a big smile on my face—because I knew I’d stumbled onto something truly special. (You know that feeling when you nail a recipe and immediately want to text your best friend about it?)
Years ago, my mom and I would try to recreate restaurant favorites on rainy weekends—we weren’t fancy, but we sure loved a challenge. These breadsticks became our obsession after a particularly memorable family dinner at Olive Garden. My siblings couldn’t get enough, sneaking extras from the basket when they thought no one was looking. That’s when I realized: these aren’t just breadsticks—they’re a memory on a plate. If I’d known how easy and satisfying homemade Olive Garden breadsticks could be, I would have started making them when I was knee-high to a grasshopper.
Honestly, these breadsticks are dangerously easy and deliver pure, nostalgic comfort in every bite. Whether you’re looking for the perfect side for pasta night, a sweet treat for your kids, or just something to brighten up your Pinterest board, this Olive Garden breadsticks recipe hits the spot. Family gatherings, gifting, or just a quiet Saturday, they’ve become a staple in my kitchen (tested more times than I care to admit—in the name of research, of course). Feels like a warm hug every single time. Bookmark this one, because you’ll come back again and again!
Why You’ll Love This Olive Garden Breadsticks Recipe
When it comes to homemade comfort food, I’ve got some tricks up my sleeve thanks to years in the kitchen and plenty of trial and error. These Olive Garden breadsticks aren’t just another copycat—they’re the best version I’ve ever tasted. Here’s why you’re going to be obsessed:
- Quick & Easy: Ready in about 2 hours (most of that is hands-off rising time), so you can whip up a batch for dinner even on a busy weeknight.
- Simple Ingredients: Everything you need is probably already in your pantry—no fancy shopping trips, just classic flour, yeast, and a little butter.
- Perfect for Any Occasion: These breadsticks are the star at potlucks, cozy family dinners, or holiday parties. Honestly, I’ve seen folks grab them before the main dish even lands!
- Crowd-Pleaser: Kids, teens, adults—everyone loves them. I’ve never had leftovers unless I hide a few for myself.
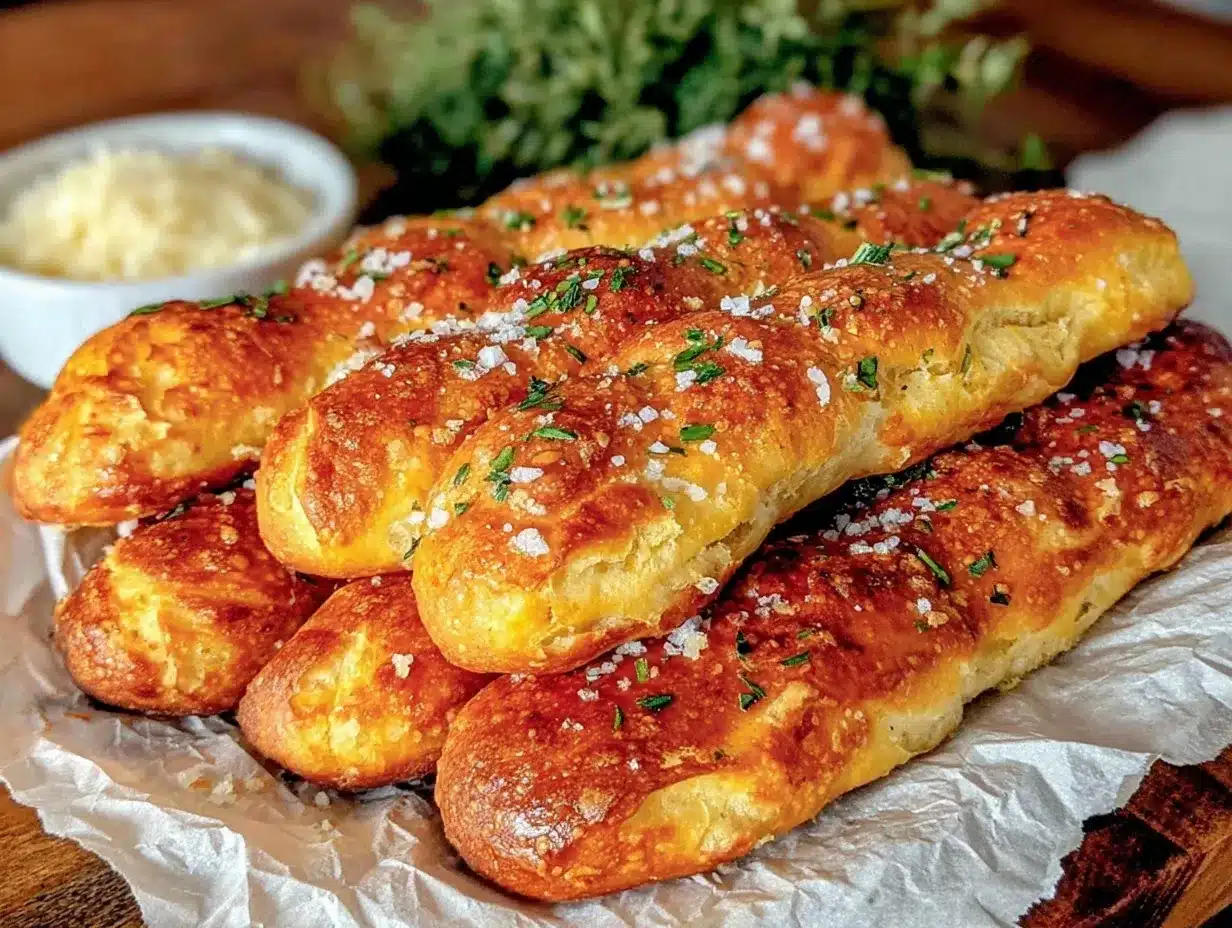
- Unbelievably Delicious: Soft, chewy insides with a golden, garlicky, buttery crust. They’re comfort food, plain and simple.
What sets this recipe apart? It’s the balance of flavors—just the right touch of garlic and butter, with a hint of sweetness in the dough. I use a special mixing technique for a super tender crumb and brush melted butter on twice for extra flavor. Sometimes, I toss in a bit of dried parsley or even a sprinkle of Parmesan for a twist. It’s all about making these breadsticks your own!
Honestly, these breadsticks make you close your eyes after the first bite. They taste like a treat you’d get only at a restaurant, but they come together faster and healthier (plus, you control what goes in). Whether you’re impressing guests or just craving some soul-soothing carbs, this Olive Garden breadsticks recipe transforms a simple meal into something memorable. Trust me—you’ll want to make them again and again.
What Ingredients You Will Need
This Olive Garden breadsticks recipe leans on straightforward, wholesome ingredients that deliver bold flavor and that classic, irresistible texture. No weird additives, no mystery—just honest pantry staples that come together in the tastiest way possible. Here’s what you’ll need:
- For the Dough:
- All-purpose flour (unbleached preferred, about 3 1/2 cups / 420g)
- Granulated sugar (2 tablespoons / 25g, adds a hint of sweetness)
- Instant yeast (2 1/4 teaspoons / 7g, or one packet)
- Salt (1 1/2 teaspoons / 9g, keeps flavor balanced)
- Warm water (1 cup / 240ml, about 110°F/43°C—helps activate the yeast)
- Unsalted butter, melted (2 tablespoons / 28g, for richness)
- For the Topping:
- Unsalted butter, melted (3 tablespoons / 42g, for brushing)
- Garlic powder (1/2 teaspoon / 2g, classic Olive Garden flavor)
- Fine salt (1/2 teaspoon / 3g, for sprinkling)
- Optional: Dried parsley flakes (for a pop of color and flavor)
A few ingredient notes from my own kitchen trials:
- I like King Arthur flour for consistent results, but any unbleached all-purpose flour works fine.
- If you need gluten-free breadsticks, swap the flour for a trusted blend (Bob’s Red Mill is my go-to).
- Dairy-free? Use vegan butter for brushing and in the dough—Earth Balance does the trick.
- For extra richness, you can replace some water with milk, but it’s optional.
- If you love a cheesy touch, sprinkle grated Parmesan after buttering!
Everything here is easy to find and even easier to tweak if you’re missing a thing or two. In summer, I’ll sometimes add a dash of Italian seasoning or swap garlic powder for roasted garlic. The recipe is forgiving, so don’t stress—just grab your pantry basics and you’re good to go.
Equipment Needed
You don’t need much to make these Olive Garden breadsticks—just a few trusty kitchen tools. Here’s what I reach for every time:
- Mixing bowls: One large and one medium, for dough and toppings (glass or stainless steel both work)
- Measuring cups and spoons: For precise flour, sugar, and yeast amounts
- Wooden spoon or dough whisk: My favorite for mixing dough without overworking it
- Stand mixer (optional): Makes kneading hands-free, but you can definitely do it by hand
- Baking sheet: Lined with parchment paper or a silicone mat for easy cleanup
- Pastry brush: For that essential butter and garlic topping
- Clean kitchen towel or plastic wrap: To cover dough during rising
If you’re missing a stand mixer, don’t sweat it—hand kneading works just fine (and gives you a little workout). I’ve used everything from thrift-store baking sheets to fancy silicone mats, and it all turns out great. For the pastry brush, even a clean basting brush will do. Just wash tools well after using butter—they last longer that way!
Honestly, this recipe is budget-friendly and forgiving on equipment. If you treat your basic tools well, homemade breadsticks will be a regular thing in your kitchen.
Preparation Method
Ready for the most satisfying bake of your week? Here’s how I make my Olive Garden breadsticks, step-by-step. (Follow along—these turn out soft and golden every time!)
- Activate the Yeast:
In a large mixing bowl, combine 1 cup (240ml) warm water (about 110°F/43°C), 2 tablespoons (25g) sugar, and 2 1/4 teaspoons (7g) instant yeast. Stir, then let sit for 5 minutes until it’s foamy and smells yeasty. If nothing happens, your water might be too hot or the yeast old—start fresh! - Mix the Dough:
Add 2 tablespoons (28g) melted butter and 1 1/2 teaspoons (9g) salt to the yeast mixture. Gradually stir in 3 1/2 cups (420g) flour. Mix with a wooden spoon until a shaggy dough forms. If it’s sticky, add flour 1 tablespoon at a time (up to 1/4 cup extra). The dough should feel soft but not wet. - Knead:
Knead the dough in the bowl for 5 minutes (or use a stand mixer with dough hook on low for 3 minutes). Dough should be smooth, elastic, and a little tacky. If it tears or feels dry, splash a teaspoon of water and knead again. - First Rise:
Shape dough into a ball, place in a lightly greased bowl, and cover with a towel or plastic wrap. Let rise in a warm spot for 1 hour, or until doubled in size. (I stick mine in the microwave—powered off—with a mug of hot water beside it.) Dough should feel airy and spring back when gently poked. - Shape Breadsticks:
Turn dough onto a floured surface. Divide into 12 equal pieces (about 50g each). Roll each piece into a rope about 7 inches (18cm) long. Place breadsticks 2 inches apart on a parchment-lined baking sheet. If they shrink, let them rest for 5 minutes and roll again. - Second Rise:
Cover breadsticks loosely with a towel and let rise 30-40 minutes, until puffy and soft. (You know they’re ready when a gentle poke leaves a slight indent.) - Bake:
Preheat oven to 400°F (200°C). Bake breadsticks for 11-13 minutes, until lightly golden on top and just barely browned on the edges. If your oven runs hot, check at 10 minutes. - Butter & Season:
Melt 3 tablespoons (42g) butter. Stir in 1/2 teaspoon garlic powder and 1/2 teaspoon fine salt. Brush generously over warm breadsticks. Sprinkle with parsley if you like. - Cool Slightly:
Let breadsticks cool for 5 minutes before serving. They should be soft and steamy inside, with a golden buttery crust.
My personal tip: For extra flavor, brush with butter before and after baking! If your breadsticks look pale, bake another 1-2 minutes. If they’re too dry, reduce baking time by a minute next round. (Everyone’s oven is different, you know?) Enjoy immediately for peak tenderness!
Cooking Tips & Techniques
After making this Olive Garden breadsticks recipe more times than I can count, I’ve learned a few tricks—and a couple “oops” moments along the way. Here’s what really helps:
- Proof Your Yeast: Always check that your yeast foams up in warm water before mixing. Dead yeast means dense breadsticks (been there, done that, trust me).
- Don’t Over-Flour: Dough should be slightly tacky, not stiff. Too much flour = tough breadsticks. If in doubt, err on the side of sticky.
- Warm Place for Rising: Dough loves warmth—if your kitchen is chilly, pop the covered bowl inside your oven (turned off) with just the oven light on.
- Even Shaping: For perfect restaurant-style breadsticks, roll dough ropes the same size. If they shrink back, let them rest then roll again.
- Bake on Middle Rack: Prevents over-browning and keeps texture soft. I’ve had breadsticks that crisp up too much on the bottom if placed too low.
- Double Butter Brush: Brush with butter before AND after baking for extra flavor and that shiny finish.
One time I forgot the salt in the dough—let’s just say, bland breadsticks aren’t worth the calories. Always taste your melted butter mixture before brushing! And don’t rush rising time; patience makes all the difference in tenderness. If prepping ahead, you can refrigerate shaped breadsticks overnight and bake fresh the next day. Multitasking tip: Start your pasta sauce while the dough rises—it’s a game changer for busy nights!
Consistency comes with practice. I keep notes on oven times and dough texture for each batch (yes, I’m that person). Follow these tips, and you’ll have Olive Garden breadsticks just like the restaurant—maybe even better!
Variations & Adaptations
Breadsticks may be simple, but they’re super versatile. Here are three of my favorite ways to switch up this Olive Garden breadsticks recipe:
- Gluten-Free: Use a trusted 1:1 gluten-free flour blend (like Bob’s Red Mill) and add 1/2 teaspoon xanthan gum for better texture. The flavor holds up, and they’re just as tender.
- Cheesy Breadsticks: Sprinkle grated Parmesan or mozzarella on top after brushing with butter. Let cheese melt in the oven for a gooey, savory twist (kids LOVE these!).
- Herb Infused: Mix 1 teaspoon dried Italian herbs or rosemary into the dough for a fragrant, earthy flavor. Perfect alongside tomato soup or a hearty salad.
For vegan breadsticks, swap butter for a plant-based alternative and use non-dairy milk in place of water for richer taste. I’ve also shaped these into twists or knots—just roll and twist before second rise. If you’re feeling adventurous, try adding roasted garlic or sun-dried tomatoes to the dough for a punchy, Mediterranean vibe.
One personal favorite: I brushed the breadsticks with garlic butter and then sprinkled Everything Bagel seasoning on top. It was a hit for brunch! Don’t be afraid to experiment—these breadsticks are a canvas for all sorts of flavors and dietary needs.
Serving & Storage Suggestions
These Olive Garden breadsticks are best served warm, fresh from the oven. Arrange them in a basket lined with a clean towel, and let family or guests pull them apart right at the table—nothing beats that soft, steamy interior!
For classic presentation, brush with extra melted butter and sprinkle with parsley. Pair them with pasta dishes (fettuccine Alfredo, spaghetti with meatballs), hearty soups, or a simple Caesar salad. If you’re hosting, set out a bowl of marinara for dipping—major crowd-pleaser!
To store, let breadsticks cool completely, then place in an airtight container or zip-top bag. They’ll stay soft at room temperature for 2 days, or refrigerate for up to 5 days. For longer storage, freeze breadsticks (wrapped tightly) for up to 2 months. To reheat, cover with foil and bake at 300°F (150°C) for 8-10 minutes, or microwave for 30 seconds until warm. (Butter them again after reheating for best flavor!)
Honestly, the flavors deepen overnight—garlic and butter meld perfectly. If you manage to save any, they’re just as tasty the next day!
Nutritional Information & Benefits
Here’s a quick look at the nutrition per breadstick (based on 12 breadsticks, with butter topping):
- Calories: ~150
- Fat: 4g
- Carbohydrates: 24g
- Protein: 3g
- Sodium: 220mg
All-purpose flour provides energy-boosting carbs, while yeast helps with digestion and flavor. Using unsalted butter keeps sodium lower than store-bought versions. If you swap in gluten-free flour or vegan butter, values will change a bit—still delicious and satisfying!
Allergens to note: contains wheat and dairy. For dairy-free, use plant butter; for gluten-free, swap flour. From my wellness perspective, these breadsticks are a treat—enjoy in moderation and pair with veggies or lean proteins for balance.
Conclusion
There’s just something about homemade Olive Garden breadsticks—they’re soft, garlicky, and satisfy any bread craving. Whether you’re making them for a cozy night in or a big family gathering, they bring smiles to the table every time. This recipe is easy to tweak, forgiving, and (let’s face it) absolutely addictive.
Try customizing with cheese, herbs, or even a vegan version. I love how these breadsticks turn an ordinary meal into a restaurant-worthy experience. Honestly, sharing them with family and friends is one of my favorite kitchen traditions.
I’d love to hear how you make these your own—drop a comment, share your photos, or tag me if you try any fun variations! Here’s to warm kitchens, happy memories, and breadsticks you’ll crave again and again.
FAQs
Can I make Olive Garden breadsticks ahead of time?
Absolutely! Shape the breadsticks, cover, and refrigerate overnight. Let them come to room temperature and rise before baking for fresh results.
What’s the best way to get soft, tender breadsticks?
Don’t over-flour the dough and let it rise in a warm spot. Brushing with butter before and after baking keeps them soft and flavorful.
Can I freeze leftover breadsticks?
Yes! Cool completely, wrap tightly, and freeze for up to 2 months. Reheat in the oven or microwave, then brush with a little butter.
Is it possible to make these breadsticks gluten-free?
Definitely. Use a 1:1 gluten-free flour blend and a touch of xanthan gum for structure. The flavor and texture are still fantastic!
What can I serve with Olive Garden breadsticks?
They’re perfect with pasta, soup, salad, or just on their own with marinara for dipping. I love them with creamy Alfredo or hearty minestrone.
Pin This Recipe!
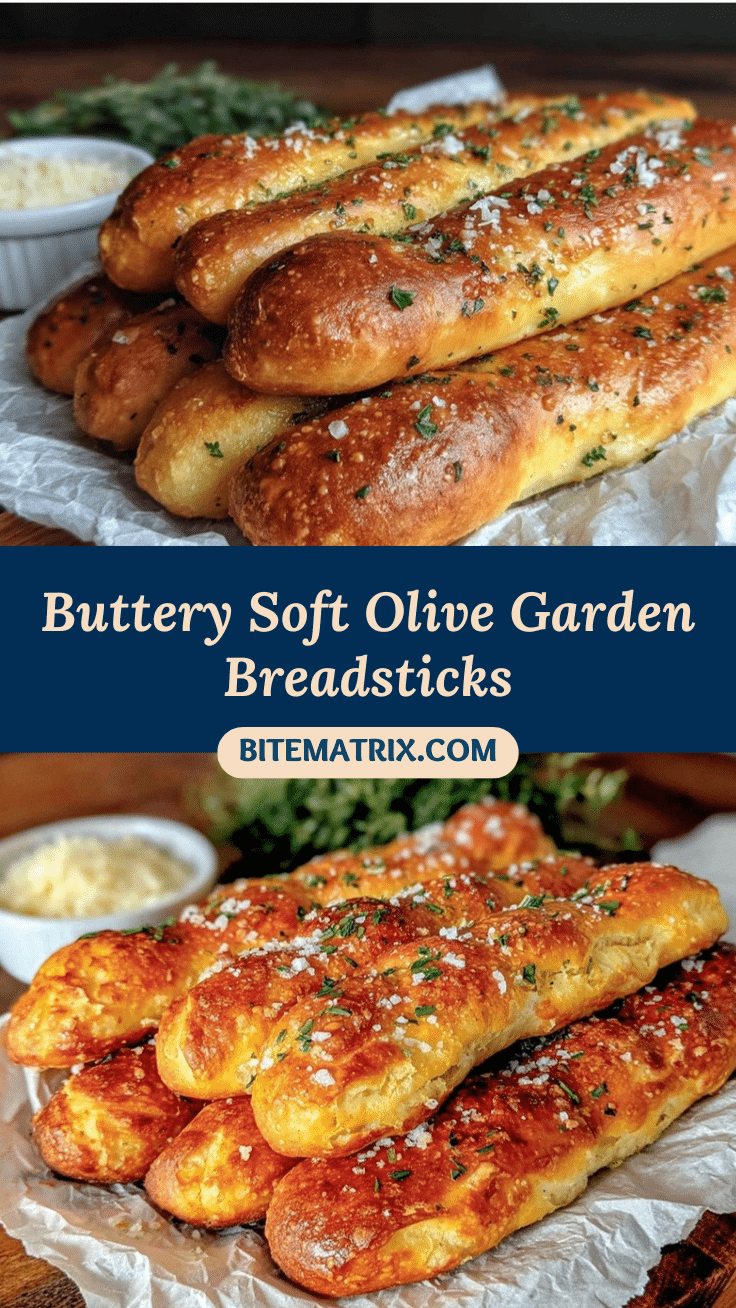
Olive Garden Breadsticks Recipe – Easy Homemade Copycat Guide

These homemade Olive Garden breadsticks are soft, garlicky, and buttery, just like the restaurant favorite. They’re quick to make, crowd-pleasing, and perfect for pairing with pasta, soup, or salad.
- Prep Time: 20 minutes
- Cook Time: 13 minutes
- Total Time: 2 hours
- Yield: 12 breadsticks 1x
- Category: Side Dish
- Cuisine: Italian-American
Ingredients
- 3 1/2 cups all-purpose flour (unbleached preferred)
- 2 tablespoons granulated sugar
- 2 1/4 teaspoons instant yeast (1 packet)
- 1 1/2 teaspoons salt
- 1 cup warm water (about 110°F)
- 2 tablespoons unsalted butter, melted
- 3 tablespoons unsalted butter, melted (for brushing)
- 1/2 teaspoon garlic powder
- 1/2 teaspoon fine salt (for sprinkling)
- Optional: dried parsley flakes
- Optional: grated Parmesan cheese
Instructions
- In a large mixing bowl, combine warm water, sugar, and instant yeast. Stir and let sit for 5 minutes until foamy.
- Add melted butter and salt to the yeast mixture. Gradually stir in flour until a shaggy dough forms. If sticky, add flour 1 tablespoon at a time.
- Knead dough in the bowl for 5 minutes (or use a stand mixer with dough hook on low for 3 minutes) until smooth and elastic.
- Shape dough into a ball, place in a lightly greased bowl, and cover. Let rise in a warm spot for 1 hour, or until doubled in size.
- Turn dough onto a floured surface. Divide into 12 equal pieces and roll each into a 7-inch rope. Place breadsticks 2 inches apart on a parchment-lined baking sheet.
- Cover breadsticks loosely and let rise 30-40 minutes, until puffy and soft.
- Preheat oven to 400°F. Bake breadsticks for 11-13 minutes, until lightly golden on top.
- Melt 3 tablespoons butter, stir in garlic powder and fine salt. Brush generously over warm breadsticks. Sprinkle with parsley or Parmesan if desired.
- Let breadsticks cool for 5 minutes before serving.
Notes
For extra flavor, brush breadsticks with butter before and after baking. Dough should be slightly tacky, not stiff. You can refrigerate shaped breadsticks overnight and bake fresh the next day. For gluten-free, use a 1:1 blend and add 1/2 teaspoon xanthan gum. For vegan, use plant-based butter and non-dairy milk.
Nutrition
- Serving Size: 1 breadstick
- Calories: 150
- Sugar: 2
- Sodium: 220
- Fat: 4
- Saturated Fat: 2
- Carbohydrates: 24
- Fiber: 1
- Protein: 3
Keywords: Olive Garden breadsticks, copycat breadsticks, homemade breadsticks, Italian breadsticks, garlic breadsticks, easy breadsticks, restaurant breadsticks