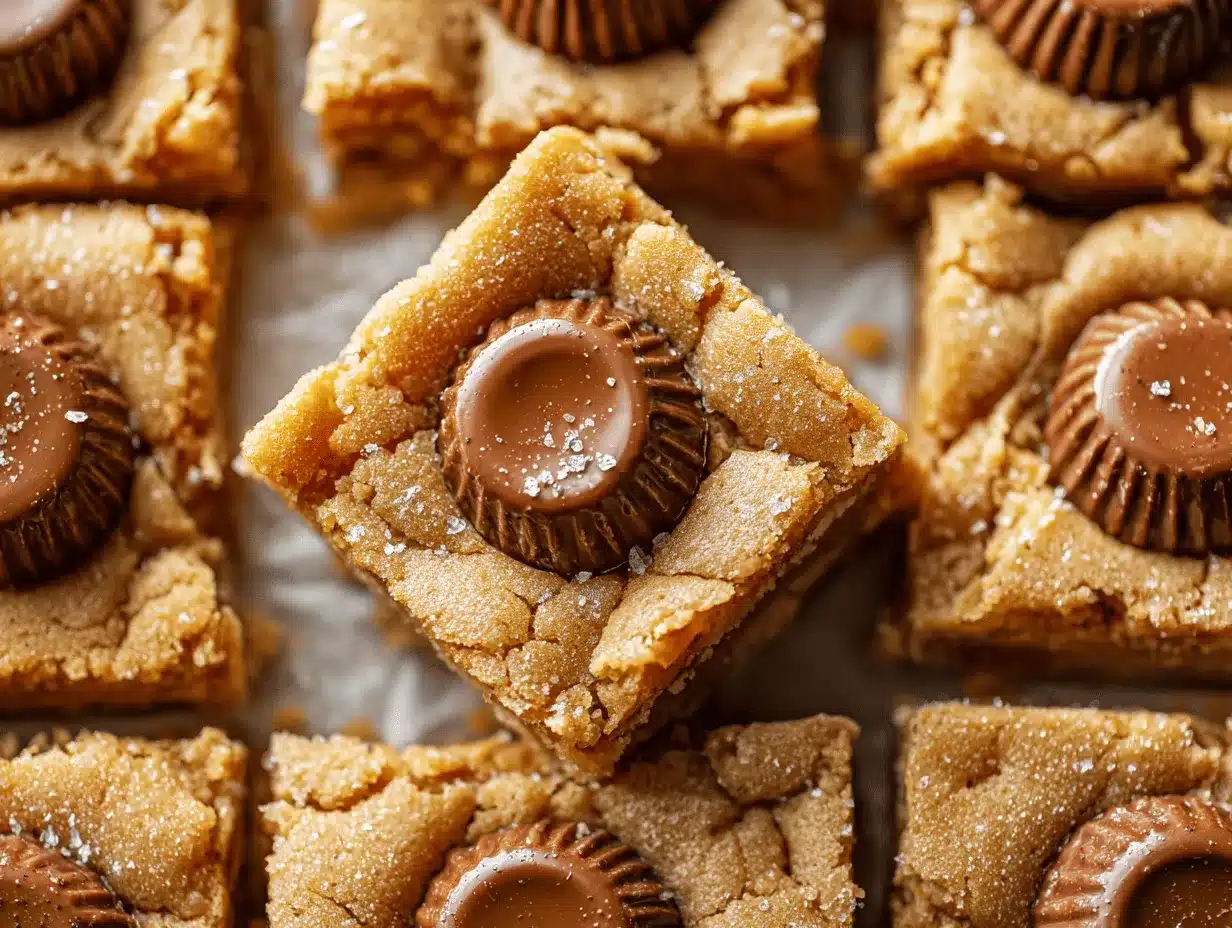
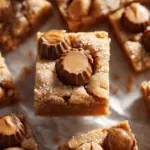
Warm, gooey peanut butter cookie bars studded with melty mini Reese’s cups—if you can’t already smell the sweet, nutty goodness, just wait until these are in your oven. Honestly, the first time I tried peanut butter blossom cookie bars with mini Reese’s cups was on a whim, using up leftover candy from Halloween. You know how you dig into the pantry, hoping for inspiration, and suddenly—bam—a new family favorite is born? That’s exactly how these came about.
There’s something about the classic blossom cookie—a peanut butter base crowned with chocolate—that’s pure comfort. But making dozens of individual cookies? Sometimes I just don’t have the patience (or the time!). That’s where these peanut butter blossom cookie bars swoop in to save the day. They deliver all the nostalgia and flavor of the original, but in an easy-to-cut, crowd-pleasing bar that’s perfect for sharing… or not. I won’t judge!
I’ve baked these for bake sales, after-school treats, and even as a last-minute holiday dessert when I was short on time. They never disappoint. What I love most is how the mini Reese’s cups melt slightly into the soft, golden peanut butter batter, creating that iconic chocolate-peanut butter combo in every single bite. If you’re a peanut butter lover or just someone who appreciates an easy, foolproof recipe, you’ll want to keep this one in your back pocket. Trust me, after testing (and taste-testing) this recipe more times than I’d like to admit, it’s become my go-to for instant cookie bar happiness.
Why You’ll Love This Recipe
Let’s face it, there are countless peanut butter bar recipes floating around, but these peanut butter blossom cookie bars with mini Reese’s cups are special. I’m not just saying that because I’ve baked enough to feed a small village—these bars have some real magic. Here’s why you’ll want to make them again and again:
- Quick & Easy: No scooping dough or rolling into balls. Just press, bake, and slice—perfect for when you need dessert fast.
- Simple Ingredients: You probably have everything on hand. No fancy stuff, just pantry basics and a bag of mini Reese’s cups.
- Perfect for Any Occasion: They fit right in at potlucks, birthday parties, or cozy nights in. I’ve even wrapped them up for holiday gifting, and they were a hit.
- Crowd-Pleaser: Kids and adults always go back for seconds. Seriously, I’ve had people ask for the recipe on the spot.
- Unbelievably Delicious: The combo of soft, chewy peanut butter cookie and creamy, melty chocolate is next-level comfort food.
What really sets this recipe apart is the way the mini Reese’s cups get gently pressed into the warm bars. I find it gives every slice its own chocolatey surprise, and the peanut butter base stays soft for days (if they last that long). Unlike some blossom bars that turn out dry or cakey, these are chewy and rich, thanks to a couple of tricks I’ve learned after way too many baking experiments (more on that later!). It’s a no-fail recipe that always brings a little joy—exactly the kind of baking we all need.
If you want a dessert that’s low-stress, high-reward, and pretty much guaranteed to bring some smiles, these peanut butter blossom cookie bars are it. I can’t count how many times these have turned a regular afternoon into something special.
What Ingredients You Will Need
This peanut butter blossom cookie bars recipe easy with mini Reese’s cups uses classic, accessible ingredients you probably already have in your pantry. Here’s what you’ll need to whip up a tray of these irresistible bars:
- For the Cookie Bar Base:
- 1/2 cup (115 g) unsalted butter, softened (adds richness and keeps bars tender)
- 1/2 cup (120 g) creamy peanut butter (I use Skippy or Jif for best texture, but natural PB works if well-stirred)
- 3/4 cup (150 g) granulated sugar
- 1/4 cup (50 g) light brown sugar, packed (adds chew)
- 1 large egg, room temperature
- 1 tsp vanilla extract (real vanilla gives best flavor—don’t skip!)
- 1 1/4 cups (160 g) all-purpose flour
- 1/2 tsp baking soda
- 1/4 tsp salt
- For the Topping:
- 20-24 mini Reese’s peanut butter cups, unwrapped (for that classic blossom cookie vibe)
- Optional: A sprinkle of flaky sea salt for a sweet & salty finish
Ingredient Notes & Swaps:
- Butter: Salted butter is fine if that’s all you have—just skip the added salt.
- Peanut Butter: Chunky peanut butter adds a bit of crunch if you like texture. For nut allergies, sunflower seed butter works, but the flavor will change.
- Flour: For gluten-free bars, use a 1:1 gluten-free flour blend (I’ve had good luck with King Arthur’s).
- Sugar: Coconut sugar can replace the brown sugar for a more caramel-y flavor.
- Mini Reese’s Cups: You can swap in Hershey’s Kisses or use mini chocolate chips if you’re out of cups.
Most of these ingredients are pantry staples, so you can make these bars on a whim—no need for special trips to the store. If you’re baking in summer and want a twist, try adding a handful of chopped strawberries before baking for a PB&J vibe. I’ve even made these with almond butter and dark chocolate cups for a grown-up version. The recipe is forgiving and flexible, so don’t stress if you need to make a few swaps!
Equipment Needed
You don’t need any fancy equipment for this peanut butter blossom cookie bars recipe easy with mini Reese’s cups, which is half the beauty of it. Here’s what I use every time:
- 8×8-inch (20×20 cm) baking pan: I prefer metal for even browning, but glass works too (just watch for overbaking).
- Mixing bowls: One medium for the wet ingredients, one for the dry.
- Hand mixer or stand mixer: Makes creaming the butter and sugar a breeze, but a sturdy whisk and elbow grease work in a pinch.
- Spatula: For scraping the bowl and smoothing the batter into the pan.
- Measuring cups and spoons: For accuracy—especially with flour and peanut butter.
- Parchment paper: Optional, but I always line my pan so the bars lift out easily for neat slicing.
- Sharp knife: Essential for cutting clean squares.
If you don’t have an 8×8 pan, you can use a 9×9 and shorten the baking time by a few minutes (bars will be a bit thinner). For easier cleanup, disposable foil pans work in a pinch—just be gentle when slicing. I’ve baked these in a toaster oven once, too (long story), and they turned out just fine! Just keep an eye on them near the end. Maintenance tip: if you use nonstick pans, avoid metal utensils to keep the coating in good shape.
Preparation Method
- Preheat your oven: Set to 350°F (175°C). Line your 8×8-inch (20×20 cm) baking pan with parchment paper, leaving some overhang for easy lifting. If you skip the parchment, just grease the pan well with butter or nonstick spray.
- Cream the butter & sugars: In a medium mixing bowl, beat 1/2 cup (115 g) unsalted butter, 1/2 cup (120 g) creamy peanut butter, 3/4 cup (150 g) granulated sugar, and 1/4 cup (50 g) light brown sugar together until light and fluffy—about 2-3 minutes with a hand mixer. The mixture should look pale and a little glossy. If you’re mixing by hand, use a sturdy whisk and some muscle!
- Add egg & vanilla: Crack in 1 large egg and pour in 1 tsp vanilla extract. Beat until well combined and smooth. The batter will thicken slightly.
- Mix the dry ingredients: In a separate bowl, whisk together 1 1/4 cups (160 g) all-purpose flour, 1/2 tsp baking soda, and 1/4 tsp salt. This step helps distribute the baking soda evenly, so you don’t end up with weird pockets of flavor.
- Combine wet and dry: Add the dry ingredients to the wet mixture. Mix on low speed or gently by hand just until no streaks of flour remain. Overmixing can make the bars tough, so stop as soon as it’s incorporated. The dough should be thick and a bit sticky.
- Spread into the pan: Scoop the dough into the prepared baking pan. Use a spatula or your (clean!) hands to press it into an even layer, making sure to reach all the corners. The batter might resist a bit—just keep smoothing.
- Bake: Place the pan in the center of your oven and bake for 18-22 minutes. The bars are done when the edges are lightly golden and a toothpick inserted into the center comes out clean or with just a few moist crumbs. Don’t overbake! The center should look set but still soft, as they’ll firm up while cooling.
- Add mini Reese’s cups: Immediately after taking the pan out of the oven, gently press 20-24 mini Reese’s cups into the top of the warm cookie bars, spacing them evenly. The cups will soften and melt slightly—that’s exactly what you want.
- Cool completely: Let the bars cool in the pan for at least 1 hour. If you try to cut them too soon, they’ll fall apart (trust me, I’ve been impatient and learned the hard way!). For quickest cooling, place the pan on a wire rack.
- Slice & serve: Use the parchment handles to lift the bars from the pan. Cut into 16 squares (or more, if you prefer smaller bites). For cleaner cuts, wipe your knife between slices.
Troubleshooting: If your bars seem dry, they may have been overbaked. Next time, check them a minute or two early. If they’re too gooey, let them cool longer before slicing—they’ll firm up as they cool. Don’t worry if the Reese’s cups sink a bit; that’s part of the charm!
Cooking Tips & Techniques
After making these peanut butter blossom cookie bars more times than I should probably admit, I’ve picked up a few tricks that guarantee perfect results every time:
- Don’t Overmix: Once you add the flour, mix just until combined. Overworking the dough can make the bars tough instead of tender.
- Room Temperature Ingredients: Softened butter and room-temp eggs blend more smoothly, which means a more even, tender crumb. If I forget to take the egg out, I pop it in warm water for 5 minutes.
- Press Evenly: Use the back of a measuring cup to smooth the dough into the pan for a level bake. Uneven dough can lead to lopsided bars (been there—still tasty, though!).
- Timing the Reese’s Cups: Press them in right after baking, while the bars are hot. If you wait too long, the cups won’t melt into the cookie and might pop out later.
- Chilling Makes Neater Slices: For perfect squares, chill the bars in the fridge for 30 minutes after cooling to room temp. Bars cut cleaner (especially if you’re going for that Pinterest-worthy look).
- Check Early: Oven temps vary, so I start checking at 18 minutes. Overdone bars get dry fast—err on the side of slightly underbaked.
- Don’t Skip the Salt: Even a little salt balances the sweetness and brings out the peanut butter flavor. I sometimes sprinkle flaky salt on top for a grown-up twist.
One time I got distracted and let the bars cool too long before adding the Reese’s cups—they just sat on top instead of melting in. Still delicious, but not the classic look! Lesson learned: have your cups ready to go before the timer dings.
Variations & Adaptations
I love how versatile this peanut butter blossom cookie bars recipe is—it’s easy to tweak for different tastes, dietary needs, or whatever you’ve got on hand. Here are a few of my favorite twists:
- Chocolate Drizzle: Melt 1/3 cup (60 g) chocolate chips and drizzle over cooled bars for extra chocolatey goodness. Honestly, it’s never too much chocolate!
- Gluten-Free Version: Swap the all-purpose flour for a 1:1 gluten-free blend. I use King Arthur’s Measure for Measure; bars turn out just as chewy and satisfying.
- Nut-Free Adaptation: Use sunflower seed butter and swap the Reese’s cups for nut-free chocolate candies. The bars take on a slightly different flavor but are still delicious.
- Seasonal Mix-Ins: In the fall, add a handful of mini chocolate chips and a pinch of cinnamon. For summer, swirl in raspberry or strawberry jam before baking for a PB&J twist.
- Vegan Option: Use vegan butter and a flax egg (1 tbsp flaxseed meal + 2.5 tbsp water, mixed and rested for 5 minutes). Reese’s makes vegan cups now, too—win!
My personal favorite? Swapping in almond butter and using dark chocolate mini cups. It’s a little more grown-up and perfect with a cup of coffee. Don’t be afraid to get creative—this recipe is forgiving, and it’s fun to see what you come up with!
Serving & Storage Suggestions
These peanut butter blossom cookie bars are best served at room temperature, where the cookie is soft and the chocolate centers are just set. For a little extra flair, I like to sprinkle a pinch of flaky sea salt on top right before serving—it makes the chocolate pop!
They look gorgeous stacked on a platter for parties or snuggled into a lunchbox for a sweet surprise. Pair them with a cold glass of milk, hot coffee, or even a scoop of vanilla ice cream for dessert. If you’re feeling fancy, drizzle with a little melted chocolate or dust with powdered sugar for that bakery look.
To store, place bars in an airtight container at room temp for up to 4 days. They stay soft and chewy (sometimes even better the next day!). For longer storage, freeze individual bars wrapped in plastic wrap and then foil for up to 2 months. Thaw at room temp or microwave for a few seconds for that fresh-baked taste. If you like the chocolate extra soft, zap a bar in the microwave for 8-10 seconds before eating. The flavors meld and deepen as they sit, so don’t worry if you have leftovers—they’re just as delicious on day three.
Nutritional Information & Benefits
Each cookie bar (based on a batch of 16) has approximately 185 calories, 10g fat, 20g carbs, and 4g protein. The peanut butter provides a dose of healthy fats and protein, while the mini Reese’s cups satisfy any chocolate craving. If you use natural peanut butter and a lower-sugar chocolate, you can shave off a few grams of sugar.
These bars are naturally vegetarian and can be made gluten-free or nut-free with the right swaps. Just watch out for peanut and dairy allergens in the Reese’s cups. While they’re definitely a treat, I like to think the protein from the peanut butter gives them a little more staying power than your average bar cookie. As always, my philosophy is all about balance—a little indulgence goes a long way toward making life sweet.
Conclusion
If you’re looking for the ultimate peanut butter cookie bar recipe that’s easy, crowd-pleasing, and packed with chocolate-peanut butter goodness, this is it. These peanut butter blossom cookie bars with mini Reese’s cups are a little celebration in every bite—no fussy steps, just classic flavor and gooey happiness.
Feel free to play with flavors and make them your own. I’ve loved sharing this recipe with friends and family, and it’s always fun to see the different twists people come up with. Baking should be joyful, not stressful, and these bars are proof that simple recipes can still be totally irresistible.
If you give these a try, let me know how you liked them! Leave a comment below, share your favorite add-ins, or snap a photo and tag me on Pinterest. Here’s to easy baking, happy memories, and never letting a single mini Reese’s cup go to waste!
Frequently Asked Questions
Can I use regular-sized Reese’s cups instead of mini?
Mini cups work best for even distribution, but you can chop regular Reese’s cups into quarters and press them into the bars. Just be gentle when slicing!
Do I need to chill the dough before baking?
No chilling required—just mix, press into the pan, and bake. That’s what makes this recipe such a time-saver.
How do I keep the bars from getting dry?
Start checking for doneness at 18 minutes. Pull the bars as soon as the edges are golden and the center is just set. Overbaking is the main culprit for dryness.
Can I double the recipe for a bigger crowd?
Absolutely! Double all ingredients and bake in a 9×13-inch (23×33 cm) pan. Add a few extra minutes to the bake time, but check early to avoid overbaking.
What’s the best way to store leftovers?
Keep bars in an airtight container at room temp for up to 4 days, or freeze individually for up to 2 months. Thaw before eating, and microwave briefly if you want the chocolate extra gooey.
PrintPeanut Butter Blossom Cookie Bars with Mini Reese’s Cups
Warm, gooey peanut butter cookie bars studded with melty mini Reese’s cups. These easy-to-make bars deliver all the nostalgia and flavor of classic blossom cookies, but in a simple, crowd-pleasing bar form.
- Prep Time: 15 minutes
- Cook Time: 20 minutes
- Total Time: 1 hour 35 minutes
- Yield: 16 bars 1x
- Category: Dessert
- Cuisine: American
Ingredients
- 1/2 cup (115 g) unsalted butter, softened
- 1/2 cup (120 g) creamy peanut butter
- 3/4 cup (150 g) granulated sugar
- 1/4 cup (50 g) light brown sugar, packed
- 1 large egg, room temperature
- 1 tsp vanilla extract
- 1 1/4 cups (160 g) all-purpose flour
- 1/2 tsp baking soda
- 1/4 tsp salt
- 20–24 mini Reese’s peanut butter cups, unwrapped
- Optional: Flaky sea salt for sprinkling
Instructions
- Preheat your oven to 350°F (175°C). Line an 8×8-inch (20×20 cm) baking pan with parchment paper, leaving overhang for easy lifting, or grease the pan well.
- In a medium mixing bowl, beat together the butter, peanut butter, granulated sugar, and brown sugar until light and fluffy (about 2-3 minutes with a hand mixer).
- Add the egg and vanilla extract. Beat until well combined and smooth.
- In a separate bowl, whisk together the flour, baking soda, and salt.
- Add the dry ingredients to the wet mixture. Mix on low speed or by hand just until no streaks of flour remain. Do not overmix.
- Spread the dough evenly into the prepared baking pan, pressing it into the corners.
- Bake for 18-22 minutes, until the edges are lightly golden and a toothpick inserted in the center comes out clean or with a few moist crumbs.
- Immediately after removing from the oven, gently press the mini Reese’s cups into the top of the warm bars, spacing them evenly.
- Let the bars cool in the pan for at least 1 hour before slicing.
- Lift the bars from the pan using the parchment handles and cut into 16 squares. Wipe your knife between slices for cleaner cuts.
Notes
For gluten-free bars, use a 1:1 gluten-free flour blend. For nut allergies, substitute sunflower seed butter and nut-free chocolate candies. Do not overbake for best texture. For neater slices, chill the bars in the fridge for 30 minutes after cooling. Store in an airtight container at room temperature for up to 4 days or freeze for up to 2 months.
Nutrition
- Serving Size: 1 bar (1/16 of recipe)
- Calories: 185
- Sugar: 13
- Sodium: 95
- Fat: 10
- Saturated Fat: 4
- Carbohydrates: 20
- Fiber: 1
- Protein: 4
Keywords: peanut butter, cookie bars, Reese's, easy dessert, peanut butter blossom, chocolate, bar cookies, bake sale, holiday dessert, crowd-pleaser