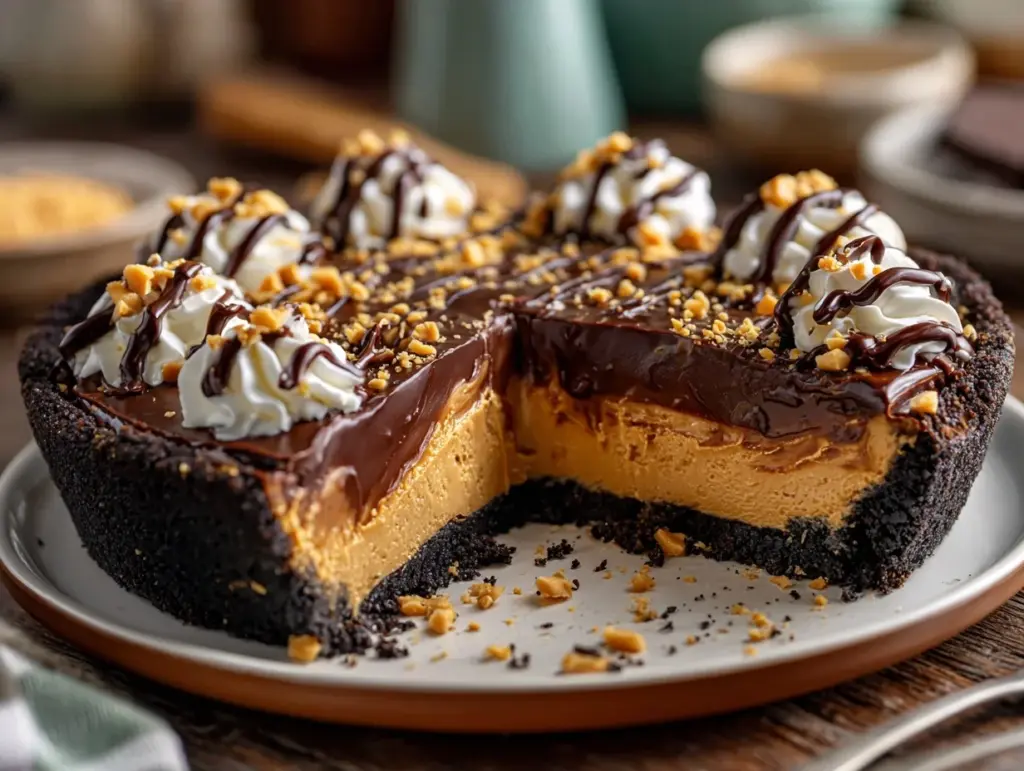
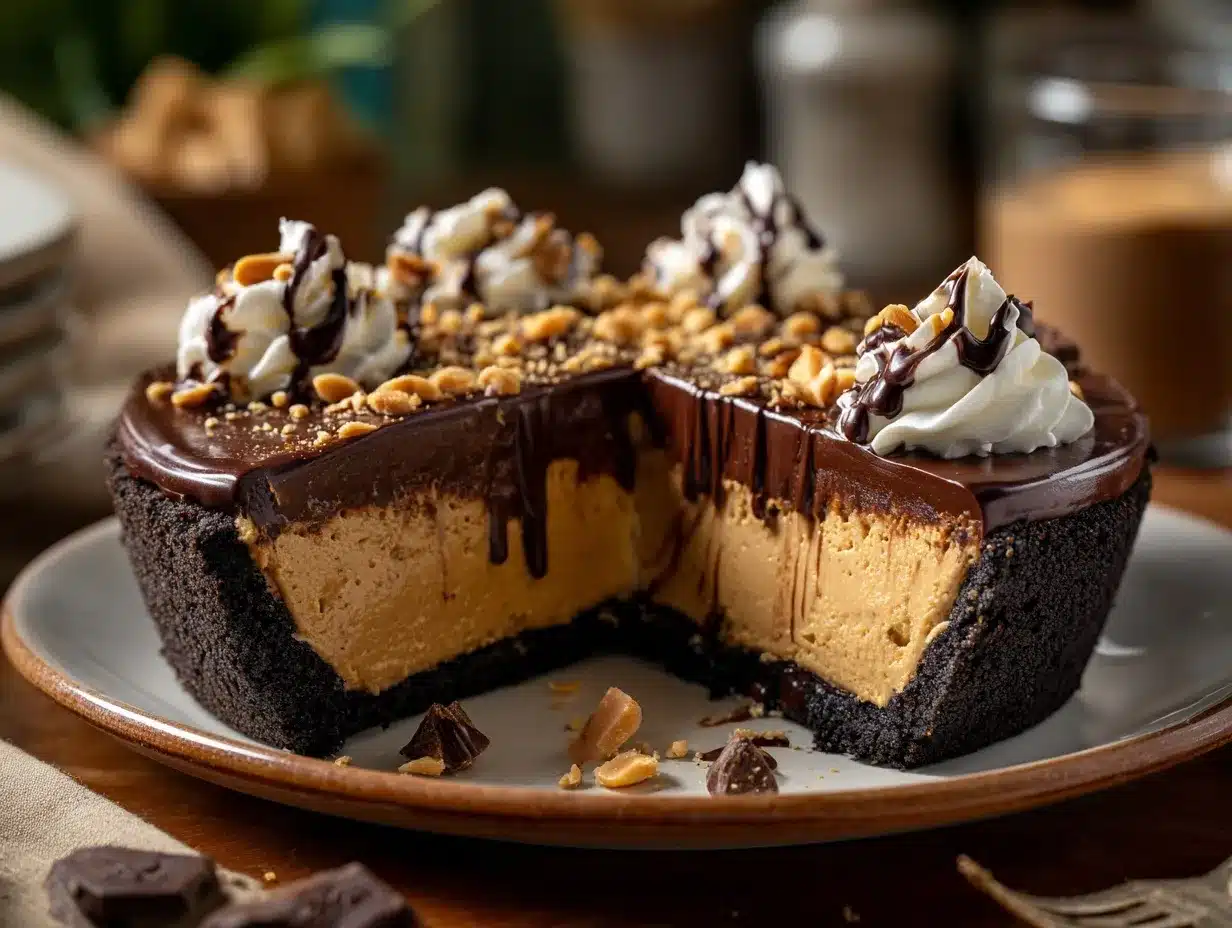
There’s something downright magical about the moment you cut into a chilled, creamy peanut butter pie with Oreo crust. The chocolatey crumbs crunch ever so slightly under your fork, giving way to a cloud of fluffy peanut butter filling. I’ll be honest—this pie is the reason my friends suddenly “drop by” around dessert time. It all started when I was searching for a no-bake treat that felt decadent but didn’t require a hot oven in the summertime. One bite of this peanut butter pie with Oreo crust, and I knew I’d hit on something special. The combo is irresistible—rich, nostalgic, and just a little bit over-the-top. If you’re looking for a dessert that’s easy enough for a weekday but show-stopping enough for a celebration, this is it.
My love for peanut butter and chocolate probably started back in childhood (hello, Reese’s cups), but this pie is my grown-up take on that classic combo. It’s big on flavor, easy on effort, and honestly, it’s hard not to sneak a slice for breakfast. I’ve tested this recipe more times than I can count—tweaking the crust-to-filling ratio, adjusting sweetness, and making sure it’s sturdy enough to slice but still melt-in-your-mouth smooth. Whether you’re a seasoned home baker or just want a foolproof dessert to wow your crew, this peanut butter pie with Oreo crust is about to become your signature treat. Perfect for potlucks, birthdays, or just a random Tuesday when you need a chocolate fix!
What really sets this apart? No oven required, minimal mess, and it’s practically impossible to mess up. If you’ve ever struggled with complicated pie recipes, this one will restore your faith (and your sweet tooth). Let’s get mixing!
Why You’ll Love This Peanut Butter Pie with Oreo Crust
- No-Bake Wonder: No oven, no problem! This pie is ready for the fridge, not the oven—making it perfect any time of year, especially in the heat of summer.
- Chocolate & Peanut Butter Perfection: The Oreo crust adds chocolatey crunch that pairs perfectly with the creamy peanut butter filling. It’s a classic combo, but done better.
- Quick and Easy: You can whip this up in about 20 minutes (plus chilling time). The hardest part is waiting for it to set!
- Simple Ingredients: Everything you need is probably already in your pantry or fridge. No fancy stuff—just pure comfort food.
- Crowd-Pleaser: Kids, adults, peanut butter lovers, and even the chocolate-obsessed—this pie gets rave reviews at every gathering. I’ve never brought home leftovers from a party.
- Make-Ahead Friendly: It actually gets better if you let it chill overnight, so it’s perfect for prepping ahead of time.
- Customizable: Allergic to peanuts? Swap in almond or sunflower butter. Want more chocolate? Add a chocolate ganache or sprinkle chocolate chips on top.
After testing this recipe for family birthdays, holiday potlucks, and let’s be honest, a few late-night cravings, I can say with total confidence this is the ultimate peanut butter pie with Oreo crust. It’s not just another pie—it’s creamy, dreamy, and downright addictive. The first bite is pure nostalgia, but the smooth, rich filling and chocolatey crust make it feel a little extra special. Whether you’re impressing guests or just treating yourself, this pie is a surefire win.
Honestly, this is the kind of dessert people ask about for weeks after. The secret? A perfectly balanced filling (not too sweet, not too dense), a thick Oreo crust that’s easy to slice, and a chilled, creamy texture that hits every time. No stress, no complicated techniques—just a pie you’ll want to make again and again.
What Ingredients You Will Need
This peanut butter pie with Oreo crust uses classic ingredients that come together for a seriously delicious treat. Here’s what you’ll need—no fancy shopping required!
For the Oreo Crust
- Oreo cookies (about 25-28 whole cookies, 250g) – no need to remove the filling; it helps bind the crust and adds flavor
- Unsalted butter (1/2 cup or 115g, melted) – brings everything together and gives the crust richness
For the Peanut Butter Filling
- Creamy peanut butter (1 cup or 240g) – use shelf-stable brands like Jif or Skippy for the best texture (natural peanut butter can cause the filling to separate)
- Cream cheese (8 oz or 225g, softened) – gives the filling a tangy, rich body (I like Philadelphia for best results)
- Powdered sugar (1 cup or 120g, sifted) – sweetens and helps thicken the filling
- Heavy whipping cream (1 cup or 240ml, cold) – when whipped, makes the filling ultra-light and fluffy
- Vanilla extract (1 teaspoon) – adds a warm, rounded flavor (I use pure vanilla, but imitation works in a pinch)
- Pinch of salt – just a touch to bring out the peanut butter and chocolate notes
For the Topping (Optional but Highly Recommended!)
- Extra whipped cream – dollop or pipe on top for a bakery look
- Chopped roasted peanuts – adds crunch and a salty finish
- Mini chocolate chips or shaved chocolate – for extra chocolatey flair
- Chocolate syrup or melted chocolate (drizzled on top for drama!)
Ingredient Tips:
- If you need this to be gluten-free, swap in gluten-free chocolate sandwich cookies for the crust.
- Dairy-free? Use vegan butter, dairy-free cream cheese, and coconut whipped cream. The texture will be slightly different but still delicious.
- If you love salty-sweet, use salted roasted peanuts for the topping!
- Store-brand Oreos work fine, but stick with the classic chocolate flavor for best results.
Equipment Needed
- 9-inch pie plate – Glass or metal both work; glass lets you see when the crust is set.
- Food processor or blender – Makes crushing the Oreos super easy. If you don’t have one, a zip-top bag and rolling pin do the trick (just takes more elbow grease).
- Mixing bowls – One large for the filling, one medium for the whipped cream.
- Electric mixer (hand or stand) – Whipping the cream by hand is possible, but honestly? It’s way easier with a mixer.
- Rubber spatula – For folding the whipped cream into the peanut butter mixture gently.
- Measuring cups and spoons – Accurate measurements help your pie set just right.
- Offset spatula (optional) – Makes smoothing the filling and adding whipped cream swirls a breeze.
On a budget? Use a basic mixing bowl and a whisk if you don’t have a mixer—you’ll just need some extra muscle for whipping the cream. I’ve made this pie in a disposable foil pie pan for easy transport, too. Just don’t forget to chill it on a flat surface so the filling sets evenly!
Pro tip: Wipe down your blades and bowls with a little vinegar or lemon juice before whipping cream. Any leftover fat can keep your cream from fluffing up.
How to Make Peanut Butter Pie with Oreo Crust
-
Prepare the Oreo Crust:
– Place 25-28 Oreo cookies (about 250g) into a food processor. Pulse until you have fine crumbs, about 30 seconds. If you don’t have a processor, put cookies in a large zip-top bag and crush with a rolling pin.
– Pour in 1/2 cup (115g) melted unsalted butter. Pulse or stir until all crumbs are evenly moistened.
– Press the mixture firmly into the bottom and up the sides of a 9-inch pie plate. Use the bottom of a glass or measuring cup to get a tight, even layer.
– Chill the crust in the refrigerator while you prepare the filling (at least 20 minutes). -
Make the Whipped Cream:
– In a medium bowl, pour 1 cup (240ml) cold heavy whipping cream.
– Using an electric mixer, beat on medium-high until soft peaks form, about 2-3 minutes. Don’t overmix! Set aside in the fridge. -
Prepare the Peanut Butter Filling:
– In a large mixing bowl, beat together 1 cup (240g) creamy peanut butter and 8 oz (225g) softened cream cheese until smooth and fluffy (about 2 minutes).
– Add 1 cup (120g) powdered sugar, 1 teaspoon vanilla extract, and a pinch of salt. Beat until well combined and creamy. -
Fold in Whipped Cream:
– Gently fold half the whipped cream into the peanut butter mixture using a rubber spatula. This lightens the filling.
– Add the remaining whipped cream and fold just until no streaks remain. The filling should be airy and smooth. -
Fill the Crust:
– Spoon the peanut butter filling into the chilled Oreo crust.
– Smooth the top with an offset spatula or the back of a spoon. -
Chill the Pie:
– Cover loosely with plastic wrap.
– Refrigerate for at least 4 hours, or overnight for the best texture. The filling will firm up and slice cleanly. -
Add Toppings (Optional):
– Just before serving, top with swirls of whipped cream, a sprinkle of chopped peanuts, mini chocolate chips, or a drizzle of chocolate syrup. -
Slice and Serve:
– For the cleanest slices, dip a sharp knife in hot water and wipe dry between cuts.
– Serve chilled and enjoy every bite!
Troubleshooting Tips:
- If your crust is crumbly, try packing it down more firmly or adding an extra tablespoon of melted butter.
- Filling soft? Make sure your cream cheese and peanut butter aren’t too warm, and don’t skip chilling time.
- Don’t overwhip the cream—if it gets grainy, start again with fresh cream for the best texture.
Trust me, once you’ve made this peanut butter pie with Oreo crust a couple of times, you’ll know the little cues—the crust will feel slightly firm to the touch, and the filling should look pillowy and hold its shape. (If you sneak a spoonful, I won’t tell!)
Pro Cooking Tips & Techniques
- Use Room Temperature Cream Cheese: Cold cream cheese can leave lumps in your filling. Let it sit out for 30-60 minutes before mixing.
- Don’t Rush the Chill Time: I’ve tried slicing this pie too soon, and the filling just oozed out. Four hours is the minimum, but overnight is even better for perfect slices.
- Blend the Peanut Butter and Cream Cheese First: Mixing these before adding sugar and whipped cream guarantees a silky-smooth filling.
- Firm Crust Tip: If your crust seems too loose, pop it in the freezer while you make the filling. It’ll set up extra firm.
- Keep Everything Cold: Whipped cream whips up best when both the cream and the bowl are cold. If your kitchen is warm, chill the bowl first.
- Multitasking: While the crust chills, prep the filling ingredients. This way, you’re never waiting around.
- Mess-Free Slicing: For Pinterest-worthy slices, wipe your knife with a damp, warm cloth between cuts.
- Common Mistake: Using natural peanut butter. I tried this once and my filling separated. Stick with classic creamy peanut butter for best results.
Honestly, I’ve learned some of these tips the hard way (soggy crust, soupy filling—been there!). But every time I tweak and taste, the pie just keeps getting better. Follow these tricks, and your peanut butter pie with Oreo crust will come out picture-perfect every time.
Variations & Adaptations
- Gluten-Free Version: Use gluten-free chocolate sandwich cookies for the crust. The texture and taste are surprisingly close to the original.
- Dairy-Free or Vegan: Swap in vegan butter, dairy-free cream cheese, and use coconut cream (chilled and whipped) instead of heavy cream. The filling will taste a bit different—slightly coconutty—but still totally dreamy.
- Nut-Free Twist: Try sunflower seed butter in place of peanut butter and skip the nut toppings if you’re working around allergies.
- Chocolate Lovers’ Dream: Add a layer of melted chocolate between the crust and filling, or top with a dark chocolate ganache before chilling.
- Seasonal Flavors: Swirl in a bit of raspberry jam before adding the filling to the crust for a PB&J inspired pie.
- My Favorite Hack: Sometimes, I fold in chopped Reese’s cups or mini peanut butter cups to the filling. It’s over-the-top, but hey, why not?
Don’t be afraid to play around—this recipe is super forgiving. If you’re making a big batch for a crowd, double the recipe and use a 9×13-inch pan for peanut butter pie bars instead of a classic round pie. It’s just as tasty and even easier to serve!
Serving & Storage Suggestions
Peanut butter pie with Oreo crust is best served chilled. I love serving thick slices on pretty plates, topped with a cloud of whipped cream and a sprinkle of chocolate shavings or peanuts. If you’re making this for a party, you can pipe whipped cream rosettes around the edge for a bakery-worthy finish.
This pie pairs beautifully with cold milk, hot coffee, or even a scoop of vanilla ice cream. For a fancier presentation, a drizzle of warm chocolate sauce takes it up a notch.
Storage Tips:
- Refrigerator: Cover tightly with plastic wrap or foil. Pie stays fresh for up to 4 days.
- Freezer: Yes, you can freeze it! Wrap the whole pie (or individual slices) in plastic wrap and foil. Freeze for up to 2 months. Thaw overnight in the fridge before serving.
- Reheating: No need—this pie is meant to be served cold. But if you like the crust extra crisp, pop a slice in the freezer for 15 minutes before eating. It’s almost like an ice cream pie!
Honestly, the flavors deepen after a day in the fridge, so making it ahead is not only convenient, but actually makes it taste even better.
Nutritional Information & Benefits
This peanut butter pie with Oreo crust is definitely an indulgence, but it’s worth every bite. A typical slice (1/8 of the pie) delivers approximately:
- Calories: 450-500
- Fat: 30g
- Carbohydrates: 40g
- Protein: 8g
Key Benefits: You get a little protein boost from the peanut butter and cream cheese, plus a dose of calcium. If you use a nut butter alternative, it’s easy to adapt for allergies. This recipe can be made gluten-free or dairy-free with simple swaps. Be aware: it contains peanuts, dairy, and gluten (unless adapted).
From a wellness perspective? I say a little slice of happiness is good for the soul. Everything in moderation, right?
Conclusion
If you’re craving something rich, creamy, and packed with chocolate-peanut butter goodness, this peanut butter pie with Oreo crust is calling your name. It’s easy, no-bake, and basically foolproof—even if you’re new to pie-making. I love how customizable it is, and there’s just something about that first cold, dreamy bite that makes it worth every step.
Honestly, this recipe has become a staple in my kitchen—my go-to for celebrations, potlucks, or just when I want to treat myself. Don’t be afraid to make it your own: add your favorite toppings, swap in a different nut butter, or double down on chocolate if that’s your thing.
Give it a try and let me know how it turns out! Leave a comment, share your favorite twist, or tag me if you post a photo. Here’s to more sweet moments and the ultimate no-bake dessert!
Frequently Asked Questions
Can I use natural peanut butter in this pie?
I wouldn’t recommend it—natural peanut butter is too oily and can cause the filling to separate. Stick with classic creamy peanut butter for the smoothest results.
How far in advance can I make peanut butter pie with Oreo crust?
You can make it up to two days ahead! In fact, the flavors get even better as it chills. Just add toppings right before serving.
What’s the best way to crush Oreos for the crust?
A food processor is quickest, but a zip-top bag and rolling pin work too. Make sure the crumbs are fine for a sturdy crust.
Can I freeze leftover pie?
Absolutely! Wrap slices tightly and freeze for up to 2 months. Thaw in the fridge overnight for a creamy texture.
Do I need to bake the Oreo crust?
Nope! This is a true no-bake recipe. Just chill the crust while you make the filling, and it’ll set up perfectly.
Pin This Recipe!

Peanut Butter Pie with Oreo Crust (Easy No Bake Dessert)

This creamy, dreamy peanut butter pie with an Oreo crust is a no-bake dessert that’s rich, nostalgic, and irresistibly delicious. Perfect for celebrations or any day you need a chocolate-peanut butter fix, it’s easy to make and always a crowd-pleaser.
- Prep Time: 20 minutes
- Cook Time: 0 minutes
- Total Time: 4 hours 20 minutes
- Yield: 8 servings 1x
- Category: Dessert
- Cuisine: American
Ingredients
- 25–28 whole Oreo cookies (about 250g, classic chocolate flavor, filling included)
- 1/2 cup (1 stick, 115g) unsalted butter, melted
- 1 cup (240g) creamy peanut butter (shelf-stable, like Jif or Skippy)
- 8 oz (225g) cream cheese, softened
- 1 cup (120g) powdered sugar, sifted
- 1 cup (240ml) heavy whipping cream, cold
- 1 teaspoon vanilla extract
- Pinch of salt
- Extra whipped cream (for topping, optional)
- Chopped roasted peanuts (for topping, optional)
- Mini chocolate chips or shaved chocolate (for topping, optional)
- Chocolate syrup or melted chocolate (for topping, optional)
Instructions
- Prepare the Oreo Crust: Place 25-28 Oreo cookies in a food processor and pulse into fine crumbs. Alternatively, crush in a zip-top bag with a rolling pin.
- Add melted butter to the crumbs and mix until evenly moistened.
- Press the mixture firmly into the bottom and up the sides of a 9-inch pie plate. Chill in the refrigerator for at least 20 minutes.
- Make the Whipped Cream: In a medium bowl, beat cold heavy whipping cream with an electric mixer until soft peaks form (about 2-3 minutes). Set aside in the fridge.
- Prepare the Peanut Butter Filling: In a large bowl, beat together peanut butter and softened cream cheese until smooth and fluffy (about 2 minutes).
- Add powdered sugar, vanilla extract, and a pinch of salt. Beat until well combined.
- Fold in half of the whipped cream gently with a rubber spatula to lighten the filling. Add the remaining whipped cream and fold until no streaks remain.
- Spoon the peanut butter filling into the chilled Oreo crust and smooth the top.
- Cover loosely with plastic wrap and refrigerate for at least 4 hours, or overnight for best results.
- Before serving, top with extra whipped cream, chopped peanuts, mini chocolate chips, or a drizzle of chocolate syrup as desired.
- For clean slices, dip a sharp knife in hot water and wipe dry between cuts. Serve chilled.
Notes
For best results, use shelf-stable creamy peanut butter and room temperature cream cheese. Chill the pie for at least 4 hours (overnight is best) for clean slices. The pie can be made gluten-free or dairy-free with simple swaps. Store covered in the fridge for up to 4 days or freeze for up to 2 months. For extra chocolate, add a ganache layer or chocolate chips. Avoid natural peanut butter as it can cause the filling to separate.
Nutrition
- Serving Size: 1 slice (1/8 of pie)
- Calories: 475
- Sugar: 26
- Sodium: 320
- Fat: 30
- Saturated Fat: 14
- Carbohydrates: 40
- Fiber: 2
- Protein: 8
Keywords: peanut butter pie, oreo crust, no bake dessert, chocolate peanut butter, easy pie, summer dessert, creamy pie, potluck dessert, make ahead dessert