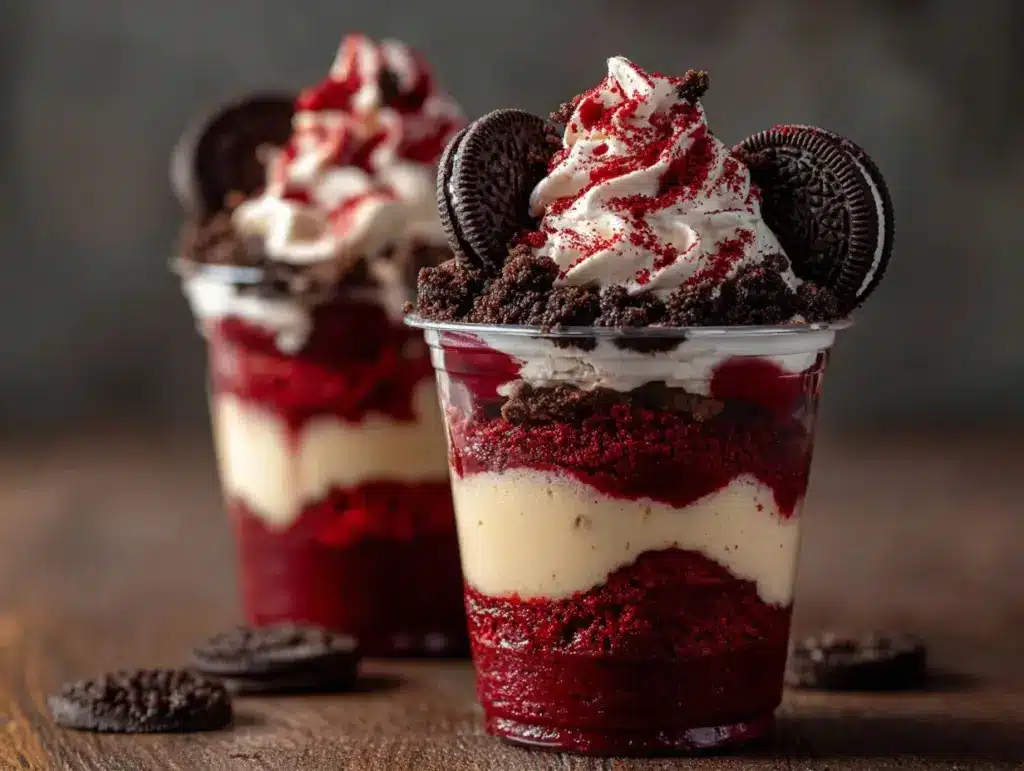
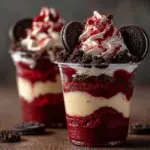
Picture this: you grab a spoon, dip into a glass cup, and get that perfect bite—velvety red cake, silky cheesecake, and crunchy Oreo bits all in one. That’s the magic of these Red Velvet Oreo Cheesecake Parfait Cups. When I first whipped these up for a girls’ night in, I honestly didn’t expect them to steal the show. But, you know, something about those dreamy layers just makes people light up. Maybe it’s the nostalgia of red velvet meeting the childhood fun of Oreos, or maybe it’s the pure indulgence of creamy cheesecake packed into a parfait. Whatever it is, these little cups are now my go-to for any celebration (or, let’s be real, for those evenings when dessert just needs to happen).
I’ll admit, I’m a sucker for all things red velvet. The color, the subtle cocoa flavor, the hint of tang—it’s honestly dessert perfection. But as much as I love traditional red velvet cake, sometimes I want something that’s both impressive and easy to serve. Enter the parfait: no fussy slicing, zero stress about cake layers sliding around, and each cup looks like a mini work of art. And if you’re a cheesecake lover, trust me, this recipe is about to become your new favorite. After testing more versions than I care to admit (hey, someone had to eat the mistakes!), I landed on this dreamy combo of whipped cream cheese filling, Oreo cookie crumbles, and moist red velvet cake.
These Red Velvet Oreo Cheesecake Parfait Cups are a total showstopper for birthdays, Valentine’s Day, or anytime you want to spoil someone special. They’re also a lifesaver for busy hosts—no oven time for the cheesecake layer, and you can make everything ahead. So if you’re craving a dessert that wows without the fuss, you’re in the right spot. Let’s get layering!
Why You’ll Love This Recipe
- Quick & Easy: These parfaits can be assembled in under 30 minutes if you use store-bought cake—perfect for last-minute dessert cravings or unexpected guests.
- Simple Ingredients: No fancy shopping required. You’ll find most items right in your pantry or fridge (and you can even use boxed cake mix, no judgment here!).
- Perfect for Parties: These parfait cups are ideal for birthdays, holidays, potlucks, or anytime you want to serve a crowd individual treats—no messy slicing or plating.
- Crowd-Pleaser: Kids and adults both go wild for the dramatic layers and classic cookies-and-cream flavor. There’s never a crumb left behind!
- Seriously Delicious: The mix of fluffy red velvet cake, creamy cheesecake filling, and crunchy Oreos is comfort food at its finest. I mean, who can resist that?
What really sets these Red Velvet Oreo Cheesecake Parfaits apart is the way the flavors and textures play together. I blend the cream cheese filling until it’s cloud-like, so it layers effortlessly and tastes like an actual cheesecake (without the hassle). The Oreo bits add just enough crunch and chocolate punch, while the red velvet cake brings that signature cocoa tang and gorgeous color.
I’ve made plenty of parfaits before, but this combination is special. It’s not just about layering whatever’s on hand—it’s about balancing richness, sweetness, and that melt-in-your-mouth feel. After a couple of rounds of taste-testing (with my family as very eager volunteers), I can say with confidence: this is the parfait you’ll want to make again and again. It’s festive, fun, and just plain irresistible.
If you’re after a dessert that looks fancy but doesn’t ask for hours in the kitchen, this is it. Each cup is a personal treat—no sharing required. So, whether you’re hosting a crowd or just treating yourself, this red velvet Oreo cheesecake parfait delivers comfort and joy in every spoonful.
What Ingredients You Will Need
This recipe uses familiar, easy-to-find ingredients that come together for a seriously eye-catching dessert. Most of these are pantry staples you’ll recognize, but I’ll share a few tips for getting the best results.
- For the Red Velvet Layer:
- Red velvet cake (homemade or boxed mix, baked and cooled)—You’ll need about 3 cups (300g) of cake cubes or crumbles. Use your favorite recipe, or go with a boxed mix for speed. I’ve had great results with Duncan Hines Classic Red Velvet.
- For the Cheesecake Filling:
- Cream cheese (8 oz / 225g, softened)—Full-fat works best for a rich, creamy texture. I like Philadelphia brand for consistency.
- Powdered sugar (1/2 cup / 60g)—Sweetens and smooths the filling without grittiness.
- Heavy whipping cream (1 cup / 240ml, cold)—Helps whip the filling to a light, mousse-like finish.
- Vanilla extract (1 teaspoon)—Adds warmth and depth.
- Lemon juice (1 teaspoon, optional)—A splash brightens the filling and mimics classic cheesecake tang.
- For the Oreo Crumble:
- Oreo cookies (12–15 cookies / about 150g), crushed—Classic or Double Stuf both work. For a gluten-free version, use gluten-free chocolate sandwich cookies.
- Optional Garnishes:
- Mini Oreos or extra crushed cookies (for topping)
- Red velvet cake crumbs (for a fancy finish)
- Whipped cream or white chocolate curls (totally optional, but so pretty!)
Ingredient Tips & Substitutions:
- If you’re short on time, store-bought red velvet cupcakes also work—just cube them up.
- For a lighter version, swap heavy cream for whipped topping (like Cool Whip), though the flavor won’t be as rich.
- Dairy-free? Use vegan cream cheese (like Kite Hill) and coconut whipped cream.
- Want extra chocolate? Use chocolate sandwich cookies with a fudge center for the Oreo layer.
Honestly, don’t overthink it—the magic is in the layers. Just make sure your cake is cool and your cream cheese is room temp for the smoothest parfait filling.
Equipment Needed
- Mixing bowls: At least two, one for the cheesecake filling and one for the cake crumbles.
- Electric mixer or stand mixer: Makes whipping the cream cheese and heavy cream a breeze. You can do it by hand, but your arm might get tired!
- Measuring cups and spoons: For accuracy—especially with the cream and sugar.
- Spatula: For scraping down the bowl and layering neatly.
- Parfait cups or small glasses: Clear cups let those gorgeous layers shine! Mason jars or even wine glasses work if you don’t have parfait cups.
- Piping bag or zip-top bag (optional): For a tidy, bakery-style look when layering the cheesecake mixture. You can also spoon it in—no stress.
- Rolling pin or food processor: For crushing Oreos. A zip-top bag and a heavy mug work in a pinch, too.
If you’re making a big batch, I recommend using disposable clear cups—easy cleanup and perfect for parties. I’ve made these in everything from fancy stemware to dollar store tumblers, and they always look adorable. For storage, a baking sheet helps keep parfaits steady in the fridge. And don’t stress if you don’t have a mixer; a good old-fashioned whisk and some patience will do the job (just ask my college self!).
Preparation Method
-
Prepare the Red Velvet Cake:
- Bake your favorite red velvet cake recipe or a boxed mix according to instructions. Let it cool completely—this prevents soggy parfaits.
- Cut or crumble about 3 cups (300g) of cake into bite-sized cubes. If using cupcakes, just break them up gently.
- Tip: Day-old cake works best—it’s less crumbly and holds up well in layers.
-
Crush the Oreos:
- Place 12–15 Oreo cookies in a zip-top bag. Crush with a rolling pin or pulse in a food processor until you have rough crumbs (not powdery—you want some chunks!).
- Set aside about 1/4 cup for garnish, if desired.
- Note: Don’t remove the filling; it helps hold the crumbs together.
-
Make the Cheesecake Filling:
- In a large bowl, beat 8 oz (225g) softened cream cheese with 1/2 cup (60g) powdered sugar until smooth and creamy (about 2 minutes).
- Add 1 teaspoon vanilla extract and 1 teaspoon lemon juice (if using). Beat until fully combined.
- In a separate bowl, whip 1 cup (240ml) cold heavy whipping cream to stiff peaks (about 2–3 minutes).
- Gently fold the whipped cream into the cream cheese mixture with a spatula until smooth and airy. Don’t overmix, or the filling can deflate.
- Sensory cue: The filling should be light, fluffy, and hold soft peaks—like a mousse.
-
Assemble the Parfait Cups:
- In each clear cup or glass, start with a layer of red velvet cake cubes (about 2 tablespoons per cup).
- Add a generous spoonful (or piped layer) of cheesecake filling, smoothing to the edges.
- Sprinkle a layer of crushed Oreos (about 1 tablespoon per cup).
- Repeat layers: cake, cheesecake, Oreos, until the cup is full or you’ve used up the ingredients. Finish with cheesecake filling and a sprinkle of cake crumbs or mini Oreos on top.
- Tip: Press down the cake gently, but don’t pack it too tight—leave room for the creamy layers.
-
Chill and Serve:
- For best flavor and texture, chill parfaits in the fridge for at least 1 hour before serving. This helps the layers meld and the cheesecake set up.
- Serve cold, straight from the fridge.
- Warning: Don’t freeze, as the cream cheese filling may become grainy.
Personal Prep Note: If you’re prepping ahead, wait to add the top Oreo layer until just before serving to keep the crunch. And if you’re making a big batch, assembly line style is your friend—set out all cups and layer each ingredient in turn. It’s fun and oddly satisfying!
Cooking Tips & Techniques
- Chill Ingredients: For the fluffiest cheesecake layer, make sure your whipping cream is super cold before you start. Warm cream won’t whip properly (been there, done that—ended up with soup instead of mousse!).
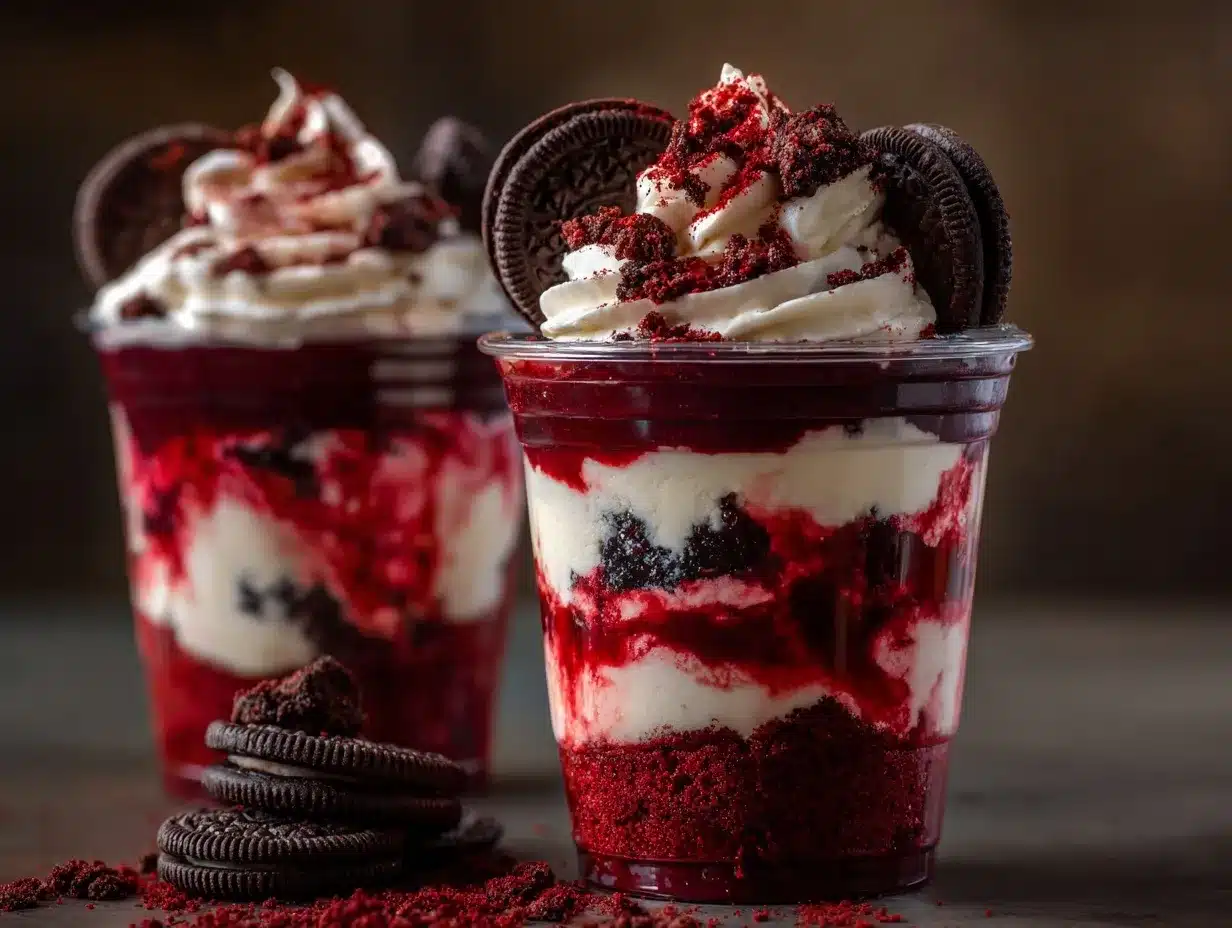
- Layering Matters: Start and end with visually striking layers—a pop of red velvet on the bottom and a creamy cheesecake top, with Oreo speckles in between. It’s all about that dramatic effect when your guests peek through the glass.
- Don’t Overmix: When combining the whipped cream and cream cheese, fold gently. Overmixing can deflate the filling or make it runny. If you ever end up with a too-soft filling, pop it in the fridge for 15 minutes to firm up before layering.
- Cake Troubleshooting: If your cake is crumbly or dry, drizzle with a little milk or simple syrup before layering—just a splash! It’ll make the bites extra moist and delicious.
- Keep It Neat: Use a piping bag or zip-top bag with the corner snipped off for the cheesecake layer if you want those bakery-perfect stripes. But honestly, a spoon works just fine. Embrace the homemade look!
- Multitasking: While the cake bakes (if you’re making it from scratch), whip up the cheesecake filling and crush the Oreos. Efficiency is key—no need to wait around.
- Consistency: Stick with the same order of layers in each cup for a professional look. I once mixed up the order and got less-than-pretty parfaits—still yummy, but not as Pinterest-worthy!
Truth be told, the first time I made these, I tried to rush the chilling step. Rookie mistake—the flavors really do need that hour in the fridge to come together. Don’t skip it! And if you’re serving these at a party, keeping them cold is as easy as placing the cups on a tray over an ice pack. That way, the cheesecake stays dreamy and not melty.
Variations & Adaptations
- Gluten-Free: Use gluten-free red velvet cake mix and swap Oreos for gluten-free chocolate sandwich cookies. The rest of the recipe stays the same!
- Chocolate Lovers’ Dream: Add a drizzle of hot fudge or chocolate ganache between layers for an extra chocolate punch. I’ve done this for my chocoholic sister, and let’s just say there were zero leftovers.
- Berry Twist: Layer in fresh raspberries or strawberries with the cake for a fruity, tangy accent. It’s especially nice in summer, and the berries look beautiful in the glass.
- Dairy-Free/Vegan: Use vegan cream cheese and coconut whipped cream for the filling, and check that your red velvet cake and cookies are dairy-free, too.
- No-Bake Shortcut: Use store-bought red velvet cookies or soft bakery cookies instead of cake for an ultra-fast, no-bake version.
One of my favorite spins? Swapping in chocolate chip cookies for the Oreos and adding a hint of espresso powder to the cheesecake filling. It’s like a mocha red velvet dream! Don’t be afraid to play—this recipe is super forgiving, and every combination I’ve tried has been a hit.
Serving & Storage Suggestions
- Serve chilled: These parfaits taste best straight from the fridge, so let them chill for at least an hour before serving. They’ll be cool, creamy, and perfectly set.
- Presentation: Clear cups or glasses show off those layers—top with extra Oreo crumbs, mini cookies, or a swirl of whipped cream for a bakery-worthy look. I love adding a few red velvet crumbs on top for a pop of color.
- Pairings: Serve with coffee, a tall glass of cold milk, or a scoop of vanilla ice cream for extra decadence. These parfaits are also great alongside fresh berries or a fruit salad.
- Storage: Cover each cup with plastic wrap or lids and store in the refrigerator for up to 3 days. Don’t freeze—the texture of the cheesecake filling changes too much.
- Reheating: No need—these are meant to be enjoyed cold! But if you want to refresh the texture after a day or two, add a fresh dollop of whipped cream and a sprinkle of new Oreo crumbs just before serving.
- Flavor over time: The flavors mellow and meld even more as they sit. I actually prefer them the day after—they get extra dreamy!
Nutritional Information & Benefits
Each Red Velvet Oreo Cheesecake Parfait Cup contains approximately 350–400 calories, 5g protein, 20g fat, and 40g carbohydrates per serving (based on a 6-cup batch and standard ingredients). Of course, exact numbers will vary depending on cake and cookie brands.
- Key ingredients: Cream cheese brings calcium and a bit of protein, while the red velvet cake offers a little iron from cocoa. Oreos add a fun crunch—everything in moderation, right?
- Dietary considerations: This recipe can be adapted for gluten-free and dairy-free diets (see the variations above). It does contain wheat, dairy, and eggs in its classic form.
- Personal wellness note: I love that these parfaits are portion-controlled—each cup is a single serving, making it easier to enjoy a treat without going overboard. Plus, you get all the flavor of classic cheesecake with less fuss (and less sugar than a big slice!).
Remember, dessert is about joy as much as nutrition—these parfaits are a sweet way to celebrate, and you can always adapt the recipe to fit your needs.
Conclusion
If you’re looking for a dessert that’s easy, stunning, and absolutely delicious, these Red Velvet Oreo Cheesecake Parfait Cups should be at the top of your list. The combination of tender red velvet, creamy cheesecake, and crunchy Oreos is pure happiness in a cup—no fancy techniques, no fuss, just good old-fashioned flavor layered to perfection.
Don’t be afraid to make this recipe your own—switch up the cookies, toss in fresh fruit, or make it gluten-free. Every time I serve these, people ask for the recipe (and I always smile and say, “It’s easier than it looks!”). That’s what I love most: it’s a treat that feels fancy, but anyone can make it.
So grab your favorite cups, gather your ingredients, and get ready to wow your taste buds. If you try these parfaits, leave a comment below or tag me with your creations. I can’t wait to see your dreamy dessert cups—because, honestly, life is too short not to have dessert in every color of the rainbow!
FAQs
Can I make Red Velvet Oreo Cheesecake Parfait Cups ahead of time?
Absolutely! You can assemble them up to 24 hours ahead. Store in the fridge, covered, and add any crunchy toppings (like extra Oreos) just before serving for the best texture.
What can I use instead of red velvet cake?
You can swap in chocolate cake, vanilla cake, or even red velvet cookies if you’re in a pinch. The parfait layers work with any soft cake or cookie base.
Are there any nut-free options for this recipe?
This recipe is naturally nut-free as written, but always check your cake mix and cookie labels to be sure if you’re serving someone with allergies.
Can I double or halve the recipe?
Yes! This recipe is super flexible. Double it for a crowd, or halve it for a cozy night in. Just adjust the ingredient amounts accordingly.
How long will the parfaits keep in the fridge?
They’ll stay fresh for up to 3 days in the refrigerator. Just keep them covered to prevent the cake from drying out and the cheesecake from absorbing fridge odors.
Pin This Recipe!
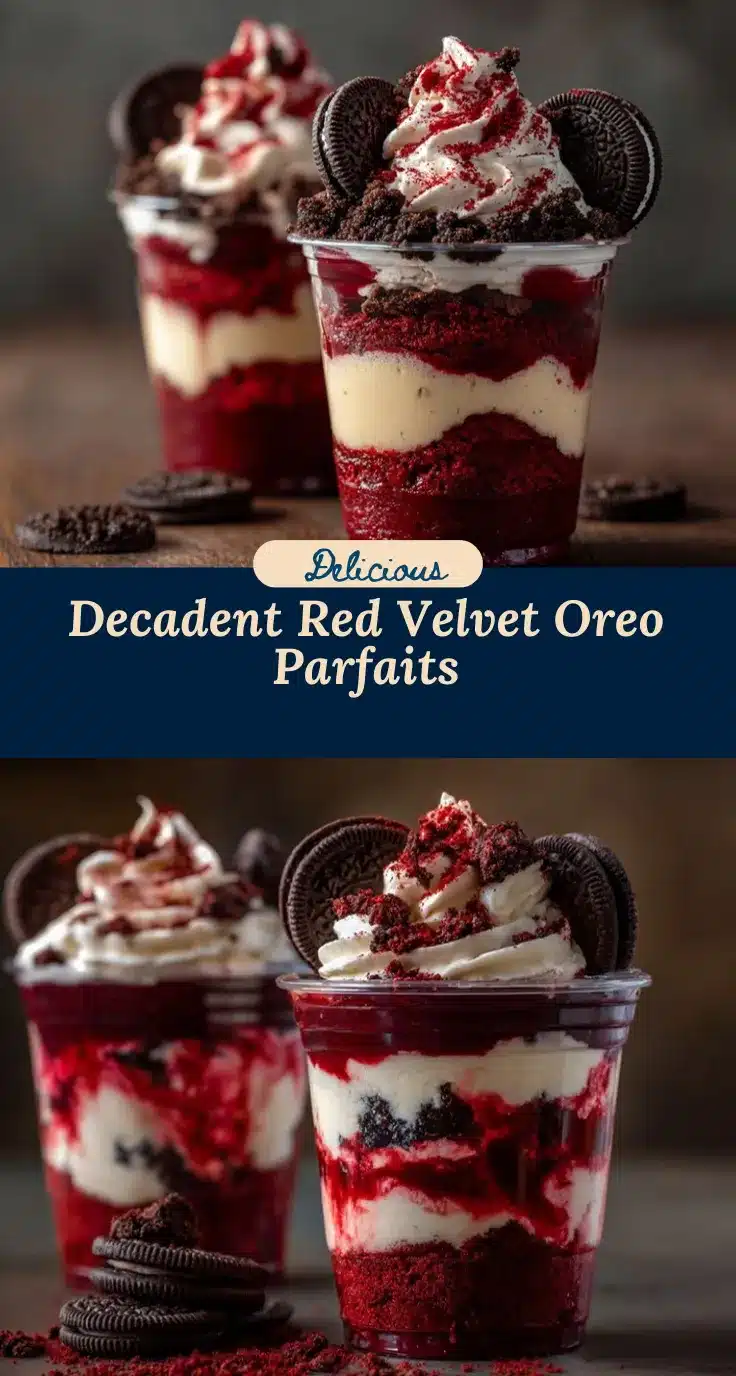
Red Velvet Oreo Cheesecake Parfaits
These easy, no-bake parfait cups layer moist red velvet cake, creamy cheesecake filling, and crunchy Oreo crumbles for a showstopping dessert that’s perfect for parties or a special treat. Quick to assemble and endlessly adaptable, they’re a crowd-pleaser for any occasion.
- Prep Time: 20 minutes
- Cook Time: 0 minutes
- Total Time: 1 hour 20 minutes
- Yield: 6 servings 1x
- Category: Dessert
- Cuisine: American
Ingredients
- 3 cups red velvet cake (homemade or boxed mix, baked and cooled), cut or crumbled into cubes
- 8 oz cream cheese, softened
- 1/2 cup powdered sugar
- 1 cup heavy whipping cream, cold
- 1 teaspoon vanilla extract
- 1 teaspoon lemon juice (optional)
- 12–15 Oreo cookies (about 1 1/2 cups), crushed
- Mini Oreos or extra crushed cookies (for topping, optional)
- Red velvet cake crumbs (for garnish, optional)
- Whipped cream or white chocolate curls (optional, for garnish)
Instructions
- Bake your favorite red velvet cake recipe or a boxed mix according to instructions. Let it cool completely, then cut or crumble about 3 cups into bite-sized cubes.
- Place 12–15 Oreo cookies in a zip-top bag and crush with a rolling pin or pulse in a food processor until you have rough crumbs. Set aside about 1/4 cup for garnish if desired.
- In a large bowl, beat softened cream cheese with powdered sugar until smooth and creamy (about 2 minutes). Add vanilla extract and lemon juice (if using) and beat until fully combined.
- In a separate bowl, whip cold heavy whipping cream to stiff peaks (about 2–3 minutes). Gently fold the whipped cream into the cream cheese mixture with a spatula until smooth and airy.
- In each clear cup or glass, start with a layer of red velvet cake cubes (about 2 tablespoons per cup). Add a generous spoonful (or piped layer) of cheesecake filling, smoothing to the edges. Sprinkle a layer of crushed Oreos (about 1 tablespoon per cup).
- Repeat layers: cake, cheesecake, Oreos, until the cup is full or you’ve used up the ingredients. Finish with cheesecake filling and a sprinkle of cake crumbs or mini Oreos on top.
- Chill parfaits in the fridge for at least 1 hour before serving for best flavor and texture. Serve cold, straight from the fridge.
Notes
For best results, use day-old cake for sturdier layers. Chill the parfaits for at least an hour before serving to allow flavors to meld. Add the top Oreo layer just before serving to keep it crunchy. For gluten-free, use gluten-free cake and cookies. Do not freeze, as the cheesecake filling may become grainy.
Nutrition
- Serving Size: 1 parfait cup (about 1/6 of recipe)
- Calories: 375
- Sugar: 27
- Sodium: 320
- Fat: 20
- Saturated Fat: 12
- Carbohydrates: 40
- Fiber: 1
- Protein: 5
Keywords: red velvet, oreo, cheesecake, parfait, no-bake dessert, layered dessert, easy dessert, party dessert, individual dessert, cream cheese, cake parfait