Imagine this: you pull a pan from the oven, and the kitchen fills with the scent of rich chocolate, buttery caramel, and just a whisper of toasted vanilla. That, my friend, is the magic of salted caramel brownie cheesecake bars. I still remember the first time I baked these—my best friend’s birthday, a rainy afternoon, and a craving for something outrageously decadent. One bite and we just sat there, speechless, grinning chocolate at each other like kids at a carnival.
This isn’t your run-of-the-mill brownie or a basic cheesecake bar. Oh no. These bars are stacked with chewy brownie, a creamy cloud of cheesecake, and a luscious swirl of homemade salted caramel that oozes into every nook and cranny. The salty-sweet finish makes each bite a little celebration. If you’re anything like me, you’ll find yourself sneaking into the fridge at midnight, fork in hand, for “just one more taste.”
I’ve tested and tweaked this salted caramel brownie cheesecake bars recipe more times than I care to admit (my family isn’t complaining). It’s now a permanent fixture for birthdays, potlucks, and honestly, any day I need a pick-me-up. The best part? You don’t need a culinary degree or fancy equipment—just a little patience and a love for gooey, layered desserts.
Whether you’re baking for a crowd or just yourself (no judgment here), these bars deliver comfort and wow-factor in equal measure. You get all the goodness of brownies, cheesecake, and salted caramel in one gorgeous, Pinterest-worthy square. Trust me, this recipe is about to become your new favorite way to treat yourself and everyone you love.
Why You’ll Love These Salted Caramel Brownie Cheesecake Bars
- Effortless Layers: You get three show-stopping layers—fudgy brownie, velvety cheesecake, and silky caramel—without any complicated steps.
- Simple Pantry Staples: No need for a shopping spree. Most of the ingredients are probably already in your kitchen (hello, chocolate chips and cream cheese!).
- Perfect for Any Occasion: These bars steal the show at birthdays, family gatherings, or when you just want something special to go with your coffee.
- Kid and Adult Friendly: My kids can’t get enough of them, and every adult I know asks for the recipe. They disappear in minutes at potlucks.
- Irresistible Flavor Combo: There’s something about the bittersweet chocolate, creamy tang of cheesecake, and a hit of salted caramel that keeps you coming back for bite after bite.
What really separates these salted caramel brownie cheesecake bars from the sea of other recipes? It’s the way the homemade caramel melts into the cheesecake, leaving gooey, golden pockets you find when you least expect it. I also use a quick trick: swirling the caramel in just before baking, so every square is different and a bit unpredictable—kind of like life, right?
Honestly, these bars are the kind you make when you want to impress, but don’t want to stress. They’re rich, indulgent, and have that perfect balance of sweet and salty that makes people close their eyes and sigh. If you’re looking for a dessert that delivers comfort, surprise, and a little bit of bakery magic, this is it. And if you’re anything like me, you’ll find yourself baking them again, just to see that moment when someone takes their first bite.
What Ingredients You Will Need
This recipe uses straightforward, everyday ingredients, but trust me, their combination transforms into something truly special. Here’s what you’ll need for perfectly layered salted caramel brownie cheesecake bars:
- For the Brownie Base:
- 1/2 cup (115g) unsalted butter, melted (adds richness and chewiness)
- 1 cup (200g) granulated sugar
- 2 large eggs, room temperature
- 1 teaspoon pure vanilla extract
- 1/3 cup (35g) unsweetened cocoa powder (use Dutch-process for a deeper chocolate flavor)
- 1/2 cup (65g) all-purpose flour
- 1/4 teaspoon salt
- 1/2 cup (90g) semi-sweet chocolate chips (I love Ghirardelli for the melt!)
- For the Cheesecake Layer:
- 8 ounces (225g) cream cheese, softened (full-fat for creamiest texture)
- 1/4 cup (50g) granulated sugar
- 1 large egg, room temperature
- 1/2 teaspoon pure vanilla extract
- For the Salted Caramel:
- 1/2 cup (100g) granulated sugar
- 2 tablespoons (30ml) water
- 3 tablespoons (45g) unsalted butter, cubed
- 1/4 cup (60ml) heavy cream, room temperature
- 1/2 teaspoon flaky sea salt (Maldon is my favorite)
Ingredient Tips: If you’re short on time, store-bought caramel sauce works, but I swear by homemade for that deep, buttery flavor. You can swap in gluten-free flour for a GF version—Bob’s Red Mill 1-to-1 works beautifully. For the cream cheese, I’ve found store brands can sometimes be watery, so stick with Philadelphia if you can.
Want to go nutty? Stir a handful of toasted pecans into the brownie batter. And if you prefer less salt, just use a pinch in the caramel, but don’t skip it entirely—it makes the flavors sing! For a dairy-free version, use vegan butter, dairy-free chocolate chips, and coconut-based cream cheese (just be aware the texture will be a bit softer).
Equipment Needed
- 8×8-inch (20x20cm) baking pan: Lined with parchment for easy removal. If you only have a 9×9-inch, just watch the baking time—they’ll be a bit thinner.
- Medium mixing bowls (2-3): One for the brownie, one for the cheesecake, and one if you’re making caramel from scratch.
- Small heavy-bottomed saucepan: For the caramel. A nonstick pan is easier to clean, but stainless steel helps you see the color change.
- Hand mixer or stand mixer: For that ultra-smooth cheesecake layer. A whisk and elbow grease also work in a pinch.
- Rubber spatula and wooden spoon: For mixing and scraping every last bit of batter out.
- Measuring cups and spoons: Don’t eyeball it for baking—accuracy matters!
- Wire rack: For cooling the bars evenly.
If you don’t have a hand mixer, a sturdy whisk does the job (just takes a little more muscle). For caramel, I’ve even used a regular soup pot—just keep a close eye on the heat. My pro tip: line your pan with parchment that overhangs the edges for easy lifting. And if you’re like me and sometimes lose your wire rack, a clean, upside-down muffin tin works in a pinch for cooling!
How to Make Salted Caramel Brownie Cheesecake Bars
- Prep and Line: Preheat your oven to 350°F (175°C). Line an 8×8-inch (20x20cm) pan with parchment paper, leaving a bit of overhang on two sides for easy lifting.
- Make the Brownie Layer: In a medium bowl, whisk together 1/2 cup melted butter and 1 cup granulated sugar until glossy and combined (1 minute). Add 2 eggs and 1 teaspoon vanilla extract; whisk until smooth and slightly thickened (another minute). Sift in 1/3 cup cocoa powder, 1/2 cup flour, and 1/4 teaspoon salt. Stir until just combined—don’t overmix, or the brownies get tough. Fold in 1/2 cup chocolate chips. Spread evenly into your prepared pan. Set aside.
- Prepare the Cheesecake Layer: In a separate bowl, beat 8 oz cream cheese and 1/4 cup sugar with a hand mixer on medium speed until creamy and lump-free (2 minutes). Add 1 egg and 1/2 teaspoon vanilla; mix just until combined. Pour the cheesecake batter over the brownie layer, smoothing gently with a spatula.
- Make the Salted Caramel: In a small, heavy-bottomed saucepan, combine 1/2 cup sugar and 2 tablespoons water over medium heat. Stir gently until the sugar dissolves, then increase the heat slightly and stop stirring. Watch closely—when the mixture turns a deep amber (about 5-7 minutes), immediately remove from heat. Whisk in 3 tablespoons butter (it’ll bubble like crazy—don’t worry, that’s normal!). Slowly stream in 1/4 cup heavy cream, whisking constantly. Stir in 1/2 teaspoon flaky sea salt. Let it cool for 5 minutes before using.
- Assemble and Swirl: Drizzle about 1/3 cup of the caramel over the cheesecake layer. Use a butter knife or toothpick to gently swirl the caramel into the cheesecake. Don’t overdo it—you want pretty ribbons, not a muddy mess.
- Bake: Bake for 35-40 minutes, or until the center is just set and the edges are lightly golden. The cheesecake will jiggle slightly but shouldn’t be liquid. If you notice browning too fast, tent with foil for the last 10 minutes.
- Cool: Remove from oven and place on a wire rack. Cool to room temperature (about 1 hour), then refrigerate for at least 4 hours (overnight is best for neat slices and maximum flavor meld).
- Slice and Serve: Lift bars out using the parchment overhang. Drizzle with extra caramel and a sprinkle of extra flaky salt just before serving. Slice into 16 squares for classic bars, or 9 for bakery-style heft.
Prep Notes: If your caramel seizes up, don’t panic—just warm gently and stir until smooth. For the best swirl, drag your knife in a figure-eight motion. And don’t rush the chilling step; the bars need time to set!
Cooking Tips & Techniques for Foolproof Bars
- Layer Order Matters: Always pour cheesecake over brownie, never the other way around, or you’ll get patchy layers.
- Don’t Overmix: Overworking the brownie batter makes it dense and dry—just mix until you see no more streaks of flour.
- Caramel Swirling: If you swirl too much, the layers blend and you lose those gorgeous caramel ribbons. Less is more—trust me, I learned this the hard way!
- Room Temp Ingredients: Cream cheese and eggs blend smoother when not cold, which means silkier cheesecake.
- Chill Out: I know it’s tough, but chilling is key. Even if the bars look set, they’ll slice much more neatly after a good nap in the fridge.
- Use Parchment Paper: It makes removing and slicing the bars a breeze—no stuck bottoms or messy corners.
- Oven Variations: Every oven is different! Start checking at 35 minutes—mine finish at 37, but my friend’s takes the full 40. Jiggle the pan gently; if the center’s too wobbly, give it a few more minutes.
- Cutting Clean Slices: Run your knife under hot water and wipe between cuts for those bakery-perfect bars.
Once, I got impatient and tried to slice before chilling—let’s just say I ended up with a delicious but messy pile. Lesson learned: patience pays off here!
Variations & Adaptations
- Gluten-Free: Swap the all-purpose flour for a gluten-free blend (I love Bob’s Red Mill 1-to-1). The texture stays wonderfully fudgy, and no one will guess it’s gluten-free.
- Peanut Butter Swirl: Drizzle 1/4 cup melted peanut butter over the cheesecake layer before adding caramel. Swirl both together for a salty-sweet twist (my kids’ favorite version!).
- Espresso Kick: Add 1 teaspoon instant espresso powder to the brownie batter for an extra bold, mocha flavor. It’s subtle but makes the chocolate pop.
- Seasonal Toppings: In fall, I sprinkle chopped toasted pecans over the caramel for crunch. In summer, a few fresh raspberries on top before serving look gorgeous and taste amazing.
- Dairy-Free: Use vegan butter, dairy-free chocolate, and plant-based cream cheese and cream. The bars are softer but still so satisfying (I’ve made them for my lactose-intolerant cousin and she loved them!).
- Nut-Free: Skip any nutty add-ins and always check chocolate chips for cross-contamination if allergies are a concern.
I once swapped in almond extract for the vanilla and added a handful of sliced almonds—it’s a fun twist if you’re into that marzipan vibe!
Serving & Storage Suggestions
- Serving Temperature: I like these best cold or at cool room temp—straight from the fridge, the layers are firm and the flavors are intense. If you prefer gooier bars, let them sit out for 15 minutes before serving.
- Presentation: Drizzle extra caramel over each square and finish with a pinch of flaky sea salt for that “wow” look. A dollop of whipped cream or a scoop of vanilla ice cream turns them into a full-blown dessert plate.
- Beverage Pairings: Serve with strong coffee, a glass of milk, or even a shot of espresso. For grown-ups, a nip of bourbon on the side is heavenly!
- Storage: Keep bars in an airtight container in the refrigerator for up to 5 days. They also freeze well—wrap tightly in plastic, then foil, and freeze for up to 2 months. Thaw overnight in the fridge before serving.
- Reheating: If you want them warm and gooey, zap a square in the microwave for 10-15 seconds (just don’t overdo it or the cheesecake can split).
- Flavor Development: The salted caramel and chocolate deepen after a day, so these bars are even better on day two (if you can wait that long!).
Nutritional Information & Benefits
Each salted caramel brownie cheesecake bar (based on 16 bars per pan) is approximately:
- Calories: 270
- Fat: 16g
- Saturated Fat: 9g
- Carbohydrates: 31g
- Sugar: 22g
- Protein: 3g
Health Highlights: While these are a treat, you’re getting the antioxidant boost from cocoa, a little calcium from the cream cheese, and the mood-lifting power of chocolate. If you swap in gluten-free or dairy-free alternatives, they work for restricted diets. Just note: they do contain eggs, dairy, and may have traces of nuts if you use certain chocolate chips. My wellness philosophy? Enjoy treats in moderation, and never feel guilty about something this delicious shared with friends!
Conclusion
There’s just something downright magical about salted caramel brownie cheesecake bars. They’re the kind of dessert that turns an ordinary day into a mini celebration, with every bite delivering a burst of chocolate, creamy cheesecake, and golden caramel. Whether you’re a seasoned baker or a total newbie, this recipe is simple to follow and guaranteed to impress.
What I love most is how easy these are to adapt—swap flours, add your favorite nuts, or play with the caramel swirl to make them truly your own. Every batch I make reminds me why I fell in love with baking: the joy of creating, sharing, and savoring something special. If you try these, I’d love to hear about your twists and see your creations!
So, don’t wait—grab those pantry staples and treat yourself to a batch of salted caramel brownie cheesecake bars. Leave a comment, share your photos, or tag me on Pinterest with your results. I can’t wait to see how you make this recipe your own. Happy baking!
FAQs About Salted Caramel Brownie Cheesecake Bars
How do I know when the bars are fully baked?
The edges should be lightly golden, and the center should jiggle just slightly when you shake the pan. If it’s very wobbly, bake for a few more minutes and check again.
Can I use store-bought caramel sauce instead of homemade?
Absolutely! If you’re short on time, your favorite store-bought caramel sauce works well. Just make sure it’s thick enough to swirl and not runny.
What’s the best way to cut the bars cleanly?
Chill the bars thoroughly, then use a sharp knife dipped in hot water and wiped dry between slices. This helps get those neat, bakery-style squares.
Can I double the recipe for a larger crowd?
Yes! Double all ingredients and bake in a 9×13-inch (23x33cm) pan. Add 5-10 minutes to the baking time, checking for doneness as usual.
Is it possible to freeze these bars?
Definitely. Once baked and cooled, wrap bars individually or as a whole in plastic wrap and foil. Freeze for up to 2 months and thaw in the fridge before serving for best texture.
Pin This Recipe!
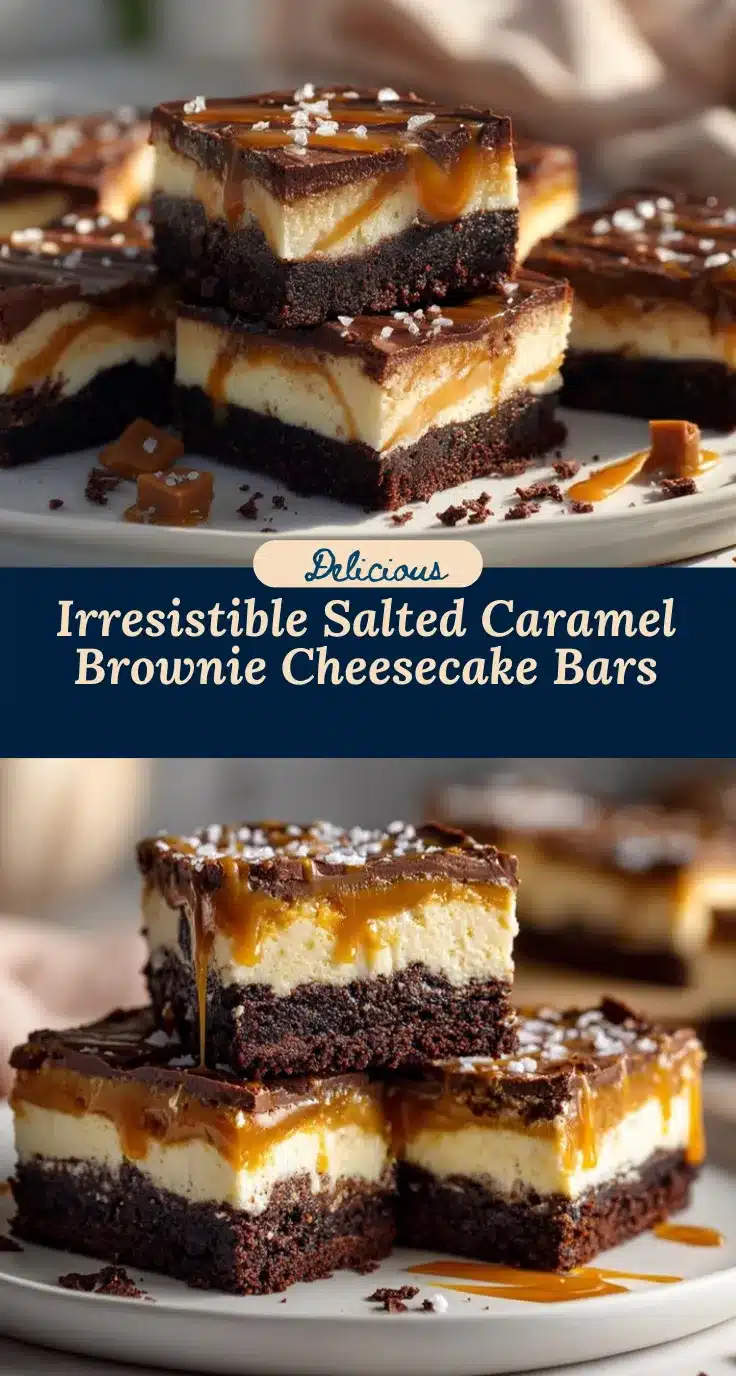
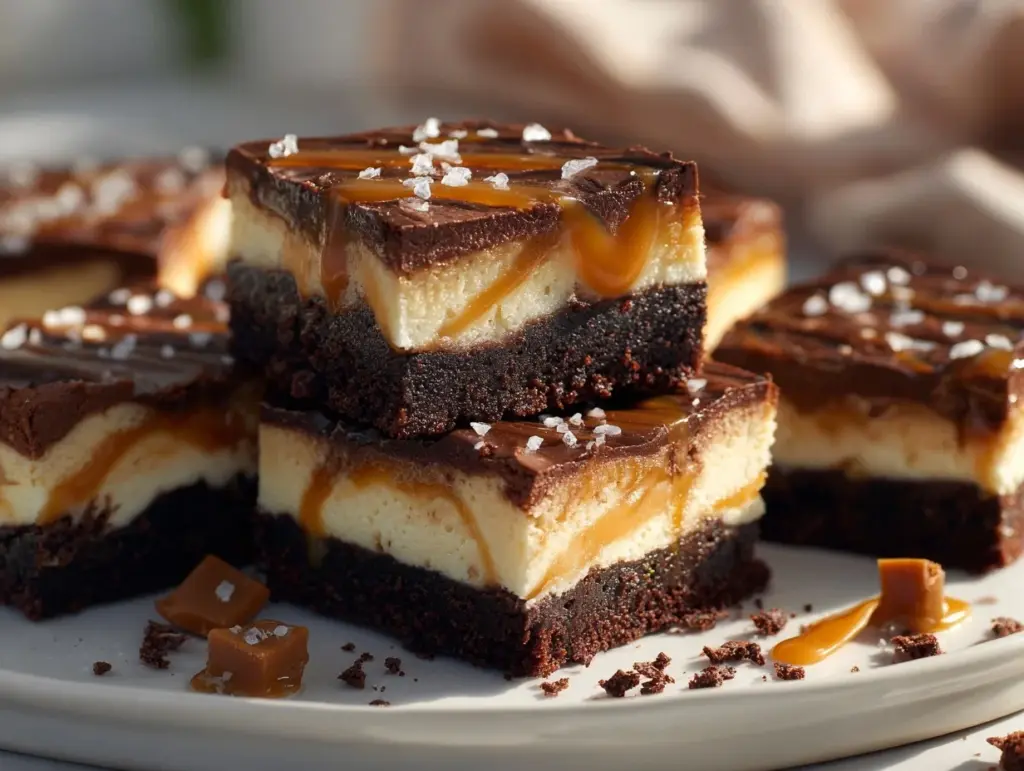
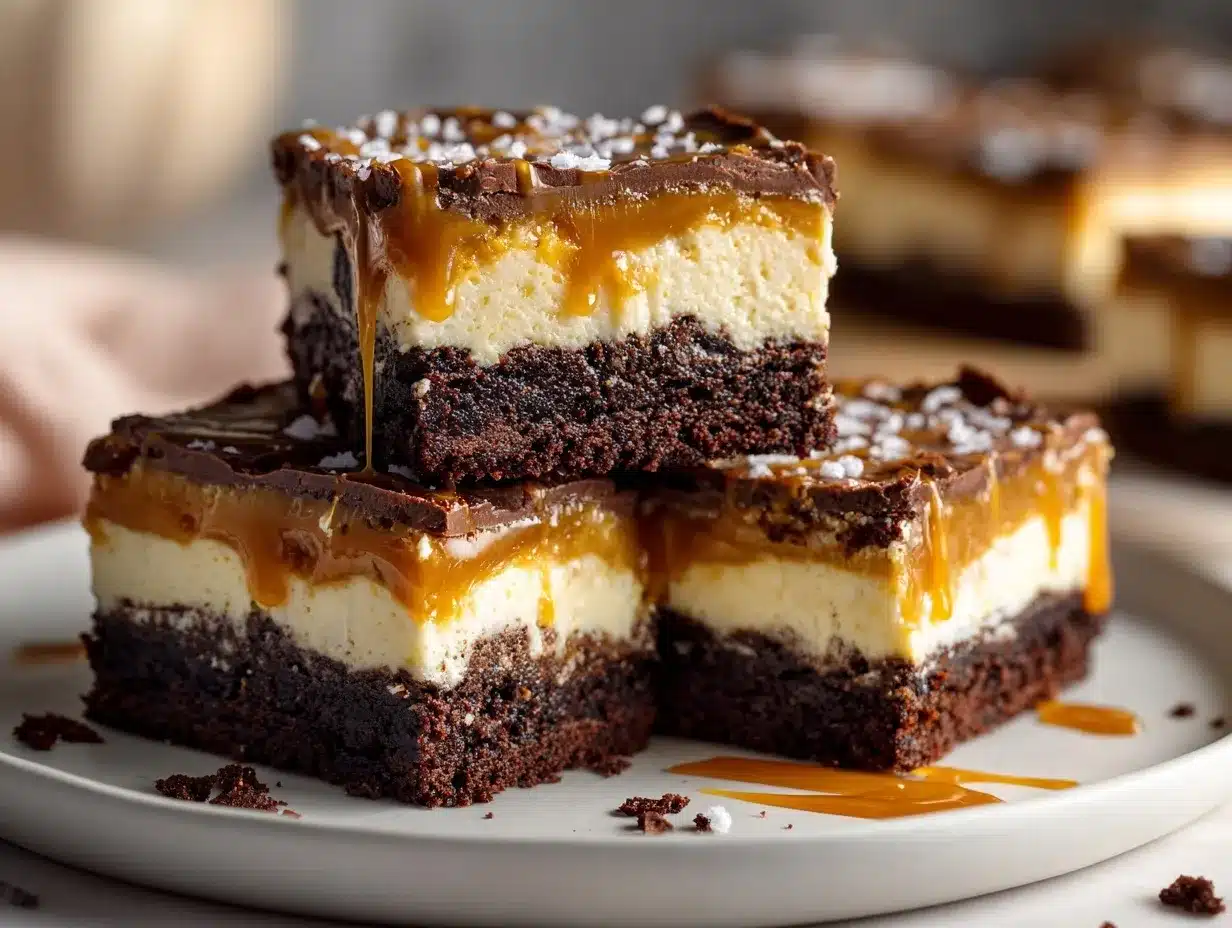
Salted Caramel Brownie Cheesecake Bars

These decadent bars feature three irresistible layers: a fudgy brownie base, creamy cheesecake, and a luscious swirl of homemade salted caramel. Perfect for celebrations or whenever you crave a rich, bakery-style treat at home.
- Prep Time: 25 minutes
- Cook Time: 40 minutes
- Total Time: 5 hours 15 minutes
- Yield: 16 bars 1x
- Category: Dessert
- Cuisine: American
Ingredients
- 1/2 cup (115g) unsalted butter, melted
- 1 cup (200g) granulated sugar
- 2 large eggs, room temperature
- 1 teaspoon pure vanilla extract
- 1/3 cup (35g) unsweetened cocoa powder (Dutch-process preferred)
- 1/2 cup (65g) all-purpose flour
- 1/4 teaspoon salt
- 1/2 cup (90g) semi-sweet chocolate chips
- 8 ounces (225g) cream cheese, softened
- 1/4 cup (50g) granulated sugar
- 1 large egg, room temperature
- 1/2 teaspoon pure vanilla extract
- 1/2 cup (100g) granulated sugar
- 2 tablespoons (30ml) water
- 3 tablespoons (45g) unsalted butter, cubed
- 1/4 cup (60ml) heavy cream, room temperature
- 1/2 teaspoon flaky sea salt
Instructions
- Preheat oven to 350°F (175°C). Line an 8×8-inch (20x20cm) pan with parchment paper, leaving overhang for easy removal.
- In a medium bowl, whisk together melted butter and 1 cup sugar until glossy. Add 2 eggs and 1 teaspoon vanilla; whisk until smooth and slightly thickened.
- Sift in cocoa powder, flour, and salt. Stir until just combined. Fold in chocolate chips. Spread evenly into prepared pan.
- In a separate bowl, beat cream cheese and 1/4 cup sugar with a hand mixer until creamy. Add 1 egg and 1/2 teaspoon vanilla; mix just until combined. Pour over brownie layer and smooth.
- For the caramel, combine 1/2 cup sugar and 2 tablespoons water in a small saucepan over medium heat. Stir until sugar dissolves, then increase heat and stop stirring. When mixture turns deep amber (5-7 minutes), remove from heat. Whisk in 3 tablespoons butter, then slowly whisk in heavy cream. Stir in flaky sea salt. Let cool 5 minutes.
- Drizzle about 1/3 cup caramel over cheesecake layer. Swirl gently with a knife or toothpick.
- Bake for 35-40 minutes, until center is just set and edges are lightly golden. Tent with foil if browning too quickly.
- Cool on a wire rack to room temperature (about 1 hour), then refrigerate at least 4 hours or overnight.
- Lift bars out using parchment. Drizzle with extra caramel and sprinkle with flaky salt before serving. Slice into 16 squares.
Notes
For best results, use room temperature ingredients and chill bars thoroughly before slicing. Store in the refrigerator for up to 5 days or freeze for up to 2 months. Swirl caramel gently for distinct ribbons. Gluten-free flour can be substituted for a GF version. For clean slices, use a hot, wiped knife between cuts.
Nutrition
- Serving Size: 1 bar (1/16 of pan)
- Calories: 270
- Sugar: 22
- Sodium: 120
- Fat: 16
- Saturated Fat: 9
- Carbohydrates: 31
- Fiber: 1
- Protein: 3
Keywords: salted caramel, brownie cheesecake bars, layered dessert, chocolate, caramel, cheesecake, easy dessert, potluck, birthday, decadent bars