Introduction
Sweet, sun-ripened strawberries mingling with creamy cheesecake and a buttery cookie crust—honestly, is there anything more tempting? The first time I pulled a pan of strawberry shortcake cheesecake bars from my oven, my kitchen smelled like a summer fair. The warm vanilla, the berry tang, the promise of that crisp crumble on top—it’s pure magic. I still remember my daughter sneaking in and snagging a corner piece before it even had time to cool. Who could blame her?
This recipe for strawberry shortcake cheesecake bars is my answer to those days when you want all the wow factor of a layered cake but none of the fuss. It bakes up perfectly in a trusty 13×9 pan (you know, the one every home cook has stashed in their cupboard), making it just right for summer picnics, potlucks, or when you need a little edible sunshine to brighten up a weeknight. Plus, it combines two classic desserts—strawberry shortcake and cheesecake—into one irresistible treat. I’ve tested this recipe more times than I care to admit (mostly because it disappears so fast), and every batch turns out gooey, creamy, and just sweet enough.
Whether you’re a seasoned baker or just getting comfortable in the kitchen, these strawberry shortcake cheesecake bars are a real keeper. They’re easy to slice, easy to serve, and—let’s face it—impossible to resist. And for those of you with busy schedules or picky eaters, you’ll love that it’s quick to throw together and always a crowd-pleaser. If you’ve been searching for the perfect easy 13×9 dessert, I promise this one’s about to become your new favorite.
Why You’ll Love This Recipe
Let’s get real: not all desserts are created equal, and these strawberry shortcake cheesecake bars are in a league of their own. After countless rounds of recipe testing (and taste-testing, of course), I can tell you there’s just something special about these bars. Here’s what sets them apart:
- Quick & Easy: You don’t need fancy equipment or hours in the kitchen. This recipe comes together in under an hour, and most of that is hands-off bake time.
- Simple Ingredients: No wild goose chases for specialty items—everything here is probably already in your pantry or fridge.
- Perfect for Every Occasion: Whether it’s a backyard barbecue, a birthday bash, or just a Tuesday night, these bars fit right in. They’re especially great for potlucks or family gatherings where you need a dessert that travels well and serves a crowd.
- Crowd-Pleaser: I’ve yet to meet someone—kid or adult—who can say no to these. The combo of creamy cheesecake and sweet strawberries is just so good.
- Unbelievably Delicious: The layers are dreamy: a buttery cookie base, silky cheesecake, juicy strawberries, and a crumbly topping. Each bite is a little celebration.
What truly makes these bars shine is the way the classic strawberry shortcake flavors blend with the richness of cheesecake—without getting overly sweet or heavy. I use a special trick (blending freeze-dried strawberries into the crumble) to boost the berry flavor in every bite. This isn’t just another strawberry cheesecake bar; it’s my best version, shaped by trial, error, and some happy accidents.
Honestly, I love how these bars manage to be both comforting and impressive. They’re the kind of dessert that makes people pause, close their eyes, and savor that first bite. If you’ve been looking for a foolproof, soul-satisfying treat, this is your ticket. It’s the best kind of comfort food—made easier, healthier (hello, real fruit!), and guaranteed to bring a smile to every table.
What Ingredients You Will Need
This recipe uses simple, wholesome ingredients to deliver that classic strawberry shortcake flavor—with a creamy cheesecake twist—without any fuss. Most items are pantry staples, and there’s plenty of room for little swaps if needed.
- For the Crust & Crumble:
- 2 cups (250g) all-purpose flour
- 1 cup (200g) granulated sugar
- 1/2 cup (115g) unsalted butter, melted (adds richness and helps with browning)
- 1/4 cup (60ml) neutral oil (like canola or sunflower for tenderness)
- 1/2 teaspoon baking powder
- 1/4 teaspoon salt
- 1/2 cup (15g) freeze-dried strawberries, crushed (for extra berry punch; optional but highly recommended)
- 1 teaspoon vanilla extract
- For the Cheesecake Layer:
- 16 oz (450g) cream cheese, softened (I prefer Philadelphia for the smoothest texture)
- 1/2 cup (100g) granulated sugar
- 2 large eggs, room temperature
- 1/4 cup (60ml) sour cream or plain Greek yogurt (adds tang and creaminess; either works great)
- 1 teaspoon vanilla extract
- For the Strawberry Filling:
- 2 cups (300g) fresh strawberries, hulled and chopped (ripe but firm is best for texture)
- 2 tablespoons (25g) granulated sugar (adjust if your berries are extra sweet or tart)
- 1 tablespoon (8g) cornstarch (helps thicken the layer so it’s not runny)
- 1 teaspoon fresh lemon juice (brightens up the berries)
Ingredient Tips: If you can’t find fresh strawberries, frozen will work—just thaw and drain them first. For a gluten-free version, swap in your favorite 1:1 gluten-free flour blend. And if you’re dairy-free, plant-based cream cheese and yogurt swap in just fine (though the texture will be slightly different). I’ve used store-brand ingredients and name-brand, and honestly, both work. The freeze-dried strawberries in the crumble are my secret weapon for next-level flavor, but you can skip them if you’re in a pinch.
Equipment Needed
- 13×9-inch Baking Pan: The classic for bars—metal or glass both work, but metal gives crisper edges. I’ve made these in ceramic too—just add a few extra minutes to the bake time.
- Parchment Paper: For easy lift-out and no sticking (trust me, you’ll thank yourself).
- Mixing Bowls: At least two—one for the crust/crumble, another for the cheesecake filling.
- Hand Mixer or Stand Mixer: Either works for beating the cheesecake layer smooth. A sturdy whisk and elbow grease will also do in a pinch, but your arm might get tired!
- Measuring Cups and Spoons: Precision helps here—especially for the cheesecake layer.
- Spatula or Spoon: For spreading layers evenly.
- Food Processor (Optional): For crushing freeze-dried strawberries or getting that crumble extra fine, but a zip-top bag and rolling pin works, too.
If you’re shopping on a budget, don’t sweat it—a basic hand mixer, thrifted baking pan, and even a simple butter knife for cutting will get you there. Just line your pan well for easy cleanup, and avoid anything too flimsy for even baking. I wipe my mixer attachments with a little vinegar to keep them squeaky clean for next time!
Preparation Method
- Prep the Pan: Preheat your oven to 350°F (175°C). Line a 13×9-inch pan with parchment paper, letting it hang over the sides for easy removal later. Give the paper a quick spritz of nonstick spray for extra insurance.
- Make the Crust & Crumble: In a large bowl, whisk together 2 cups (250g) flour, 1 cup (200g) sugar, 1/2 teaspoon baking powder, 1/4 teaspoon salt, and (if using) 1/2 cup freeze-dried strawberries, crushed. Add 1/2 cup (115g) melted butter, 1/4 cup (60ml) oil, and 1 teaspoon vanilla extract. Stir until the mixture is evenly crumbly but holds together when pressed. Reserve 1 heaping cup (about 150g) of the mixture for the topping; press the rest firmly and evenly into the bottom of your prepared pan. If it seems dry, sprinkle in a teaspoon or two more oil.
- Par-Bake the Crust: Bake the crust for 10 minutes, until it looks just set and smells toasty. It won’t get golden yet (that comes later). This step keeps the crust from getting soggy—trust me, I tried skipping this once, and the base ended up mushy.
- Prepare the Strawberry Layer: While the crust bakes, toss 2 cups (300g) chopped strawberries with 2 tablespoons (25g) sugar, 1 tablespoon (8g) cornstarch, and 1 teaspoon lemon juice. Set aside to macerate; the berries will get juicy and syrupy.
- Mix the Cheesecake Filling: In a clean bowl, beat 16 oz (450g) cream cheese with 1/2 cup (100g) sugar until smooth (about 2 minutes). Scrape down the sides often—lumps are the enemy here. Beat in 2 eggs, one at a time, then 1/4 cup (60ml) sour cream or yogurt and 1 teaspoon vanilla. The batter should be creamy and pourable, with no streaks. If it looks curdled, keep beating gently—it usually comes together.
- Assemble the Layers: Pour the cheesecake filling over the par-baked crust, smoothing evenly with a spatula. Spoon the strawberry mixture evenly over the cheesecake layer (don’t worry if some juice pools—it’ll set as it bakes). Crumble the reserved crust mixture over the top, squeezing some into larger clumps for a pretty effect.
- Bake: Bake in the center of the oven for 35-40 minutes, until the top is lightly golden and the center jiggles just slightly when you shake the pan. Don’t overbake—cheesecake sets as it cools! If the crumble gets too brown before the center is set, cover loosely with foil for the last 10 minutes.
- Cool Completely: Let bars cool at room temperature for 1 hour, then chill in the fridge for at least 2 hours (overnight is even better). This makes slicing so much easier, and the flavors really develop. Don’t rush this step—warm bars will be messy and not as tasty.
- Slice & Serve: Use the parchment handles to lift the whole slab out. Cut into 16 squares (or smaller for bite-sized treats). Wipe your knife between cuts for clean edges.
Troubleshooting: If your crust crumbles too much, it might be too dry—add a teaspoon of oil and re-mix. If your cheesecake cracks, don’t stress—the crumble topping covers imperfections. And if your berries are super juicy, add an extra teaspoon of cornstarch to prevent a runny layer. Pro tip: taste a bit of the strawberry layer before assembling; adjust sugar or lemon to your liking.
Cooking Tips & Techniques
After baking these strawberry shortcake cheesecake bars more times than I can count, I’ve picked up a few tricks that make all the difference:
- Room Temperature Ingredients: Let your cream cheese, eggs, and yogurt come to room temp before mixing. Cold ingredients can lead to a lumpy cheesecake layer (I’ve learned this the hard way!).
- Don’t Overmix the Cheesecake: As tempting as it is to keep mixing, too much air can cause the bars to puff up and crack. Stop as soon as it’s smooth and creamy.
- Keep an Eye on Bake Time: Ovens can be sneaky—mine bakes a bit hot, so I always start checking at the 35-minute mark. The center should jiggle slightly but not slosh.
- Chill Before Cutting: These bars really do need a chill session for the cleanest slices. If you’re in a hurry, pop the pan in the freezer for 30 minutes after cooling at room temp.
- Berry Layer Consistency: If your berries are very ripe and juicy, add a little extra cornstarch (about 1/2 teaspoon more) to keep the filling from getting watery. If using frozen berries, drain them well and pat dry before tossing with sugar.
- Crumbly Topping Magic: I like to squeeze some of the topping into bigger clumps—those bits get extra golden and give you that classic shortcake vibe. Try mixing the freeze-dried strawberries into the topping for extra color and flavor—it’s a game-changer!
- Multitasking: While the crust is baking, prep the berries and cheesecake layer. That way, you can assemble everything quickly while the base is still warm.
My biggest lesson? Don’t panic if things look imperfect. The crumble hides a lot, and the flavors always shine. Even my “oops” batches get rave reviews!
Variations & Adaptations
One of my favorite things about these strawberry shortcake cheesecake bars is how easy they are to tweak. Here are a few ways to make them your own:
- Gluten-Free: Use a 1:1 gluten-free flour blend in place of the all-purpose. I’ve had great luck with Bob’s Red Mill. The bars turn out just as tasty!
- Dairy-Free: Swap in plant-based cream cheese and yogurt (like Kite Hill or Daiya). Use vegan butter for the crust. The texture is a bit softer, but the flavor is still spot-on.
- Berry Swaps: Use raspberries, blueberries, or blackberries instead of strawberries—or try a mixed berry combo! In winter, I use frozen berries (thawed and well-drained).
- Lemon Zest: Add 1 teaspoon of lemon zest to the cheesecake layer for a bright citrus pop. It really wakes up the flavors!
- Chocolate Drizzle: For a decadent twist, drizzle melted white or dark chocolate over the cooled bars. My kids beg for this version every Valentine’s Day.
- Nut-Free: This recipe is naturally nut-free, but if you want extra crunch, sprinkle some sliced almonds over the crumble topping.
My personal favorite? Swapping in raspberries and adding a pinch of cardamom to the crumble layer—it’s unexpected and seriously good. Don’t be afraid to experiment; these bars are pretty forgiving, and every version I’ve tried gets gobbled up just as fast!
Serving & Storage Suggestions
These strawberry shortcake cheesecake bars are best served chilled or at cool room temperature. I love to cut them into generous squares and pile them on a pretty platter, dusted with a little powdered sugar for that bakery look. If you’re feeling fancy, add a dollop of whipped cream or a few fresh strawberry slices on top—it makes them extra festive for special occasions.
For parties or potlucks, I like to cut the bars a bit smaller so everyone can grab a piece. They pair wonderfully with a cup of tea, lemonade, or even a scoop of vanilla ice cream for a summery dessert plate. If you’re going the picnic route, keep them in a cooler until serving so the cheesecake layer stays firm.
Store any leftovers (if you have them!) in an airtight container in the fridge for up to 5 days. The flavors actually deepen over time—day two bars are my secret favorite. You can also freeze the bars, tightly wrapped, for up to 2 months. Thaw in the fridge overnight and enjoy cold, or let them come to room temp for 30 minutes before serving. To revive the crumble’s crunch, a couple minutes in a low oven (300°F/150°C) does the trick!
Nutritional Information & Benefits
Each bar (based on 16 servings) is estimated to have about 250 calories, 14g fat, 28g carbohydrates, and 4g protein. The real stars here are the strawberries—they’re packed with vitamin C and fiber, making these bars not just delicious but a little bit nourishing too. Cream cheese and Greek yogurt add a nice protein bump, while the recipe can be adapted for gluten-free or dairy-free diets.
Potential allergens include dairy, eggs, and gluten (unless you use the swaps above). I love that these bars are less sweet than a typical cheesecake, and the fruit-forward filling always feels lighter than a heavy dessert. If you’re watching sugar, you could reduce the sugar in the crust and berry layers by a tablespoon or two without sacrificing taste.
From a wellness perspective, these strawberry shortcake cheesecake bars strike a happy balance: indulgent, but not over the top, and easy to share with friends and family.
Conclusion
If you’re looking for a dessert that’s simple to make, bursting with flavor, and always a hit, these strawberry shortcake cheesecake bars are your answer. They blend the best parts of two favorite treats into one, and honestly, they’re as fun to make as they are to eat.
Don’t be afraid to play around with the recipe—switch up the berries, tweak the crumble, or add your own creative touch. I love how forgiving and versatile this recipe is; there’s no such thing as a “bad” batch!
This easy 13×9 dessert is a staple in my kitchen, and I hope it becomes a favorite in yours, too. If you make them, I’d love to hear how it goes—share your photos, leave a comment, or tell me about your own twist on the recipe. Here’s to sweet, strawberry-filled moments and homemade happiness!
Frequently Asked Questions
Can I use frozen strawberries instead of fresh?
Absolutely! Just thaw and drain the berries really well before using, so your bars don’t turn out watery.
Do I have to use freeze-dried strawberries in the crumble?
No, they’re optional but add a big boost of strawberry flavor and pretty color. If you skip them, the bars will still taste great—just a bit more classic shortcake style.
How do I know when the cheesecake layer is done baking?
The center should jiggle just a little when you gently shake the pan, but not look runny. It will finish setting as it cools.
Can these bars be made ahead of time?
Yes! They keep well in the fridge for up to 5 days, and actually taste even better after a night in the fridge. You can also freeze them for longer storage.
What’s the best way to cut clean squares?
Chill the bars thoroughly, then use the parchment handles to lift them out. Wipe your knife between each cut for neat edges—no more messy slices!
Pin This Recipe!
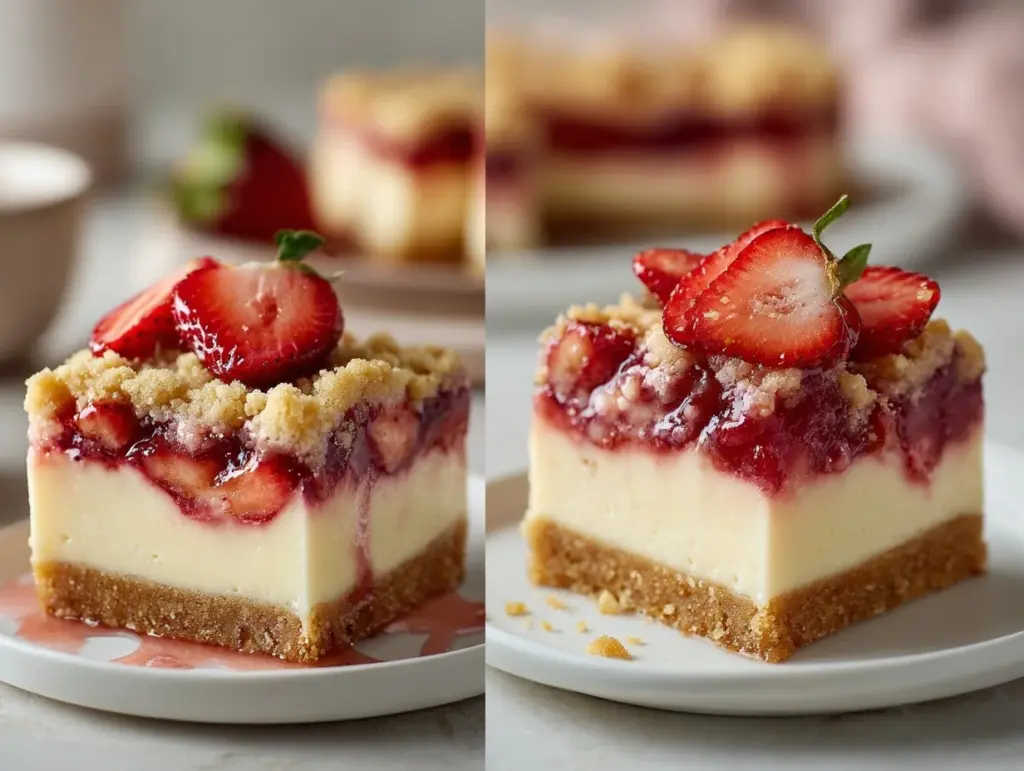
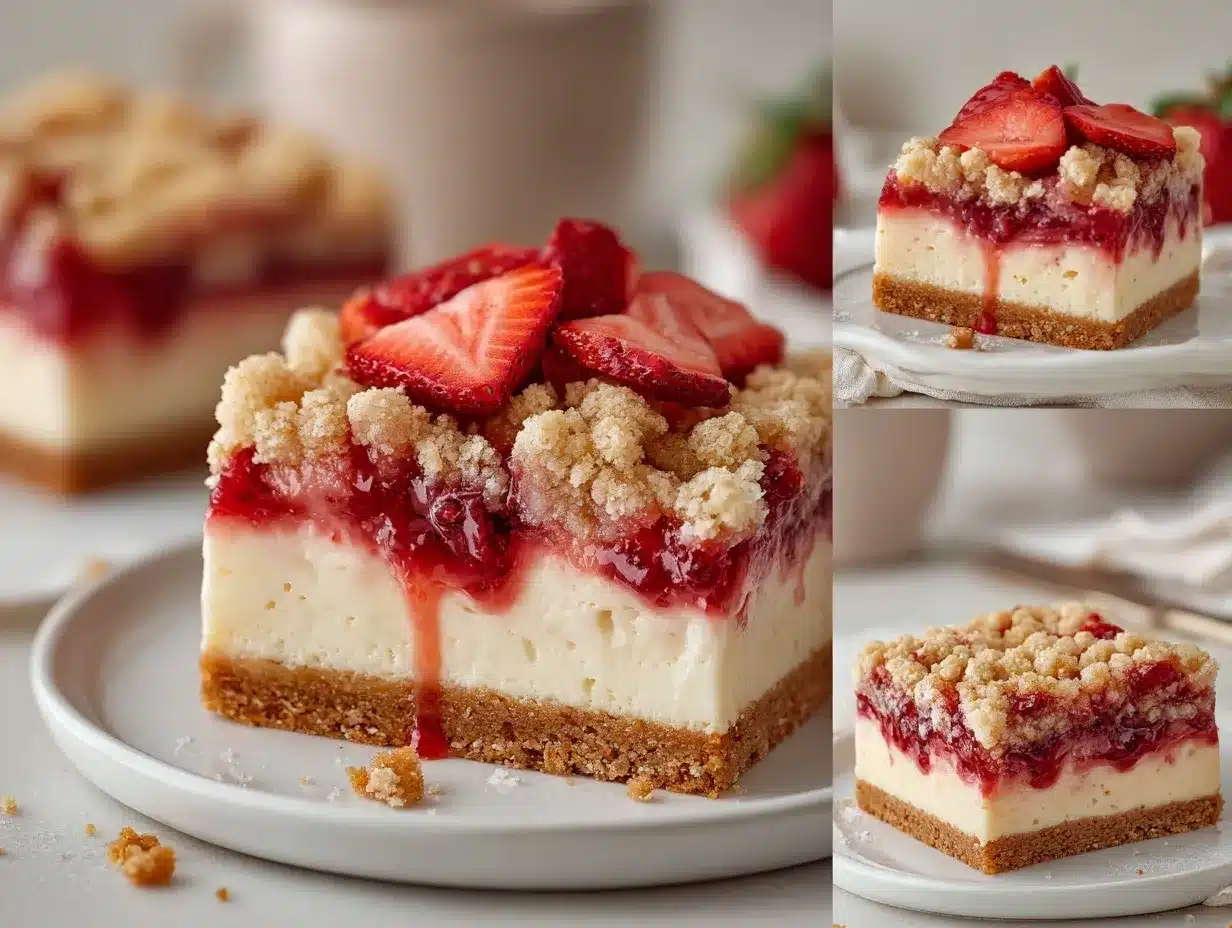
Strawberry Shortcake Cheesecake Bars

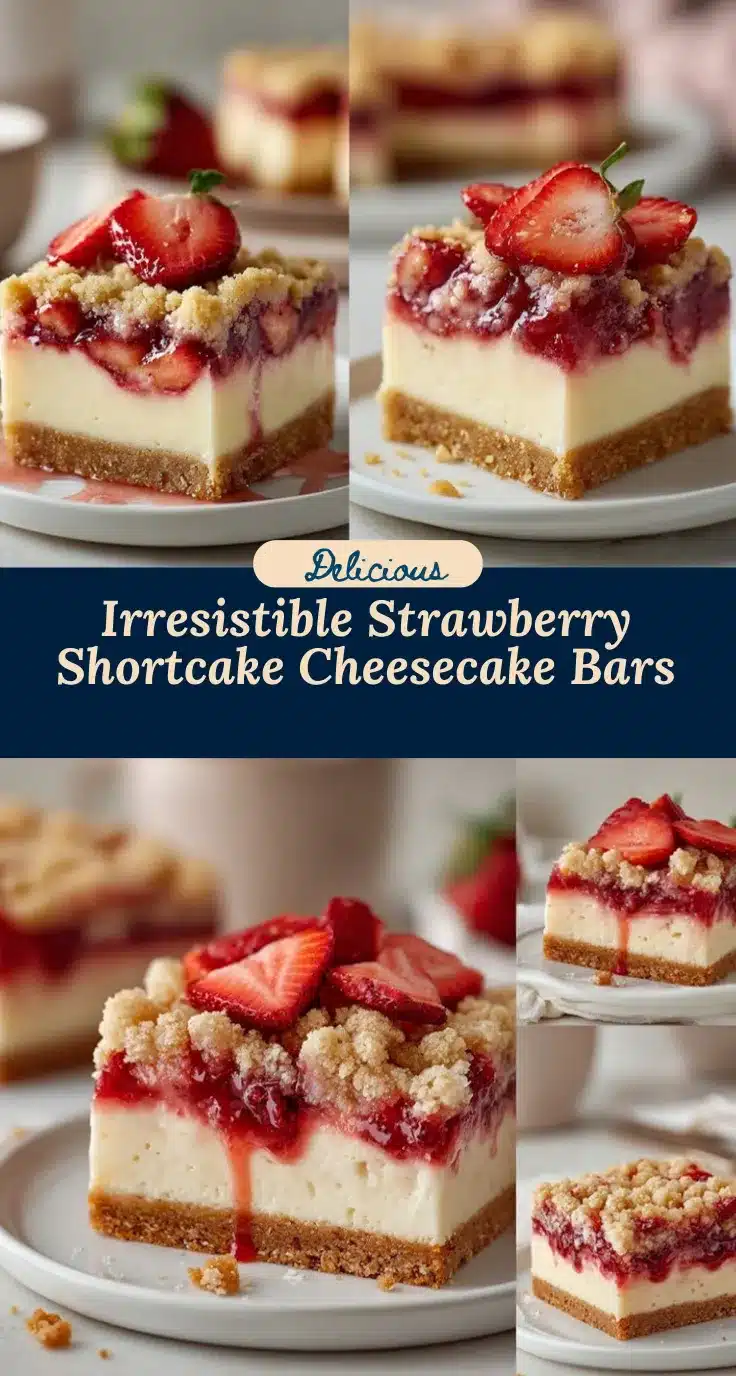
These Strawberry Shortcake Cheesecake Bars combine a buttery cookie crust, creamy cheesecake, and juicy strawberries with a crumbly topping for an easy, crowd-pleasing 13×9 dessert. Perfect for potlucks, picnics, or any occasion when you want a summery treat without the fuss of a layered cake.
- Prep Time: 20 minutes
- Cook Time: 50 minutes
- Total Time: 3 hours 10 minutes
- Yield: 16 bars 1x
- Category: Dessert
- Cuisine: American
Ingredients
- 2 cups (250g) all-purpose flour
- 1 cup (200g) granulated sugar
- 1/2 cup (115g) unsalted butter, melted
- 1/4 cup (60ml) neutral oil (canola or sunflower)
- 1/2 teaspoon baking powder
- 1/4 teaspoon salt
- 1/2 cup (15g) freeze-dried strawberries, crushed (optional)
- 1 teaspoon vanilla extract
- 16 oz (450g) cream cheese, softened
- 1/2 cup (100g) granulated sugar
- 2 large eggs, room temperature
- 1/4 cup (60ml) sour cream or plain Greek yogurt
- 1 teaspoon vanilla extract
- 2 cups (300g) fresh strawberries, hulled and chopped
- 2 tablespoons (25g) granulated sugar
- 1 tablespoon (8g) cornstarch
- 1 teaspoon fresh lemon juice
Instructions
- Preheat oven to 350°F (175°C). Line a 13×9-inch pan with parchment paper, letting it hang over the sides. Lightly spray with nonstick spray.
- In a large bowl, whisk together flour, sugar, baking powder, salt, and (if using) crushed freeze-dried strawberries. Add melted butter, oil, and vanilla extract. Stir until crumbly but holds together when pressed.
- Reserve 1 heaping cup of the mixture for the topping. Press the remaining mixture firmly and evenly into the bottom of the prepared pan.
- Bake the crust for 10 minutes, until just set and fragrant. Remove from oven.
- While the crust bakes, toss chopped strawberries with sugar, cornstarch, and lemon juice. Set aside to macerate.
- In a clean bowl, beat cream cheese with sugar until smooth (about 2 minutes). Beat in eggs one at a time, then sour cream or yogurt and vanilla extract. Mix until creamy and pourable.
- Pour cheesecake filling over the par-baked crust and smooth evenly. Spoon the strawberry mixture evenly over the cheesecake layer.
- Crumble the reserved crust mixture over the top, squeezing some into larger clumps.
- Bake for 35-40 minutes, until the top is lightly golden and the center jiggles just slightly. If the crumble browns too quickly, cover loosely with foil for the last 10 minutes.
- Cool bars at room temperature for 1 hour, then chill in the fridge for at least 2 hours (overnight is best).
- Use parchment handles to lift the bars out. Cut into 16 squares, wiping the knife between cuts for clean edges.
Notes
For best results, use room temperature cream cheese, eggs, and yogurt. Chill bars thoroughly before slicing for clean edges. If using frozen strawberries, thaw and drain well. For a gluten-free version, use a 1:1 gluten-free flour blend. The freeze-dried strawberries in the crumble are optional but add extra flavor and color.
Nutrition
- Serving Size: 1 bar (1/16 of recipe)
- Calories: 250
- Sugar: 16
- Sodium: 140
- Fat: 14
- Saturated Fat: 8
- Carbohydrates: 28
- Fiber: 1
- Protein: 4
Keywords: strawberry shortcake, cheesecake bars, easy dessert, 13x9 dessert, summer dessert, potluck, picnic, strawberry cheesecake, bar cookies