
Let me tell you, the scent of cinnamon and baked apples curling through my kitchen is downright magical—it’s the kind of aroma that makes neighbors pause on their evening walk and peek longingly through your window. The first time I pulled this apple crisp with crumble topping from the oven, I remember the steam rising off the bubbling fruit and the golden, crackly topping practically begging for a spoon. It’s a sensory overload in the best way possible: soft, warm apples tucked under a sweet, slightly salty streusel, each bite balancing comfort and nostalgia.
This recipe carries a little piece of my childhood—back when I was knee-high to a grasshopper, my grandma would whip up her famous apple crisp whenever the orchard haul was too big for pies alone. I tried to recreate those memories one rainy afternoon, thinking, “Why did I wait so long to bring this back?” The answer, honestly, is that apple crisp is dangerously easy to fall in love with (and even easier to make). It’s got that pure, nostalgic comfort that makes you feel right at home, no matter where you are.
Family gatherings at our place now always include this dessert. My kids can’t resist sneaking spoonfuls off the cooling rack—my partner included! It’s a proven crowd-pleaser, and I’ve tested it more times than I care to admit (all in the name of research, of course). Whether you’re looking for a simple homemade dessert for a cozy night in, need something to brighten up your Pinterest board, or just want a sweet treat that feels like a warm hug, this apple crisp with crumble topping is the staple you’re going to want to bookmark. Trust me, once you try it, you’ll wonder why you ever bothered with complicated desserts.
Why You’ll Love This Recipe
When you’ve whipped up as many apple desserts as I have, you start to notice what really sets a recipe apart. After countless batches and taste tests (with some pretty honest feedback from my gang), I can say this apple crisp with crumble topping is a keeper. Here’s why:
- Quick & Easy: You can have this on the table in under an hour—perfect for last-minute cravings or unexpected guests.
- Simple Ingredients: All you need are pantry staples and fresh apples. Nothing fancy, nothing fussy.
- Perfect for Any Occasion: This dessert works for everything—Sunday dinners, potlucks, weeknight treats, even holiday mornings for a sweet breakfast.
- Crowd-Pleaser: Kids, adults, apple lovers, even self-proclaimed “not a dessert person”—they all go back for seconds.
- Unbelievably Delicious: The mix of tart apples, buttery crumb topping, and a hint of cinnamon—honestly, it’s next-level comfort food.
What makes this apple crisp different from the rest? I use a special crumble topping that’s both crunchy and tender, thanks to the mix of oats and brown sugar. A squeeze of lemon in the filling lifts the flavor, and using a blend of apple varieties gives you both tang and sweetness. No soggy bottoms here; the crisp comes out perfectly golden every time.
This isn’t just another apple dessert—it’s the kind that makes you close your eyes after the first bite. It’s comfort food, made simpler and a little lighter, but with all the soul-soothing satisfaction you remember. If you want to impress guests without a lot of fuss, or just turn a regular Tuesday into something memorable, this recipe is your ticket. I’ve made it for holidays, birthdays, and late-night snacks, and it never disappoints. You’ll feel like a dessert pro (even if you don’t bake often)!
What Ingredients You Will Need
Great apple crisp isn’t about fancy ingredients—it’s about getting the basics just right. This recipe leans on simple, wholesome flavors to deliver bold taste and satisfying texture without any fuss. Most of these are pantry staples, and substitutions are easy if you need to tweak for allergies or taste. Here’s what you’ll need:
- For the apple filling:
- 6-7 medium apples (about 900g), peeled, cored, and sliced (I like a mix of Granny Smith for tartness and Fuji for sweetness)
- 2 tablespoons lemon juice (fresh is best, keeps apples from browning and adds brightness)
- 1/3 cup (70g) granulated sugar (adjust to taste, depending on your apples)
- 1 teaspoon ground cinnamon (adds warmth)
- 1/4 teaspoon ground nutmeg (optional, but so good for depth)
- 2 tablespoons all-purpose flour (or cornstarch for gluten-free, thickens the filling)
- For the crumble topping:
- 3/4 cup (90g) old-fashioned rolled oats (for texture and crunch)
- 3/4 cup (95g) all-purpose flour (swap with almond flour for gluten-free)
- 1/2 cup (100g) packed light brown sugar (adds caramel-like sweetness)
- 1/3 cup (75g) granulated sugar (for balanced sweetness)
- 1/2 cup (115g) unsalted butter, cold and cut into cubes (dairy-free butter works if needed)
- 1/4 teaspoon salt (don’t skip—makes the topping sing!)
- Optional: 1/2 cup (60g) chopped pecans or walnuts (for nutty crunch)
Ingredient Tips: For apples, I recommend mixing tart and sweet varieties—Granny Smith and Honeycrisp are my go-to combo. If you’re out of lemon juice, a splash of orange juice works in a pinch. For a vegan version, use plant-based butter. For more flavor, toss in some dried cranberries or raisins with the apples. If oats aren’t your thing, just use extra flour for a smoother topping. Honestly, this recipe is forgiving—sometimes I even sneak in a pinch of cardamom for a twist.
Substitution Suggestions: You can use coconut sugar instead of brown sugar, or swap the nuts for seeds to make it nut-free. Want it a little healthier? Use whole wheat flour or cut back on sugar. No apples? Try pears or peaches (but apples really are the classic). Use what you have and make it your own!
Equipment Needed
I’m all about keeping things simple in the kitchen, and this apple crisp with crumble topping doesn’t require anything fancy. Here’s what you’ll need:
- 1 large mixing bowl (for tossing apples with sugar and spices)
- 1 medium mixing bowl (for making the crumble topping)
- 9×13-inch (23x33cm) baking dish (ceramic or glass works great)
- Peeler and corer (a basic vegetable peeler does the trick—an apple corer is nice but not essential)
- Sharp knife and cutting board (for slicing apples)
- Pastry blender or fork (for cutting butter into the crumble, but clean hands work just as well)
- Measuring cups and spoons
If you don’t have a pastry blender, two butter knives or your fingertips do the job. I’ve even used a food processor (just pulse gently so you don’t overmix). For baking dishes, both glass and metal pans work, but glass gives a crispier topping—just don’t use a disposable foil pan unless you’re desperate. Cleaning tip: soak the mixing bowls right after using; the sugar can get sticky if left too long.
Honestly, budget-friendly options are fine here. I’ve made this in a thrifted dish and with my oldest wooden spoon, and it still turns out perfect every time.
Preparation Method
- Preheat the oven: Set your oven to 350°F (175°C). Grease a 9×13-inch (23x33cm) baking dish lightly with butter or nonstick spray.
- Prepare the apples: Peel, core, and slice 6-7 medium apples (about 900g). Aim for slices about 1/4-inch thick—uniform size helps them cook evenly. Toss the apple slices in a large bowl with 2 tablespoons lemon juice, 1/3 cup (70g) sugar, 1 teaspoon cinnamon, 1/4 teaspoon nutmeg, and 2 tablespoons flour. Stir until apples are evenly coated and everything’s mixed. The apples should look glossy and smell sweetly spiced.
- Layer the apples: Pour the apple mixture into your prepared baking dish and spread it out evenly. Press down lightly so the apples settle into a flat layer (helps the topping sit nicely).
- Make the crumble topping: In a medium bowl, combine 3/4 cup (90g) oats, 3/4 cup (95g) flour, 1/2 cup (100g) brown sugar, 1/3 cup (75g) granulated sugar, and 1/4 teaspoon salt. Stir together. Add 1/2 cup (115g) cold, cubed butter. Use a pastry blender, fork, or your fingers to work the butter in until the mixture resembles coarse crumbs—some pea-sized clumps are perfect. Fold in nuts if using.
- Top the apples: Sprinkle the crumble mixture evenly over the apples. Don’t press it down—leaving it loose gives the topping a better texture. Make sure it covers the apples fully (some gaps are okay; the juices will bubble up).
- Bake: Bake for 40-45 minutes, until the topping is golden brown and the apples are bubbling around the edges. If your apples are extra juicy, you might need 5 extra minutes. The kitchen should smell amazing, and the topping should look crisp, not pale.
- Cool: Remove from oven and let cool for at least 10 minutes. The filling thickens as it sits, and you won’t burn your tongue (been there, done that!).
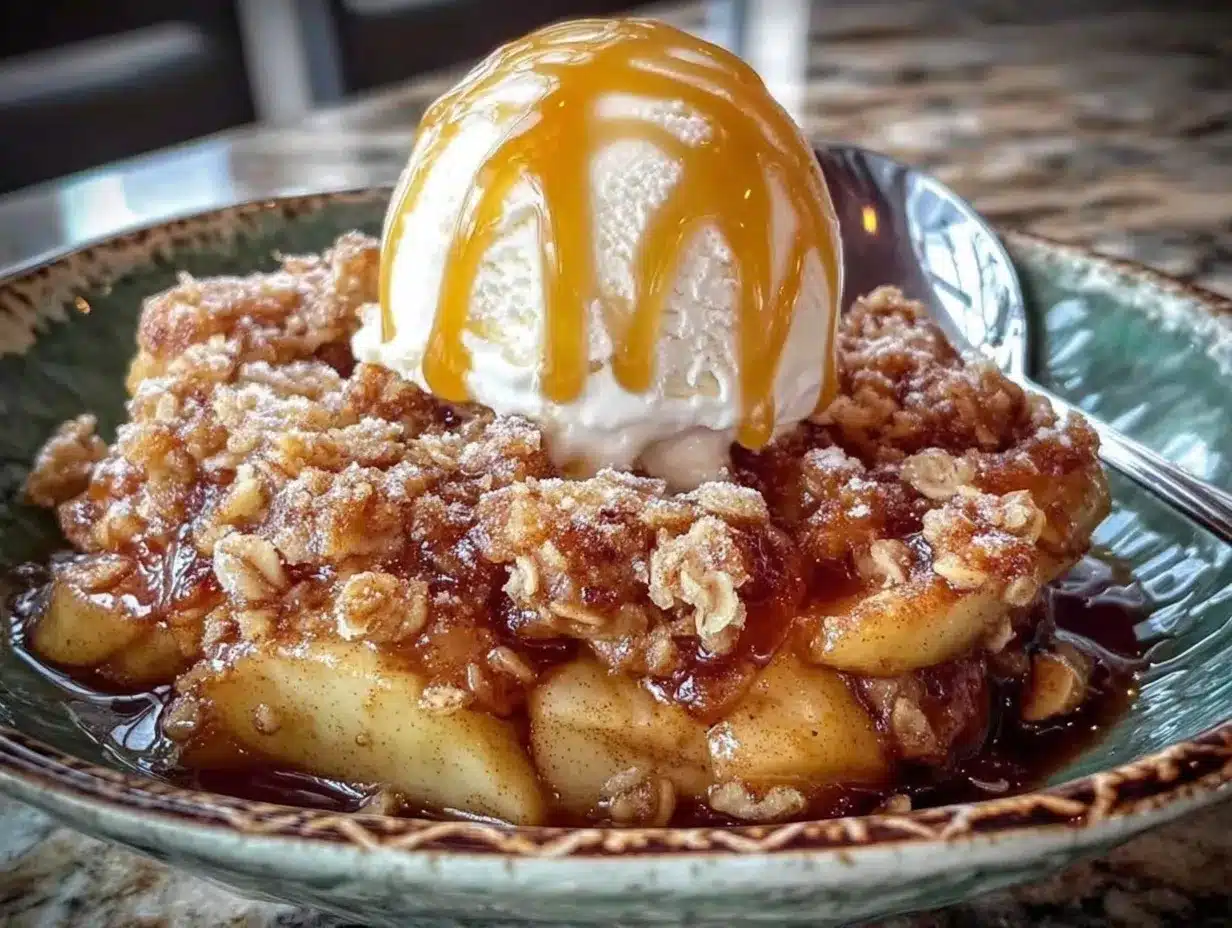
- Serve: Scoop into bowls while warm. I love it with vanilla ice cream or whipped cream, but honestly, it’s dreamy on its own.
Prep Tips: If your apples are super tart, add an extra tablespoon of sugar. If they’re soft, cut back on baking time so they don’t turn mushy. For a crispier topping, use cold butter and don’t overmix. If your kitchen is warm, chill the crumble topping briefly before baking. Wipe down your counters right away—the cinnamon gets everywhere!
Troubleshooting: If the topping looks too dry halfway through, sprinkle a tablespoon of melted butter on top. If it’s too wet, bake uncovered a bit longer. Don’t fret if the filling bubbles over—just means it’s extra juicy!
Cooking Tips & Techniques
Years of making apple crisp with crumble topping have taught me a few solid tricks (and, let’s be real, a couple of hard lessons). Here are my top tips for getting it right every time:
- Apple Selection: Mix tart and sweet apples for the best flavor—Granny Smith for bite, Fuji or Gala for sweetness. Too many soft apples will make the filling mushy.
- Cold Butter is Key: Use cold, cubed butter for the crumble. Warm butter makes the topping greasy and flat (learned that the hard way one summer).
- Don’t Overmix: When making the topping, stop as soon as you see coarse crumbs. Overworking it will turn it cakey instead of crumbly.
- Layer Evenly: Spread apples flat in the dish so the topping cooks uniformly. If the apples pile up, the topping can get soggy in the middle.
- Bake Until Bubbling: Don’t just look at the topping—make sure the filling is bubbling at the edges. That’s how you know the apples are cooked and the juices have thickened.
- Rest Before Serving: Let the crisp cool for at least 10 minutes before scooping. The filling sets up and the topping stays crisp.
- Multitasking Tip: Prep the apples while the oven preheats and make the topping at the same time. You’ll have the crisp ready in no time.
I’ve burned the topping by cranking up the heat to rush things—trust the process and stick to 350°F (175°C). For consistency, always measure your ingredients (guessing can lead to a soggy mess). And don’t worry if the crumble looks chunky; those little clumps are pure magic!
Variations & Adaptations
The beauty of apple crisp with crumble topping is how flexible it is. Here are a few favorite ways to mix things up:
- Gluten-Free Version: Swap all-purpose flour for almond or oat flour in both filling and topping. Make sure your oats are certified gluten-free.
- Vegan or Dairy-Free: Use plant-based butter or coconut oil for the crumble topping. You won’t miss the dairy!
- Seasonal Twist: Try pears, peaches, or plums instead of apples. In the fall, add fresh cranberries for tartness.
- Nutty Crunch: Add chopped pecans, walnuts, or hazelnuts to the topping for extra flavor. If you’re nut-free, use sunflower seeds or leave them out entirely.
- Spice It Up: Add a pinch of cardamom or ginger to the filling for a little zing.
I once made this with a handful of dried cherries in the apple layer—honestly, it was a hit at the family reunion. If you’re watching sugar, try cutting back by a third or using coconut sugar. For a richer topping, replace half the flour with finely ground oats. Don’t be afraid to play around and find your favorite combo!
Baking methods can shift, too. Individual ramekins make cute single servings, and you can grill the crisp for a smoky, campfire version. Just keep the proportions the same and adjust the baking time as needed.
Serving & Storage Suggestions
This apple crisp with crumble topping tastes best warm, right out of the oven. Spoon generous helpings into bowls and top with vanilla ice cream, whipped cream, or a drizzle of caramel sauce—seriously, your taste buds will thank you. For a breakfast treat, serve leftovers with Greek yogurt.
Pair with a hot cup of coffee or a mug of spiced cider for pure cozy vibes. It’s a dreamy finish to hearty dinners or a sweet surprise for brunch. For parties, present in pretty ramekins or mini mason jars (Pinterest gold, honestly).
To store, cover and refrigerate leftovers for up to 3 days. The flavors deepen as it sits, and the topping stays crisp with a quick oven reheat (10 minutes at 350°F / 175°C). You can freeze the baked crisp for up to 2 months—just thaw overnight and reheat gently. Avoid microwaving if you want the topping to stay crunchy; use the oven instead.
As the crisp sits, the spices mellow and the apples become even more tender. I always sneak a bite the day after baking—sometimes, it’s even better!
Nutritional Information & Benefits
A generous serving of this apple crisp with crumble topping (about 1/8 of the pan) delivers roughly 280 calories, 6g fat, 50g carbs, and 3g protein. You’ll get fiber from the apples and oats, and a nice dose of vitamin C from the fruit. If you use nuts, you’ll add healthy fats, too.
Apples are a great source of antioxidants and dietary fiber, making this dessert a bit lighter than most. If you go the gluten-free or dairy-free route, it’s friendly for those with sensitivities. Just watch for allergens in the topping (nuts, gluten, or dairy, depending on your swaps).
Personally, I love that you can adjust the sugar and flour to suit your nutrition goals. It’s a treat, yes, but one that feels a little more wholesome than most desserts.
Conclusion
If you’re searching for a simple homemade dessert that’s packed with flavor, warmth, and a touch of nostalgia, this apple crisp with crumble topping should be at the top of your list. It’s easy, flexible, and always delivers that comforting, crowd-pleasing taste. Don’t be afraid to customize—swap apples, tweak spices, or play with your favorite toppings.
I genuinely love this recipe because it brings my family together, fills the house with delicious smells, and always makes me smile. It’s a staple for holidays, weeknights, and special occasions alike. Give it a try, and let your taste buds decide!
Drop a comment below with your favorite twists, share with friends, and tag me if you post your creation (Pinterest folks, I see you!). Here’s to simple, sweet moments—one bite at a time!
FAQs
Can I make apple crisp with crumble topping ahead of time?
Absolutely! Prep the apples and crumble, assemble, then cover and refrigerate overnight. Bake fresh when ready to serve for best texture.
What are the best apples for apple crisp?
A mix of Granny Smith (for tartness) and Fuji or Honeycrisp (for sweetness) gives the best flavor and texture. Avoid mushy apples like Red Delicious.
Can I freeze apple crisp?
Yes! Bake, cool completely, then wrap tightly and freeze for up to 2 months. Thaw overnight in the fridge and reheat in the oven for a crispy topping.
How do I make this recipe gluten-free?
Use almond flour or certified gluten-free oat flour in place of regular flour, and make sure your oats are gluten-free.
What can I do if my apple crisp topping is too soft?
If the topping is soft, try baking uncovered for 5-10 more minutes, or sprinkle a bit of extra oats and sugar on top before returning to the oven.
Pin This Recipe!

Apple Crisp With Crumble Topping

This easy homemade apple crisp features tender baked apples under a crunchy oat and brown sugar crumble topping. It’s a comforting dessert that’s simple to make and perfect for any occasion.
- Prep Time: 15 minutes
- Cook Time: 45 minutes
- Total Time: 1 hour
- Yield: 8 servings 1x
- Category: Dessert
- Cuisine: American
Ingredients
- 6–7 medium apples (about 2 lbs), peeled, cored, and sliced (Granny Smith and Fuji recommended)
- 2 tablespoons lemon juice
- 1/3 cup granulated sugar
- 1 teaspoon ground cinnamon
- 1/4 teaspoon ground nutmeg (optional)
- 2 tablespoons all-purpose flour (or cornstarch for gluten-free)
- 3/4 cup old-fashioned rolled oats
- 3/4 cup all-purpose flour (or almond flour for gluten-free)
- 1/2 cup packed light brown sugar
- 1/3 cup granulated sugar
- 1/2 cup unsalted butter, cold and cut into cubes
- 1/4 teaspoon salt
- Optional: 1/2 cup chopped pecans or walnuts
Instructions
- Preheat oven to 350°F (175°C). Lightly grease a 9×13-inch baking dish with butter or nonstick spray.
- Peel, core, and slice apples into 1/4-inch thick slices. Toss in a large bowl with lemon juice, granulated sugar, cinnamon, nutmeg, and flour until evenly coated.
- Spread the apple mixture evenly in the prepared baking dish and press down lightly.
- In a medium bowl, combine oats, flour, brown sugar, granulated sugar, and salt. Stir together.
- Add cold, cubed butter to the topping mixture. Use a pastry blender, fork, or fingers to work the butter in until the mixture resembles coarse crumbs. Fold in nuts if using.
- Sprinkle the crumble topping evenly over the apples without pressing down.
- Bake for 40-45 minutes, until the topping is golden brown and the apples are bubbling at the edges. If apples are extra juicy, bake 5 minutes longer.
- Remove from oven and let cool for at least 10 minutes before serving.
- Serve warm, optionally topped with vanilla ice cream or whipped cream.
Notes
Mix tart and sweet apples for best flavor. Use cold butter for a crisp topping. For gluten-free, use almond flour and certified gluten-free oats. Let the crisp cool before serving for best texture. Store leftovers covered in the fridge for up to 3 days; reheat in the oven to keep the topping crunchy.
Nutrition
- Serving Size: 1/8 of the pan
- Calories: 280
- Sugar: 29
- Sodium: 90
- Fat: 6
- Saturated Fat: 3
- Carbohydrates: 50
- Fiber: 4
- Protein: 3
Keywords: apple crisp, crumble topping, easy dessert, homemade, fall dessert, comfort food, oats, cinnamon, fruit crisp


