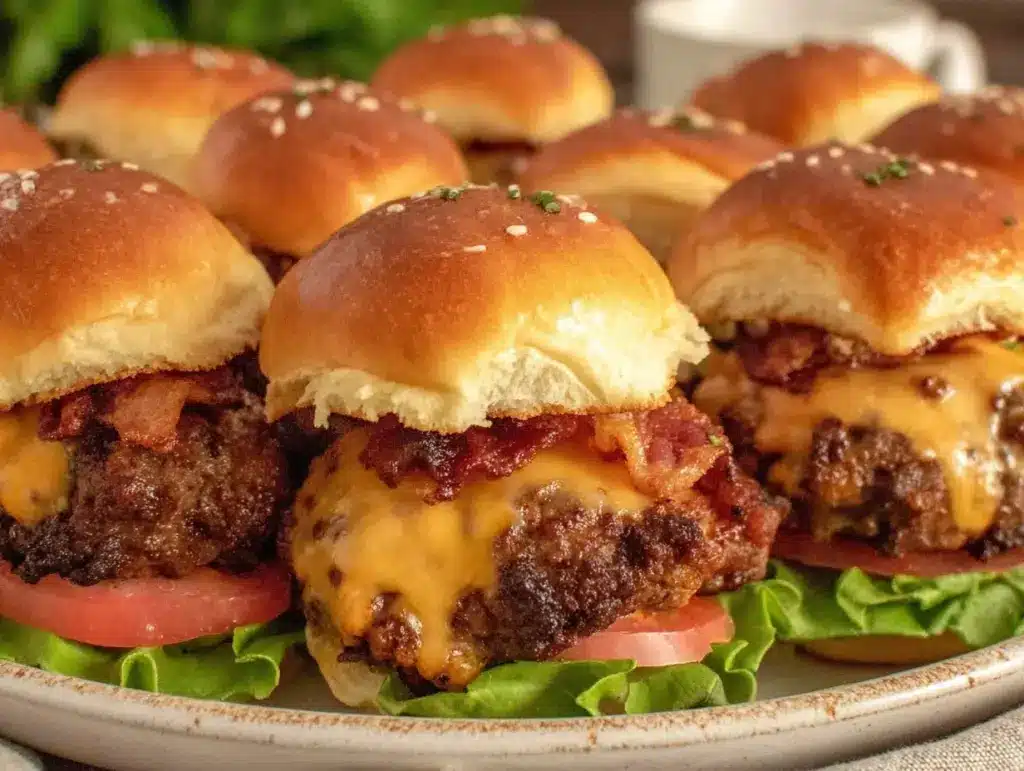
Let me paint you a picture: the aroma of sizzling bacon and juicy ground beef mingling in the air, golden slider buns warming in the oven, gooey cheddar melting just right. It’s the kind of scent that stops everyone in their tracks—and, honestly, it’s the reason people start hovering in the kitchen well before kickoff. The first time I made these bacon cheeseburger sliders for a party, I was instantly hooked. Picture crispy bacon tucked inside every bite and a rich, cheesy melt that practically begs for extra napkins. There was that moment, you know, when I paused, took a breath, and knew I had stumbled onto something worth celebrating.
Back when I was knee-high to a grasshopper, my mom used to make mini burgers for family get-togethers. She called them “party burgers,” and let’s face it, they disappeared before the last tray left the oven. Years ago, I tried recreating her recipe for a rainy weekend with friends, but it wasn’t until I discovered the magical combo of smoky bacon and sharp cheddar that these sliders truly reached their full potential. (Wish I’d figured that out way sooner!) My family couldn’t stop sneaking them off the cooling rack, and I can’t really blame them. Even my picky cousin, who swears he doesn’t eat bacon, was caught nibbling a slider or three.
Honestly, these bacon cheeseburger sliders are dangerously easy—pure, nostalgic comfort wrapped up in party-perfect bites. They’re perfect for potlucks, game day spreads, or even to brighten up your Pinterest appetizer board. Whether you want a sweet treat for your kids after school or a crowd-pleaser for holiday gatherings, this recipe checks all the boxes. I’ve tested these sliders more times than I can count (all in the name of research, of course), and they’re now a staple for family parties, gifting, and quick weeknight dinners. It feels like a warm hug every time you bite in, and you’re going to want to bookmark this bacon cheeseburger sliders recipe for parties—trust me.
Why You’ll Love This Bacon Cheeseburger Sliders Recipe
This isn’t just another slider recipe—it’s the one you’ll keep coming back to. After countless game days, birthday parties, and even a few midnight cravings, these bacon cheeseburger sliders have proven their worth time and again. From chef-tested tweaks to family-approved flavors, here’s why you’ll be obsessed:
- Quick & Easy: Comes together in under 45 minutes—perfect for busy weeknights or last-minute party prep (no kidding, I’ve whipped these up during halftime and still made it back for the third quarter).
- Simple Ingredients: No fancy grocery runs—everything you need is probably already in your fridge and pantry. Ground beef, bacon, cheddar, slider buns, and a few staple seasonings.
- Perfect for Parties: Whether it’s game day, potluck, birthday bash, or even a casual family dinner—these sliders fit right in. You can double or triple the batch without breaking a sweat.
- Crowd-Pleaser: Gets rave reviews from kids, adults, and even those “I don’t really eat beef” folks. Every time I bring these to a gathering, I leave with an empty tray and requests for the recipe.
- Unbelievably Delicious: The combo of crispy bacon, juicy beef, and gooey cheddar hits all the comfort food notes. The buttery buns soak up every bit of flavor—seriously, you’ll want to lick your fingers.
What makes these sliders unique? Well, for starters, mixing the bacon right into the beef ensures every bite is loaded with savory goodness (no sad, bacon-less bites here). I blend a dash of garlic powder and Worcestershire sauce into the meat for that classic burger flavor—just like my grandma did, but with a modern twist. And don’t skip the brush of melted butter on top! It’s a simple touch, but it takes these sliders out of “good” and straight into “best easy appetizer” territory.
The thing is, this bacon cheeseburger sliders recipe is more than just tasty—it’s the kind that makes you close your eyes on the first bite. Comfort food, but faster, easier, and just as satisfying. Perfect for impressing guests without stress or turning a Tuesday night into something worth celebrating.
What Ingredients You Will Need
This recipe uses simple, wholesome ingredients to deliver bold flavor and satisfying texture—no fuss, no hunting for specialty items. Most of these are pantry staples, and you can swap things out to suit your taste or dietary needs. Grouped by their role, here’s what you’ll need to make the best bacon cheeseburger sliders for parties or game day:
- For the Sliders:
- 1 lb (450g) ground beef (80/20 blend for juiciness; I usually stick with Angus for flavor)
- 8 slices bacon, cooked and chopped (thick-cut bacon gives the best texture—try applewood smoked for extra flavor)
- 1 cup (115g) shredded sharp cheddar cheese (I’m partial to Cabot or Tillamook, but any good cheddar works)
- 12 slider buns or mini rolls (soft, bakery-style buns are best—King’s Hawaiian are a favorite in our house)
- 1/2 small onion, finely chopped (optional, but adds nice sweetness)
- 2 tbsp Worcestershire sauce (adds depth—don’t skip!)
- 1 tsp garlic powder (or minced fresh garlic for a punchier flavor)
- Salt and pepper, to taste
- For Assembly & Topping:
- 2 tbsp unsalted butter, melted (for brushing buns, makes them golden and irresistible)
- 1 tbsp sesame seeds (optional, for a classic burger look)
- Pickles, sliced (for garnish—use dill or bread & butter, whatever you like)
- Ketchup, mustard, or burger sauce (for serving—totally up to you)
- For Customization:
- Swap cheddar for American, Swiss, or pepper jack for a different flavor profile
- Use turkey bacon or veggie bacon for lighter versions
- For gluten-free, use gluten-free slider rolls (Schar or Udi’s are reliable brands)
- For low-carb, swap buns with mini lettuce wraps or keto buns
- Add jalapeños or sautéed mushrooms for extra kick
If you want to get fancy, you can even add a thin tomato slice or a dash of hot sauce. Ingredient selection matters—I always look for fresh, lean beef and thick-cut bacon. For cheese, pre-shredded works in a pinch, but shredding it yourself makes for better melt. In summer, I swap in fresh tomatoes and crisp lettuce for extra color. Feel free to go wild with your favorite burger toppings—these sliders are all about making them your own!
Equipment Needed
You don’t need a ton of fancy gear for this bacon cheeseburger sliders recipe. Most items are already in your kitchen, but here’s the full rundown:
- Baking sheet or casserole dish: For assembling and baking the sliders. I prefer rimmed baking sheets for easy cleanup, but a glass casserole works too.
- Large skillet or frying pan: For cooking bacon and browning the beef. Cast iron gives the best flavor—if you have one, use it!
- Spatula: For flipping beef and bacon. Silicone spatulas are easiest to clean and gentle on nonstick pans.
- Sharp knife and cutting board: For chopping bacon, onions, and slicing buns.
- Pastry brush: For spreading melted butter over buns (if you don’t have one, just use the back of a spoon—I’ve been there).
- Measuring spoons and cups: For seasoning and cheese—precision helps, but eyeballing works in a pinch.
If you don’t own a pastry brush, a spoon or even clean fingers work for buttering the buns. For the skillet, nonstick pans are fine, but I always get the best browning in cast iron. As far as budget-friendly options go, I’ve used dollar store baking sheets and survived just fine—just watch for warping! If you ever get stuck with stuck-on cheese, a soak in warm soapy water does wonders.
Preparation Method

Ready to get cooking? Follow these step-by-step instructions for the perfect bacon cheeseburger sliders recipe for parties and game day. Here’s how I make them for a crowd, with helpful notes along the way.
-
Prep the Bacon:
Cook 8 slices of bacon in a large skillet over medium heat until crispy, about 8-10 minutes. Drain on paper towels and chop into small pieces.
Tip: For extra crispiness, bake bacon on a rack at 400°F (200°C) for 15 minutes. -
Brown the Beef:
In the same skillet (no need to clean, bacon fat = flavor!), brown 1 lb (450g) ground beef over medium-high heat until no longer pink, about 5-7 minutes. Drain excess fat.
Note: Avoid overcooking; juicy beef is key for sliders. -
Add Seasonings:
Stir in 1/2 small onion (optional), 2 tbsp Worcestershire sauce, 1 tsp garlic powder, salt, and pepper. Cook for 2 more minutes, mixing well.
Sensory cue: Beef should smell savory and slightly sweet. -
Mix in Bacon & Cheese:
Remove pan from heat. Add chopped bacon and 1 cup (115g) shredded cheddar. Stir until cheese melts and mixture is evenly combined.
Efficiency tip: Cheese melts best if you sprinkle it in gradually. -
Prepare Buns:
Slice 12 slider buns horizontally, keeping tops and bottoms intact as two large sheets if possible (like a giant sandwich). Lay bottoms in a greased baking sheet or casserole dish.
Warning: Don’t separate buns individually; group slices keep filling from spilling out. -
Assemble Sliders:
Spoon beef-bacon-cheese mixture evenly over bun bottoms. Top with pickle slices if desired. Replace bun tops.
Note: Press gently to keep sliders compact. -
Butter & Bake:
Brush melted butter (2 tbsp) over bun tops. Sprinkle sesame seeds if using.
Bake at 350°F (175°C) for 12-15 minutes, until buns are golden and cheese is bubbly.
Sensory cue: Buns should be lightly crisped; cheese oozing out the sides. -
Slice & Serve:
Use a sharp knife to slice into individual sliders. Serve warm with ketchup, mustard, or your favorite burger sauce.
Tip: Let them cool for 2 minutes before slicing to avoid melty cheese mess.
If you’re making sliders ahead, assemble and refrigerate before baking—just add a couple extra minutes to bake time. Troubleshooting: If sliders seem dry, drizzle a little extra melted butter or add a cheese slice before baking. For party prep, I sometimes cook the bacon and beef mixture a day in advance, then assemble just before guests arrive. Efficiency? Line everything up like an assembly line and get the family involved—kids love stacking sliders!
Cooking Tips & Techniques
Over the years (and more batches than I can count), I’ve learned a few tricks to make bacon cheeseburger sliders come out perfect every time. Here’s what works—and what doesn’t!
- Keep It Juicy: Don’t overcook the beef. Pull it off the heat as soon as the pink disappears and let residual heat finish the job. Dry beef is, well, a bummer.
- Bacon in Every Bite: Mix chopped bacon into the beef rather than layering it. That way, you get smoky flavor all the way through, not just in random bites.
- Cheese Melting: Shred your own cheese for the best melt. Pre-shredded cheese has coatings that make it less gooey—trust me, I’ve tried both.
- Assembly Line Style: Lay out all buns at once, spread filling quickly, and work with a sharp knife for slicing. Multitasking is your friend, especially with helpers.
- Watch the Butter: Don’t skip the melted butter! Brush it on buns before baking for golden tops. If you forget it (I have), buns dry out quickly.
- Common Mistakes: Overfilling sliders makes them fall apart. Use just enough beef mixture to cover each bun. If you get cheese overflow, let it cool a minute before slicing.
- Personal Failures: I once tried baking these uncovered with extra cheese on top—disaster! Cheese burned before buns were done. Always stick to the inside cheese and bake covered with foil if you want extra softness.
- Consistency Tips: Use the same size buns, and cut even slices. If your buns are too crusty, wrap them in a damp paper towel and microwave for 15 seconds to soften before assembling.
Variations & Adaptations
One of the best things about this bacon cheeseburger sliders recipe is how flexible it is. You can easily make it work for different diets, seasons, and flavor preferences. Here are some tried-and-true variations:
- Gluten-Free: Swap regular slider buns for gluten-free rolls. Brands like Udi’s or Schar work well. Just watch bake time—gluten-free buns brown quickly.
- Low-Carb/Keto: Use mini lettuce wraps or keto-friendly buns. Skip the pickles if you’re strict about carbs, or go for dill slices for extra crunch.
- Vegetarian: Replace ground beef with plant-based crumbles (Beyond Meat or Impossible Burger). Use veggie bacon and stick with sharp cheddar or vegan cheese.
- Seasonal Flavors: In summer, add a thin slice of fresh tomato and a leaf of butter lettuce. In fall, try adding sautéed mushrooms and a sprinkle of smoked paprika.
- Spicy Kick: Mix in diced jalapeños or a dash of hot sauce for heat lovers. Pepper jack cheese also works wonders.
- Cooking Method: Instead of the oven, grill sliders on a grill pan for smoky char marks. Or, air fry assembled sliders at 350°F (175°C) for 8-10 minutes for extra crispiness.
Allergen substitutions are easy with this recipe. For dairy-free, use vegan cheese and dairy-free butter. For egg allergies, check bun ingredients—some brands sneak eggs in. Personally, my favorite twist is adding caramelized onions and swapping cheddar for Swiss cheese (it’s a hit for grown-up parties!). Feel free to get creative—these sliders are your canvas!
Serving & Storage Suggestions
If you want your bacon cheeseburger sliders to be the star of the party, presentation matters. Here’s how I like to serve them for maximum wow-factor—and keep them fresh for leftovers:
- Serving Temperature: Best served hot and fresh out of the oven. If you’re feeding a crowd, keep sliders warm by tenting with foil or using a warming tray.
- Presentation: Arrange sliders on a wooden board or platter, garnish with extra pickles, and serve with dipping sauces (ketchup, mustard, burger sauce).
- Complementary Dishes: Pair with crispy potato wedges, sweet potato fries, or a crunchy coleslaw. For drinks, classic lemonade or iced tea works—beer for the grown-ups, of course.
- Storage: Cool leftovers completely, then transfer to an airtight container. Store in the fridge for up to 3 days. For longer storage, wrap sliders tightly and freeze for up to a month.
- Reheating: To reheat, pop sliders in a 350°F (175°C) oven for 8-10 minutes, or microwave in 30-second bursts until warmed through. If frozen, thaw overnight in the fridge first.
- Flavor Note: Flavors actually deepen after a day—bacon and beef meld together, making leftovers almost better than the originals.
Honestly, I’ve packed these for school lunches and road trips—they travel well and taste great even at room temperature. Don’t be afraid to make extra!
Nutritional Information & Benefits
Here’s a quick overview of what you’re getting with these bacon cheeseburger sliders:
- Estimated per slider: ~220 calories, 12g fat, 15g protein, 12g carbs
- Protein Power: Ground beef and cheddar cheese offer a solid protein boost—great for energy during parties or game day.
- Calcium: Cheese adds calcium, supporting bone health and giving that satisfying, creamy melt.
- Customizable: Easily adapted for gluten-free, low-carb, or dairy-free diets.
- Potential Allergens: Wheat (buns), dairy (cheese, butter), soy (Worcestershire sauce). Always check labels if you’re cooking for guests!
From a wellness perspective, I love that these sliders encourage portion control—mini burgers mean you can enjoy all the flavors without overdoing it. Plus, you can balance with veggie sides or swap ingredients to fit your goals. As always, moderation is key (but hey, sometimes you need that extra slider—no judgment here!).
Conclusion
If you’re searching for a crowd-pleasing, easy-to-make appetizer that never disappoints, this bacon cheeseburger sliders recipe for parties and game day is it. Juicy beef, crispy bacon, and melty cheddar in every bite—what’s not to love? The recipe is endlessly customizable, fits any occasion, and brings smiles every time. I return to it again and again, whether I’m making snacks for the family or prepping for a big game day bash.
Give it a try, and don’t be afraid to tweak the ingredients or add your favorite twists. That’s the beauty of homemade sliders—they’re yours to play with! I love this recipe because it’s simple, memorable, and always makes people happy (my kitchen has never smelled better). If you make these, let me know in the comments how you adapted them, or share a photo on Pinterest! Your feedback keeps the party going.
So bookmark this one, grab your ingredients, and get ready for some seriously good eats. Happy slider-making!
FAQs
Can I make bacon cheeseburger sliders ahead of time?
Yes! Assemble the sliders, cover tightly, and refrigerate before baking. Just add a couple extra minutes to the bake time when you’re ready to serve.
What’s the best way to keep sliders warm for parties?
Keep them covered with foil on a low-heat warming tray or in the oven set to 200°F (95°C) until ready to serve. They’ll stay soft and melty.
Can I freeze bacon cheeseburger sliders?
Absolutely. Cool completely, wrap well, and freeze for up to a month. Thaw overnight in the fridge, then reheat in the oven until warm.
What can I substitute for ground beef?
Try ground turkey, chicken, or plant-based crumbles for a lighter or vegetarian version. Adjust seasonings as needed for flavor.
How do I make these sliders gluten-free?
Just use gluten-free slider rolls—several brands work well. Watch bake times, as gluten-free buns can brown faster than regular ones.
Pin This Recipe!

Bacon Cheeseburger Sliders Recipe for Parties

Juicy ground beef, crispy bacon, and melty cheddar cheese are packed into soft slider buns for the ultimate party appetizer. These easy bacon cheeseburger sliders are perfect for game day, potlucks, or family gatherings and come together in under 45 minutes.
- Prep Time: 15 minutes
- Cook Time: 25 minutes
- Total Time: 40 minutes
- Yield: 12 sliders 1x
- Category: Appetizer
- Cuisine: American
Ingredients
- 1 lb ground beef (80/20 blend)
- 8 slices bacon, cooked and chopped
- 1 cup shredded sharp cheddar cheese
- 12 slider buns or mini rolls
- 1/2 small onion, finely chopped (optional)
- 2 tbsp Worcestershire sauce
- 1 tsp garlic powder
- Salt and pepper, to taste
- 2 tbsp unsalted butter, melted
- 1 tbsp sesame seeds (optional)
- Pickles, sliced (for garnish)
- Ketchup, mustard, or burger sauce (for serving)
Instructions
- Cook bacon in a large skillet over medium heat until crispy, about 8-10 minutes. Drain on paper towels and chop into small pieces.
- In the same skillet, brown ground beef over medium-high heat until no longer pink, about 5-7 minutes. Drain excess fat.
- Stir in onion (if using), Worcestershire sauce, garlic powder, salt, and pepper. Cook for 2 more minutes, mixing well.
- Remove pan from heat. Add chopped bacon and shredded cheddar cheese. Stir until cheese melts and mixture is evenly combined.
- Slice slider buns horizontally, keeping tops and bottoms intact as two large sheets if possible. Lay bottoms in a greased baking sheet or casserole dish.
- Spoon beef-bacon-cheese mixture evenly over bun bottoms. Top with pickle slices if desired. Replace bun tops.
- Brush melted butter over bun tops. Sprinkle sesame seeds if using.
- Bake at 350°F for 12-15 minutes, until buns are golden and cheese is bubbly.
- Use a sharp knife to slice into individual sliders. Serve warm with ketchup, mustard, or your favorite burger sauce.
Notes
For gluten-free, use gluten-free slider rolls. For vegetarian, substitute plant-based crumbles and veggie bacon. Shred your own cheese for best melt. Assemble sliders ahead and refrigerate before baking if needed. Brush buns with melted butter for golden tops. Let sliders cool for 2 minutes before slicing for cleaner cuts.
Nutrition
- Serving Size: 1 slider
- Calories: 220
- Sugar: 2
- Sodium: 420
- Fat: 12
- Saturated Fat: 6
- Carbohydrates: 12
- Fiber: 1
- Protein: 15
Keywords: bacon cheeseburger sliders, party appetizer, game day, easy sliders, beef sliders, cheddar, bacon, finger food, potluck, mini burgers


