
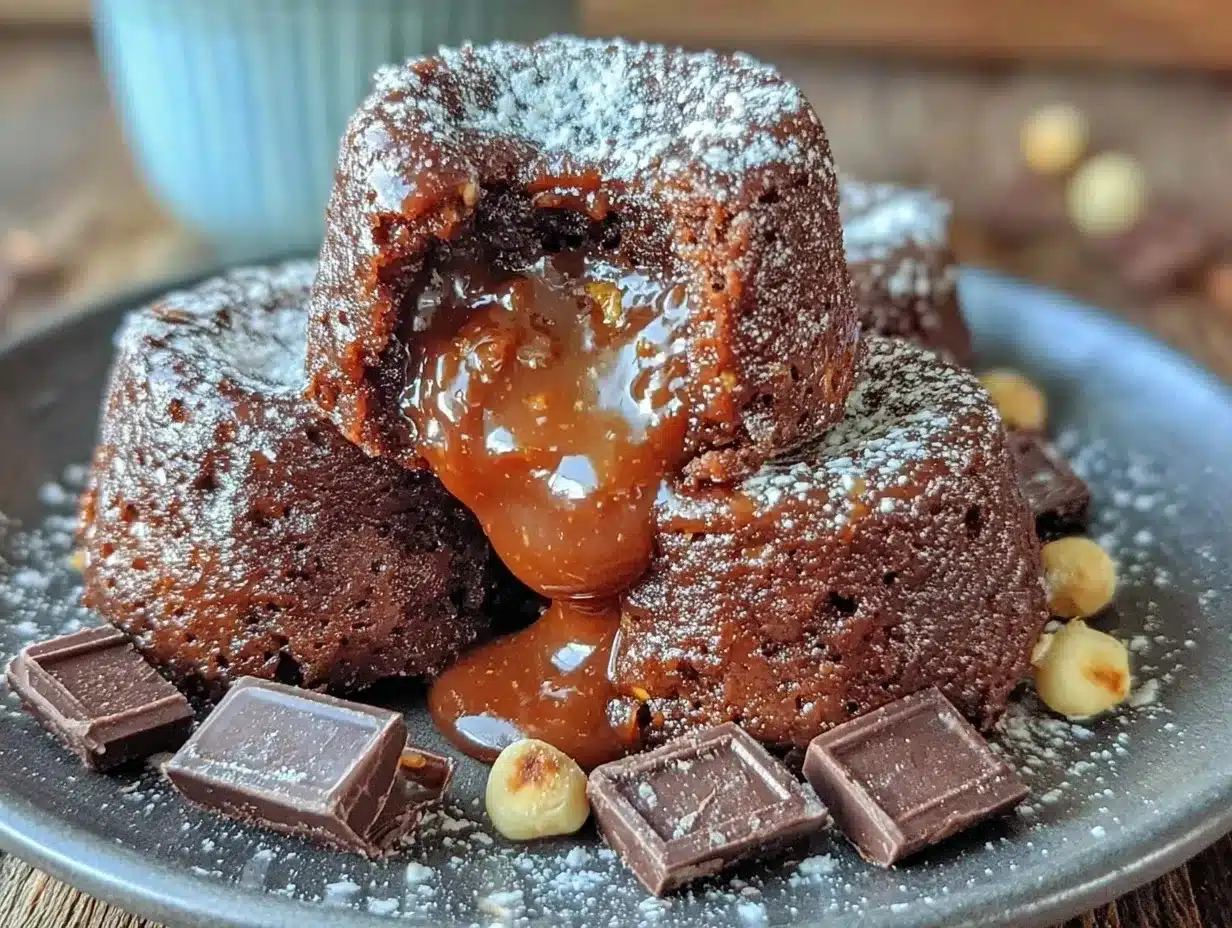
Imagine this: you pull a tray of chocolate hazelnut lava cakes out of the oven, and the air instantly fills with the rich, slightly nutty aroma of melted chocolate and toasted hazelnuts. The cakes look innocent enough at first—little rounds, gently puffed and just beginning to crack on top. But then comes the magic moment: you dig your spoon into the center, and warm, glossy chocolate flows out like a river, mingling with the crunch of hazelnuts. The first time I ever tasted one, it was at a dinner party years ago (when I was knee-high to a grasshopper, or at least that’s how it feels now!), and I was instantly hooked. It’s the kind of moment where you pause, take a deep breath, and just smile because you know you’re onto something truly special.
This chocolate recipe has a sweet spot in my heart. My grandma used to swear by chocolate-hazelnut combos for every holiday (Nutella toast for breakfast, anyone?), so making these lava cakes always brings back those kitchen memories. I stumbled upon this version on a rainy weekend, while trying to recreate the little molten cakes from a Parisian bakery. To be honest, I wish I’d discovered this method years ago—it’s dangerously easy and the results are pure, nostalgic comfort.
My family couldn’t stop sneaking them off the cooling rack (and I can’t really blame them). There’s something about the combination of deep chocolate, creamy hazelnut, and that oozy center that gets people excited. Whether you’re whipping these up for a potluck, a sweet treat for your kids, or just want to brighten up your Pinterest dessert board, these lava cakes never disappoint. I’ve tested this recipe more times than I care to admit (in the name of research, of course), and it’s officially become a staple for family gatherings and gifting. It feels like a warm hug in dessert form—you’re going to want to bookmark this one.
Why You’ll Love This Chocolate Hazelnut Lava Cake Recipe
Honestly, if you’re a chocolate lover (or just someone who likes a bit of drama with their dessert), these cakes are a total game-changer. I’ve made more versions of molten cakes than I care to count, but this one stands out for a few solid reasons—let’s face it, you’ll be craving another bite before you’ve even finished the first!
- Quick & Easy: Ready in under 30 minutes, making it perfect for weeknights or those “I need dessert now” moments.
- Simple Ingredients: No fancy grocery trips required; you’ll probably have everything you need in your pantry already.
- Perfect for Entertaining: These chocolate hazelnut lava cakes are impressive enough for dinner parties but simple enough for a cozy night in.
- Crowd-Pleaser: Kids, adults, even picky eaters—everyone falls for that gooey chocolate center.
- Unbelievably Delicious: The combo of rich chocolate and nutty hazelnut is next-level comfort food.
What makes this recipe different? I use real toasted hazelnuts and a touch of salt to balance the sweetness, plus a nifty trick with the baking time to guarantee gooey centers every time. No more guessing or dry, crumbly cakes—just pure, melty chocolate bliss. If you’ve ever struggled to get that perfect lava flow, trust me, this method works.
It’s not just good—it’s the kind of dessert that makes you close your eyes and sigh after the first bite. It’s classic comfort food, made just a little bit healthier and faster, but with all the soul-soothing satisfaction you need. Perfect for impressing guests without any stress, or for turning a Tuesday night into something memorable. This chocolate hazelnut lava cake recipe is my go-to when I want to bring a little wow-factor to the table (or when I just need a pick-me-up!).
What Ingredients You Will Need
This chocolate hazelnut lava cake recipe uses simple, wholesome ingredients to deliver bold flavor and gooey texture without any fuss. Most of these are pantry staples, and you can easily swap a few things to fit what you have on hand. Here’s what you’ll need:
- For the Lava Cakes:
- 4 oz (115 g) bittersweet chocolate, chopped (I like Valrhona or Ghirardelli for extra richness)
- 1/2 cup (115 g) unsalted butter, cubed
- 1/2 cup (60 g) hazelnuts, toasted and roughly chopped (adds crunch and flavor)
- 2 large eggs, room temperature
- 2 large egg yolks, room temperature (for extra richness and gooeyness)
- 1/4 cup (50 g) granulated sugar
- 1/4 tsp salt (balances the sweetness)
- 1/2 tsp vanilla extract (optional, but I never skip it)
- 2 tbsp (16 g) all-purpose flour (or use almond flour for gluten-free)
- For the Center:
- 4 tbsp (60 g) chocolate hazelnut spread (like Nutella, or use homemade for a deeper flavor)
- For the Topping:
- Powdered sugar, for dusting (optional but oh-so-pretty)
- Extra chopped hazelnuts (for crunch and garnish)
- Fresh berries or a scoop of vanilla ice cream (optional, but highly recommended)
Ingredient Tips:
- Chocolate: Use bittersweet or dark chocolate for a deeper, less sweet taste. Milk chocolate works too, but the lava will be sweeter.
- Hazelnuts: Toasting makes a huge difference—just pop them in the oven at 350°F (175°C) for 8 minutes, then rub off the skins.
- Eggs: Room temperature eggs blend better and make the cakes fluffier.
- Flour: Almond flour makes an easy gluten-free swap—just use the same amount.
- Nutella: If you’re dairy-free, try a vegan chocolate-hazelnut spread instead.
If you’re missing something, don’t panic! Walnuts or almonds work in place of hazelnuts, and you can use coconut oil instead of butter for a twist. In summer, swap out the berries for stone fruit or cherries. For nut allergies, omit the hazelnuts and use sunflower seed butter in the center—still delicious!
Equipment Needed
You don’t need a fancy kitchen setup for these chocolate hazelnut lava cakes, but having the right tools does make things smoother. Here’s what I use (and some tips for making do with what you have):
- 6-ounce (175 ml) ramekins (ceramic or glass work best, but muffin tins will do in a pinch)
- Small saucepan (for melting chocolate and butter)
- Mixing bowls (one medium, one small)
- Whisk (hand or electric)
- Rubber spatula (for blending and scraping every bit of batter)
- Baking sheet (for easy transport and even heating)
- Cooking spray or soft butter (for greasing ramekins)
If you don’t have ramekins, muffin tins lined with parchment work surprisingly well. I’ve tried both, and while ramekins give the perfect height, muffin tins make for easy removal. For melting chocolate, a double boiler is nice, but a microwave works if you go slow (heat in 20-second bursts).
Budget tip: Thrift stores are gold mines for ramekins and mixing bowls. Keep your whisk clean and dry—chocolate sticks to everything! If you use nonstick pans, avoid metal whisks to keep them scratch-free. Honestly, you can get great results with the most basic tools, so don’t stress about perfection.
Preparation Method
Let’s get down to the nitty-gritty—prepping these chocolate hazelnut lava cakes is easier than you think. Here’s how to do it, step by step:
- Prep the Ramekins:
Generously grease six 6-ounce (175 ml) ramekins with butter or cooking spray. Place them on a baking sheet for easy handling later. If using muffin tins, line them with parchment rounds. - Toast the Hazelnuts:
Preheat your oven to 425°F (220°C). Spread hazelnuts on a baking sheet and toast for 8 minutes, then rub off skins with a clean towel. Roughly chop and set aside. (They should smell nutty and fragrant!) - Melt Chocolate & Butter:
In a small saucepan over low heat, melt 4 oz (115 g) chopped bittersweet chocolate with 1/2 cup (115 g) unsalted butter. Stir until glossy and smooth. Set aside to cool slightly. (If using a microwave, heat in 20-second bursts and stir between each.) - Mix Eggs & Sugar:
In a medium bowl, whisk together 2 large eggs, 2 large egg yolks, and 1/4 cup (50 g) granulated sugar until pale and slightly thickened (about 2 minutes). Add 1/4 tsp salt and 1/2 tsp vanilla extract. - Combine Wet Ingredients:
Slowly pour the melted chocolate mixture into the egg mixture, whisking constantly to prevent scrambling. Mix until fully blended (it should look shiny and thick). - Add Flour & Hazelnuts:
Sift in 2 tbsp (16 g) all-purpose flour and fold gently with a spatula until just combined—don’t overmix! Fold in 1/2 cup (60 g) toasted hazelnuts. - Fill the Ramekins:
Divide half the batter evenly among the ramekins (about 2 tbsp per ramekin). Place 2 tsp (about 10 g) chocolate hazelnut spread in the center of each, then cover with remaining batter. Smooth the tops lightly. - Bake:
Bake on the center rack for 11-13 minutes, until edges are set but centers still look soft and slightly jiggly. (Don’t overbake or you’ll lose the gooey center!) Ramekins will be hot, so use oven mitts. - Cool & Turn Out:
Let cakes cool for 1 minute, then run a knife around the edges. Invert onto plates (or serve in ramekins). If they stick, give a gentle shake. - Garnish & Serve:
Dust with powdered sugar, sprinkle with extra hazelnuts, and add berries or ice cream if you like. Serve immediately—lava cakes wait for no one!
Preparation Notes: If your cakes collapse, they were probably underbaked (tasty, but messy!). If they’re dry, they were overbaked—pull them out as soon as the edges set. The batter can be made ahead and chilled for up to 24 hours—just bring to room temp before baking.
Cooking Tips & Techniques
I’ll be honest: making the perfect chocolate hazelnut lava cake took me a few tries to nail. Here’s what I learned (the hard way!):
- Timing is Everything: The key to gooey centers is baking for just the right amount of time—watch for set edges and wobbly middles. I set a timer and don’t wander off!
- Check Your Oven Temp: Ovens can run hot or cold. Use an oven thermometer if you have one. Too hot and the cakes set too fast, too cool and they won’t puff.
- Grease Well: Generously butter your ramekins, especially the bottoms and sides. I’ve lost a few cakes to sticky pans over the years.
- Don’t Overmix: Fold flour in gently—overmixing makes tough cakes. The batter should be just blended and still a little streaky.
- Watch the Lava Center: Go easy on the chocolate hazelnut spread; too much makes the cakes collapse. If you want extra goo, freeze dollops of spread and use those.
- Multitasking: While the cakes bake, prep your toppings—berries, ice cream, or extra hazelnuts. That way, you can serve immediately.
- Failures Happen: My first batch was a chocolate puddle (still delicious!). If yours collapse, scoop into bowls and call it “molten chocolate pudding.” No shame!
- Consistency: Use room temperature eggs and let melted chocolate cool slightly before mixing. This helps the batter blend smoothly.
Remember, practice makes perfect—your cakes will get better every time. Don’t stress about tiny cracks on top; they’re a good sign of gooey centers. The best tip? Enjoy the process and embrace the little imperfections. After all, homemade chocolate lava cakes are supposed to be a bit rustic!
Variations & Adaptations
If you’re like me, you love playing with recipes to suit your mood (or your pantry). Here are some fun ways to switch up these chocolate hazelnut lava cakes:
- Gluten-Free: Swap all-purpose flour with almond flour or a gluten-free baking blend. The texture stays rich and gooey!
- Dairy-Free: Use coconut oil or vegan butter instead of regular butter. Opt for a dairy-free chocolate hazelnut spread.
- Seasonal Twist: Add orange zest to the batter for a wintery flavor, or stir in fresh raspberries for a summery kick.
- Extra Chocolate: Place a square of dark chocolate in the center instead of hazelnut spread for double lava action.
- Nut-Free: Skip the hazelnuts and use seed butter (like sunflower seed spread) for the center. The cakes stay gooey and rich without nuts.
- Different Cooking Methods: Bake in muffin tins for mini lava cakes, or use a cast iron skillet for a shareable version.
Personal favorite? I once made these with a splash of espresso in the batter—game changer! For holiday gatherings, I add a pinch of cinnamon and cardamom. Don’t be afraid to get creative; these cakes are super forgiving. Just keep an eye on the baking time if you change the size or ingredients. You’ll find your own signature version in no time.
Serving & Storage Suggestions
Chocolate hazelnut lava cakes are best served warm, right out of the oven, when the centers are molten and gooey. I like to plate them with fresh berries, a scoop of vanilla ice cream, or even whipped cream. For a Pinterest-worthy presentation, dust with powdered sugar and scatter a few extra hazelnuts on top.
If you’re making these ahead, bake, cool, and refrigerate for up to 3 days. To serve, reheat gently in the microwave for 20 seconds or in a low oven (300°F/150°C) for 5 minutes—just until warm and gooey again. You can also freeze unbaked batter in the ramekins (wrap well), then bake straight from frozen—just add a couple minutes to the baking time. Flavors deepen overnight, making leftovers extra rich (if you have any!).
Pair these cakes with coffee, espresso, or a dessert wine for an elegant touch. For brunch, serve with fruit salad and yogurt. You know what? They’re pretty irresistible any time of day.
Nutritional Information & Benefits
Each chocolate hazelnut lava cake contains approximately:
- Calories: 350
- Protein: 6g
- Fat: 22g
- Carbs: 34g
- Sugar: 22g
Health Benefits: Hazelnuts provide healthy fats and vitamin E, while bittersweet chocolate is packed with antioxidants. Using almond flour makes these gluten-free and adds extra protein. If you choose dairy-free options, the cakes work well for plant-based diets.
Dietary Considerations: Easily adapted for gluten-free, dairy-free, and nut-free diets (see variations above). Allergens may include eggs, nuts, dairy, and gluten—always check labels if cooking for others.
From a wellness perspective, these cakes are indulgent but can fit into a balanced lifestyle. I love knowing exactly what’s going into my treats—real chocolate, real nuts, and nothing weird!
Conclusion
Let’s be honest: there’s no dessert quite like chocolate hazelnut lava cakes with gooey centers. They’re easy enough for beginners, impressive enough for guests, and have that wow-factor you want for special occasions (or just a Wednesday night!). I love how they bring together the deep richness of chocolate with the nutty warmth of hazelnuts—a combo that’s pure comfort and nostalgia.
Don’t be afraid to tweak the recipe to suit your tastes—try new flavors, swap ingredients, or change the presentation. The best part is making it your own. Honestly, these cakes never last long in my house. I hope you love them as much as my family does (and if you do, please let me know—comments always make my day!).
So grab your ramekins, preheat that oven, and treat yourself to a dessert that feels like a warm hug. You deserve it!
FAQs
Can I make chocolate hazelnut lava cakes ahead of time?
Yes! Prepare the batter and fill the ramekins, then cover and refrigerate for up to 24 hours. Bake just before serving for the gooey center.
What’s the best chocolate for lava cakes?
Bittersweet or dark chocolate (around 60-70% cocoa) gives the deepest flavor. Milk chocolate works, but the cakes will be sweeter and less rich.
Can I freeze lava cakes?
Absolutely. Freeze unbaked cakes in ramekins, well wrapped. Bake straight from frozen, adding a couple minutes to the baking time. Baked cakes can be frozen too, but the centers won’t be as gooey when reheated.
How do I know when my lava cakes are ready?
The edges should be set and the center slightly jiggly. Don’t overbake, or the lava center will disappear. Check at 11 minutes and go from there.
What can I serve with chocolate hazelnut lava cakes?
Vanilla ice cream, fresh berries, whipped cream, or even a drizzle of caramel sauce. Coffee or espresso makes a perfect pairing too.
Pin This Recipe!
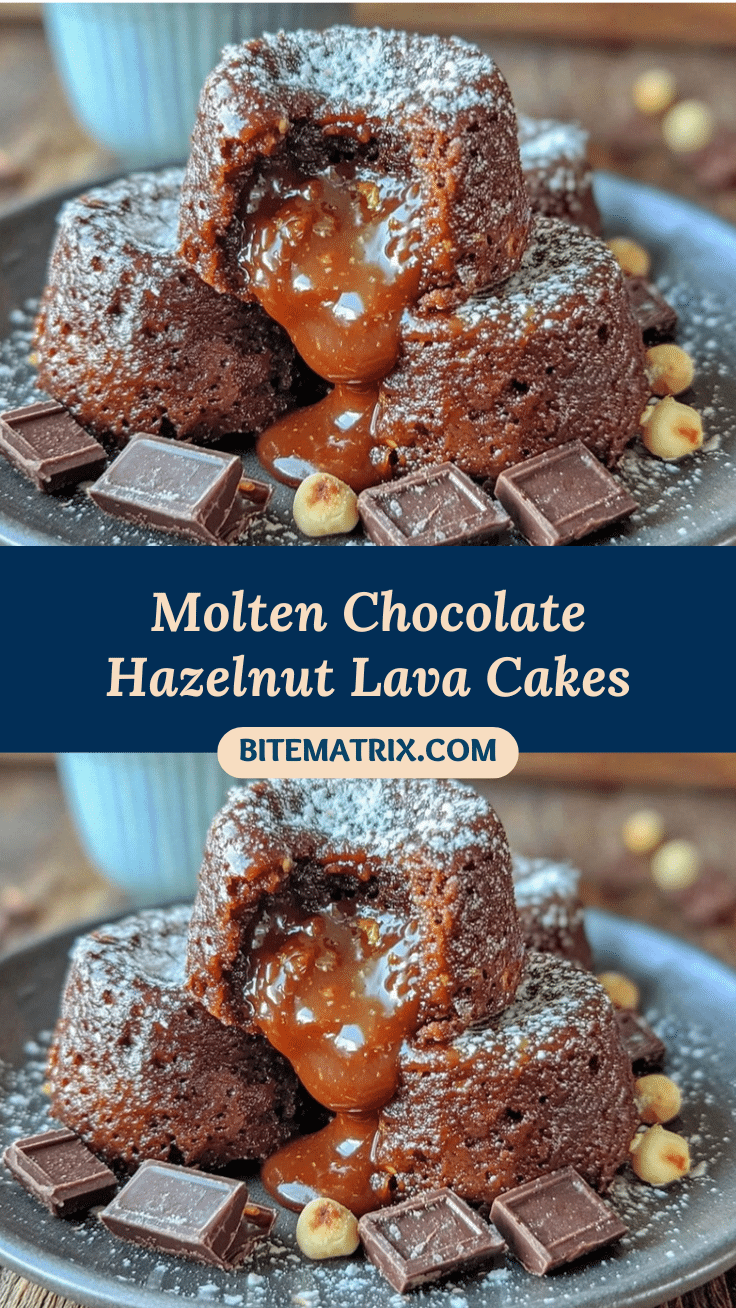
Chocolate Hazelnut Lava Cakes

These chocolate hazelnut lava cakes feature a rich, gooey chocolate center with the crunch of toasted hazelnuts. Quick to prepare and perfect for entertaining, they deliver pure comfort and wow-factor in every bite.
- Prep Time: 15 minutes
- Cook Time: 13 minutes
- Total Time: 28 minutes
- Yield: 6 servings 1x
- Category: Dessert
- Cuisine: French
Ingredients
- 4 oz bittersweet chocolate, chopped
- 1/2 cup unsalted butter, cubed
- 1/2 cup hazelnuts, toasted and roughly chopped
- 2 large eggs, room temperature
- 2 large egg yolks, room temperature
- 1/4 cup granulated sugar
- 1/4 tsp salt
- 1/2 tsp vanilla extract (optional)
- 2 tbsp all-purpose flour (or almond flour for gluten-free)
- 4 tbsp chocolate hazelnut spread (like Nutella)
- Powdered sugar, for dusting (optional)
- Extra chopped hazelnuts, for garnish
- Fresh berries or vanilla ice cream, for serving (optional)
Instructions
- Generously grease six 6-ounce ramekins with butter or cooking spray and place on a baking sheet. If using muffin tins, line with parchment rounds.
- Preheat oven to 425°F (220°C). Spread hazelnuts on a baking sheet and toast for 8 minutes, then rub off skins and roughly chop.
- In a small saucepan over low heat, melt chopped chocolate and butter until glossy and smooth. Set aside to cool slightly.
- In a medium bowl, whisk together eggs, egg yolks, and sugar until pale and slightly thickened (about 2 minutes). Add salt and vanilla extract.
- Slowly pour melted chocolate mixture into the egg mixture, whisking constantly until fully blended.
- Sift in flour and fold gently with a spatula until just combined. Fold in toasted hazelnuts.
- Divide half the batter evenly among the ramekins. Place 2 tsp chocolate hazelnut spread in the center of each, then cover with remaining batter and smooth tops.
- Bake on the center rack for 11-13 minutes, until edges are set but centers are soft and slightly jiggly.
- Let cakes cool for 1 minute, then run a knife around the edges and invert onto plates or serve in ramekins.
- Dust with powdered sugar, sprinkle with extra hazelnuts, and add berries or ice cream if desired. Serve immediately.
Notes
For gluten-free, use almond flour. For dairy-free, substitute coconut oil or vegan butter and use a dairy-free chocolate hazelnut spread. Batter can be made ahead and chilled for up to 24 hours. Freeze unbaked cakes in ramekins and bake straight from frozen, adding a couple minutes to baking time. Serve warm for best results.
Nutrition
- Serving Size: 1 lava cake (about 6
- Calories: 350
- Sugar: 22
- Sodium: 120
- Fat: 22
- Saturated Fat: 10
- Carbohydrates: 34
- Fiber: 3
- Protein: 6
Keywords: chocolate lava cake, hazelnut, molten cake, dessert, easy, quick, Nutella, gluten-free option, dairy-free option, entertaining, comfort food


