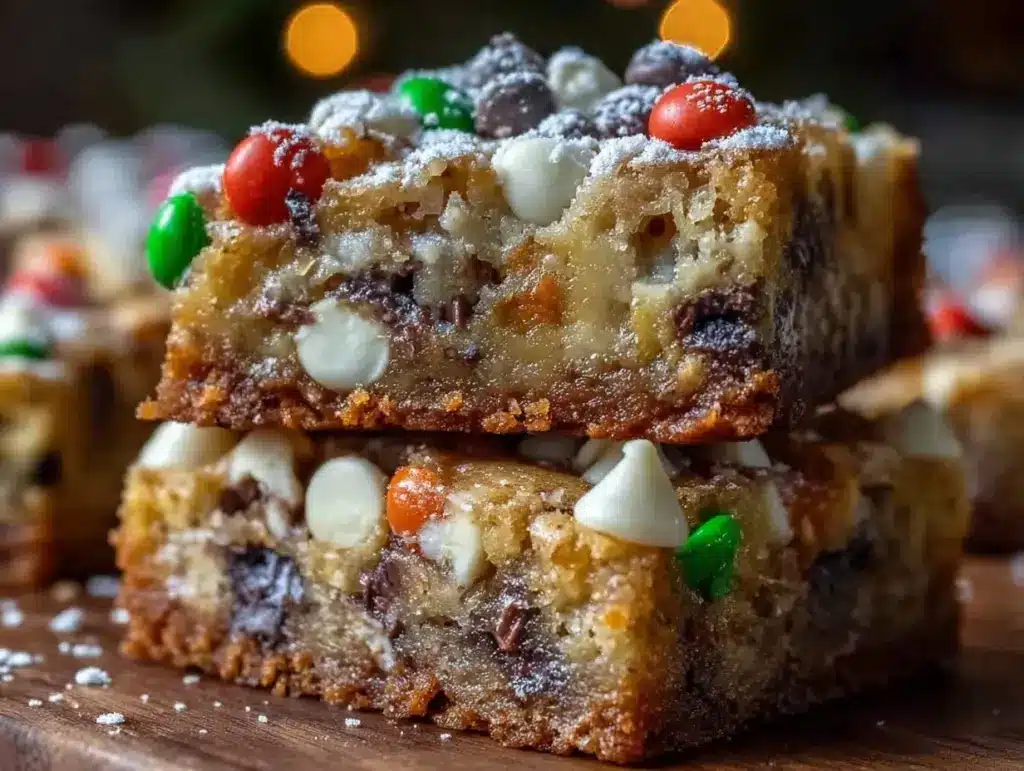
Close your eyes for a second and imagine the sweet, buttery scent of Christmas cookie bars drifting from your oven, mingling with the faint aroma of cinnamon and vanilla. The golden edges, dotted with ruby-red cranberries and creamy white chocolate, glisten under the kitchen lights. The first time I pulled a pan of these festive cookie bars out on a snowy December evening, I’ll be honest—I was instantly hooked. It was the kind of moment you just want to hit pause, soak in the warmth, and maybe sneak a corner piece before anyone else notices.
These Christmas cookie bars didn’t come from a fancy cookbook, but from a scribbled recipe card passed down by my aunt, the queen of holiday baking. She used to whip up trays of these for our family’s Christmas Eve, usually while humming “Jingle Bells” and shooing us kids away from the sprinkles. I still remember being knee-high to a grasshopper, sneaking tastes of dough when she wasn’t looking (sorry, Aunt Marge—old habits die hard!).
Now, whenever I bake these, my family can’t resist hovering around the kitchen. My teenagers try to “test for doneness” by stealing hot, gooey pieces right from the pan, and my husband says they’re “dangerously easy to eat.” I can’t blame them—they’re pure, nostalgic comfort, the sort of treat that brightens up any cookie platter and makes you the hero of the holiday potluck.
Honestly, I wish I’d discovered just how simple these are years ago. Perfect for gifting, classroom parties, or just an after-dinner nibble with cocoa, these Christmas cookie bars have become a staple in our house. I’ve tested and tweaked the recipe more times than I can count (all in the name of research, of course), and every batch feels like a warm hug. Trust me, you’re going to want to bookmark this one—these bars are as festive and foolproof as holiday baking gets.
Why You’ll Love This Christmas Cookie Bars Recipe
You know what makes these Christmas cookie bars a permanent fixture on my holiday baking list? It’s not just the merry sprinkles or the hint of almond—it’s the way they bring everyone together, from kids with sticky fingers to grandparents trading stories by the tree. After years of testing, tweaking, and (let’s face it) eating more than my fair share, here’s why this recipe stands out:
- Quick & Easy: These bars come together in under 45 minutes, start to finish. No rolling, chilling, or cookie cutters—just mix, press, and bake. Perfect for last-minute holiday cravings or when you need a sweet treat, stat.
- Simple Ingredients: You probably have everything on hand—think butter, sugar, flour, eggs, and a few festive mix-ins. No need to hunt for rare spices or specialty flours.
- Perfect for Sharing: Whether you’re headed to a cookie exchange, office party, or family brunch, these bars cut easily into neat squares and travel like a dream.
- Crowd-Pleaser: Kids love the pops of chocolate and sprinkles, while grown-ups appreciate the rich, buttery base. I’ve never had leftovers last more than a day!
- Unbelievably Delicious: The soft, chewy middle with just a little crisp on the edges? It’s everything you want in a holiday dessert bar. Each bite is a cozy blend of vanilla, white chocolate, and holiday cheer.
What really sets these Christmas cookie bars apart is the method—a gentle creaming of butter and sugar for the softest crumb, plus a generous scattering of red and green mix-ins. No dry, crumbly bars here—just moist, bakery-style treats with a festive flair.
If you’ve been burned by bland bar cookies or complicated recipes with endless steps, let this be your redemption. I’ve made these for everything from Sunday school bake sales to Christmas Eve dessert tables, and they always deliver that wow factor. They’re the kind of treat that makes you close your eyes and savor just how good homemade holiday baking can be. Whether you’re baking with kids, impressing in-laws, or sneaking a late-night snack, these bars have your back—delicious, reliable, and packed with holiday spirit.
What Ingredients You Will Need
This recipe uses simple, wholesome ingredients to deliver bold flavor and the perfect cookie bar texture—no fancy shopping list required! You’ll find that most of these are pantry staples, with a few festive twists to make your Christmas cookie bars shine.
- For the Cookie Bar Base:
- Unsalted butter, softened (1 cup / 227g): Gives these bars their rich, tender crumb.
- Brown sugar, packed (1 cup / 200g): Adds moisture and deep flavor. I love using light brown sugar for just the right balance.
- Granulated sugar (1/2 cup / 100g): Sweetens and balances the brown sugar. Domino brand is always reliable in my kitchen.
- Large eggs (2, room temperature): Help bind everything together and give the bars lift.
- Vanilla extract (2 teaspoons / 10ml): For that classic cookie aroma. If you have homemade vanilla, even better!
- Almond extract (1/2 teaspoon / 2.5ml, optional): Adds a subtle, festive nuttiness—highly recommended for holiday flair.
- All-purpose flour (2 1/4 cups / 280g): The backbone of the structure. King Arthur Flour works great for consistent results.
- Baking powder (1 teaspoon / 4g): Lifts the bars just enough.
- Baking soda (1/2 teaspoon / 2g): Works with the baking powder for the perfect rise.
- Salt (1/2 teaspoon / 3g): Balances the sweetness and brings out the flavors.
- For the Festive Mix-Ins:
- White chocolate chips (1 cup / 170g): Melty, creamy pockets of sweetness in every bite. Ghirardelli or Guittard are my top picks.
- Dried cranberries (1/2 cup / 60g): For tart, chewy bursts of flavor and a pop of color. Substitute with chopped dried cherries for a twist.
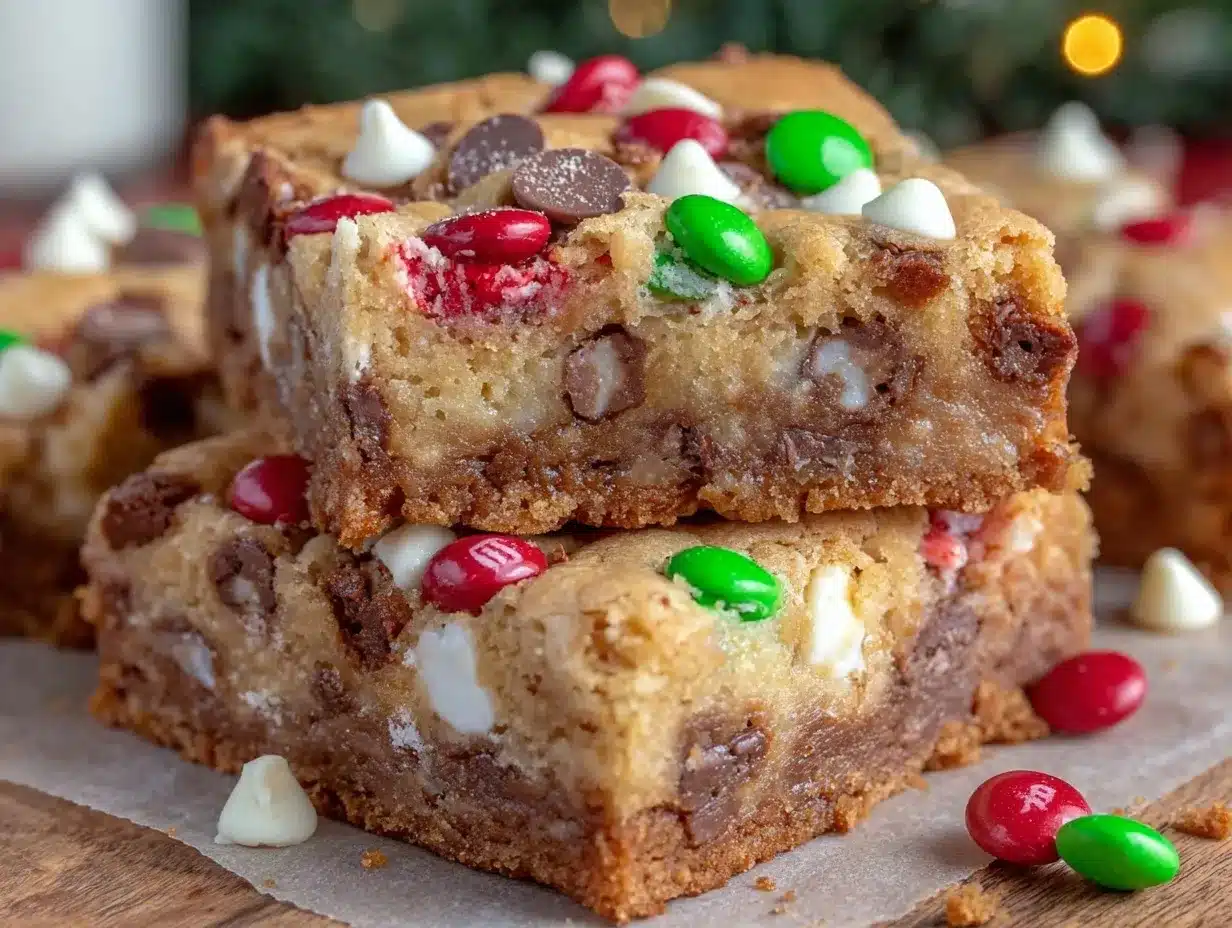
- Holiday sprinkles or red/green M&Ms (1/3 cup / 50g): Brings that Christmas magic—use whatever festive candies you like.
- Chopped pecans or walnuts (1/3 cup / 40g, optional): Adds crunch and a nutty finish. Toast them lightly for extra flavor.
- Ingredient Tips & Substitutions:
- If you need gluten-free, swap in a 1:1 all-purpose gluten-free flour blend (like Bob’s Red Mill).
- For dairy-free, use vegan butter sticks and dairy-free white chocolate chips (Enjoy Life brand is solid).
- If you don’t love cranberries, try chopped dried apricots or even mini marshmallows for a s’mores vibe.
- Sprinkles not your thing? Just add more chocolate chips—no one ever complains!
- Don’t skip the salt—it really makes the flavors sing.
Gather your goodies, and you’re already halfway to holiday magic. These ingredients are as flexible as your schedule—swap in what you have and make these Christmas cookie bars your own.
Equipment Needed
You don’t need a professional bakery setup to whip up these Christmas cookie bars—just a few kitchen basics and maybe a little holiday spirit.
- 9×13-inch (23x33cm) baking pan: The perfect size for thick, chewy bars. If you only have an 8×12, just watch the baking time (you might need a few extra minutes).
- Parchment paper or nonstick spray: Parchment makes lifting and slicing a breeze. If you’re out, a generous coat of butter or spray works too.
- Large mixing bowl: You’ll need space to cream butter and sugar, then stir in all those festive mix-ins.
- Hand mixer or stand mixer: Either works—I’ve used both and even mixed by hand in a pinch (just takes a bit more muscle!).
- Measuring cups and spoons: Accuracy is key for that perfect chewy texture.
- Rubber spatula or wooden spoon: For folding in chocolate, cranberries, and all the good stuff.
- Small offset spatula (optional): Helps spread the dough evenly in the pan—if not, use the back of a spoon.
- Wire cooling rack: Lets the bars cool evenly and keeps the bottoms from getting soggy.
Don’t have a 9×13 pan? Two 8×8 pans will do in a pinch (just check them a bit earlier for doneness). My trusty old glass Pyrex has seen dozens of Christmases and still turns out perfect bars. Clean your mixer paddles right away—dried dough is a bear to scrub off! And if you’re on a budget, hand mixing totally works—just let your butter soften well, and put a little muscle into it.
How to Make Christmas Cookie Bars
- Preheat and Prep:
- Preheat your oven to 350°F (175°C). Line a 9×13-inch (23x33cm) baking pan with parchment paper, leaving a little overhang for easy lifting. If you’re not using parchment, grease generously with butter or nonstick spray.
- Cream Butter and Sugars:
- In a large mixing bowl, beat together 1 cup (227g) softened unsalted butter, 1 cup (200g) brown sugar, and 1/2 cup (100g) granulated sugar until light and fluffy—about 2-3 minutes. The mixture should look creamy and pale. (If it looks grainy, keep beating—patience pays off here!)
- Add Eggs and Extracts:
- Beat in 2 large eggs, one at a time, scraping down the sides as needed. Add 2 teaspoons (10ml) vanilla extract and 1/2 teaspoon (2.5ml) almond extract (if using). Mix until smooth and glossy—your batter should have a lovely sheen now.
- Combine Dry Ingredients:
- In a separate bowl, whisk together 2 1/4 cups (280g) all-purpose flour, 1 teaspoon (4g) baking powder, 1/2 teaspoon (2g) baking soda, and 1/2 teaspoon (3g) salt. Make sure there are no lumps.
- Mix Wet and Dry:
- Gradually add the dry ingredients to the wet, mixing on low speed or by hand until just combined. (Don’t overmix! That’s the secret to tender bars.) The dough will be thick—almost like classic cookie dough.
- Fold in Mix-Ins:
- Switch to a spatula or wooden spoon. Stir in 1 cup (170g) white chocolate chips, 1/2 cup (60g) dried cranberries, 1/3 cup (50g) holiday sprinkles or M&Ms, and 1/3 cup (40g) nuts if using. Save a few chips and candies to sprinkle on top for a picture-perfect finish.
- Spread in Pan:
- Scrape the dough into your prepared pan. Use a spatula or lightly greased hands to press it evenly to the edges—don’t stress if it’s a little rustic, that’s part of the charm. Scatter the reserved chips and sprinkles on top and gently press them in.
- Bake:
- Bake for 22-28 minutes, until the edges are golden and a toothpick inserted in the center comes out with a few moist crumbs (not wet batter). My oven takes about 25 minutes, but every oven is different. If you like chewier bars, pull them at the lower end of the range.
- Cool and Slice:
- Let the bars cool completely in the pan on a wire rack—about 1 hour. (I know it’s hard to wait, but they slice so much cleaner once cooled.) Use the parchment overhang to lift out, then cut into 24-28 squares.
- Store or Serve:
- Devour right away, or store in an airtight container. See below for storage tips!
- Troubleshooting:
- If the bars seem too soft, let them cool longer—they firm up as they rest.
- Too brown on the edges? Check your oven temp—it might run hot, or try moving your rack up a notch.
- If your dough feels dry, double-check your flour measurements (spoon and level—don’t scoop straight from the bag).
My personal tip: for the chewiest bars, don’t overbake. They’ll look a bit soft in the middle but set up perfectly as they cool. And if you want super-clean cuts, chill the bars for 30 minutes before slicing—trust me, it’s worth the wait.
Cooking Tips & Techniques
After baking dozens of batches (some better than others), I’ve picked up a few tricks for flawless Christmas cookie bars every time. Here’s what I’ve learned the hard way (so you don’t have to!):
- Room Temperature Ingredients: Soft butter and room-temp eggs mix faster and trap more air, giving you a lighter, chewier bar. If you forget, zap your eggs in warm water for 5 minutes and cube your butter to speed up softening.
- Don’t Overmix: Once you add the flour, mix just until combined. Overmixing leads to tough, dense bars (ask me how I know—one batch turned into bricks!).
- Even Layering: Use an offset spatula or your hands (lightly greased) to press the dough evenly in the pan. Gaps or thick spots bake unevenly, so take a minute to smooth it out.
- Oven Watching: All ovens run a little differently. Start checking at 22 minutes. The edges should be golden, and the center just set. If you see bubbling or dark brown edges, pull them out!
- Mix-Ins on Top: Reserve a handful of chips, sprinkles, or candies for the top. It looks bakery-beautiful and helps every piece feel special.
- Chill for Clean Slices: If you want perfect Pinterest-worthy bars, chill the cooled pan for 30 minutes before cutting. Use a sharp knife and clean between cuts.
- Multitasking: While the bars bake, tidy up or prep your next round of holiday treats. Trust me, you’ll thank yourself later.
One time I forgot the salt—never again! It makes a world of difference. Don’t skip lining your pan, either; it’s the difference between easy removal and a crumbled mess. And finally, if you’re gifting these, wrap individual bars in festive parchment and tie with baker’s twine. They look as good as they taste!
Variations & Adaptations
The beauty of Christmas cookie bars? They’re a blank canvas for whatever the holiday (or your pantry) throws at you. Here are some of my favorite ways to switch things up:
- Gluten-Free: Swap the all-purpose flour for a 1:1 gluten-free blend. I’ve had great luck with King Arthur’s and Bob’s Red Mill. No one notices a difference!
- Chocolate Lovers: Replace half the white chocolate chips with dark or milk chocolate. For extra decadence, drizzle melted chocolate over the cooled bars.
- Nut-Free: Leave out the nuts and use sunflower seeds or extra sprinkles. These are perfect for school events where allergies are a concern.
- Vegan/Dairy-Free: Use vegan butter and dairy-free chocolate chips. Substitute flax eggs (2 tablespoons ground flax + 5 tablespoons water, let sit 5 minutes) for the eggs. I made these for a vegan neighbor, and they were a hit!
- Seasonal Flavors: For a fall twist, add 1/2 teaspoon ground cinnamon and swap cranberries for dried apples. In spring, use pastel M&Ms and lemon zest.
- Different Mix-Ins: Try chopped peppermint bark, toffee bits, or butterscotch chips for a new flavor each time. My personal favorite? Chopped candied ginger and dark chocolate—unexpected but so good!
Adapt these Christmas cookie bars to fit your family’s tastes, dietary needs, or whatever you have on hand. Sometimes the best batches come from a little last-minute improvising—just like my aunt’s kitchen every December!
Serving & Storage Suggestions
These Christmas cookie bars look gorgeous stacked on a festive platter or tucked into pretty tins. I love serving them at room temperature, where the flavors and textures really shine. For a special touch, dust with powdered sugar or drizzle with melted chocolate right before serving—your guests will think you bought them from a fancy bakery.
Pair these bars with hot cocoa, mulled cider, or (let’s be honest) a tall glass of milk. They’re the perfect sweet finish for a holiday brunch, cookie swap, or cozy movie night by the fire. For parties, cut them into smaller squares for easy nibbling and sharing.
Storage is a breeze: just keep the bars in an airtight container at room temperature for up to 4 days. If you want to make them ahead, they freeze beautifully—just wrap tightly in plastic and then foil, and freeze for up to 2 months. Thaw at room temp and they’re as fresh as the day you baked them.
To reheat, pop a bar in the microwave for 8-10 seconds for that just-baked gooeyness. (Trust me, it’s worth it.) The flavors deepen as they sit, so don’t be afraid to bake a day ahead for your big holiday event.
Nutritional Information & Benefits
Each Christmas cookie bar (cut into 24 squares) contains approximately 170 calories, 8g fat, 24g carbohydrates, and 2g protein. They’re a sweet treat, for sure, but you’ll also get a little fiber from the dried cranberries and healthy fats if you add nuts. For gluten-free or dairy-free needs, the substitutions above work beautifully—just double-check your mix-ins for allergens.
These bars are naturally vegetarian and can be made nut-free with a simple swap. While they’re not exactly health food, I believe in the joy of a holiday treat shared with family and friends. Everything in moderation, right? Besides, the happiness these Christmas cookie bars bring is good for the soul.
Conclusion
When it comes to easy, show-stopping holiday treats, these Christmas cookie bars hit that sweet spot between festive fun and foolproof baking. They’re packed with flavor, adaptable to any crowd, and—best of all—bring people together around the dessert table. Whether you’re a baking newbie or a seasoned pro, you’ll love how these bars turn out every time.
Don’t be afraid to put your own spin on the recipe or let the kids help with sprinkles—half the fun is making them your own. Personally, I keep coming back to these because they remind me of family, laughter, and the simple joys of the holiday season.
If you try these Christmas cookie bars, I’d love to hear your feedback! Leave a comment below, tag your creations on social media, or share your favorite mix-ins. Here’s wishing you a season full of sweet moments, cozy kitchens, and plenty of cookie bar magic. Happy holidays and happy baking!
Frequently Asked Questions
Can I make Christmas cookie bars ahead of time?
Absolutely! Bake and cool the bars, then store in an airtight container at room temperature for up to 4 days. They also freeze well—wrap tightly and freeze for up to 2 months.
How do I know when the bars are done baking?
The edges should be golden and a toothpick inserted in the center should come out with a few moist crumbs (not raw batter). They’ll continue to set as they cool.
What can I use instead of white chocolate chips?
You can swap in dark or milk chocolate chips, chopped chocolate bars, or even butterscotch chips for a fun twist.
Are these Christmas cookie bars gluten-free?
The base recipe uses all-purpose flour, but you can easily substitute a 1:1 gluten-free flour blend for a gluten-free version. Just check your other mix-ins for gluten as well.
Can I double the recipe for a crowd?
Yes! Double all ingredients and bake in two 9×13-inch pans, or use a large sheet pan (adjust baking time as needed). Perfect for parties or gifting big batches during the holidays.
Pin This Recipe!
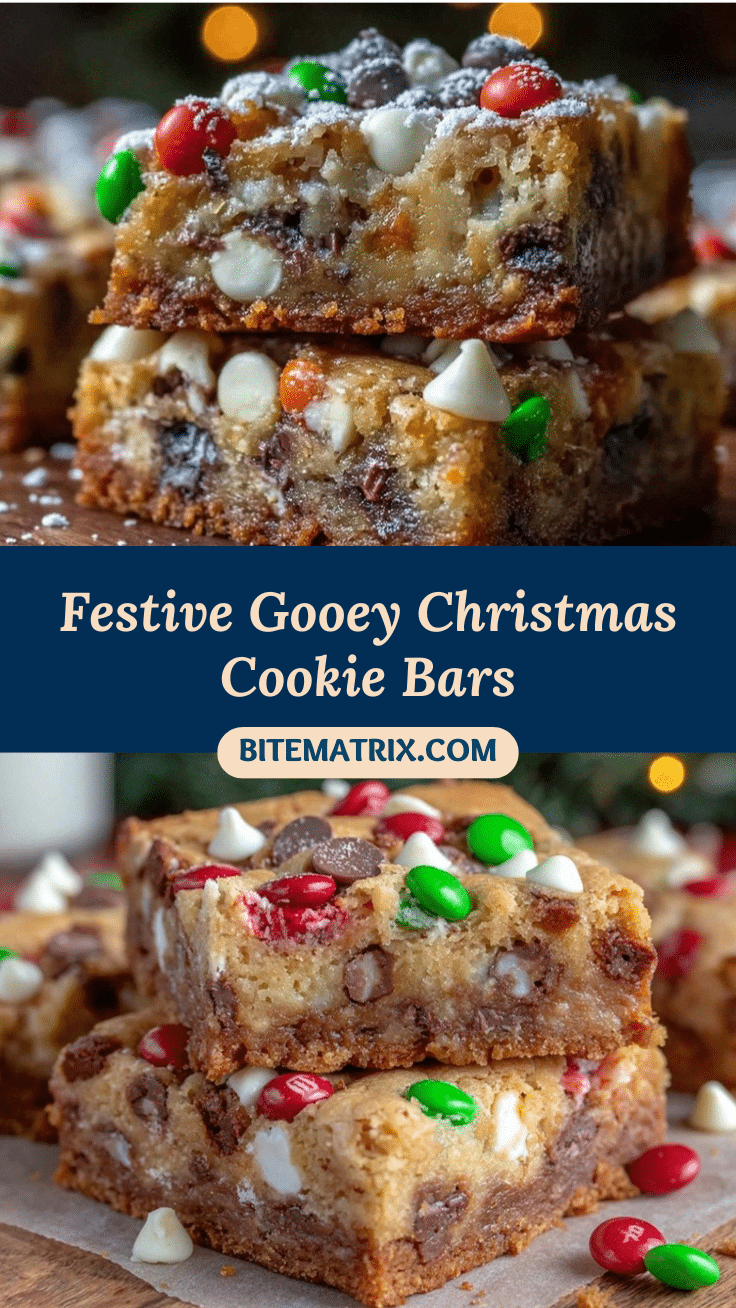
Christmas Cookie Bars Recipe Easy Festive Holiday Dessert Bars
These Christmas cookie bars are a quick, festive, and foolproof holiday treat packed with white chocolate, cranberries, and sprinkles. Perfect for sharing at parties, gifting, or enjoying with family, they come together in under 45 minutes and deliver bakery-style flavor with minimal effort.
- Prep Time: 15 minutes
- Cook Time: 25 minutes
- Total Time: 40 minutes
- Yield: 24-28 bars 1x
- Category: Dessert
- Cuisine: American
Ingredients
- 1 cup (227g) unsalted butter, softened
- 1 cup (200g) brown sugar, packed
- 1/2 cup (100g) granulated sugar
- 2 large eggs, room temperature
- 2 teaspoons (10ml) vanilla extract
- 1/2 teaspoon (2.5ml) almond extract (optional)
- 2 1/4 cups (280g) all-purpose flour
- 1 teaspoon (4g) baking powder
- 1/2 teaspoon (2g) baking soda
- 1/2 teaspoon (3g) salt
- 1 cup (170g) white chocolate chips
- 1/2 cup (60g) dried cranberries
- 1/3 cup (50g) holiday sprinkles or red/green M&Ms
- 1/3 cup (40g) chopped pecans or walnuts (optional)
Instructions
- Preheat your oven to 350°F (175°C). Line a 9×13-inch baking pan with parchment paper, leaving an overhang for easy lifting, or grease generously with butter or nonstick spray.
- In a large mixing bowl, beat together the softened butter, brown sugar, and granulated sugar until light and fluffy, about 2-3 minutes.
- Beat in the eggs, one at a time, scraping down the sides as needed. Add vanilla extract and almond extract (if using), and mix until smooth and glossy.
- In a separate bowl, whisk together the flour, baking powder, baking soda, and salt.
- Gradually add the dry ingredients to the wet ingredients, mixing on low speed or by hand until just combined. Do not overmix.
- Fold in the white chocolate chips, dried cranberries, sprinkles or M&Ms, and nuts if using. Reserve a few chips and candies for topping.
- Spread the dough evenly into the prepared pan. Scatter reserved chips and sprinkles on top and gently press them in.
- Bake for 22-28 minutes, until the edges are golden and a toothpick inserted in the center comes out with a few moist crumbs.
- Let the bars cool completely in the pan on a wire rack, about 1 hour. Use the parchment overhang to lift out, then cut into 24-28 squares.
- Serve immediately or store in an airtight container.
Notes
For chewiest bars, do not overbake; they will set as they cool. Chill bars for 30 minutes before slicing for clean cuts. Easily adapt for gluten-free or dairy-free diets with simple substitutions. Store in an airtight container at room temperature for up to 4 days or freeze for up to 2 months.
Nutrition
- Serving Size: 1 bar (1/24 of recip
- Calories: 170
- Sugar: 16
- Sodium: 80
- Fat: 8
- Saturated Fat: 5
- Carbohydrates: 24
- Fiber: 1
- Protein: 2
Keywords: Christmas cookie bars, holiday dessert, easy cookie bars, festive bars, white chocolate cranberry bars, Christmas baking, cookie exchange, holiday treats


