
Let me tell you, the moment I first whipped up the Clever Kitty Litter Cake, the scent of sweet vanilla frosting mixed with crumbly cookie bits filled the kitchen in a way that made me grin from ear to ear. Honestly, it’s one of those desserts that catches you off guard — fun, quirky, and totally irresistible. The first time I made this playful dessert was during a rainy weekend when my niece begged for something “super silly” to bring to her school party. I was instantly hooked the moment I saw how her eyes lit up, the kind of moment where you pause, take a deep breath, and just smile because you know you’re onto something truly special.
Years ago, when I was knee-high to a grasshopper, my grandma used to make the goofiest treats at family gatherings — but nothing quite like this clever kitty litter cake. I stumbled upon the recipe while trying to recreate that nostalgic fun, and boy, do I wish I’d found it sooner! My family couldn’t stop sneaking spoonfuls off the cooling rack (and I can’t really blame them). This dessert brings pure, nostalgic comfort with a mischievous twist, perfect for potlucks, kids’ birthday parties, or whenever you want to brighten up your dessert table with something dangerously easy and utterly charming.
After testing the recipe multiple times (in the name of research, of course), it’s become a staple for family gatherings and gifting. It’s playful, delicious, and honestly, feels like a warm hug in dessert form. Trust me, you’re going to want to bookmark this one for your next celebration!
Why You’ll Love This Clever Kitty Litter Cake Recipe
From a baking enthusiast’s perspective, this Clever Kitty Litter Cake recipe is a total winner. I’ve tried loads of playful dessert ideas, but this one really stands out. Here’s why I think you’ll love it:
- Quick & Easy: Comes together in about 30 minutes — perfect for last-minute parties or sweet cravings.
- Simple Ingredients: No fancy shopping trips needed; most items are pantry staples or easy to find.
- Perfect for Kids’ Parties: Its whimsical look and crunchy texture make it a total crowd-pleaser for little ones and adults alike.
- Crowd-Pleaser: Everyone from toddlers to grandparents will be sneaking bites when they think you’re not looking.
- Unbelievably Delicious: The combo of creamy frosting, cookie crumbs, and gummy “kitty litter” candies is next-level fun and flavor.
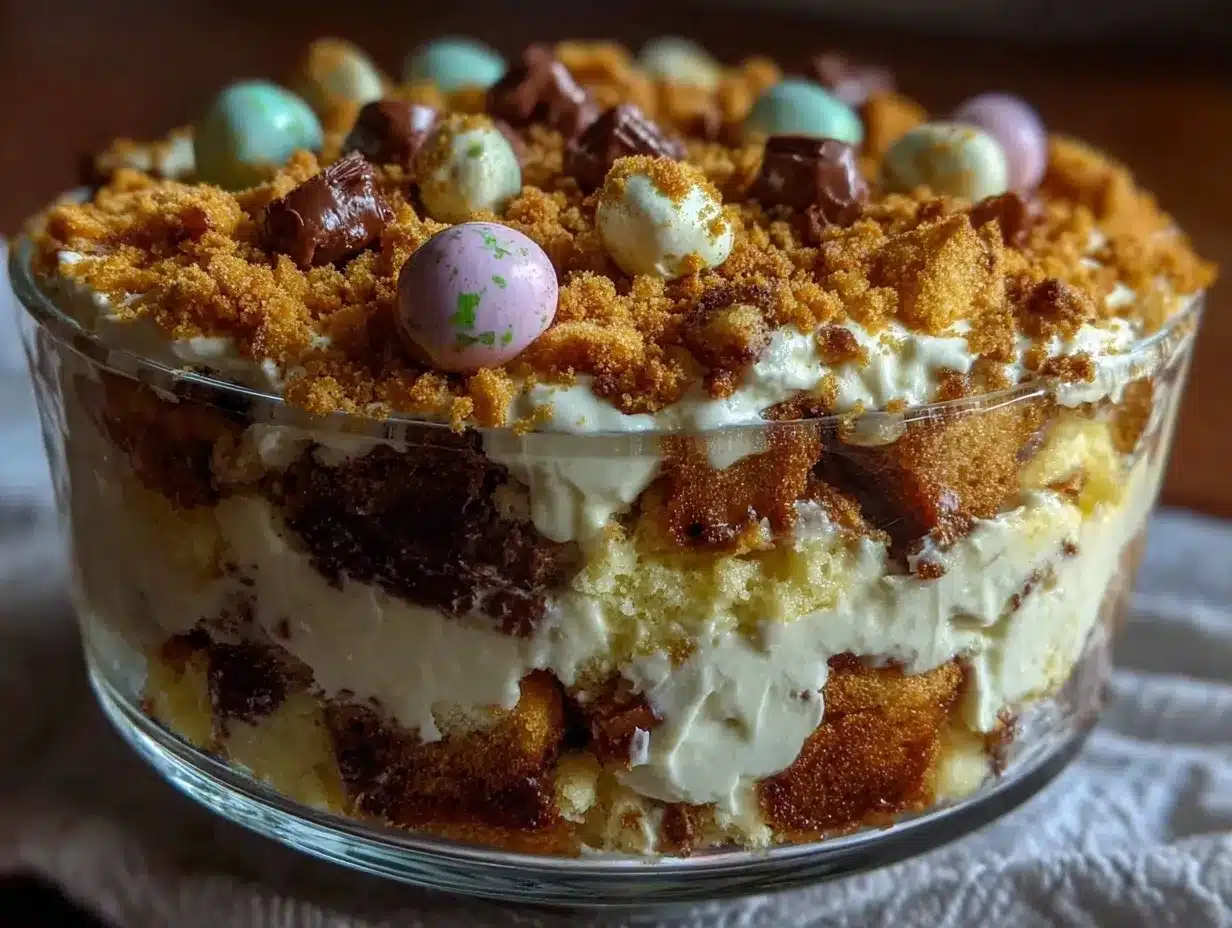
What makes this Clever Kitty Litter Cake so special is its playful presentation paired with a straightforward method. Instead of just layering cake and frosting like the usual, this recipe cleverly mimics the look of kitty litter using crushed cookies and candy, adding a quirky twist that’s equal parts fun and tasty. Plus, the balance of creamy and crunchy textures makes every bite a delightful surprise. It’s the kind of dessert that has you closing your eyes after the first forkful, savoring every sweet, nostalgic bite. Perfect for impressing guests without any stress — just pure, playful joy on a plate.
What Ingredients You Will Need
This Clever Kitty Litter Cake uses simple, wholesome ingredients to deliver bold flavor and satisfying texture without the fuss. Most of these are pantry staples, and you can easily swap a few to suit your needs.
- Yellow cake mix (or your favorite boxed cake mix) – easy base, keeps it moist
- Water, vegetable oil, and eggs – for the cake batter
- Vanilla frosting (store-bought or homemade) – creamy and sweet, acts as “glue”
- Golden Oreos (crushed) – creates the “kitty litter” crumb texture; I recommend Nabisco for best crunch
- Gummy worms or gummy candy – adds the playful “bugs” effect
- Powdered sugar – a pinch in the frosting for extra sweetness (optional)
- Butter (unsalted, softened) – if making homemade frosting
- Vanilla extract – for flavor boost in frosting or cake
Ingredient tips: For a gluten-free option, swap the cake mix with a gluten-free blend and use gluten-free cookies. If you want to keep it dairy-free, use a dairy-free frosting and substitute butter with coconut oil or vegan margarine. In summer, try adding fresh berries on top for a fruity twist!
Equipment Needed
- Mixing bowls: Multiple sizes for batter and frosting
- Electric mixer or hand whisk: For smooth frosting and batter mixing (a hand whisk works fine if you don’t have a mixer)
- 9×13-inch baking pan: Perfect size for layering and serving
- Spatula: For spreading frosting evenly and folding in ingredients
- Food processor or plastic bag with a rolling pin: To crush the Oreos finely (I’ve used both and the bag method works great if you’re short on gadgets)
- Cooling rack: To cool the cake completely before frosting
Personally, I recommend investing in a good-quality electric mixer if you bake often—makes things a breeze. But honestly, this recipe is forgiving, so no stress if you’re just starting out or working with basics. Just be gentle when folding crushed cookies to keep that perfect “kitty litter” texture intact.
Preparation Method
- Preheat your oven to 350°F (175°C). Grease and flour your 9×13-inch pan or line it with parchment paper. This helps prevent sticking and makes cleanup easier. (Prep time: 10 minutes)
- Prepare the cake batter: In a large bowl, mix the yellow cake mix with 1 cup (240 ml) of water, 1/3 cup (80 ml) vegetable oil, and 3 large eggs (room temperature). Use an electric mixer on medium speed for about 2 minutes until smooth. If you don’t have a mixer, whisk vigorously by hand until combined — the batter should look thick but pourable.
- Bake the cake: Pour the batter into the prepared pan and spread evenly. Bake for 30–35 minutes or until a toothpick inserted in the center comes out clean. You’ll notice the edges start pulling away from the pan slightly when it’s done.
- Cool completely: Remove the cake from the oven and place on a cooling rack. Let it cool for at least 30 minutes before frosting. This step is key to prevent your frosting from melting into a puddle.
- Crush the Golden Oreos: While the cake cools, place about 3 cups (300 g) of Golden Oreos into a food processor and pulse until you get fine crumbs resembling kitty litter granules. No food processor? No problem! Put the cookies in a sturdy plastic bag and crush with a rolling pin or heavy pan. Aim for mostly fine crumbs with a few small chunks for texture.
- Frost the cake: Spread a generous layer of vanilla frosting evenly over the cooled cake. Don’t be shy here — the frosting holds the crumbs and candy in place, so it needs to be thick enough to stick.
- Add the “kitty litter”: Sprinkle the crushed Oreos evenly over the frosting layer until fully covered.
- Decorate with gummy worms: Strategically place gummy worms or other gummy candies on top to mimic “bugs” in the kitty litter. I like to tuck some halfway under the crumbs for a sneaky surprise.
- Chill before serving: Refrigerate the cake for at least 1 hour so the frosting firms up and everything sets nicely. This also helps the flavors meld together beautifully.
- Slice and serve: Use a sharp knife to cut into squares, wiping the blade clean between cuts to keep edges neat.
Pro tip: If you want extra creaminess, whip a little cream cheese into the frosting. Just be sure to taste as you go — balance is everything!
Cooking Tips & Techniques
Making the Clever Kitty Litter Cake is fun, but a few tricks make the process smoother and the results better. Here’s what I’ve learned from my many baking sessions:
- Don’t rush cooling: Frosting a warm cake is a rookie mistake that leads to melting and sliding crumbs. Patience here pays off — your cake will look cleaner and hold together better.
- Crush cookies carefully: Too fine and the crumbs can turn powdery; too chunky and they won’t settle well. Aim for a sandy texture with some small chunks mixed in for a realistic kitty litter effect.
- Frosting consistency matters: If your frosting is too runny, the crumbs won’t stick properly. If it’s too thick, it can be tough to spread. Add a splash of milk or a bit more powdered sugar to adjust as needed.
- Use room temperature ingredients: Eggs, butter, and frosting spread better and mix more evenly when not cold. This tip saves you from lumpy batter or frosting headaches.
- Multitasking helps: While your cake is baking and cooling, prep your crushed cookies and gummy decorations. It’s a simple time-saver that feels like cheating but really isn’t!
One time, I forgot to cool the cake completely and ended up with a messy disaster (crumbs sliding everywhere!), so take it from me — this step is non-negotiable if you want that picture-perfect look.
Variations & Adaptations
This Clever Kitty Litter Cake is wonderfully adaptable to suit your tastes or dietary needs. Here are some fun variations I’ve tried (and loved):
- Chocolate version: Swap the yellow cake mix with chocolate cake mix and use crushed chocolate Oreos or chocolate wafer cookies for a richer, darker kitty litter effect.
- Gluten-free: Use a gluten-free cake mix and gluten-free cookies. I’ve had great success with Bob’s Red Mill gluten-free mixes and their gluten-free Oreos alternative.
- Vegan adaptation: Choose a vegan cake mix, use flax eggs (1 tbsp ground flaxseed + 3 tbsp water per egg), and swap butter for coconut oil. Use dairy-free frosting and gummy candies made without gelatin.
- Seasonal twist: Add candy pumpkins or candy corn in fall, or swap gummy worms for colorful sprinkles or edible flowers in spring.
- Personal favorite: I once added a layer of cream cheese frosting mixed with a little lime zest for a tangy surprise beneath the cookie crumbs. It was a hit!
Serving & Storage Suggestions
Serve this Clever Kitty Litter Cake chilled or at room temperature for the best flavor and texture. It’s a showstopper on any dessert table, perfect paired with a cold glass of milk or a light fruit punch at kids’ parties.
For storage, cover the cake tightly with plastic wrap or store in an airtight container in the refrigerator. It keeps well for up to 4 days, though honestly, it rarely lasts that long in my house! You can freeze slices wrapped individually in plastic and foil for up to 2 months — just thaw overnight in the fridge before serving.
Reheating isn’t really needed here, but if you prefer a softer texture, let the cake sit at room temperature for 15-20 minutes before serving. Flavors tend to deepen after a day, making it even more delightful as leftovers.
Nutritional Information & Benefits
While the Clever Kitty Litter Cake is a fun indulgence, it’s made with mostly simple ingredients without artificial junk. A typical serving (about 1/12th of the cake) contains roughly:
| Calories | 320 |
|---|---|
| Fat | 15g |
| Sugar | 35g |
| Protein | 3g |
The key “flavors” come from vanilla and cookie crumbs, both crowd favorites. While not a health food, you can make simple swaps to reduce sugar or fat, like low-sugar frosting or dairy-free options. It’s also naturally free of nuts (check candy ingredients), making it a safer choice for many kids’ parties.
I like to think of this cake as a sweet treat that brings smiles and fun, which is important too! Sometimes, sharing joy through food is just as nourishing as any superfood.
Conclusion
The Clever Kitty Litter Cake is a playful, delicious dessert that’s far from ordinary. It’s a recipe that brings out smiles, sparks conversation, and fills your kitchen with nostalgic sweetness. Whether you’re hosting a kids’ party, looking for a quirky dessert idea, or just want a fun baking adventure, this cake has you covered.
Feel free to customize it with your favorite flavors and candy combinations — that’s part of the joy! Personally, I love how this cake combines simple ingredients with a clever presentation that’s guaranteed to impress without the stress.
Give it a try, share your variations, and let me know how your family reacts! Don’t forget to leave a comment or share this recipe if it brings a little extra fun to your dessert table. Happy baking and dessert delight!
FAQs About Clever Kitty Litter Cake
What does Clever Kitty Litter Cake taste like?
It tastes like a sweet vanilla cake topped with creamy frosting and crunchy cookie crumbs, with playful gummy candy adding a chewy texture. It’s fun and nostalgic with a balanced sweetness.
Can I make this cake ahead of time?
Yes! It actually tastes better after chilling for a few hours or overnight. Just store it covered in the fridge and add gummy worms right before serving for the freshest look.
What if I don’t have Golden Oreos?
You can use regular Oreos or any vanilla sandwich cookies. Just crush them finely to mimic the kitty litter texture. Chocolate Oreos work great for a darker, chocolatey twist.
Is this recipe kid-friendly to make?
Absolutely! Kids love helping crush cookies and decorate with gummy worms. Just supervise around the oven and mixing steps for safety.
Can I make this cake gluten-free or vegan?
Yes! Use gluten-free cake mixes and cookies, and swap eggs and dairy for vegan alternatives. Look for vegan gummy candies to keep it fully plant-based.
Pin This Recipe!
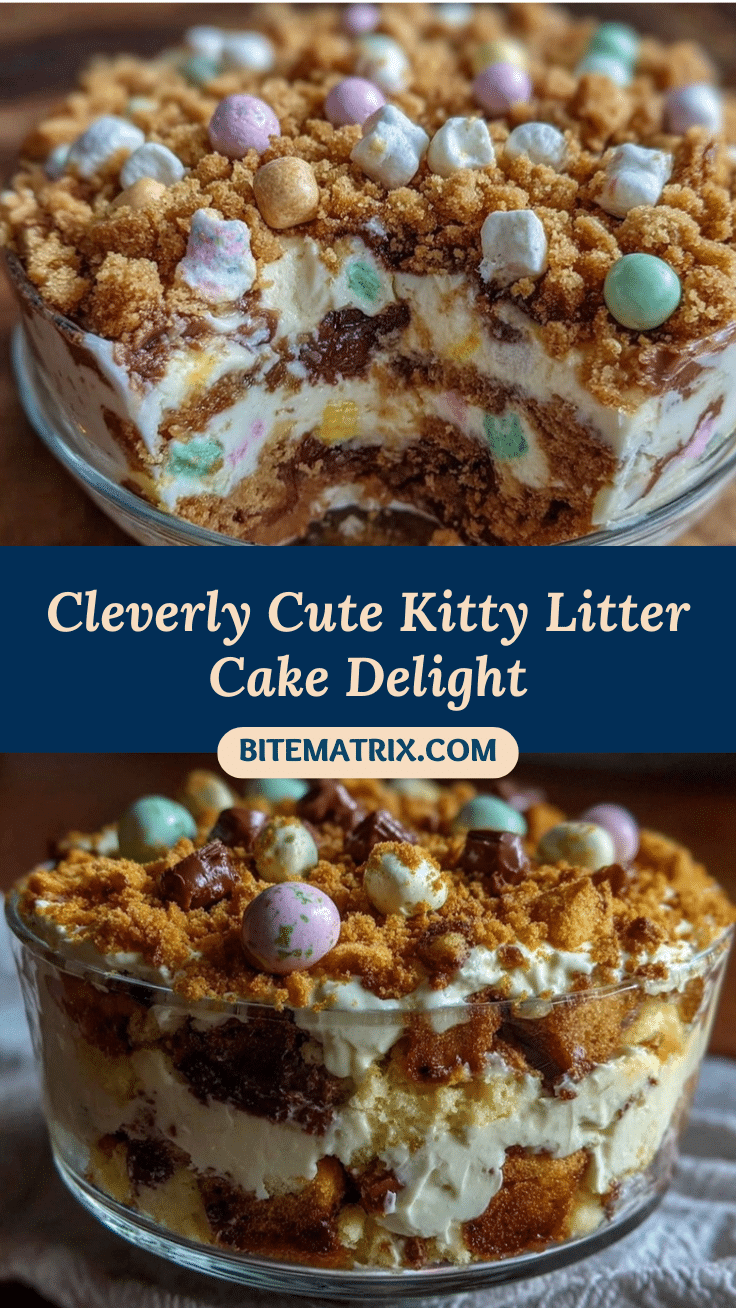
Clever Kitty Litter Cake Recipe Easy Homemade Dessert for Kids Party

A playful and nostalgic dessert featuring vanilla cake, creamy frosting, crushed Golden Oreos mimicking kitty litter, and gummy worms for a fun kids’ party treat.
- Prep Time: 10 minutes
- Cook Time: 30-35 minutes
- Total Time: 1 hour 45 minutes
- Yield: 12 servings 1x
- Category: Dessert
- Cuisine: American
Ingredients
- 1 box yellow cake mix (or your favorite boxed cake mix)
- 1 cup water (240 ml)
- 1/3 cup vegetable oil (80 ml)
- 3 large eggs (room temperature)
- Vanilla frosting (store-bought or homemade)
- 3 cups Golden Oreos, crushed
- Gummy worms or gummy candy
- Powdered sugar (optional, for frosting)
- Butter, unsalted and softened (if making homemade frosting)
- Vanilla extract (for frosting or cake)
Instructions
- Preheat your oven to 350°F (175°C). Grease and flour a 9×13-inch pan or line it with parchment paper.
- In a large bowl, mix the yellow cake mix with 1 cup water, 1/3 cup vegetable oil, and 3 large eggs. Use an electric mixer on medium speed for about 2 minutes until smooth, or whisk vigorously by hand until combined.
- Pour the batter into the prepared pan and spread evenly. Bake for 30–35 minutes or until a toothpick inserted in the center comes out clean.
- Remove the cake from the oven and place on a cooling rack. Let it cool completely for at least 30 minutes before frosting.
- While the cake cools, crush about 3 cups of Golden Oreos into fine crumbs with some small chunks using a food processor or a plastic bag and rolling pin.
- Spread a generous layer of vanilla frosting evenly over the cooled cake.
- Sprinkle the crushed Oreos evenly over the frosting layer until fully covered.
- Decorate with gummy worms or other gummy candies, tucking some halfway under the crumbs for a sneaky surprise.
- Refrigerate the cake for at least 1 hour to let the frosting firm up and flavors meld.
- Slice into squares using a sharp knife, wiping the blade clean between cuts.
Notes
Do not frost the cake while it is warm to prevent melting and sliding crumbs. Crush cookies to a sandy texture with some small chunks for realistic kitty litter effect. Adjust frosting consistency with milk or powdered sugar as needed. Use room temperature ingredients for better mixing. Chill cake for at least 1 hour before serving. For extra creaminess, whip cream cheese into frosting.
Nutrition
- Serving Size: 1 slice (1/12th of c
- Calories: 320
- Sugar: 35
- Fat: 15
- Protein: 3
Keywords: kitty litter cake, kids party dessert, easy cake recipe, vanilla cake, gummy worms, Oreo cake, playful dessert


