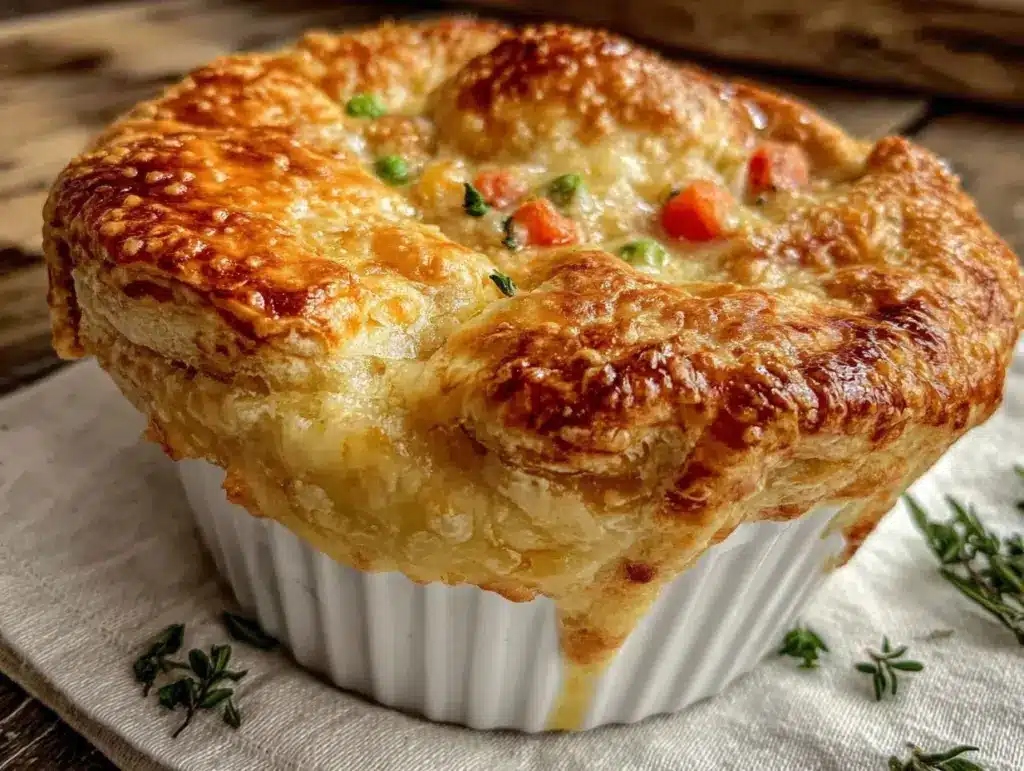
Let me tell you, the scent of warm, buttery crust mingling with savory chicken and vegetables wafting from my oven is enough to make anyone’s mouth water. The first time I baked these individual ramekin pot pies, I was instantly hooked—the kind of moment where you pause, take a deep breath, and just smile because you know you’re onto something truly special. Years ago, when I was knee-high to a grasshopper, my grandma used to make a giant pot pie that filled the kitchen with pure, nostalgic comfort. But these cozy ramekin pot pies? They bring a fresh twist to that old-time favorite, offering perfectly portioned servings with a dangerously easy flaky crust that’s just begging to be devoured.
Honestly, my family couldn’t stop sneaking them off the cooling rack (and I can’t really blame them). You know what makes these pot pies stand out? It’s not just the rich filling or the flaky crust—it’s the way they turn an ordinary weeknight dinner into a warm, comforting experience. Perfect for potlucks, a sweet treat for your kids, or to brighten up your Pinterest cookie board with a savory twist, this cozy ramekin pot pie recipe is guaranteed to become a staple in your kitchen. I’ve tested it more times than I can count (in the name of research, of course), and it’s become a go-to for family gatherings and gifting alike. Trust me, this recipe feels like a warm hug on a chilly day—you’re going to want to bookmark this one!
Why You’ll Love This Cozy Ramekin Pot Pie Recipe
When it comes to comfort food, this cozy ramekin pot pie with buttery flaky crust really checks all the boxes. Having tested countless pot pie recipes, I can honestly say this one hits the sweet spot between rich flavor, flaky texture, and simple prep. Here’s why it’s a winner:
- Quick & Easy: Comes together in under 45 minutes, perfect for busy weeknights or last-minute cravings.
- Simple Ingredients: No fancy grocery trips needed; you probably have everything in your pantry and fridge already.
- Perfect for Cozy Nights: Ideal for chilly evenings when you want something warm and satisfying without fuss.
- Crowd-Pleaser: Always gets rave reviews from both kids and adults—seriously, it disappears fast!
- Unbelievably Delicious: That buttery, flaky crust paired with a creamy, savory filling is pure comfort food heaven.
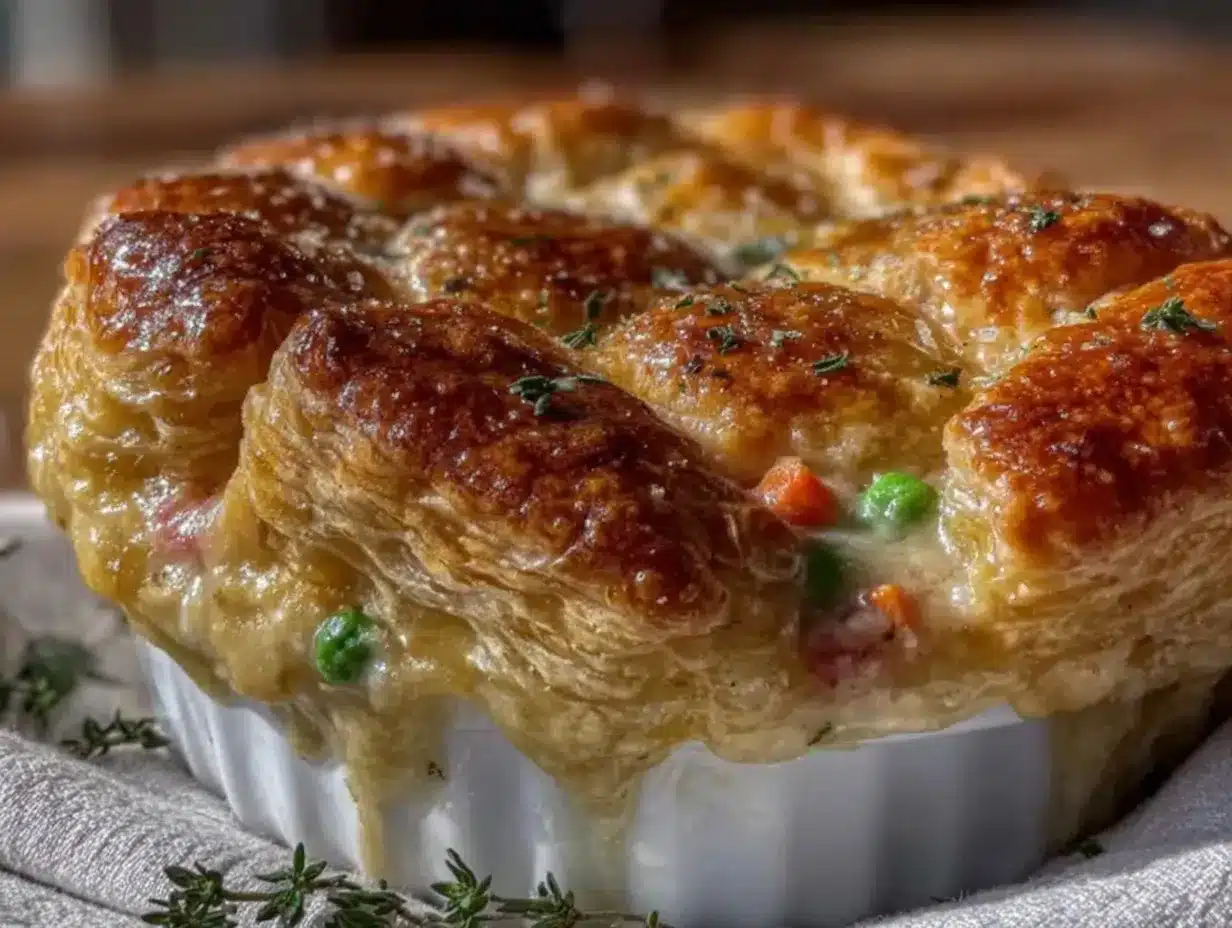
What sets this recipe apart? The crust is made with a special touch—cold butter is cut into the flour just right to create layers that flake beautifully during baking. No soggy bottoms here! Plus, the filling strikes a perfect balance of seasoning with tender chicken, fresh veggies, and a creamy sauce that’s not too heavy. I’ve swapped in low-sodium broth and fresh herbs to keep it light yet full of flavor. This isn’t just another pot pie; it’s your best version of homey goodness that hits all the right notes. Honestly, it’s the kind of recipe that makes you close your eyes after the first bite and sigh contentedly. Whether you’re impressing guests or just treating yourself, this cozy ramekin pot pie recipe delivers that soul-soothing satisfaction without the stress.
What Ingredients You Will Need
This cozy ramekin pot pie recipe uses simple, wholesome ingredients to deliver bold flavor and satisfying texture without the fuss. Most of these are pantry staples, and you can easily swap a few to suit your dietary needs.
- For the crust:
- All-purpose flour – 1 1/4 cups (155g), sifted for lightness
- Cold unsalted butter – 1/2 cup (115g), cut into small cubes (adds richness and flakiness)
- Ice water – 3 to 4 tablespoons (to bring the dough together)
- Pinch of salt
- For the filling:
- Cooked chicken breast – 1 cup (150g), diced (leftover rotisserie chicken works great)
- Carrots – 1/2 cup, diced (fresh or frozen)
- Peas – 1/2 cup (frozen peas are convenient and sweet)
- Celery – 1/3 cup, finely chopped
- Yellow onion – 1/4 cup, finely chopped
- Garlic – 1 clove, minced (adds depth to the filling)
- Unsalted butter – 2 tablespoons (for sautéing veggies)
- All-purpose flour – 2 tablespoons (to thicken the sauce)
- Chicken broth – 1 cup (240ml), low sodium preferred
- Milk – 1/2 cup (120ml), whole or 2% for creaminess
- Dried thyme – 1/2 teaspoon
- Salt and freshly ground black pepper – to taste
- Optional:
- Fresh parsley – chopped, for garnish
- Egg wash – 1 egg beaten with 1 tablespoon water (for shiny crust)
For a gluten-free option, swap the all-purpose flour with a 1:1 gluten-free baking flour blend (I like Bob’s Red Mill for consistent results). If dairy-free is your thing, use coconut oil in place of butter and almond or oat milk instead of dairy milk. The filling is versatile, so feel free to switch up the veggies based on what’s in season.
Equipment Needed
- Ramekins – 4 to 6 individual-sized (6-ounce or 180ml capacity works well)
- Mixing bowls – for dough and filling prep
- Pastry cutter or fork – to cut butter into flour (a food processor works if you have one)
- Medium skillet or sauté pan – for cooking the filling
- Rolling pin – to roll out the crust (a clean wine bottle can substitute in a pinch)
- Baking sheet – to place ramekins on for easier handling
- Pastry brush – for applying egg wash (optional but gives a nice golden finish)
Personally, I’ve found a pastry cutter makes the crust prep less messy, but if you don’t have one, cold hands and a fork do the trick. Ramekins can be pricey, so thrift stores are a good budget-friendly spot to find them. Keep an eye on your baking sheet; placing ramekins on it helps with stability when moving in and out of the oven, especially when the filling’s hot.
Preparation Method
- Make the crust dough: In a large bowl, whisk together 1 1/4 cups (155g) of sifted all-purpose flour and a pinch of salt. Add the cold unsalted butter cubes (1/2 cup or 115g). Using a pastry cutter or fork, cut the butter into the flour until the mixture resembles coarse crumbs with pea-sized bits of butter remaining. This little bit of butter is what makes the crust flaky, so don’t overwork it! Slowly add ice water, 1 tablespoon at a time, mixing gently until the dough just comes together. You might not need all 4 tablespoons. Form the dough into a disk, wrap in plastic, and chill in the fridge for at least 30 minutes.
- Prepare the filling: While the dough chills, melt 2 tablespoons of unsalted butter in a medium skillet over medium heat. Add diced onion, celery, and carrots, cooking until softened—about 5 minutes. Toss in minced garlic and cook for another minute until fragrant. Sprinkle 2 tablespoons of flour over the veggies, stirring constantly to make a roux; cook for 2 minutes to get rid of the raw flour taste.
- Gradually whisk in 1 cup (240ml) of chicken broth and 1/2 cup (120ml) milk. Stir continuously until the sauce thickens and bubbles gently, about 3-4 minutes. Add diced cooked chicken, peas, dried thyme, salt, and pepper to taste. Mix well and remove from heat. The filling should be creamy, not runny—if it’s too thick, add a splash more broth.
- Roll out the dough: Preheat your oven to 400°F (200°C). On a lightly floured surface, roll out the chilled dough to about 1/8-inch (3mm) thickness. Use a round cutter or the rim of your ramekin to cut circles slightly larger than the ramekin tops.
- Assemble the pot pies: Spoon the filling evenly into each ramekin, leaving about 1/4 inch space at the top. Place a dough circle over each ramekin and gently press the edges to seal. Trim any excess dough if needed. For a golden crust, brush the tops with egg wash (1 beaten egg mixed with 1 tablespoon water).
- Bake: Place the ramekins on a baking sheet and bake in the preheated oven for 20-25 minutes or until the crust is puffed and golden brown. Keep an eye on them starting at the 20-minute mark to avoid overbaking.
- Rest and serve: Let the pot pies cool for about 5 minutes before serving. This rest time helps the filling set slightly, so you don’t burn your tongue on the first bite. Garnish with fresh parsley if desired.
Pro tip: If your crust edges start browning too fast, tent with foil halfway through baking. This little trick keeps the crust perfectly golden without burning.
Cooking Tips & Techniques
Here’s what I’ve learned making these cozy ramekin pot pies over many tries:
- Keep everything cold: The butter and water for the crust must stay cold to create flaky layers. Warm butter means tough crust—trust me, I’ve been there!
- Don’t overmix the dough: Mix just until it comes together. Overworking develops gluten, making the crust chewy instead of flaky.
- Use a gentle hand when sealing: Press edges gently to avoid squeezing out the filling, but make sure it’s sealed well so the filling doesn’t bubble over.
- Watch the baking time: Ovens vary, so check at 20 minutes for that perfect golden crust. If you’re doubling the recipe, they might take a bit longer.
- Multitask smartly: Roll out dough while the filling simmers to save time. Just remember to chill the dough first for best results.
- Customize the filling texture: If you prefer chunkier veggies, add peas last so they keep their pop. For creamier, mash a few veggies slightly before mixing.
Cooking these pot pies is as much about patience as technique. When you nail that flaky crust and creamy filling balance, it’s pure joy on a plate. Don’t get discouraged if your first try isn’t perfect—it only gets better with love and practice.
Variations & Adaptations
This cozy ramekin pot pie recipe is super versatile. Here are a few ways to switch it up:
- Vegetarian Version: Swap chicken for hearty mushrooms and add a splash of soy sauce or tamari for umami depth. Use vegetable broth instead of chicken.
- Seasonal Veggies: In spring, try asparagus and peas; in fall, roasted butternut squash and sage add a cozy vibe. Just adjust cooking times for denser veggies.
- Spice it Up: Add a pinch of cayenne or smoked paprika to the filling for a subtle heat and smoky flavor twist.
- Gluten-Free Crust: Use a 1:1 gluten-free flour blend, like King Arthur’s, and be mindful the dough might be a bit more fragile.
- Dairy-Free Option: Substitute butter with coconut oil or vegan butter and milk with almond or oat milk to keep it creamy without dairy.
Personally, I once tried adding sharp cheddar cheese on top before baking—dangerously good! The cheese melts into the crust, adding an extra layer of flavor and golden crispiness. Experimenting with this recipe is half the fun.
Serving & Storage Suggestions
These cozy ramekin pot pies are best served warm, fresh out of the oven when that crust is still flaky and the filling is bubbling gently. They make a lovely individual presentation for dinner parties or cozy family meals. Pair them with a crisp green salad or steamed green beans to balance the richness.
Got leftovers? Cover the ramekins tightly with plastic wrap or foil and refrigerate for up to 3 days. To reheat, pop them in a 350°F (175°C) oven for about 15 minutes until warmed through and the crust regains its crispness. Avoid microwaving if you want to keep the crust flaky. For longer storage, these pot pies freeze well—wrap tightly and freeze for up to 2 months. Thaw overnight in the fridge before reheating in the oven.
Fun fact: The flavors actually deepen after resting, so leftovers sometimes taste even better the next day. The filling thickens and melds, making each bite extra comforting.
Nutritional Information & Benefits
Each cozy ramekin pot pie serving provides roughly:
| Calories | Protein | Fat | Carbohydrates | Fiber |
|---|---|---|---|---|
| ~350 kcal | 22g | 18g | 25g | 3g |
The recipe packs a good protein punch, thanks to the chicken, balanced with healthy fats from butter and nutrient-rich veggies like carrots and peas. Using low-sodium broth helps keep the sodium in check. This dish fits well into a balanced diet and can be customized for gluten-free or dairy-free needs. Just watch the butter quantity if you’re mindful of saturated fat.
From a wellness perspective, this pot pie is a satisfying, home-cooked meal that fuels both body and soul. It’s a great way to sneak in veggies for picky eaters and enjoy a wholesome, comforting dinner without processed ingredients.
Conclusion
So, why should you give this cozy ramekin pot pie with buttery flaky crust a try? Because it’s the perfect blend of simple ingredients and classic comfort food, all wrapped up in individual servings that make dinner feel special. The flaky crust and creamy filling come together in a way that’s both impressive and easy to pull off, even on a busy night. I love this recipe because it reminds me of family, warmth, and those satisfying moments where good food just makes everything feel right.
Feel free to play around with the veggies, spices, or crust to make it your own. Seriously, once you taste that first bite, you’ll understand why this recipe has become a favorite in my kitchen. If you try it, I’d love to hear how you customized it or any tips you discover along the way—drop a comment below or share your photos!
Happy baking and here’s to many cozy meals ahead!
FAQs About Cozy Ramekin Pot Pie
Can I prepare the pot pies ahead of time?
Absolutely! Assemble them, cover tightly, and keep refrigerated for up to 24 hours before baking. Just add a few extra minutes to bake time if baking straight from the fridge.
Can I use frozen cooked chicken for the filling?
Yes, just thaw it completely and pat dry before dicing. Leftover rotisserie chicken works perfectly too.
How do I prevent the crust from getting soggy?
Make sure the filling isn’t too watery before filling the ramekins. Also, rolling the dough a little thicker and baking immediately helps keep the crust crisp.
What can I use if I don’t have ramekins?
Small oven-safe bowls or even muffin tins work in a pinch, but adjust baking time accordingly.
Is this recipe suitable for kids?
Definitely! The mild flavors and individual portions make it a hit for little hands and picky eaters alike.
Pin This Recipe!
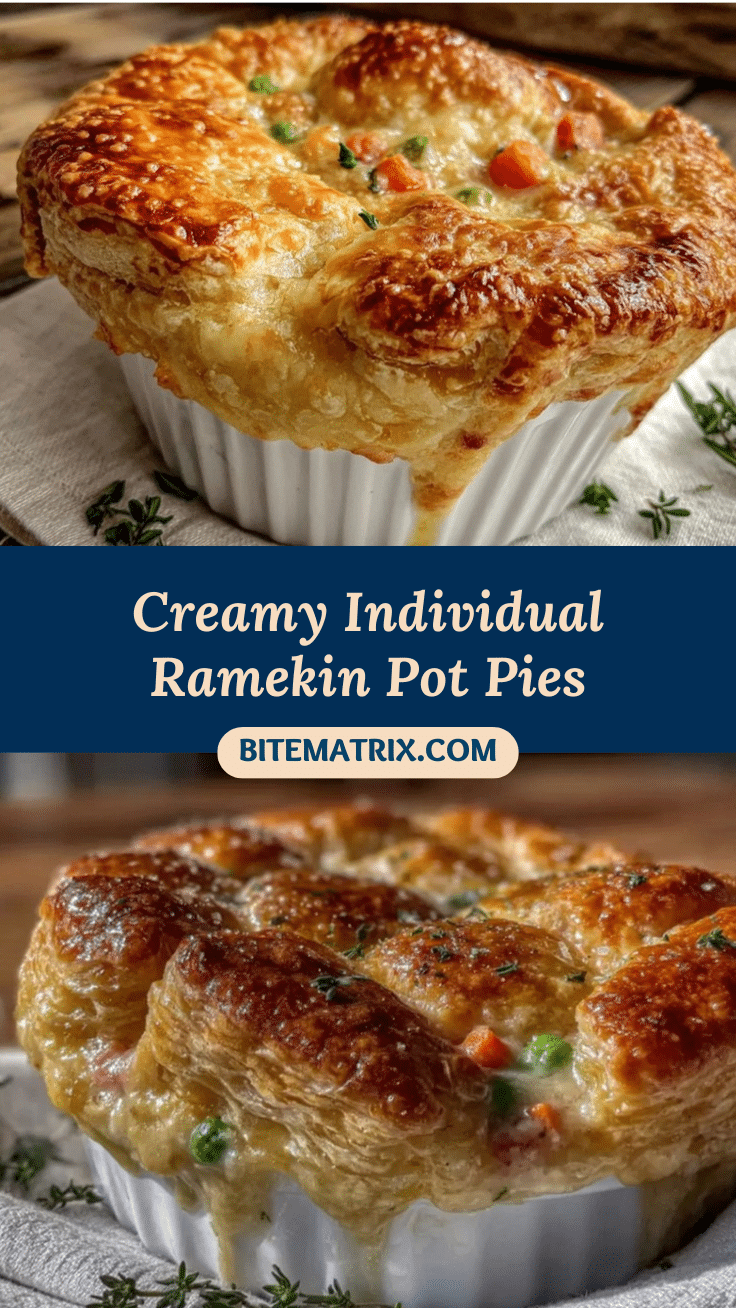
Cozy Ramekin Pot Pie Recipe Easy Homemade Flaky Crust Delight

This cozy ramekin pot pie recipe features a buttery flaky crust and a creamy, savory chicken and vegetable filling, perfect for warm, comforting individual servings.
- Prep Time: 15 minutes
- Cook Time: 25 minutes
- Total Time: 40 minutes
- Yield: 4 to 6 servings
- Category: Main Course
- Cuisine: American
Ingredients
- All-purpose flour – 1 1/4 cups (155g), sifted
- Cold unsalted butter – 1/2 cup (115g), cut into small cubes
- Ice water – 3 to 4 tablespoons
- Pinch of salt
- Cooked chicken breast – 1 cup (150g), diced
- Carrots – 1/2 cup, diced
- Peas – 1/2 cup
- Celery – 1/3 cup, finely chopped
- Yellow onion – 1/4 cup, finely chopped
- Garlic – 1 clove, minced
- Unsalted butter – 2 tablespoons
- All-purpose flour – 2 tablespoons
- Chicken broth – 1 cup (240ml), low sodium
- Milk – 1/2 cup (120ml), whole or 2%
- Dried thyme – 1/2 teaspoon
- Salt and freshly ground black pepper – to taste
- Optional: Fresh parsley – chopped, for garnish
- Optional: Egg wash – 1 egg beaten with 1 tablespoon water
Instructions
- Make the crust dough: In a large bowl, whisk together 1 1/4 cups sifted all-purpose flour and a pinch of salt. Add cold unsalted butter cubes. Using a pastry cutter or fork, cut the butter into the flour until mixture resembles coarse crumbs with pea-sized bits of butter remaining. Slowly add ice water, 1 tablespoon at a time, mixing gently until dough just comes together. Form dough into a disk, wrap in plastic, and chill in fridge for at least 30 minutes.
- Prepare the filling: Melt 2 tablespoons unsalted butter in a medium skillet over medium heat. Add diced onion, celery, and carrots; cook about 5 minutes until softened. Add minced garlic and cook 1 minute until fragrant. Sprinkle 2 tablespoons flour over veggies, stirring constantly to make a roux; cook 2 minutes.
- Gradually whisk in 1 cup chicken broth and 1/2 cup milk. Stir continuously until sauce thickens and bubbles gently, about 3-4 minutes. Add diced cooked chicken, peas, dried thyme, salt, and pepper to taste. Mix well and remove from heat.
- Roll out the dough: Preheat oven to 400°F (200°C). On lightly floured surface, roll out chilled dough to about 1/8-inch thickness. Use round cutter or ramekin rim to cut circles slightly larger than ramekin tops.
- Assemble pot pies: Spoon filling evenly into each ramekin, leaving about 1/4 inch space at top. Place dough circle over each ramekin and gently press edges to seal. Trim excess dough if needed. Brush tops with egg wash for golden crust if desired.
- Bake: Place ramekins on baking sheet and bake for 20-25 minutes or until crust is puffed and golden brown. Check at 20 minutes to avoid overbaking.
- Rest and serve: Let pot pies cool about 5 minutes before serving. Garnish with fresh parsley if desired.
Notes
Keep butter and water cold for flaky crust. Do not overmix dough to avoid toughness. Press edges gently to seal without squeezing filling out. Tent with foil if crust browns too fast. Dough can be rolled while filling simmers to save time. Customize filling texture by adding peas last for pop or mashing veggies for creaminess. For gluten-free, use 1:1 gluten-free flour blend. For dairy-free, substitute butter with coconut oil and milk with almond or oat milk. Leftovers reheat best in oven to keep crust flaky. Freeze up to 2 months.
Nutrition
- Serving Size: 1 ramekin pot pie (a
- Calories: 350
- Fat: 18
- Carbohydrates: 25
- Fiber: 3
- Protein: 22
Keywords: ramekin pot pie, flaky crust, chicken pot pie, comfort food, individual pot pies, easy pot pie recipe, homemade crust


