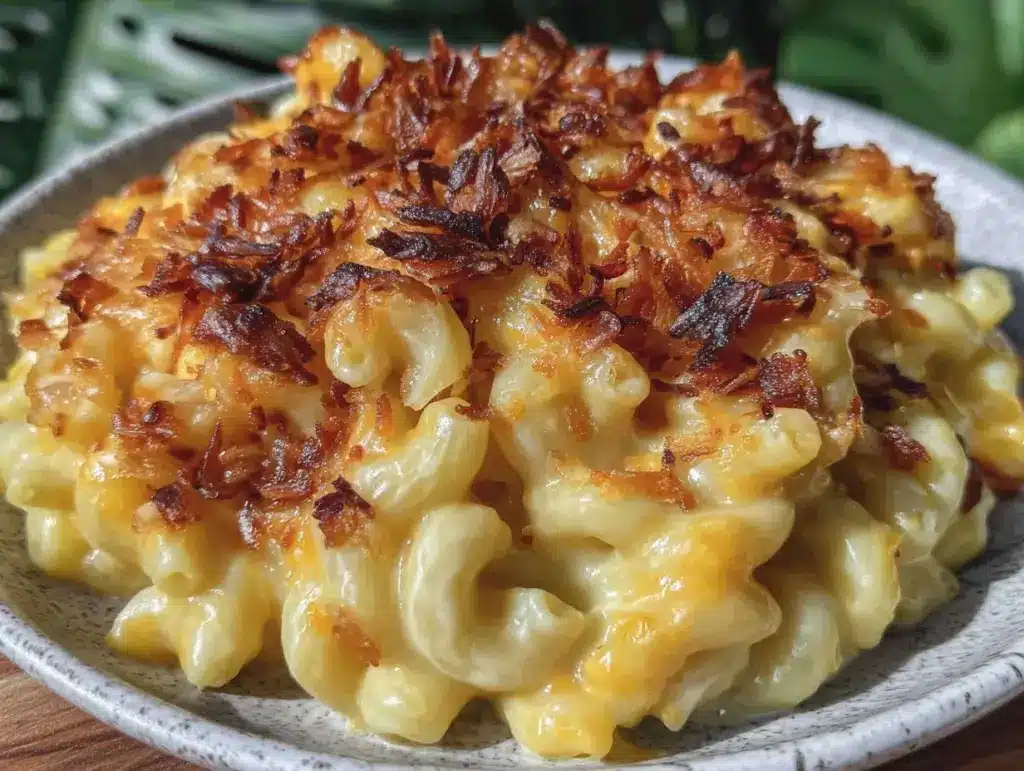
Picture this: you crack open your oven door and a wave of pure, cheesy heaven rolls out—there’s that unmistakable scent of sharp cheddar bubbling away, golden edges just catching the light, and a crunchy, buttery topping that’s practically singing your name. The first time I pulled this creamy baked cheddar mac and cheese with crunchy topping from the oven, I just stood there, spoon in hand, grinning like a kid at a carnival. It’s the kind of moment where you pause, take a deep breath, and just smile because you know you’re onto something truly special.
I grew up on stovetop mac and cheese (the blue box kind, you know the one), but when I was knee-high to a grasshopper, my grandma would sometimes whip up her “company” version—baked, bubbling, extra creamy, and crowned with a crispy layer that was always fought over at the table. Years later, on a rainy Saturday when I was craving that familiar comfort, I decided to try recreating it (with a few modern twists). Honestly, I wish I’d stumbled on this method years ago. It’s dangerously easy and brings pure, nostalgic comfort to the table.
My family couldn’t stop sneaking forkfuls off the cooling rack (and I can’t really blame them). There’s always that moment of “let’s just taste the corner” that turns into “wait, who ate half the pan?” Perfect for potlucks, a sweet treat for your kids after school, or to brighten up your Pinterest recipe board—this creamy baked cheddar mac and cheese with crispy topping is a staple at family gatherings, makes for pretty fabulous leftovers, and honestly feels like a warm hug on a cold day. I’ve tested and tweaked this recipe more times than I care to admit (in the name of research, of course), and if you’re searching for the ultimate comfort food, you’re going to want to bookmark this one.
Why You’ll Love This Recipe
Let’s face it: there are about a million mac and cheese recipes floating around, but this creamy baked cheddar mac and cheese with crunchy topping stands apart for all the best reasons. After countless batches and plenty of “test bites,” here’s what truly makes this the cheesiest, creamiest, most crowd-pleasing mac and cheese you’ll ever pull from the oven:
- Quick & Easy: Ready in just under an hour—no fancy steps or endless stirring. Perfect for busy weeknights, cozy Sundays, or those last-minute “I need comfort food now” moments.
- Simple Ingredients: You don’t have to hunt down specialty cheeses or obscure seasonings. If you’ve got milk, butter, some decent cheddar, and pasta, you’re good to go!
- Perfect for Every Occasion: From holiday feasts to potlucks, game days, or quiet nights in, this mac and cheese always fits right in. It’s a guaranteed hit at any gathering (I’ve brought it to more than a few and never come home with leftovers).
- Crowd-Pleaser: Kids and adults both love the creamy sauce and that irresistible crunchy topping (honestly, you might want to make a little extra just for snacking).
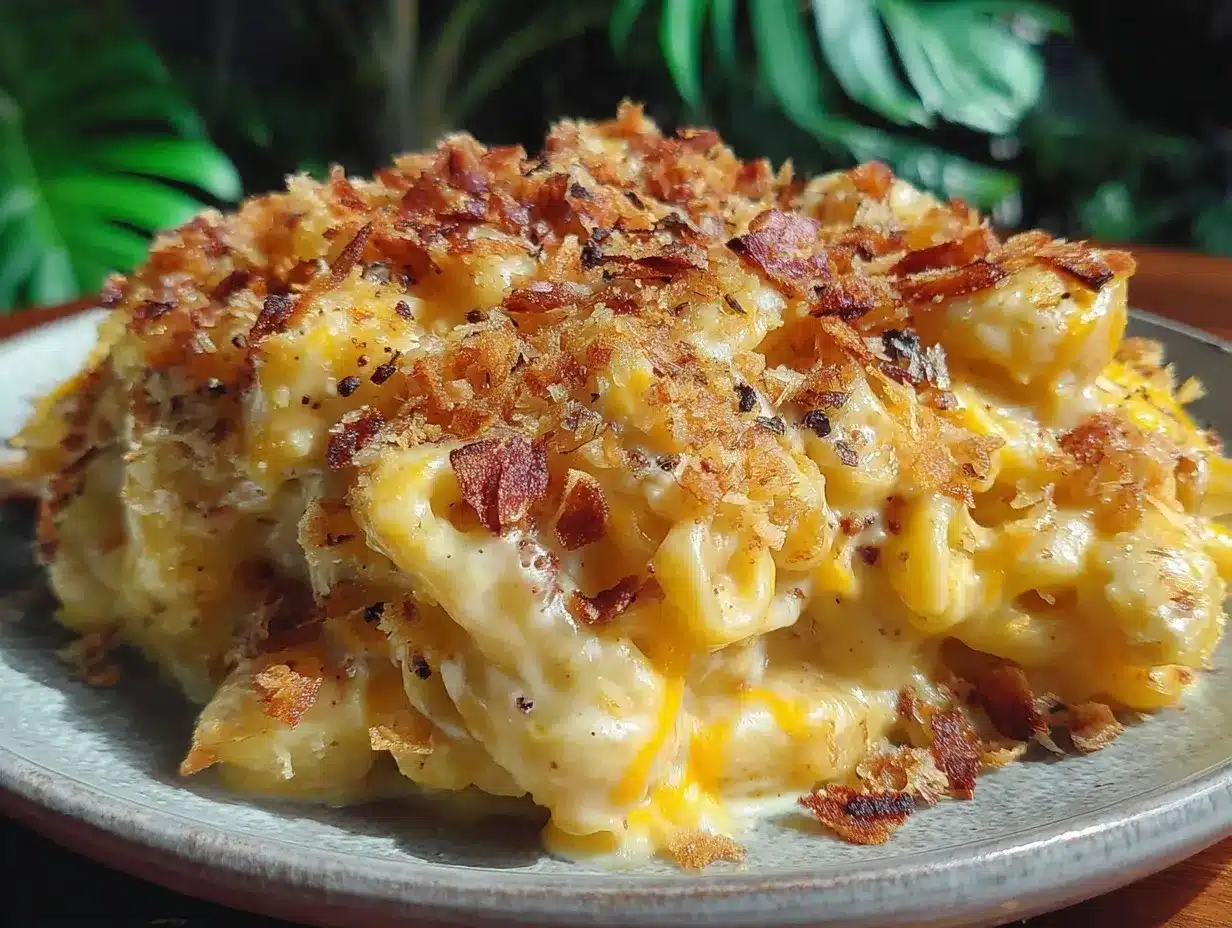
- Unbelievably Delicious: The ultra-smooth cheddar sauce, tender macaroni, and buttery, crunchy topping combine for the ultimate comfort food experience.
What really sets this recipe apart? I blend part of the sauce for an extra silky mouthfeel, use a mix of cheeses for depth, and add just a pinch of smoked paprika for a little something special. Trust me, I’ve tried dozens of versions—grainy, bland, or dry mac and cheese just wasn’t cutting it. This method—backed by family taste tests and years of cheesy mishaps—gives you perfect results every single time.
It’s not just about the cheese (though, let’s be honest, that’s a big part of it)—it’s about that first bite that makes you close your eyes and sigh. This is the kind of dish that makes you feel cared for. Whether you’re impressing friends at your next potluck or feeding your family after a long day, this creamy baked cheddar mac and cheese recipe with crispy topping is your new go-to for one-pan happiness.
What Ingredients You Will Need
This creamy baked cheddar mac and cheese recipe with crispy topping uses simple, wholesome ingredients to deliver bold flavor and a texture that’ll have everyone reaching for seconds. Most of these are pantry staples, and a few easy swaps make this a flexible favorite.
- For the Pasta:
- Elbow macaroni – 12 ounces (340g) (classic, but small shells or cavatappi work great too)
- Salt – for boiling water (makes all the difference in flavor)
- For the Cheese Sauce:
- Unsalted butter – 4 tablespoons (56g), plus more for greasing the dish
- All-purpose flour – 1/4 cup (30g) (for thickening the sauce)
- Whole milk – 2 cups (480ml) (I sometimes swap in half-and-half for an extra-rich version)
- Heavy cream – 1 cup (240ml) (trust me, it’s worth it for the creamy factor)
- Sharp cheddar cheese – 3 cups (340g), freshly grated (I recommend Tillamook or Cabot for their meltability)
- Gruyère or Monterey Jack cheese – 1 cup (90g), freshly grated (adds smoothness and depth; use all cheddar if you prefer)
- Cream cheese – 2 ounces (56g), softened (makes the sauce extra rich and velvety)
- Ground mustard – 1 teaspoon (balances the cheese flavor)
- Smoked paprika – 1/2 teaspoon (optional, but it gives a subtle smoky note)
- Salt and freshly ground black pepper – to taste (start with 1/2 teaspoon salt, 1/4 teaspoon pepper)
- For the Crunchy Topping:
- Panko breadcrumbs – 1 cup (60g) (they toast up beautifully crunchy)
- Parmesan cheese – 1/3 cup (30g), grated
- Unsalted butter – 2 tablespoons (28g), melted
- Optional: A pinch of garlic powder or dried parsley for extra flavor
Ingredient Tips:
Freshly grating your cheese makes all the difference—bagged shreds are coated with anti-caking agents and don’t melt as smoothly. If you’re gluten-free, substitute your favorite gluten-free pasta and use a 1:1 gluten-free flour blend for the roux. Feel free to swap whole milk for 2% or your favorite non-dairy milk (just note the sauce won’t be quite as rich). In summer, I sometimes stir in fresh tomatoes or peas before baking. For a spicy kick, toss a little cayenne or diced jalapeños in the sauce!
Equipment Needed
- Large pot or Dutch oven: For boiling the pasta. If you use a Dutch oven, you can make the sauce in the same pot (less cleanup!).
- Medium saucepan: For making the cheese sauce if not using a Dutch oven.
- Whisk: Essential for stirring the roux and blending the cheese into the sauce. A silicone whisk works great for nonstick pans.
- Wooden spoon or silicone spatula: For stirring the pasta and mixing the sauce.
- Box grater or food processor: For grating cheese (I always recommend grating fresh for best meltability—pre-shredded cheese can result in a grainy sauce).
- Measuring cups and spoons: Accuracy matters for creamy results!
- Casserole dish (2.5 to 3-quart/9×13-inch): For baking. Glass or ceramic both work; just grease lightly with butter.
- Small mixing bowl: For tossing together the crunchy topping.
- Oven mitts: Safety first (I’ve burned my hands more times than I care to admit).
If you don’t have a box grater, a food processor with a grating attachment is a real time-saver. For the topping, regular breadcrumbs work, but panko gives that signature crispy crunch. Budget-friendly tip: day-old bread pulsed in a food processor makes fantastic homemade crumbs!
How to Make Creamy Baked Cheddar Mac and Cheese with Crunchy Topping
-
Preheat and Prep: Preheat your oven to 375°F (190°C). Butter a 2.5 to 3-quart casserole dish (or a 9×13-inch pan) and set aside.
Tip: I like to sprinkle a little extra grated cheddar on the bottom for a cheesier crust. -
Cook the Pasta: Bring a large pot of salted water to a boil. Add 12 ounces (340g) elbow macaroni and cook just until al dente—about 1 minute less than package directions (usually 6–7 minutes).
Warning: Don’t overcook! The pasta will keep cooking in the oven.
Drain and set aside. -
Make the Crunchy Topping: In a small bowl, combine 1 cup (60g) panko breadcrumbs, 1/3 cup (30g) grated Parmesan, 2 tablespoons (28g) melted butter, and a pinch of garlic powder or parsley if you like. Toss until evenly coated and set aside.
Personal tip: I sometimes add a pinch of smoked paprika here for a little extra color. -
Prepare the Cheese Sauce:
- In a medium saucepan or the wiped-out pasta pot, melt 4 tablespoons (56g) unsalted butter over medium heat.
- Whisk in 1/4 cup (30g) all-purpose flour and cook, stirring constantly, for 1–2 minutes until bubbling and just golden (not brown!).
- Gradually whisk in 2 cups (480ml) whole milk and 1 cup (240ml) heavy cream. Keep whisking until smooth and starting to thicken, about 3–5 minutes.
- Reduce heat to low. Add 3 cups (340g) sharp cheddar, 1 cup (90g) Gruyère or Monterey Jack, and 2 ounces (56g) cream cheese. Stir until completely melted and silky.
- Whisk in 1 teaspoon ground mustard, 1/2 teaspoon smoked paprika, 1/2 teaspoon salt, and 1/4 teaspoon pepper. Taste and adjust seasoning as needed.
If the sauce looks too thick, add a splash more milk. If it looks a bit thin, don’t worry—it thickens as it bakes.
-
Combine: Add drained pasta to the cheese sauce and stir gently to coat every noodle.
Sensory cue: The sauce should look glossy and cling to the macaroni, not puddle in the bottom. -
Assemble: Pour the cheesy pasta into your prepared baking dish. Sprinkle the buttery panko topping evenly over the surface.
Personal tip: Press the topping down lightly with your hand for maximum crunch. -
Bake: Bake, uncovered, for 25–30 minutes, until the topping is deeply golden and the edges are bubbling.
Troubleshooting: If the top is browning too fast, tent loosely with foil. If it’s not browning, broil for 1–2 minutes at the end—but watch closely! -
Rest and Serve: Let the baked mac and cheese sit for 5–10 minutes before digging in. This helps the sauce set up for perfect, creamy scoops.
Warning: It smells amazing, but it will be molten hot straight from the oven!
For extra efficiency, I always shred my cheese while the pasta water’s coming to a boil. And if you’re really in a hurry, you can assemble the casserole up to a day ahead and bake it off fresh—just add 5 minutes to the baking time if it’s coming straight from the fridge.
Pro Cooking Tips & Techniques
- Freshly Grated Cheese: Always grate your cheese by hand (or use a food processor). Pre-shredded cheese often leads to a grainy sauce due to added starches. I learned this the hard way after a couple of “what happened?” batches!
- Don’t Overcook the Pasta: Slightly undercooking the macaroni means it won’t turn mushy in the oven. Trust me, no one wants limp noodles.
- Roux Mastery: Take the time to whisk your flour and butter until foamy and just turning golden. If you rush this step, you might taste raw flour in the finished dish. Been there, done that.
- Low Heat for Melting Cheese: Drop your heat before adding cheese. High heat can cause the sauce to split and turn oily (ask me how I know!).
- Sauce Consistency: The cheese sauce should be a bit thinner than you think—it thickens in the oven and as it cools. If it’s too thick in the pot, add a splash more milk.
- Crunchy Topping Tricks: Panko breadcrumbs give you the best crunch, but you can pulse day-old bread in a processor for homemade crumbs. Mixing in a little melted butter makes the topping irresistible.
- Golden Topping: If you want extra color, broil the dish for a minute at the end. Just don’t walk away—I’ve burned more than one batch by getting distracted!
Honestly, the biggest trick is not to overthink it. If you’re making it for a crowd, you can double the recipe and bake it in two pans. For smaller households, leftovers reheat beautifully (and the topping stays pretty crisp if you use a toaster oven). Above all, have fun and taste as you go—there’s something special about making cheesy goodness from scratch, and your kitchen will smell amazing.
Variations & Adaptations
- Gluten-Free: Use your favorite gluten-free pasta and a 1:1 gluten-free flour blend for the sauce. Panko-style gluten-free breadcrumbs are easy to find at most stores now.
- Veggie Packed: Stir in 1–2 cups (150–300g) of steamed broccoli, peas, or roasted butternut squash before baking. I’ve tossed in fresh spinach and it melts right in—sneaky and delicious.
- Spicy Kick: Add 1–2 tablespoons diced pickled jalapeños to the sauce, or a pinch of cayenne or hot sauce for heat lovers. My husband likes to sprinkle crushed red pepper on top for an extra zing.
- Meaty Version: Stir in cooked bacon bits, diced ham, or shredded rotisserie chicken before baking for a heartier main dish.
- Lighter Option: Swap half the cheese for your favorite reduced-fat versions, and use 2% milk instead of whole. The sauce won’t be quite as rich, but it’s still delicious.
- Dairy-Free: Try using an unsweetened non-dairy milk (like oat or cashew), vegan butter, and a good melty vegan cheese. The sauce will be a bit different, but the process is the same.
One of my favorite personal twists? Stirring caramelized onions into the sauce before baking. Adds such a cozy, savory depth! If you want a smoky flavor, you can use smoked cheddar or add a splash of liquid smoke. Honestly, this creamy baked cheddar mac and cheese with crunchy topping is a great canvas for your favorite flavors—play around and make it your own.
Serving & Storage Suggestions
I love serving this creamy baked cheddar mac and cheese right out of the oven, when the topping is at peak crunch and the sauce is bubbling hot. Let it stand for 5–10 minutes before scooping—this helps everything set up (and saves your tongue from a cheese burn!).
- Presentation: Spoon into bowls or onto plates, garnish with a sprinkle of chopped fresh parsley or chives for a pop of color. For parties, serve in mini ramekins for a fun twist!
- Pairings: This dish pairs perfectly with a crisp green salad, roasted veggies, or barbecue mains. For drinks, try a cold glass of iced tea, sparkling lemonade, or a dry white wine.
- Refrigerator Storage: Cool leftovers completely, then cover and refrigerate for up to 4 days. The topping stays crisp if you reheat uncovered!
- Freezer Friendly: You can freeze unbaked mac and cheese (without topping) for up to 2 months. Thaw overnight, add the topping, and bake as directed, adding 10–15 minutes to the baking time.
- Reheating: Bake leftovers at 350°F (175°C), uncovered, until hot and bubbly. For the crispiest topping, reheat in a toaster oven or under the broiler for a minute or two.
Honestly, the flavors deepen after a day in the fridge—making it a fantastic make-ahead dish for busy weeks or special occasions. Just don’t be surprised if there aren’t many leftovers!
Nutritional Information & Benefits
Each generous serving (about 1/8 of the pan) has an estimated 480 calories, 24g fat, 16g protein, and 42g carbohydrates. The balance of protein and carbs makes this creamy baked cheddar mac and cheese with crunchy topping a satisfying main or hearty side dish.
Sharp cheddar brings calcium and a hit of vitamin A, while whole milk and cream add richness (and a little extra vitamin D). If you go for veggie add-ins like broccoli or spinach, you’ll sneak in fiber and extra nutrients. For those following a gluten-free diet, simple swaps make this dish accessible without sacrificing flavor.
Potential allergens include wheat, dairy, and eggs (if using enriched pasta). If you or your loved ones have food sensitivities, check ingredient labels and try the suggested alternatives. From a personal wellness perspective, I believe in enjoying comfort food in moderation—it’s all about balance and savoring every cheesy, joyful bite.
Conclusion
If you’re searching for the ultimate comfort food, this creamy baked cheddar mac and cheese recipe with crispy topping is the answer—every time. It’s everything mac and cheese should be: silky, cheesy, buttery, and crowned with the kind of crunchy topping you’ll find yourself snacking on straight from the pan.
I love how flexible this recipe is—swap in your favorite cheeses, toss in some veggies, or add a spicy twist. Don’t be afraid to make it your own. For me, this dish brings back memories of family, laughter, and all the best kind of kitchen chaos.
Give this recipe a try and let me know how it turns out! Drop a comment below with your favorite add-ins, or tag me if you share your cheesy masterpiece on Pinterest or Instagram. There’s nothing better than sharing good food and good vibes—here’s to many happy, creamy, crunchy meals around your table. You’ve got this!
FAQs about Creamy Baked Cheddar Mac and Cheese with Crunchy Topping
Can I make this creamy baked cheddar mac and cheese ahead of time?
Absolutely! You can assemble the mac and cheese (without the topping), cover, and refrigerate for up to 24 hours. Add the crunchy topping just before baking and add 5–10 minutes to the bake time if cold from the fridge.
What’s the best cheese to use for mac and cheese?
Sharp cheddar is classic for flavor, but mixing in Gruyère, Monterey Jack, or even a little mozzarella gives a creamier texture. Always grate your cheese fresh for the smoothest sauce.
How do I prevent my cheese sauce from turning grainy?
Melt cheese over low heat and use freshly grated cheese. Avoid pre-shredded cheese, which can cause graininess. If your sauce splits, stirring in a little extra cream or whisking vigorously can help bring it back together.
Can I freeze baked mac and cheese?
Yes, but for best results, freeze the mac and cheese before baking (without the topping). Thaw overnight in the fridge, add the topping, and bake as directed. Baked leftovers can also be frozen, but the topping may lose some crispiness.
What’s the best way to reheat leftovers?
Reheat in a 350°F (175°C) oven, uncovered, until hot and bubbly. For the crispiest topping, use a toaster oven or broil for a minute at the end. You can also microwave single servings, but the topping may soften.
Pin This Recipe!
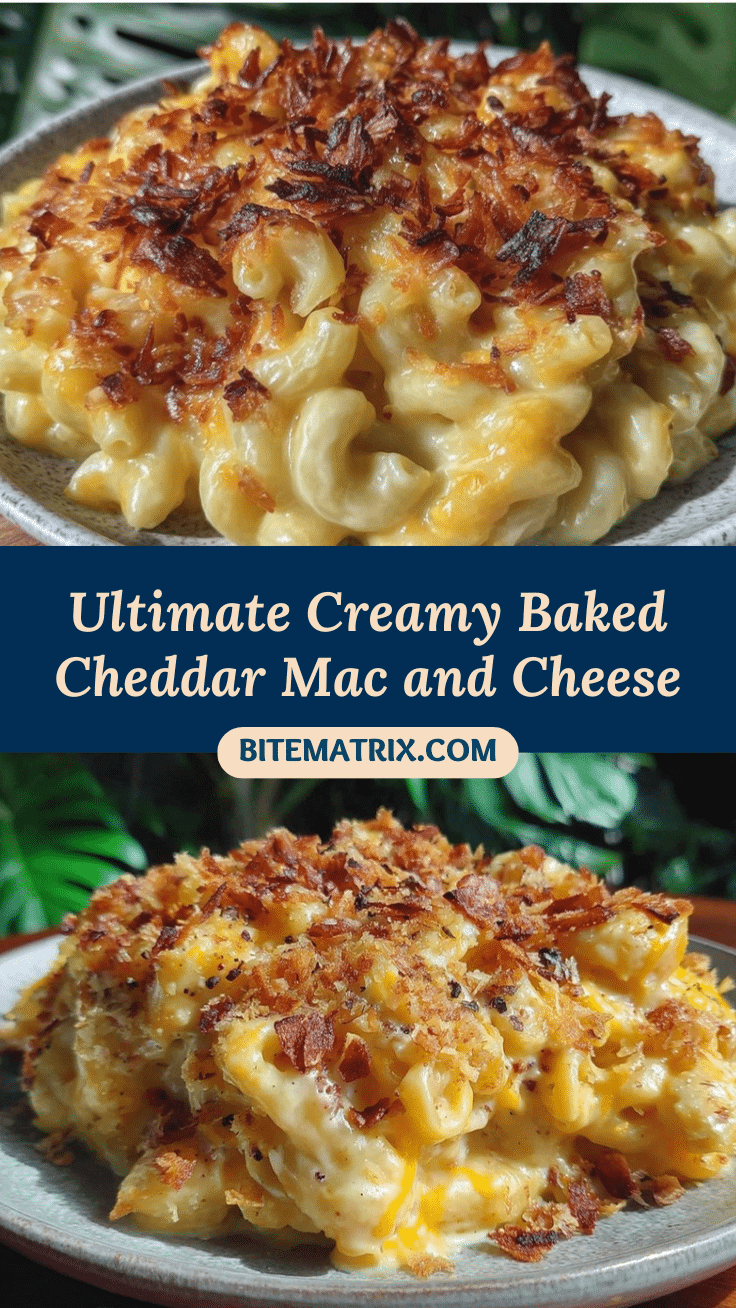
Creamy Baked Cheddar Mac and Cheese Recipe with Crispy Topping

This ultra-creamy baked cheddar mac and cheese features a silky cheese sauce, tender macaroni, and a buttery, crunchy panko topping. It’s the ultimate comfort food, perfect for family gatherings, potlucks, or cozy nights in.
- Prep Time: 20 minutes
- Cook Time: 30 minutes
- Total Time: 50 minutes
- Yield: 8 servings 1x
- Category: Main Course
- Cuisine: American
Ingredients
- 12 ounces elbow macaroni (about 3 cups dry)
- Salt, for boiling water
- 4 tablespoons unsalted butter, plus more for greasing dish
- 1/4 cup all-purpose flour
- 2 cups whole milk
- 1 cup heavy cream
- 3 cups sharp cheddar cheese, freshly grated
- 1 cup Gruyère or Monterey Jack cheese, freshly grated (or more cheddar)
- 2 ounces cream cheese, softened
- 1 teaspoon ground mustard
- 1/2 teaspoon smoked paprika (optional)
- Salt and freshly ground black pepper, to taste (start with 1/2 teaspoon salt, 1/4 teaspoon pepper)
- 1 cup panko breadcrumbs
- 1/3 cup Parmesan cheese, grated
- 2 tablespoons unsalted butter, melted
- Optional: Pinch of garlic powder or dried parsley for topping
Instructions
- Preheat oven to 375°F (190°C). Butter a 2.5 to 3-quart casserole dish (or 9×13-inch pan) and set aside.
- Bring a large pot of salted water to a boil. Add elbow macaroni and cook just until al dente, about 1 minute less than package directions (6–7 minutes). Drain and set aside.
- In a small bowl, combine panko breadcrumbs, grated Parmesan, melted butter, and a pinch of garlic powder or parsley if desired. Toss until evenly coated and set aside.
- In a medium saucepan or the wiped-out pasta pot, melt 4 tablespoons butter over medium heat. Whisk in flour and cook, stirring constantly, for 1–2 minutes until bubbling and just golden.
- Gradually whisk in whole milk and heavy cream. Keep whisking until smooth and starting to thicken, about 3–5 minutes.
- Reduce heat to low. Add sharp cheddar, Gruyère or Monterey Jack, and cream cheese. Stir until completely melted and silky.
- Whisk in ground mustard, smoked paprika, salt, and pepper. Taste and adjust seasoning as needed.
- Add drained pasta to the cheese sauce and stir gently to coat.
- Pour the cheesy pasta into the prepared baking dish. Sprinkle the buttery panko topping evenly over the surface and press down lightly.
- Bake, uncovered, for 25–30 minutes, until the topping is deeply golden and the edges are bubbling. If the top is browning too fast, tent loosely with foil. For extra color, broil for 1–2 minutes at the end, watching closely.
- Let the baked mac and cheese sit for 5–10 minutes before serving.
Notes
For best results, always grate your cheese fresh. Slightly undercook the pasta to avoid mushiness. The sauce should be a bit thinner than you think—it thickens as it bakes. You can assemble the dish ahead (without topping) and refrigerate, then bake with topping added. Gluten-free and dairy-free adaptations are possible. Leftovers reheat well and the topping stays crisp if reheated uncovered.
Nutrition
- Serving Size: About 1/8 of the pan
- Calories: 480
- Sugar: 5
- Sodium: 540
- Fat: 24
- Saturated Fat: 14
- Carbohydrates: 42
- Fiber: 2
- Protein: 16
Keywords: mac and cheese, baked macaroni, cheddar, comfort food, casserole, family dinner, creamy, crunchy topping, easy, potluck


