Introduction
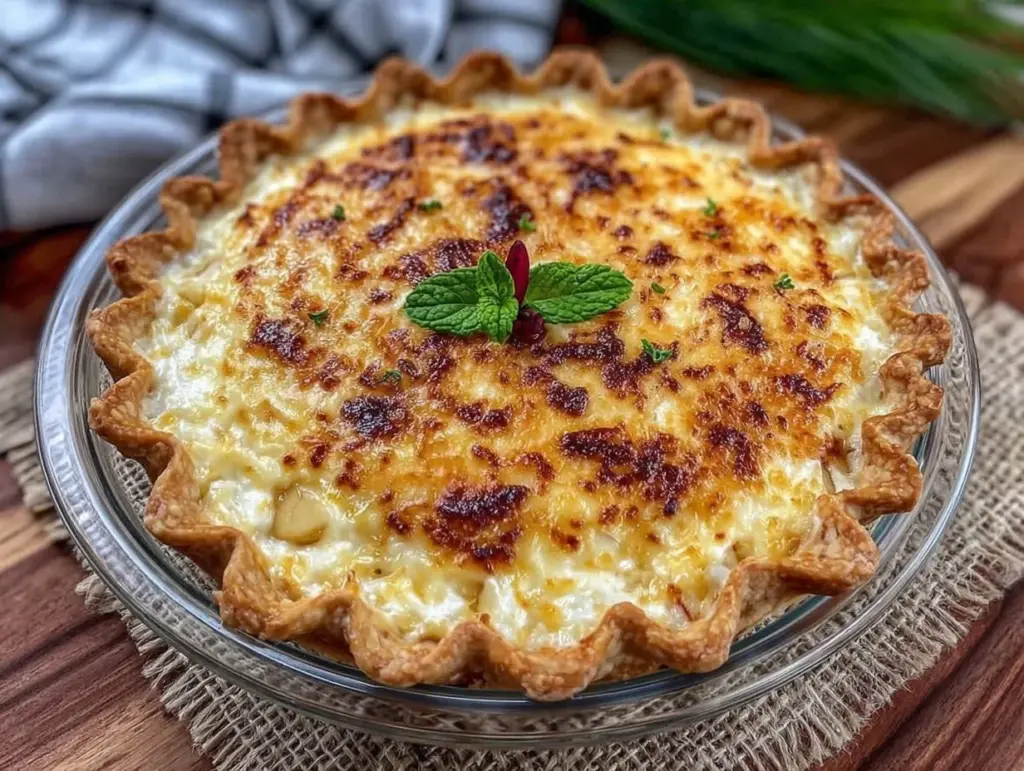
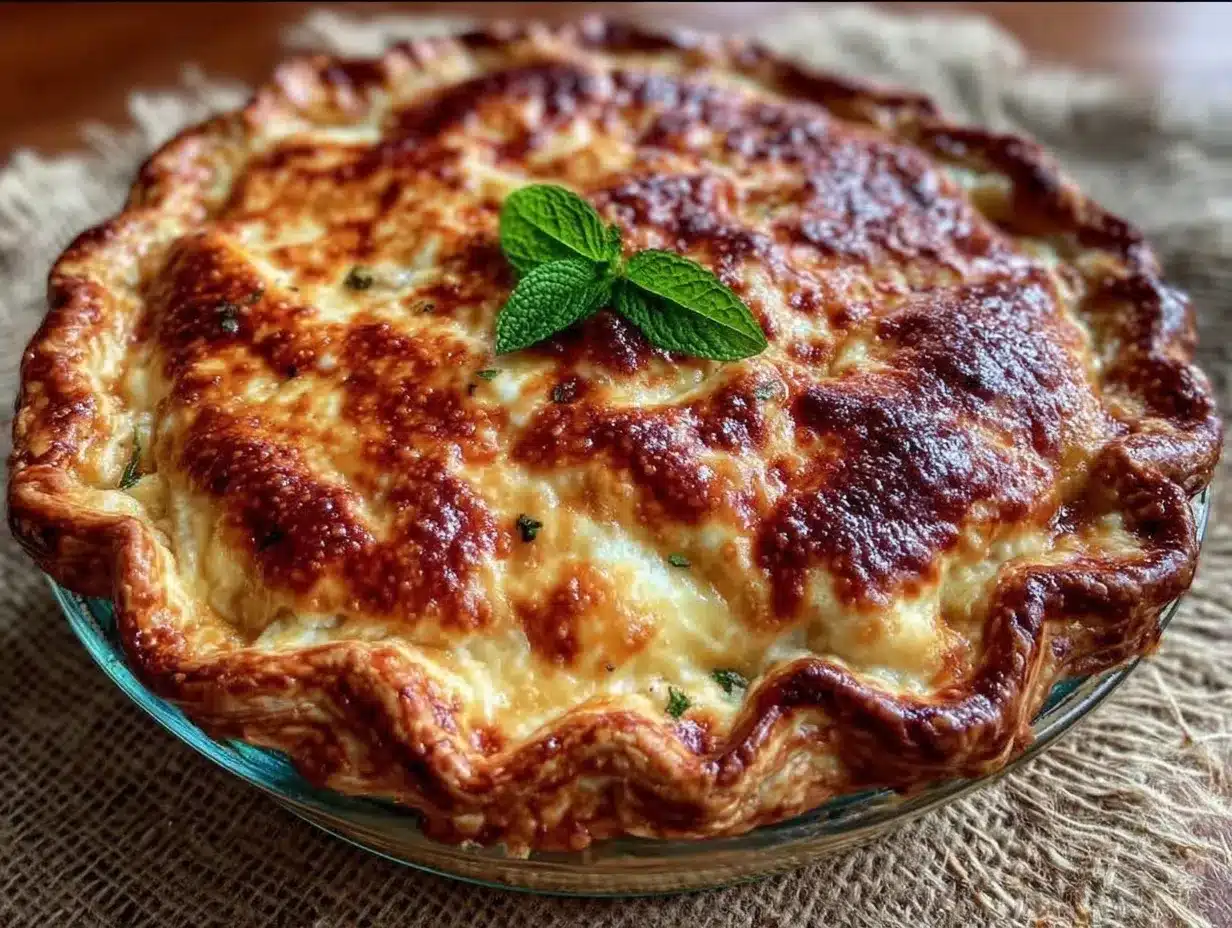
Let me paint a picture for you—imagine the warm, inviting aroma of apples mingling with cinnamon and nutmeg, curling through your kitchen as a golden, creamy pie bubbles in the oven. It’s the sort of scent that makes you pause mid-task, close your eyes, and just breathe it all in. Honestly, the first time I baked a Creamy Marlborough Pie, I wasn’t prepared for how nostalgic and comforting it would feel. The moment I pulled it out, the rustic apple filling was peeking through a silky custard, and the whole thing looked straight out of an old New England autumn postcard.
I stumbled across this recipe years ago, tucked into the back of my grandmother’s weathered cookbook—one of those days when I was knee-high to a grasshopper, desperate for something sweet and easy. Turns out, Marlborough Pie isn’t just another apple pie; it’s a creamy, almost pudding-like dessert that somehow manages to be both rustic and refined. My family couldn’t stop sneaking slices when I set it to cool (and, honestly, neither could I). That first bite is a revelation—the kind of moment you pause, fork in hand, and wonder why you haven’t had this hidden gem before.
It’s dangerously easy to make, with simple ingredients and a method that’s forgiving enough for even the busiest home cooks. This pie is perfect for potlucks, a sweet treat for your kiddos after school, or just to brighten up your Pinterest dessert board. I’ve tested it over and over (in the name of research, of course!), and it’s become a staple for family gatherings and gifting. If comfort food had a mascot, Creamy Marlborough Pie would be it—pure, silky comfort wrapped in a flaky crust. You’re definitely going to want to bookmark this one for fall.
Why You’ll Love This Recipe
There’s a certain magic to Marlborough Pie that keeps me coming back to it every autumn. Over the years, I’ve tweaked and tested this recipe until it was just right—creamy, rustic, and packed with apple flavor. Here’s why this Creamy Marlborough Pie recipe stands out from the crowd:
- Quick & Easy: Comes together in under an hour (with most of the work done in just 20 minutes), making it perfect for busy weeknights or when you’ve got last-minute guests.
- Simple Ingredients: There’s no need for fancy grocery trips—the apples, eggs, cream, and spices are probably already in your kitchen.
- Perfect for Fall Gatherings: Whether it’s a cozy dinner, a weekend brunch, or your annual harvest party, this pie fits right in with the season.
- Crowd-Pleaser: Kids love the creamy filling (it’s almost like apple custard!), adults rave about the rustic apple goodness, and it disappears faster than you’d expect.
- Unbelievably Delicious: The creamy, custardy texture set against the tart, tender apples is just next-level comfort food—seriously, it’s the kind of recipe that makes folks ask for seconds.
What really sets this Marlborough Pie apart is the blend of textures: you get the tender bite of apples, the silkiness of the custard, and that flaky, homemade crust (or store-bought, if you’re in a rush). I use a touch of lemon zest and a dash of vanilla to bring out the apples’ natural flavors, and I always opt for a splash of heavy cream for richness. It’s not just another apple pie—it’s my best version, and I’m betting it’ll become yours too.
This pie is comfort food reimagined for today’s busy kitchens—faster, a bit lighter, but every bit as soul-soothing as grandma’s. It’s perfect for impressing guests without breaking a sweat, and it turns an ordinary meal into a memorable one. Honestly, if you love apples, creamy desserts, and simple baking, you’re about to discover your new favorite fall recipe.
What Ingredients You Will Need
This Creamy Marlborough Pie recipe keeps things simple and fuss-free, relying on wholesome ingredients to deliver bold flavor and that satisfying, creamy texture. Most are pantry staples, and the apples can be swapped for local, seasonal varieties if you like.
- For the Pie Filling:
- 2 cups (about 250g) tart apples, peeled, cored, and grated (Granny Smith or Honeycrisp work wonders)
- 3 large eggs, room temperature
- 1 cup (240ml) half-and-half or whole milk (for extra creaminess, use 1/4 cup heavy cream with 3/4 cup milk)
- 2/3 cup (130g) granulated sugar (you can swap in coconut sugar for a deeper flavor)
- 2 tablespoons (30g) unsalted butter, melted and cooled slightly
- 1 tablespoon (8g) all-purpose flour (or use almond flour for a gluten-free option)
- 1 teaspoon vanilla extract (I love Nielsen-Massey for its robust flavor)
- 1/2 teaspoon ground cinnamon
- 1/4 teaspoon ground nutmeg (freshly grated if you have it!)
- 1 teaspoon lemon zest (brightens up the apple flavor)
- Pinch of salt
- For the Pie Crust:
- 1 single 9-inch (23cm) pie crust, homemade or store-bought (use gluten-free pastry if needed)
- Optional: 1 tablespoon granulated sugar for sprinkling over the crust
Ingredient Notes & Substitutions:
- Apples: Firm, tart apples are best—Granny Smith, Honeycrisp, or Braeburn. In summer, try mixing in a handful of fresh berries for a twist!
- Milk/Cream: For dairy-free, swap with unsweetened coconut milk or oat milk. You’ll get a slightly different but still creamy result.
- Butter: Use vegan butter if you need a plant-based option. I’ve tried Earth Balance with great results.
- Flour: Almond flour or a gluten-free blend works fine, especially if you’re watching gluten.
- Spices: Go heavier on cinnamon if you love bold spice, or add a pinch of cardamom for warmth.
- Pie Crust: Homemade always wins for flakiness, but in a pinch, a good store-bought crust gets the job done (Trader Joe’s is my go-to for convenience).
Feel free to personalize the filling with a handful of raisins or chopped walnuts—my kids love the crunch! The best part? This recipe is forgiving, so you can swap, mix, and match based on what you’ve got or what you love.
Equipment Needed
You don’t need a fancy kitchen setup to whip up a Creamy Marlborough Pie, which is part of its charm. Here’s what you’ll want on hand:
- 9-inch (23cm) pie plate (glass or ceramic gives the best bake)
- Mixing bowls—one large for the filling, one small for the eggs
- Whisk (for blending custard smooth)
- Box grater (for those rustic grated apples)
- Measuring cups and spoons (accuracy matters in pies!)
- Small saucepan (for melting butter)
- Rubber spatula (helps scrape every bit of filling into the crust)
- Baking sheet (to catch any pie drips and save your oven from messes)
If you don’t have a box grater, I’ve used a food processor with a shred attachment in a pinch—works great and saves your knuckles. For the pie plate, a sturdy glass dish is my favorite for even browning. If you’re just starting out, budget-friendly tools from places like Target or IKEA work fine. I always dry my pie plates thoroughly before use—a little moisture can make the crust soggy, and nobody wants that!
Just make sure your whisk is up to the job; a balloon whisk blends the custard silky smooth. And if you’re using a store-bought crust, keep it in the fridge until the last minute for flakiness.
Preparation Method
- Prepare the Pie Crust:
Roll out your pie dough to fit a 9-inch (23cm) pie plate. Gently press it into the plate, trimming excess and crimping the edges if you like. Chill the crust in the fridge while you make the filling (about 10 minutes). If using a pre-made crust, keep it chilled until step 5. - Grate the Apples:
Peel, core, and grate 2 cups (about 250g) of tart apples. Pat them dry with paper towels—too much moisture will make the custard runny. You want them to look juicy but not soggy. - Mix the Custard:
In a large bowl, whisk together 3 eggs, 1 cup (240ml) half-and-half or whole milk, 2/3 cup (130g) granulated sugar, 2 tablespoons (30g) melted butter, 1 tablespoon (8g) flour, 1 teaspoon vanilla extract, 1/2 teaspoon cinnamon, 1/4 teaspoon nutmeg, 1 teaspoon lemon zest, and a pinch of salt. Whisk until everything’s well combined and you don’t see any streaks. (Custard should smell sweet and a little spicy.) - Combine Apples and Custard:
Add the grated apples to the custard mixture. Stir gently with a spatula until evenly distributed. If your apples seem extra juicy, you might need to sprinkle in an extra teaspoon of flour to help thicken. - Fill the Pie Crust:
Pour the apple-custard filling into the chilled pie crust. Smooth the top with a spatula. Optional: Sprinkle 1 tablespoon sugar over the filling for a caramelized finish. - Bake:
Place the pie plate on a baking sheet (to catch drips) and bake in a preheated oven at 350°F (175°C) for 40-45 minutes. The top should be golden and the custard set—give the pie a gentle shake; if the center jiggles just a little, it’s ready. If it looks wet, bake another 5 minutes. - Cool and Serve:
Let the pie cool on a wire rack for at least 1 hour. (This is the hardest part, honestly!) The filling will firm up as it sits, making it easier to slice.
Troubleshooting Tips:
- If the crust browns too quickly, tent the edges with foil after 20 minutes.
- If your pie cracks, don’t sweat it. A rustic pie is supposed to look imperfect, and it’ll taste just as dreamy.
Sensory cues: You should smell cinnamon and apples, and the filling should look creamy but not soupy. The crust will be golden and flaky on the edges.
My efficiency tip: Grate the apples while the crust chills—less downtime, more pie time!
Cooking Tips & Techniques
Let’s face it, pie baking can be tricky, but Marlborough Pie is surprisingly forgiving. Here are some pro tips and personal lessons learned (sometimes the hard way!) to keep your Creamy Marlborough Pie recipe on track:
- Grate, Don’t Chop: Grated apples blend seamlessly into the custard, giving you a creamy bite every time. Chopped apples tend to sink and make pockets.
- Mind the Moisture: Too much juice from apples is the classic pitfall—pat those apples dry after grating. I’ve had a few pies turn into apple soup before learning this the hard way.
- Egg Temperature: Room-temperature eggs help the custard set smoothly. Cold eggs can lead to curdling and uneven texture.
- Crust Chilling: Always chill your crust before filling. It keeps the butter solid and helps the crust stay flaky. If you skip this, expect a soggy bottom.
- Don’t Overbake: The custard should have just a slight jiggle in the center. Overbake and it goes rubbery; underbake and it’ll be runny. If in doubt, err on the side of a little under rather than over.
- Flavor Tweaks: Don’t be afraid to add extra lemon zest or a pinch more cinnamon if you want it bold. I’ve found a little nutmeg goes a long way, so don’t overdo it!
- Multitasking: Grate apples while the crust chills and prep your custard while the butter melts. Pie-making doesn’t have to be a drawn-out ordeal.
Consistency comes down to the details—measure carefully, taste your apples beforehand, and keep an eye on oven timing. And hey, if your pie cracks or the custard isn’t picture-perfect, just call it “rustic” and no one will mind. The flavor is what counts!
Variations & Adaptations
This Creamy Marlborough Pie is a chameleon—easy to adapt for a bunch of dietary needs, seasonal twists, or just your own flavor cravings. Here are some fun ways to make it your own:
- Gluten-Free: Swap the all-purpose flour for almond flour in the filling and use a gluten-free pastry for the crust. It’s just as creamy and delicious.
- Dairy-Free: Use coconut milk or oat milk instead of dairy milk, and vegan butter for richness. I’ve made this version for friends with allergies—still dreamy!
- Spiced Pear Variation: Replace half the apples with ripe pears for a floral, autumn twist. Add a pinch of ground ginger for warmth.
- Berry-Apple Pie: Toss in a handful of fresh cranberries or blueberries for a burst of color and tartness, especially in summer.
- Nuts & Raisins: Add 1/3 cup chopped walnuts or golden raisins to the filling for texture. My kids love the crunch.
- Mini Pies: Make individual Marlborough pies in muffin tins—just reduce the baking time to 20 minutes. Easier for parties or lunchboxes!
If you’re baking for someone with egg allergies, try a custard base with silken tofu and a bit of cornstarch. I tested this last spring, and while it’s not identical, it’s surprisingly creamy. Feel free to mix and match apples based on what’s in season, and don’t be shy about playing with spices. My personal favorite adaptation? Cranberry-apple with a splash of orange zest—so festive!
Serving & Storage Suggestions
Creamy Marlborough Pie is best served slightly warm or at room temperature, so the filling is soft and the flavors are at their peak. Slice it up and pair with a dollop of whipped cream or a scoop of vanilla ice cream for extra decadence.
For presentation, garnish with a sprinkle of cinnamon or a few thin apple slices on top. This pie looks gorgeous on a rustic wooden board or a pretty cake stand—Pinterest-worthy for sure!
If you’re serving for a brunch, pair with hot coffee, spiced chai, or even a glass of cold apple cider. For dinner, it’s lovely with a mild cheese board and crisp white wine.
To store, cover leftovers tightly with foil or plastic wrap and keep in the fridge for up to 3 days. The custard sets up even more overnight, so the flavors actually deepen. For longer storage, wrap slices and freeze up to 2 months—just reheat gently in the oven at 300°F (150°C) for 10 minutes. Avoid microwaving, as it can make the filling rubbery.
Honestly, this pie rarely makes it to day three in my house. The flavors mellow and marry overnight, so if you can wait, it’s even better the next day!
Nutritional Information & Benefits
Each slice of Creamy Marlborough Pie (1/8 of a 9-inch pie) contains roughly:
- Calories: 210
- Fat: 9g
- Carbohydrates: 30g
- Protein: 4g
- Fiber: 2g
- Sugar: 18g
Health Benefits: Apples are loaded with fiber, vitamin C, and antioxidants, making this pie a bit more wholesome than your average dessert. The eggs and milk add protein and calcium, while spices like cinnamon and nutmeg have their own anti-inflammatory perks.
Dietary Considerations: This recipe is easy to adjust for gluten-free, dairy-free, or nut-free diets—just swap out ingredients as needed. Watch out for eggs and dairy if you have allergies. Personally, I feel good serving this pie, knowing it packs in a little fruit and isn’t just empty sweetness.
Conclusion
If you’re searching for a fall dessert that’s creamy, comforting, and packed with apple flavor, this Creamy Marlborough Pie recipe is truly worth a try. It’s simple enough for baking beginners, yet the results are impressive enough to wow your guests. I love how it brings together rustic charm and creamy luxury in every bite.
Don’t be shy about customizing—try new spices, swap in pears, or experiment with gluten-free pastry. That’s the joy of home baking! For me, this pie is more than just a recipe; it’s a slice of family tradition, comfort, and seasonal joy. I hope it finds a happy place in your kitchen too.
If you bake this Creamy Marlborough Pie, drop a comment below, share your favorite twists, or tag your photos online—I’d love to see your creations! Happy baking, and may your fall be filled with warmth and delicious pie.
FAQs
What kind of apples work best for Creamy Marlborough Pie?
Tart, firm apples like Granny Smith, Honeycrisp, or Braeburn are ideal. They hold up well during baking and add a nice balance to the creamy filling.
Can I make this pie ahead of time?
Absolutely! Make it a day in advance and store covered in the fridge. The flavors deepen overnight, and the texture sets up perfectly.
Is Marlborough Pie the same as regular apple pie?
Nope! Marlborough Pie features a creamy custard base with grated apples, making it more like an apple pudding in a pie crust than a standard apple pie.
Can I freeze Creamy Marlborough Pie?
Yes, you can freeze individual slices wrapped tightly for up to 2 months. Reheat gently in the oven to maintain the creamy texture.
How do I prevent the crust from getting soggy?
Chill the crust before adding the filling and make sure to pat the grated apples dry. Baking on a lower oven rack can help the crust crisp up nicely.
Pin This Recipe!
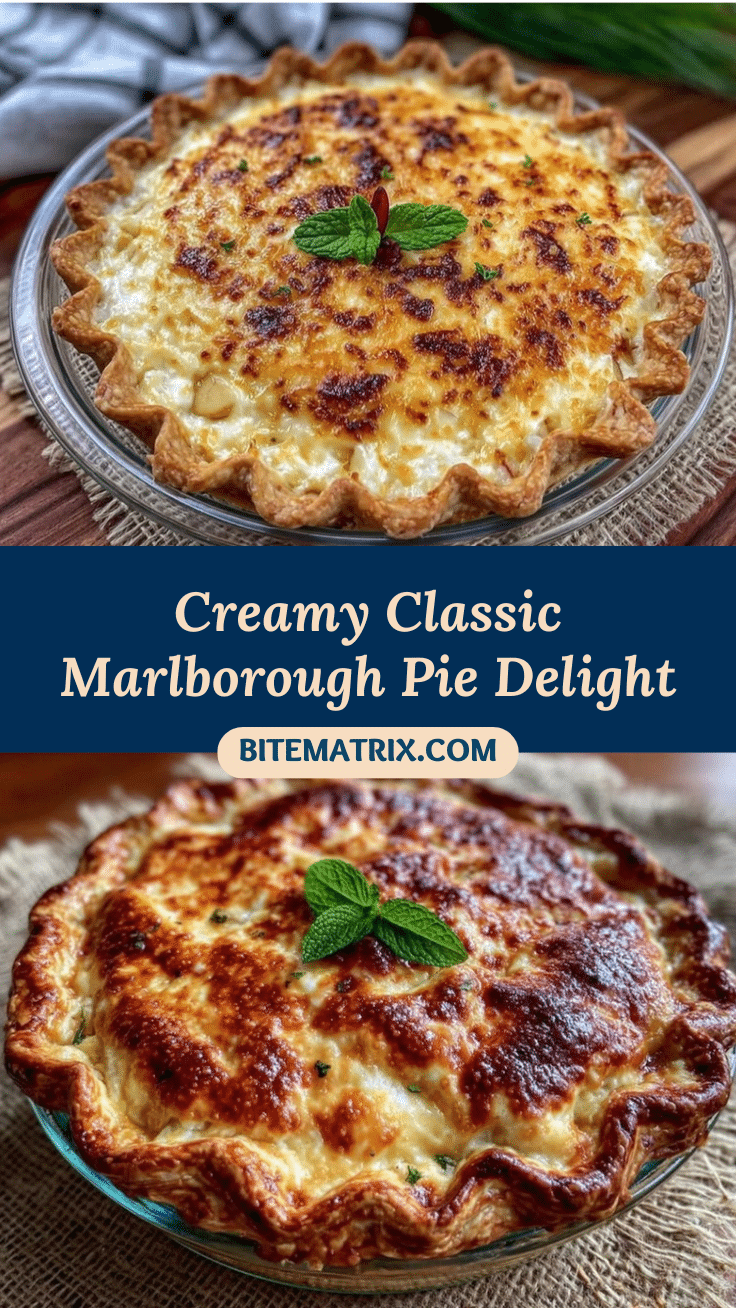
Creamy Marlborough Pie

Creamy Marlborough Pie is a rustic New England apple dessert featuring a silky custard base and tender grated apples in a flaky crust. It’s easy to make, comforting, and perfect for fall gatherings or cozy family dinners.
- Prep Time: 20 minutes
- Cook Time: 40-45 minutes
- Total Time: 1 hour 5 minutes
- Yield: 8 servings 1x
- Category: Dessert
- Cuisine: New England, American
Ingredients
- 2 cups tart apples, peeled, cored, and grated (Granny Smith or Honeycrisp recommended)
- 3 large eggs, room temperature
- 1 cup half-and-half or whole milk (or 3/4 cup milk + 1/4 cup heavy cream for extra creaminess)
- 2/3 cup granulated sugar (or coconut sugar)
- 2 tablespoons unsalted butter, melted and cooled
- 1 tablespoon all-purpose flour (or almond flour for gluten-free)
- 1 teaspoon vanilla extract
- 1/2 teaspoon ground cinnamon
- 1/4 teaspoon ground nutmeg
- 1 teaspoon lemon zest
- Pinch of salt
- 1 single 9-inch pie crust, homemade or store-bought (gluten-free if needed)
- Optional: 1 tablespoon granulated sugar for sprinkling over the crust
Instructions
- Roll out your pie dough to fit a 9-inch pie plate. Press into the plate, trim excess, and crimp edges. Chill the crust in the fridge for about 10 minutes while preparing the filling.
- Peel, core, and grate 2 cups of tart apples. Pat dry with paper towels to remove excess moisture.
- In a large bowl, whisk together eggs, half-and-half or milk, sugar, melted butter, flour, vanilla extract, cinnamon, nutmeg, lemon zest, and salt until well combined.
- Add grated apples to the custard mixture and stir gently until evenly distributed. If apples are very juicy, add an extra teaspoon of flour.
- Pour the apple-custard filling into the chilled pie crust. Smooth the top with a spatula. Optionally, sprinkle 1 tablespoon sugar over the filling.
- Place the pie plate on a baking sheet and bake in a preheated oven at 350°F for 40-45 minutes, until the top is golden and the custard is set with a slight jiggle in the center.
- Cool the pie on a wire rack for at least 1 hour before slicing and serving.
Notes
Pat grated apples dry to avoid a runny custard. Chill the crust before filling for flakiness. Tent crust edges with foil if browning too quickly. For gluten-free, use almond flour and gluten-free pastry. For dairy-free, substitute coconut or oat milk and vegan butter. Add nuts or raisins for texture. Pie is best served slightly warm or at room temperature and can be made ahead.
Nutrition
- Serving Size: 1 slice (1/8 of a 9-
- Calories: 210
- Sugar: 18
- Sodium: 120
- Fat: 9
- Saturated Fat: 5
- Carbohydrates: 30
- Fiber: 2
- Protein: 4
Keywords: Marlborough Pie, apple dessert, creamy pie, fall baking, rustic pie, New England recipe, custard pie, easy apple pie, autumn dessert


