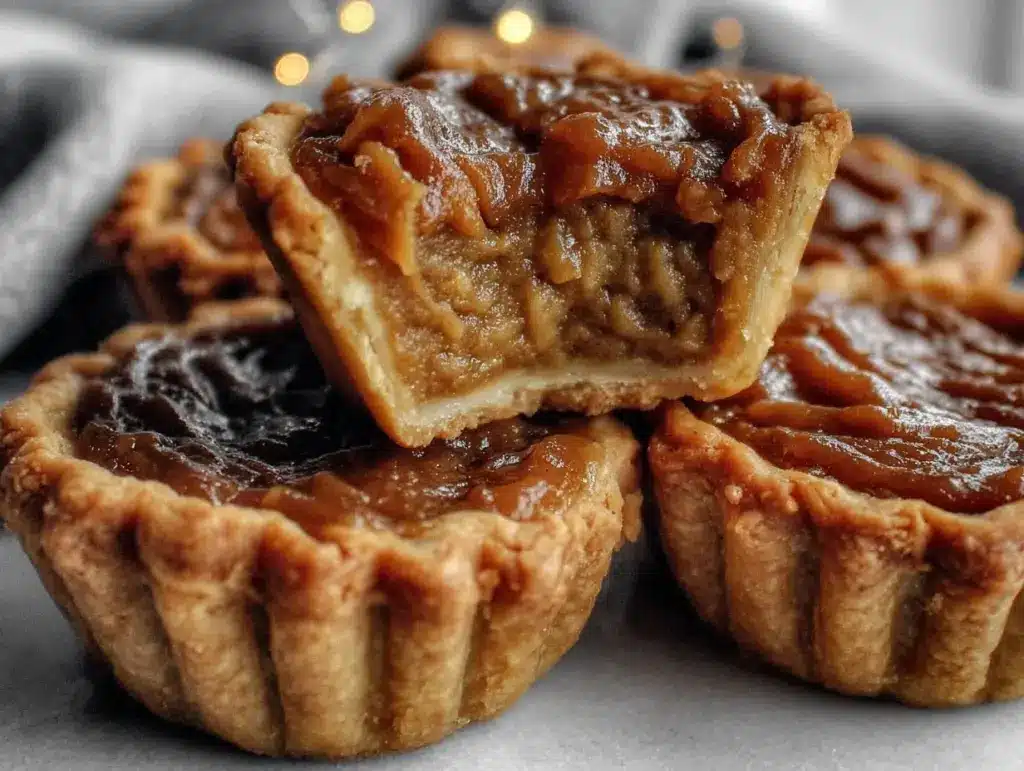
Let me tell you, the scent of cinnamon, nutmeg, and pumpkin swirling together as these creamy mini pumpkin pies bake is pure autumn magic. The first time I pulled a tray of these from the oven, I stood there, wooden spoon in hand, just soaking in that sweet, spicy aroma—a moment that felt like a hug from October itself. Years ago, when I was knee-high to a grasshopper, my grandma would bake pumpkin pies that were the talk of every fall party. So, naturally, I had to try my hand at mini pumpkin pies, hoping to capture a slice of that nostalgia (with just a touch less elbow grease).
Honestly, these little pies are dangerously easy to make. I stumbled onto the idea on a rainy weekend, trying to figure out something quick for a bake sale. Now, my family can’t stop sneaking them off the cooling rack (and I can’t really blame them). The creamy pumpkin filling is smooth as silk, tucked neatly inside a golden, flaky crust that shatters just right with every bite. These mini pumpkin pies always earn a chorus of “mmm’s” and “can I have another?” from kids and grandparents alike.
You know what? If you’re looking to brighten up your Pinterest dessert board, fill your kitchen with cozy aromas, or whip up a sweet treat for your next fall gathering, this recipe is the answer. Perfect for potlucks, holiday brunches, or a simple Tuesday night indulgence, these little pies have become a staple for family gatherings and gifting (in the name of research, of course). There’s something about that creamy pumpkin filling and buttery crust that feels like pure comfort. Go ahead—bookmark this one. You’re going to want to make it again and again.
Why You’ll Love This Creamy Mini Pumpkin Pies Recipe
After more than a dozen batches (yes, I counted), I can say these creamy mini pumpkin pies are a game-changer for fall desserts. Whether you’re a pie newbie or an old pro, they always turn out crowd-pleasingly perfect. Here’s why you’ll be obsessed:
- Quick & Easy: Ready in under an hour, so you can whip them up for last-minute parties or spontaneous pumpkin cravings.
- Simple Ingredients: No fancy shopping required—you probably have everything in your pantry right now.
- Perfect for Parties: Their handheld size means less mess and more fun at potlucks, brunches, or cozy holiday gatherings.
- Crowd-Pleaser: Both kids and adults can’t resist that creamy filling and buttery crust combo.
- Unbelievably Delicious: The texture is silky and rich, the crust is perfectly flaky, and together, it’s autumn comfort food at its best.
What sets this creamy mini pumpkin pies recipe apart? Instead of just mixing and pouring, I use a secret touch—blending the pumpkin with a bit of cream cheese for extra smoothness and depth. The crust? It’s made from scratch with a pinch of cinnamon, adding a subtle warmth that makes every bite memorable. If you’re tired of soggy-bottomed pies, I learned (the hard way) that a quick pre-bake of the crust keeps it crisp—no more disappointment.
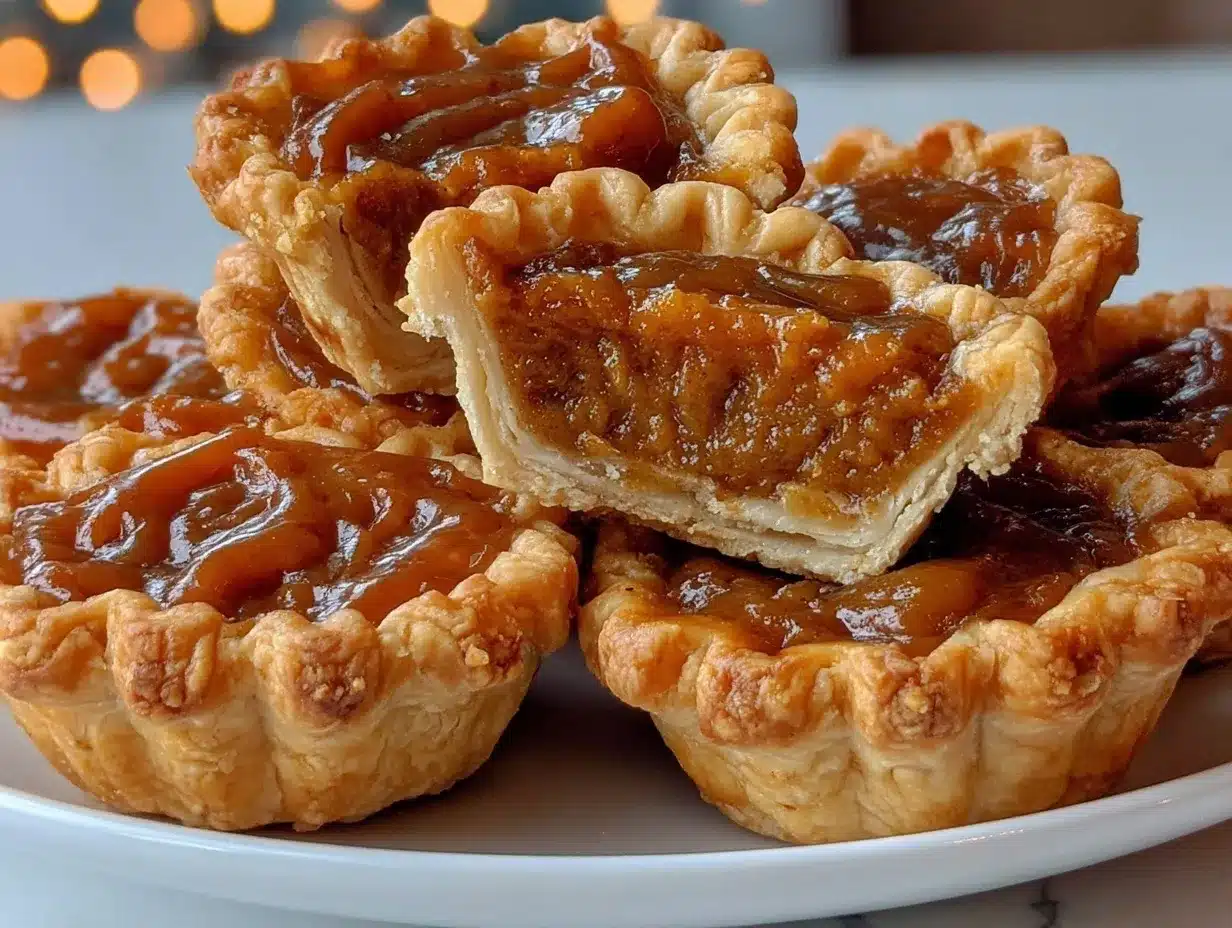
This isn’t just another pumpkin dessert. It’s a bite-sized piece of fall that makes you close your eyes and smile after the first taste. These pies let you serve up nostalgia with a twist—faster, easier, and just as comforting. Perfect for impressing friends (with minimal effort), or turning an ordinary day into something special.
What Ingredients You Will Need
This creamy mini pumpkin pies recipe uses simple, wholesome ingredients to deliver bold flavor and a dreamy texture—no fuss, no drama. Most of these are pantry staples or easy to grab at any grocery store. Here’s what you’ll need:
- For the Flaky Crust:
- All-purpose flour (200g / 1 2/3 cups) – basic, reliable, and easy to work with
- Unsalted butter (113g / 1/2 cup), cold and cubed – for that melt-in-your-mouth flakiness
- Granulated sugar (1 tbsp) – just a hint for flavor
- Salt (1/2 tsp) – lifts the taste
- Ice water (3–4 tbsp) – keeps the dough tender
- Ground cinnamon (1/2 tsp) – adds a subtle warmth (optional, but so good!)
- For the Creamy Pumpkin Filling:
- Pumpkin puree (245g / 1 cup) – canned or homemade, just make sure it’s pure pumpkin
- Cream cheese (60g / 2 oz), softened – trust me, it makes the filling ultra-creamy
- Brown sugar (65g / 1/3 cup, packed) – for a deeper, caramel-like sweetness
- Large egg (1), room temperature – binds everything together
- Heavy cream (60ml / 1/4 cup) – for that luscious texture
- Vanilla extract (1 tsp) – rounds out the flavor
- Ground cinnamon (1/2 tsp), ground nutmeg (1/4 tsp), ground ginger (1/4 tsp), ground cloves (pinch) – the classic pumpkin pie spice blend
- Salt (pinch) – balances the sweetness
- Optional for Garnish:
- Whipped cream – store-bought or homemade (I like to whip my own for a fresh touch)
- Extra cinnamon or nutmeg – for sprinkling
- Pecans or mini chocolate chips – for crunch or a little flair
Ingredient Notes & Swaps:
- Use gluten-free flour if needed—Bob’s Red Mill makes a good one.
- Dairy-free cream cheese and coconut cream work in the filling; results are still dreamy.
- In a pinch, pre-made pie crust works, but the homemade crust is worth the few extra minutes.
- If you’re out of brown sugar, mix granulated sugar with a teaspoon of molasses.
That’s it! Simple ingredients, big pumpkin pie flavor.
Equipment Needed
- Mini muffin pan (24-cup) – the easiest way to shape perfect mini pies
- Rolling pin – for spreading out the pie dough (if you don’t have one, a clean wine bottle works in a pinch)
- 2-inch round cookie cutter (or a glass with a similar diameter) – for cutting out dough circles
- Mixing bowls – at least two: one for dough, one for filling
- Electric mixer or sturdy whisk – helps with that creamy pumpkin filling
- Measuring cups and spoons – accuracy matters for both crust and filling
- Pastry brush – for brushing egg wash (totally optional, but gives a nice golden finish)
- Fork – for crimping edges and poking holes in the crust
Honestly, I’ve made these using nothing but old hand-me-down bowls and a basic whisk, so don’t stress if you’re missing a specialty gadget. If your muffin pan is non-stick, cleanup is a breeze! Just be sure to dry everything well—especially your rolling pin and cookie cutter—before storing, to keep them in good shape for next time. You don’t need to spend a fortune; even budget-friendly tools work wonders for this recipe.
Preparation Method
- Make the Flaky Pie Crust:
- In a large bowl, mix together 200g (1 2/3 cups) flour, 1 tbsp sugar, 1/2 tsp salt, and 1/2 tsp cinnamon. Whisk to combine.
- Add 113g (1/2 cup) cold, cubed butter. Use a pastry cutter or your fingers to work the butter into the flour until it resembles coarse crumbs (pea-sized bits are perfect).
- Drizzle in 3–4 tbsp ice water, one tablespoon at a time, mixing gently until the dough just comes together. (Don’t overwork it—stop as soon as it holds.)
- Shape into a disk, wrap in plastic, and chill for at least 20 minutes. (This step keeps the crust extra flaky. I once skipped it—never again!)
- Prepare the Pumpkin Filling:
- In a medium bowl, beat 60g (2 oz) softened cream cheese until smooth.
- Add 245g (1 cup) pumpkin puree, 65g (1/3 cup) brown sugar, 1 large egg, 60ml (1/4 cup) heavy cream, and 1 tsp vanilla extract. Beat until creamy and well combined.
- Mix in 1/2 tsp cinnamon, 1/4 tsp nutmeg, 1/4 tsp ginger, a pinch of cloves, and a pinch of salt. Taste and adjust spices if you like it bolder.
- Preheat & Prep:
- Preheat your oven to 190°C (375°F).
- Lightly grease your mini muffin pan.
- Roll out the chilled dough on a floured surface to about 1/8-inch (3mm) thickness.
- Cut out 24 circles using a 2-inch cutter or glass. Gently press each dough circle into the muffin cups, smoothing up the sides.
- Prick the bottoms with a fork to prevent air bubbles.
- Blind Bake the Crusts:
- Bake the empty crusts for 7 minutes. (Pre-baking helps avoid soggy bottoms—learned that after a wet pie disaster!)
- Remove from oven and cool slightly.
- Fill and Bake:
- Spoon pumpkin filling into each mini crust, filling about 3/4 full.
- Bake for 18–22 minutes, until the filling is set and a toothpick comes out mostly clean. The tops may puff slightly; they’ll settle as they cool.
- Cool in the pan for 10 minutes, then use a small spoon to gently lift each pie onto a wire rack.
- Garnish and Serve:
- Once completely cool, top with whipped cream, a sprinkle of cinnamon, or a pecan half if you’re feeling fancy.
Prep Notes & Troubleshooting:
- If your dough cracks when pressing into the pan, patch with scraps—it happens!
- Filling too runny? Chill it in the fridge for 10 minutes before baking.
- Pan sticking? Run a butter knife gently around the edges—no shame in a little extra help.
This method gives you creamy mini pumpkin pies with a flaky crust every time—promise!
Cooking Tips & Techniques
After countless trays of mini pumpkin pies (and a few mishaps), I’ve gathered some real-life tips that make all the difference:
- Keep Ingredients Cold: For the flakiest crust, butter and water must be ice-cold. If the kitchen’s warm, chill your flour for 10 minutes first.
- Don’t Overwork the Dough: Mixing too much makes crust tough. As soon as it sticks together, stop—imperfections are okay!
- Blind Baking Matters: Skipping this step can leave you with soggy bottoms (I learned the hard way). A quick pre-bake keeps crusts crisp.
- Even Filling: Use a small cookie scoop for neat, equal portions. It’s a little thing, but helps them bake up uniformly.
- Watch the Oven: Mini pies bake fast, so check at 18 minutes. Overbaking dries out the filling, stealing away that creamy texture.
- Multitasking: While the dough chills, mix the filling. Saves time and keeps things moving.
- Consistency: If you want every batch the same, use a digital scale for the crust and filling. Trust me, it’s worth the extra minute.
- Failures Happen: My first batch stuck like glue to the pan. Grease well and let them cool before removing—they pop out so much easier.
With these tips, your creamy mini pumpkin pies will be bakery-worthy every time. Just remember: sometimes the best pies are the slightly imperfect ones you eat straight from the cooling rack!
Variations & Adaptations
One of my favorite things about creamy mini pumpkin pies is how easy they are to tweak. Whether you’re baking for dietary needs, seasonal changes, or just want something a little different, here are a few ideas:
- Gluten-Free: Swap the all-purpose flour for a gluten-free blend (like King Arthur or Bob’s Red Mill). The crust stays crisp and delicious.
- Dairy-Free: Use vegan butter and dairy-free cream cheese (like Kite Hill), along with coconut cream in place of heavy cream. I’ve tried this for a friend—still rich and smooth!
- Maple Pumpkin: Replace brown sugar with pure maple syrup. The filling gets a subtle, earthy sweetness that pairs beautifully with the spices.
- Chocolate Swirl: Drop a teaspoon of melted chocolate into each pie before adding the filling for a marbled effect. Kids love it!
- Nut-Free: Skip any nut toppings and check your pie crust ingredients.
- Air Fryer Mini Pies: If you’re short on oven space, bake these in an air fryer at 175°C (350°F) for 12–15 minutes (watch closely—they cook quickly!).
I personally love the maple pumpkin version in late October—it feels extra festive and smells incredible. Mix and match these adaptations to fit your tastes or dietary needs, and let your imagination run wild!
Serving & Storage Suggestions
Creamy mini pumpkin pies taste best at room temperature or slightly chilled. Arrange them on a rustic wooden board or a bright fall platter—perfect for Pinterest-worthy photos! For parties, add a dollop of whipped cream and a sprinkle of cinnamon for that bakery finish.
Pair with hot cider, spiced tea, or even a scoop of vanilla ice cream. They play well with other fall treats, like apple crisp or pecan bars.
To store, keep leftover pies in an airtight container in the fridge for up to 5 days. They freeze beautifully, too—just wrap tightly and thaw overnight in the fridge. For reheating, pop in a 160°C (325°F) oven for 5–7 minutes to refresh the crust and filling. Over time, the flavors deepen, so don’t be surprised if they taste even better the next day!
Nutritional Information & Benefits
Each creamy mini pumpkin pie is about 120 calories, with roughly 7g fat, 15g carbs, 2g protein, and 7g sugar—so you can enjoy a couple without guilt. Pumpkin puree is rich in vitamin A, fiber, and antioxidants. The spices add not just flavor, but a little extra wellness boost (cinnamon is said to help with blood sugar!).
If you go for gluten-free or dairy-free swaps, you’ll keep these pies accessible for all. The recipe contains dairy, eggs, and gluten (unless adapted), so check for allergen needs. Honestly, I love that you can get all the comfort of pumpkin pie in a lighter, portion-controlled package—great for mindful eating during holiday season!
Conclusion
There’s a reason creamy mini pumpkin pies with flaky crusts have become my go-to fall dessert. They’re easy, comforting, and packed with pumpkin spice goodness. Whether you stick with the classic recipe or put your own twist on it, you’re in for a treat that brings people together—no stress, all smiles.
Give this recipe a try, and don’t be shy about making it your own. Share your results, swap in favorite spices, or try different toppings. Cooking should be fun, after all! Personally, these little pies always remind me of cozy afternoons, laughter, and the simple joy of baking for those you care about. Drop a comment below if you make them, or tag your creation on Pinterest—let’s keep the fall baking spirit alive!
Here’s to delicious bites, happy gatherings, and pies that taste like a warm hug. Enjoy!
Frequently Asked Questions
Can I use canned pumpkin pie filling instead of pumpkin puree?
Technically yes, but pumpkin pie filling has added sugar and spices. If you use it, reduce the sugar and spices in the recipe so things don’t get too sweet or overpowering.
How do I prevent the mini pies from sticking to the pan?
Grease the muffin pan well, or use non-stick spray. Let the pies cool for 10 minutes before removing—if they’re stubborn, run a small knife around the edges.
Can I freeze creamy mini pumpkin pies?
Absolutely! Once cooled, wrap them tightly in plastic or foil and freeze for up to 2 months. Thaw overnight in the fridge before serving.
What is the best way to make these ahead for a party?
Bake the pies up to 2 days in advance, store in the fridge, and add whipped cream or toppings just before serving for maximum freshness.
Can I make this recipe gluten-free?
Yes—substitute a gluten-free flour blend for the crust. The filling is naturally gluten-free, so no other changes needed.
Pin This Recipe!
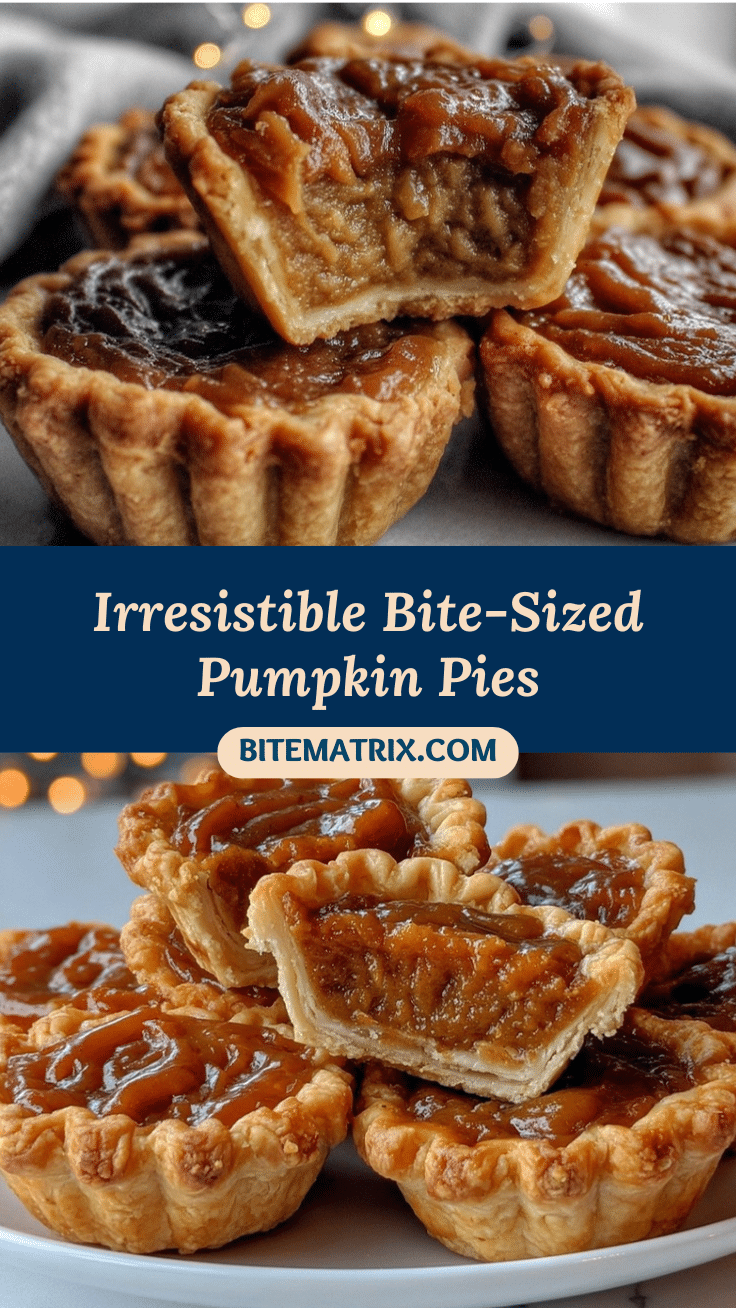
Creamy Mini Pumpkin Pies
These creamy mini pumpkin pies feature a silky pumpkin filling blended with cream cheese, nestled in a flaky, cinnamon-spiced crust. Perfect for fall parties, potlucks, or cozy gatherings, they’re easy to make and always a crowd-pleaser.
- Prep Time: 25 minutes
- Cook Time: 25 minutes
- Total Time: 50 minutes
- Yield: 24 mini pies 1x
- Category: Dessert
- Cuisine: American
Ingredients
- 1 2/3 cups all-purpose flour (200g)
- 1/2 cup unsalted butter, cold and cubed (113g)
- 1 tablespoon granulated sugar
- 1/2 teaspoon salt
- 3–4 tablespoons ice water
- 1/2 teaspoon ground cinnamon (optional)
- 1 cup pumpkin puree (245g)
- 2 ounces cream cheese, softened (60g)
- 1/3 cup brown sugar, packed (65g)
- 1 large egg, room temperature
- 1/4 cup heavy cream (60ml)
- 1 teaspoon vanilla extract
- 1/2 teaspoon ground cinnamon
- 1/4 teaspoon ground nutmeg
- 1/4 teaspoon ground ginger
- Pinch ground cloves
- Pinch salt
- Whipped cream (optional, for garnish)
- Extra cinnamon or nutmeg (optional, for garnish)
- Pecans or mini chocolate chips (optional, for garnish)
Instructions
- In a large bowl, mix together flour, sugar, salt, and cinnamon. Whisk to combine.
- Add cold, cubed butter. Use a pastry cutter or your fingers to work the butter into the flour until it resembles coarse crumbs.
- Drizzle in ice water, one tablespoon at a time, mixing gently until the dough just comes together. Shape into a disk, wrap in plastic, and chill for at least 20 minutes.
- In a medium bowl, beat softened cream cheese until smooth.
- Add pumpkin puree, brown sugar, egg, heavy cream, and vanilla extract. Beat until creamy and well combined.
- Mix in cinnamon, nutmeg, ginger, cloves, and salt. Taste and adjust spices if desired.
- Preheat oven to 375°F (190°C). Lightly grease a 24-cup mini muffin pan.
- Roll out chilled dough on a floured surface to about 1/8-inch thickness. Cut out 24 circles using a 2-inch cutter or glass. Press each dough circle into the muffin cups, smoothing up the sides. Prick the bottoms with a fork.
- Bake the empty crusts for 7 minutes. Remove from oven and cool slightly.
- Spoon pumpkin filling into each mini crust, filling about 3/4 full.
- Bake for 18–22 minutes, until the filling is set and a toothpick comes out mostly clean. Cool in the pan for 10 minutes, then gently lift each pie onto a wire rack.
- Once completely cool, top with whipped cream, a sprinkle of cinnamon, or a pecan half if desired.
Notes
Keep butter and water ice-cold for the flakiest crust. Blind bake the crusts to avoid soggy bottoms. Filling can be chilled if too runny. Use gluten-free flour and dairy-free substitutes for dietary needs. Pies freeze well and taste even better the next day.
Nutrition
- Serving Size: 1 mini pie
- Calories: 120
- Sugar: 7
- Sodium: 70
- Fat: 7
- Saturated Fat: 4
- Carbohydrates: 15
- Fiber: 1
- Protein: 2
Keywords: mini pumpkin pies, creamy pumpkin pie, fall dessert, party dessert, easy pumpkin pie, flaky crust, autumn baking, Thanksgiving dessert, bite-sized pie


